Revamp Your Woodworking Projects: Craft Wood Filler With Sawdust
To make wood filler with sawdust, combine equal parts of fine sawdust and wood glue until a paste-like consistency is achieved. Wood fillers are commonly used in woodworking to repair small imperfections in wood surfaces.
Whether you have to fill holes, cracks, or gaps in your project, making your own wood filler can be a cost-effective solution. In addition, it allows you to match the color and texture of your wood, resulting in a seamless finish.
By using sawdust and wood glue, you can create a paste that can be easily applied and sanded down to blend with the surrounding wood. This article will guide you through the process step-by-step, helping you achieve professional results with minimal effort.
Understanding Wood Fillers
Learn how to create your own wood filler using sawdust, providing a cost-effective solution for repairing and filling gaps in wood surfaces. With just a few simple steps, you can make a homemade filler that matches the color and texture of your project, saving both time and money.
Wood fillers are versatile products used to repair, fill, and disguise imperfections in wood surfaces. Whether you are a DIY enthusiast or a professional woodworker, understanding the different types of wood fillers and their benefits is essential for achieving a smooth and flawless finish on your woodworking projects. In this blog post, we will explore the different types of wood fillers and the benefits of using them. We will also provide a step-by-step guide on how to make your own wood filler using sawdust.
Different Types Of Wood Fillers
Wood fillers can be categorized into two main types: epoxy-based fillers and cellulose-based fillers.
1. Epoxy-based fillers: These fillers are made from two components – a resin and a hardener. When combined, they form a durable and long-lasting filler that can be sanded, shaped, and stained. Epoxy-based fillers are ideal for filling large gaps and voids in wood surfaces. They are also resistant to moisture and temperature changes, making them suitable for both interior and exterior applications.
2. Cellulose-based fillers: These fillers are composed of wood fibers or sawdust mixed with a binder, such as glue or resin. They have a similar texture and color to wood, making them a popular choice for repairing smaller imperfections, such as cracks, dents, or nail holes. Cellulose-based fillers are generally easy to work with and can be stained or painted to match the surrounding wood.
Benefits Of Using Wood Fillers
Using wood fillers offers several benefits that can enhance your woodworking projects. Here are some advantages to consider:
1. Enhanced aesthetics: Wood fillers can effectively hide imperfections, giving your woodworking projects a professional and polished look. Whether you want to fill in gaps, knots, or scratches, wood fillers can help you achieve a seamless and flawless finish.
2. Improved structural integrity: By filling voids and gaps in wood surfaces, fillers can reinforce the structural integrity of your projects. This ensures that your finished piece remains sturdy and durable over time.
3. Cost-effective solution: Repairing and filling imperfections with wood fillers is a cost-effective alternative to replacing entire wood pieces or sections. It allows you to save money by salvaging existing wood materials while still achieving a high-quality result.
4. Versatility: Wood fillers can be used on various types of wood, including hardwood, softwood, plywood, and even particleboard. This versatility makes them suitable for a wide range of woodworking projects, from furniture repairs to cabinetry.
5. Customizability: Wood fillers can be stained, painted, or coated to match the color and finish of the surrounding wood. This allows you to seamlessly blend the repaired areas with the rest of the project, creating a cohesive and professional appearance.
Now that you have a deeper understanding of wood fillers and their benefits, let’s explore how you can make your own wood filler using sawdust in our next section.
Crafting Wood Filler With Sawdust
Crafting your own wood filler with sawdust is a cost-effective and eco-friendly solution for repairing wood surfaces. Not only does it allow you to repurpose waste material, but it also ensures a seamless match for the color and texture of your project. In this guide, we will walk you through the simple steps of gathering and preparing sawdust, mixing it with a suitable binder, and adding color and pigments.
Gathering And Preparing Sawdust
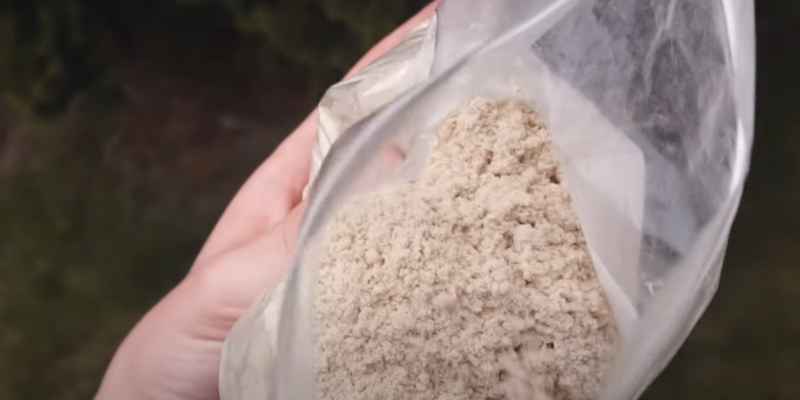
Gathering sawdust is the first step to creating your own wood filler. You can obtain sawdust from various sources such as woodworking projects, sanding, or even by asking local woodshops for their excess material. When collecting sawdust, make sure to choose the type of wood that matches the project you are working on, as different woods have different grain patterns and colors.
Once you have gathered the desired amount of sawdust, it is essential to prepare it properly for mixing. Start by sieving the sawdust to remove any large particles or contaminants. This step ensures a smoother and more consistent texture for your wood filler. Additionally, you can also oven-dry the sawdust at a low temperature to eliminate any moisture, which could affect the performance of the filler.
Mixing Sawdust With Suitable Binder
After you have prepared the sawdust, the next step is to mix it with a suitable binder that will help hold the filler together. One easy-to-find binder option is wood glue or carpenter’s glue, which provides excellent adhesion and dries clear. To create the desired consistency, start by adding a small amount of wood glue to the sawdust and mix it thoroughly.
If you prefer a more flexible wood filler, you can mix the sawdust with a two-part epoxy resin. This type of binder creates a strong and durable filler that is resistant to shrinking or cracking over time. Follow the manufacturer’s instructions for mixing the epoxy resin and combine it with the sawdust until it forms a thick paste-like consistency.
Adding Color And Pigments
To achieve a perfect color match with your wood project, you can add color and pigments to the wood filler. You can use wood stain, powdered pigments, or even acrylic paint to tint the filler. Start by adding small amounts of your chosen color to the sawdust mixture and gradually adjust until you reach the desired shade.
When adding pigments, it is essential to consider the wood species and the final finish of your project. Keep in mind that some stains and pigments may alter the appearance of the wood filler after it has dried, so it’s always a good idea to test the color on a scrap piece of wood before applying it to the actual project.
By following these simple steps, you can create your own wood filler using sawdust, saving money while achieving a seamless repair on your wood surfaces. Remember to gather and prepare the sawdust, mix it with a suitable binder, and add color and pigments to achieve the desired result. Give this eco-friendly solution a try and experience the satisfaction of crafting your own wood filler.

Applying Wood Filler
Once you have prepared the wood surface and created your homemade wood filler using sawdust, it’s time to apply the filler to achieve a smooth and flawless finish. Follow these simple steps to ensure proper application:
Preparing The Wood Surface
Before applying the wood filler, it is crucial to properly prepare the wood surface to ensure the best adhesion and results. Follow these steps:
- Clean the surface: Use a clean cloth or brush to remove any dust, dirt, or debris from the wood surface. This will help the wood filler adhere better and create a smooth finish.
- Sand the area: Use sandpaper or a sanding block to lightly sand the area where the wood filler will be applied. This will roughen up the surface, providing better grip for the filler.
- Remove excess sawdust: Before applying the wood filler, make sure to remove any excess sawdust from the surface. Use a clean cloth or brush to wipe away any loose particles.
Applying The Filler
Now that the wood surface is properly prepared, it’s time to apply the homemade wood filler. Follow these steps for successful application:
- Apply the filler: Using a putty knife or a similar tool, scoop a small amount of the wood filler and apply it to the damaged or uneven areas of the wood surface. Press firmly to ensure the filler fills in all the gaps and cracks.
- Smooth out the filler: After applying the filler, use the putty knife or a similar tool to smooth out the surface. This will help create a seamless finish and remove any excess filler.
- Fill larger voids in layers: If you are filling larger voids or deep cracks, it is recommended to apply the filler in layers. Allow each layer to dry before applying the next one, ensuring a sturdy and long-lasting repair.
Sanding And Finishing
Once the wood filler has dried and cured properly, it’s time to sand and finish the surface to achieve a professional look. Follow these steps:
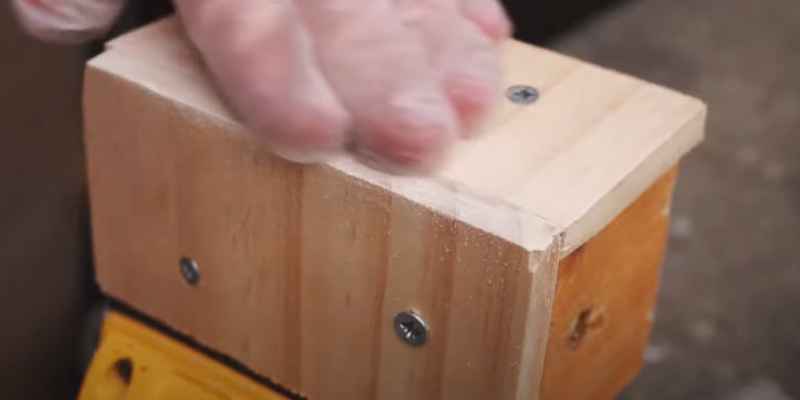
- Sand the surface: Use fine-grit sandpaper or a sanding block to gently sand the filled areas until they are smooth and flush with the rest of the wood surface. Sand in the direction of the wood grain to avoid leaving visible scratch marks.
- Clean the surface: After sanding, use a clean cloth or brush to remove any sanding dust from the surface. This will ensure a clean and debris-free surface for finishing.
- Apply finish: Depending on the desired look, apply the appropriate finish such as stain, paint, or varnish to the wood surface. Follow the manufacturer’s instructions for proper application and drying times.
Advantages Of Homemade Wood Filler
Discover the advantages of homemade wood filler made with sawdust. This simple DIY solution allows you to effectively fill in cracks and holes, saving you time and money on repairs while achieving a seamless finish.
Homemade wood filler offers several advantages over store-bought options. By making your own wood filler using sawdust, you can save money, customize the color and texture to match your project perfectly, and contribute to a more eco-friendly approach to woodworking.
Cost-effectiveness
Making your own wood filler with sawdust is a cost-effective choice for any woodworker. Instead of purchasing pre-made fillers, which can be quite expensive, using sawdust allows you to create a filler that is just as effective at a fraction of the cost.
With homemade wood filler, you can utilize the sawdust leftover from your woodworking projects, reducing waste and maximizing the use of your resources. This not only saves you money but also reduces the overall expenses associated with your projects.
Customizability Of Color And Texture
One of the main advantages of homemade wood filler is the ability to customize both the color and texture to match your project requirements. When purchasing store-bought fillers, you are limited to the available options, which may not exactly match your wood’s color or texture.
With homemade wood filler, however, you have complete control over the ingredients, allowing you to achieve the perfect color match by combining sawdust from the same wood species used in your project. Additionally, you can adjust the texture by varying the amount of sawdust or mixing it with other materials.
Eco-friendly Alternative
Using homemade wood filler made from sawdust is an eco-friendly alternative to store-bought fillers. By repurposing sawdust, you prevent it from ending up in the landfill, reducing environmental impact.
Furthermore, making your own wood filler eliminates the need for purchasing fillers packaged in non-recyclable or non-compostable containers. It allows you to adopt a more sustainable approach to woodworking and contribute to a greener future.
Tips For Successful Wood Filling
Proper wood filling is crucial for maintaining the beauty and durability of your wooden objects and surfaces. Whether you are repairing a small dent or filling larger gaps, these tips will help you achieve successful results. From choosing the right sawdust to matching the filler to the wood type, and ensuring proper drying and curing, each step plays a vital role in achieving a seamless and long-lasting wood fill.
Choosing The Right Sawdust
When it comes to making wood filler with sawdust, selecting the right type is essential. Opting for the same type of sawdust as the wood you are filling will ensure the most natural color match. The finer the sawdust particles, the smoother your final filler will be. Keep in mind that sawdust from softwood and hardwood may have slightly different properties, so choose accordingly based on the project requirements.
Matching The Filler To The Wood Type
Match the filler material to the type of wood you are working with to achieve optimal results. Different wood species absorb moisture differently, therefore using a compatible filler ensures proper adhesion and compatibility. For example, for oily woods like teak or cedar, it is advisable to use an epoxy-based filler as it will bond effectively to the wood’s surface.
Proper Drying And Curing
Allowing sufficient drying and curing time is crucial to obtain a strong and lasting wood fill. The exact drying time necessary will depend on the type and brand of the filler used. Follow the manufacturer’s guidelines or perform a small test in an inconspicuous area to determine the approximate drying time required. Additionally, ensure the wood fill is fully cured before sanding or applying any finishes to prevent any potential issues in the final look and durability of the repair.
By following these tips for successful wood filling and taking the time to choose the right sawdust, match the filler to the wood type, and ensure proper drying and curing, you will achieve seamless repairs and beautiful results for your wooden projects.
Frequently Asked Questions Of How To Make Wood Filler With Sawdust
What Can I Mix With Sawdust To Make Wood Filler?
Mix sawdust with wood glue or epoxy resin to make wood filler.
How Do You Make Homemade Wood Filler?
To make homemade wood filler, combine fine sawdust with wood glue until it forms a thick paste. Add glue gradually and mix until the desired consistency is achieved. Use the mixture to fill in gaps and cracks in wood surfaces.
Sand it once dry for a smooth finish.
What Kind Of Glue Do You Mix With Sawdust?
Mixing sawdust with wood glue creates a strong adhesive for various woodworking projects.
Is Wood Glue And Sawdust Better Than Wood Filler?
Wood glue and sawdust are a good alternative to wood filler. It provides a strong bond and can be stained to match the wood color. Simply mix the wood glue and sawdust together until you have a paste-like consistency and apply it to the area needing repair.
Smoothen and let it dry before sanding if necessary.
Conclusion
Wood filler made from sawdust is a cost-effective and eco-friendly solution for repairing furniture and other wooden items. By combining sawdust with a binder such as wood glue or epoxy, you can create a durable and easily customizable filler. Whether you’re a DIY enthusiast or a professional woodworker, making your own wood filler allows you to match the color and texture of your project seamlessly.
Now, you have the knowledge and tools to confidently tackle any woodworking repair with this homemade wood filler.