How to Make Wood Food Safe: Expert Tips and Techniques
To make wood food safe, clean it thoroughly and apply a food-safe finish or sealer, such as mineral oil or beeswax. Wood is a popular material for various kitchen utensils, cutting boards, and serving dishes.
However, it is important to ensure that the wood used is food safe. When it comes to making wood food safe, following a few simple steps can help you achieve the desired result. Cleaning the wood thoroughly by removing any dirt or debris is the first step.
After cleaning, applying a food-safe finish or sealer, such as mineral oil or beeswax, can help protect the wood and make it safe for food use. These finishes are non-toxic and will not interfere with the taste or quality of the food. By taking these steps, you can enjoy the beauty and functionality of wood without compromising on food safety.
Types Of Food-safe Wood
When it comes to making wood food safe, it’s important to choose the right type of wood. Certain types of wood are safe for food contact, while others may leach harmful substances. In this article, we will discuss the different types of food-safe wood and which ones are best for cutting boards. We will also highlight the woods that should be avoided.
Hardwoods Vs Softwoods
One important distinction to make when selecting food-safe wood is between hardwoods and softwoods. Hardwoods such as maple, cherry, walnut, and oak are denser and have a tighter grain structure, making them less likely to absorb liquids and odors. This makes them ideal for cutting boards as they are more resistant to knife marks and bacteria growth. Softwoods, on the other hand, like pine or cedar, have a looser grain structure and are more prone to absorbing liquids and odors. While softwoods can still be used for non-food contact surfaces, they should be avoided for cutting boards or other food preparation surfaces.
Best Picks For Cutting Boards
When it comes to cutting boards, certain hardwoods are considered the best choices due to their durability and natural resistance to bacteria. Here are some of the top picks:
| Wood Type | Features |
|---|---|
| Maple | Hard, dense, and non-porous. Resistant to bacteria growth. Easy to maintain and doesn’t dull knives. |
| Cherry | Durable and naturally antibacterial. Develops a rich patina with use. |
| Walnut | Beautiful and resilient. Its natural oil content makes it resistant to bacteria growth. |
These hardwoods not only provide a sturdy surface for cutting but also have natural properties that inhibit the growth of bacteria. Regular maintenance, such as cleaning with a mild soap solution and oiling, will help ensure the longevity of these cutting boards.
Woods To Avoid
When selecting wood for food preparation surfaces, some woods should be avoided altogether due to their toxic properties or high resin content. These include:
- Teak: Contains natural oils that can cause allergic reactions and is also high in silica, which can dull knives.
- Olive: Can contain high levels of toxic substances such as oleuropein.
- Pine: Softwood that is more porous and prone to absorbing liquids and odors.
By avoiding these woods, you can ensure that your cutting boards or other food preparation surfaces remain safe and free from any potential health risks.
Preparing Wood For Kitchen Use
When it comes to using wood in the kitchen, ensuring it is food-safe is of utmost importance. Preparing the wood properly not only enhances its durability but also ensures a healthy cooking environment. In this article, we will guide you through the essential steps of preparing wood for kitchen use, including sanding techniques to achieve smooth surfaces and cleaning procedures before treatment. Let’s dive in!
Sanding Techniques For Smooth Surfaces
Before you begin treating the wood, it’s crucial to achieve a smooth surface. Sanding the wood not only removes any roughness but also helps to improve the overall appearance of the finished product.
Here are some effective sanding techniques to achieve those smooth surfaces:
- Start with a coarse-grit sandpaper, such as 80 or 100 grit, to remove any rough surfaces or imperfections in the wood.
- Move on to a finer-grit sandpaper, such as 120 or 150 grit, to smoothen the surface further. Be sure to sand with the grain of the wood to avoid creating any scratches.
- For the final step, use an even finer-grit sandpaper, like 220 or 240 grit, to achieve a buttery-smooth finish. This step ensures that the wood is ready for treatment and enhances its food-safe properties.
Remember to wipe away any residual dust from the sanding process before moving on to the next step. This will ensure a clean surface for further treatment.
Cleaning Procedures Before Treatment
Proper cleaning of the wood is essential to eliminate any contaminants that might affect its suitability for kitchen use. Before applying any treatment or finish, follow these cleaning procedures:
- Gently remove any dirt or debris from the wood using a microfiber cloth or a soft brush. Avoid using harsh chemicals or abrasive cleaners as they may damage the wood’s surface.
- To eliminate any potential bacteria, fungi, or pests, wash the wood with warm soapy water. Use a mild dish soap or a wood-specific cleaner and a sponge or cloth to scrub the surface gently.
- Rinse the wood thoroughly to remove any soap residue. Ensure no soapy water remains on the surface.
- Dry the wood completely using a clean towel or allow it to air dry in a well-ventilated area. This step prevents moisture from penetrating the wood, which can lead to warping or mold growth.
Following these cleaning procedures will help ensure that your wood is clean, sanitary, and ready for treatment.
Now that you know how to prepare wood for kitchen use, you can proceed with confidence. By applying proper sanding techniques and following the necessary cleaning procedures, you can create a safe and functional wooden surface for all your culinary adventures.
Note: Ensure to wear appropriate safety equipment, such as a dust mask and eye protection, when sanding wood.
Selecting Food-safe Finishes
When it comes to making wood food-safe, selecting the right finishes is crucial. The finishes not only enhance the natural beauty of the wood but also provide a protective layer that prevents any food contamination. In this article, we will explore different types of food-safe finishes and discuss the best situations to use each one. So, let’s dive in!
Natural Oil Treatments
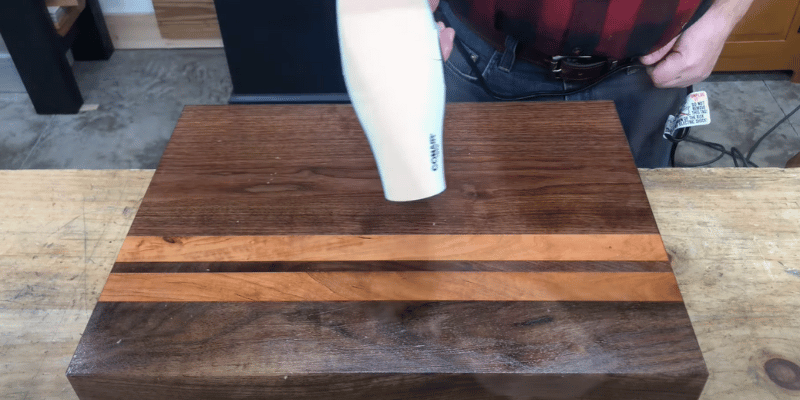
Natural oil treatments are a popular choice for making wood food-safe due to their non-toxic nature and excellent sealing properties. One of the most commonly used oils is tung oil, which creates a durable and water-resistant finish. It penetrates deep into the wood and forms a protective layer that keeps food acids and liquids from seeping in. Another popular option is linseed oil, which brings out the natural colors and grain patterns of the wood while providing a food-safe seal. Applying these oils is relatively easy, and they require periodic reapplication to maintain their effectiveness.
Wax And Shellac Options
Wax and shellac finishes are another viable choice for making wood food-safe. Beeswax is a natural and renewable option that creates a smooth and glossy surface. It forms a water-resistant barrier and helps prevent the growth of bacteria. Wax finishes are easy to apply and maintain, making them an appealing choice for those looking for a low-maintenance solution. On the other hand, shellac is a resin-based finish that provides excellent protection against moisture and food stains. It forms a hard and durable surface that is easy to clean. However, shellac may not be suitable for high-temperature environments as it can soften or melt.
When To Use Water-based Finishes
Water-based finishes are a great option for many food-adjacent wood surfaces, but polyurethane and varnish are not recommended for cutting boards, bowls, or utensils. Even once fully cured (which takes about 30 days), these film-forming finishes cannot stand up to knife contact or scraping utensils. A blade or fork eventually cuts into and chips off tiny flakes of the hardened finish, and those flakes can end up in your food — and the cut also lets moisture get underneath, where it cannot dry out. For dining tables, shelving, or other food-adjacent surfaces that will not be cut or scraped on, a cured polyurethane or varnish coating is fine. But for any surface you will actually cut, chop, or eat directly off of, use a penetrating oil finish (like food-grade mineral oil or a hardwax oil) instead of a film-forming one.

The safest, allergy-free default finish for cutting boards, bowls, and utensils.
- Best for: any surface that touches food directly, especially cutting boards
- Why we picked it: penetrates instead of forming a film, so there’s nothing for a knife to chip off into your food
- Main drawback: needs reapplying every few weeks since it doesn’t cure hard


As an Amazon Associate, we earn from qualifying purchases.
Applying Finishes Correctly
When it comes to making wood food safe, applying the right finishes is essential. A properly applied finish not only enhances the beauty of the wood but also provides a protective barrier that prevents harmful substances from leaching into your food. In this section, we will guide you through the step-by-step application process, discuss curing times and best practices, and explain how to maintain the finish over time.
Step-by-step Application Process
- Prepare the surface: Begin by ensuring that the wood surface is clean and smooth. Sand down any rough spots and remove any dust or debris.
- Choose a food-safe finish: Select a finish specifically formulated for use on food-serving items. Food-grade mineral oil and beeswax are the safest all-around choices. Walnut oil is also popular and highly refined walnut oil finishes are considered low-risk, but anyone with a tree nut allergy should avoid walnut oil finish or check with an allergist first, since commercial walnut oil products carry a tree-nut allergy warning.
- Apply the first coat: Using a clean, lint-free cloth or a brush, apply a thin, even coat of the chosen finish to the entire surface of the wood. Work with the grain to achieve a smooth finish.
- Allow drying time: Let the first coat dry for the recommended time specified by the manufacturer. This usually ranges from a few hours to overnight.
- Sand lightly: After the first coat has dried, lightly sand the wood surface with fine-grit sandpaper. This step helps to smooth out any imperfections.
- Apply subsequent coats: Repeat the application process, applying additional coats as desired. Most food-safe finishes require two to three coats for optimal protection.
- Allow final curing: Once you have applied the desired number of coats, allow the finish to fully cure according to the manufacturer’s instructions. This ensures that the finish reaches its maximum strength and durability.
Curing Times And Best Practices
Understanding curing times is crucial in achieving a properly sealed and food-safe wood surface. While drying time refers to when the finish is no longer tacky, curing time refers to the duration needed for the finish to fully harden and become resistant to moisture and heat. Curing times can vary depending on the chosen finish, humidity levels, and temperature. To ensure proper curing, it is crucial to follow the manufacturer’s recommendations.
Here are some best practices to optimize the curing process:
- Place the finished wood item in a well-ventilated area with consistent temperature and low humidity.
- Avoid exposing the wood to excessive heat or direct sunlight during the curing phase.
- Avoid using the finished item for food service until the finish has fully cured.
- Regularly check the curing progress and touch up any areas that may need attention.
Maintaining The Finish Over Time
To ensure the longevity of your food-safe wood finish, proper maintenance is essential. Follow these simple tips to keep your wood surface looking beautiful and protected:
- Clean with a mild, non-abrasive soap and warm water. Avoid harsh chemicals as they can damage the finish.
- Avoid prolonged exposure to standing water or extreme temperature changes.
- When not in use, store the wood item in a cool and dry place to prevent warping or cracking.
- Periodically apply a thin coat of the food-safe finish to maintain protection and enhance the wood’s natural beauty.
Regular Wood Maintenance Tips
Proper maintenance is crucial to keep your wooden food surfaces safe and in great condition. By following these regular wood maintenance tips, you can ensure that your wood stays food-safe and looking its best for years to come.
Routine Cleaning Practices
To maintain the food safety of your wood, it’s essential to establish a routine cleaning practice. Here are a few steps to follow:
- Start by removing any loose debris or crumbs from the surface using a soft brush or a damp cloth.
- Next, create a solution of mild dish soap and warm water. Dampen a cloth with the solution and gently wipe down the wood surface, ensuring that you don’t saturate the wood with excess water.
- Rinse the cloth thoroughly and wipe away any soap residue from the surface.
- To prevent moisture from seeping into the wood, dry the surface completely with a clean, dry cloth.
Following these routine cleaning practices will help keep your wooden surfaces clean and free from potential food contaminants.
Addressing Scratches And Cuts
Over time, the wooden surfaces may develop scratches and cuts. To prevent any harboring of bacteria or other food contaminants, it’s important to address them promptly. Here’s what you can do:
- If the scratch is shallow, applying a small amount of food-grade mineral oil or a recommended wood conditioner can help minimize its appearance and protect the wood.
- For deeper scratches or cuts, gently sand the damaged area with fine-grit sandpaper, following the wood grain. Clean the sanded area with a slightly damp cloth, allow it to dry, and then apply a food-safe wood filler. Once the filler is dry, sand it until it becomes smooth and even with the surrounding surface.
- After addressing the scratches and cuts, apply a fresh coat of food-safe finish or sealant on the treated area to restore both the appearance and protection of the wood.
Remember to always follow the manufacturer’s instructions when using any wood care products.
When To Reapply Finishes
Finishes play a vital role in protecting wooden surfaces from moisture and stains. However, they may wear off over time. Here’s how you can determine when it’s time to reapply finishes:
| Signs | Action |
|---|---|
| Faded or dull appearance | It’s time to reapply the finish. Start by sanding the surface lightly to remove any dirt or imperfections. Then, follow the manufacturer’s instructions to apply a fresh coat of food-safe finish. |
| Water no longer beads on the surface | This indicates that the protective layer has worn off. It’s recommended to reapply the finish to maintain the wood’s resistance to moisture. |
| Visible stains or discoloration that cannot be removed | These may be signs of the finish wearing off or being compromised. Sand the stained area lightly, clean it with a damp cloth, and reapply the finish to restore the appearance and protection of the wood. |
Regularly assessing the condition of the finishes on your wooden food surfaces will help you preserve the wood’s integrity and food safety.
Frequently Asked Questions For How To Make Wood Food Safe
How Do You Seal Wood To Make It Food Safe?
To make wood food safe, follow these steps:
1. Sand the wood to ensure a smooth surface.
2. Apply a food-safe sealer such as mineral oil, beeswax, or a food-grade finish.
3. Allow the sealer to penetrate the wood and dry completely.
4. Reapply the sealer periodically to maintain its food-safe properties.
5. Regularly clean the sealed wood with mild soap and water.
Can Any Wood Be Food Safe?
Yes, not all woods are food-safe. Some woods contain toxins that can contaminate food. It’s important to choose food-grade woods like maple, cherry, or walnut, which are naturally safe for food contact. Avoid using woods treated with chemicals or those prone to mold or rot.
How Do I Make A Piece Of Wood Food Safe?
To make a piece of wood food safe, follow these steps:
1. Clean the wood thoroughly with mild soap and warm water.
2. Sand the surface to remove any rough areas.
3. Apply a food-safe finish, such as mineral oil or beeswax, to seal the wood.
4. Let the finish dry completely before using the wood for food preparation.
5. Reapply the finish periodically to maintain the food-safe barrier.
Can You Stain Wood And Make It Food Safe?
Yes, you can stain wood and make it food-safe by using a food-safe wood sealer or finish. These products create a protective barrier that makes the wood safe for food contact. It is important to choose products specifically labeled as food safe to ensure the safety of your food.
Conclusion
Ensuring that wood surfaces used for food are safe requires proper treatment and maintenance. By following the steps outlined in this post, you can effectively make wood food safe. Remember to clean and dry the surface thoroughly, apply appropriate food-safe finishes, and regularly maintain the wood to uphold its safety.
With these practices in place, you can enjoy using wood in your kitchen without compromising your health or the quality of your food.