How To Create Stunning Painted Glass Windows: A Step-by-Step Guide
To paint on glass windows, first clean the surface thoroughly with glass cleaner. Then, use glass paints or acrylic paints specifically designed for glass painting and apply them using a brush or sponge in thin layers for a smooth finish.
Avoid excess paint and let each layer dry completely before adding the next.
Choosing The Right Glass
When it comes to painting on glass windows, choosing the right type of glass is crucial for achieving the desired results. Glass selection depends on various factors, including the type of paint you plan to use, the location of the window, and the overall aesthetic you want to achieve. In this post, we will discuss the considerations for glass selection and explore the different types of glass that work best for painted windows.
Considerations For Glass Selection
Before you start painting on glass windows, it is important to consider a few key factors that will influence your choice of glass:
1. Paint Compatibility:
The type of paint you intend to use will heavily impact the type of glass you choose. Some paints are specifically formulated for glass surfaces, while others are meant for different materials. It is essential to check whether your chosen paint is compatible with glass surfaces.
2. Window Location:
The location of the window is another crucial consideration. If the window is exposed to direct sunlight, extreme temperatures, or high humidity levels, you will need a glass that can withstand these conditions. For instance, tempered or laminated glass is more resistant to heat and impact, making it suitable for exterior windows.
3. Transparency and Privacy:
Think about the level of transparency and privacy you want to achieve. Certain types of glass, such as frosted or etched glass, can provide privacy while still allowing some natural light to pass through. Clear glass, on the other hand, offers maximum transparency.

Types Of Glass For Painted Windows
Now that we have discussed the considerations for glass selection, let’s explore the different types of glass that work well for painted windows:
1. Float Glass:
Float glass is the most commonly used type of glass for painted windows. It is a versatile and cost-effective option that provides excellent clarity. Available in various thicknesses, float glass is suitable for both interior and exterior window painting projects.
2. Frosted Glass:
Frosted glass is ideal if you are looking to create a more opaque or textured appearance on your windows. It can be painted on to achieve unique designs while still maintaining a level of privacy. Frosted glass works best for interior windows or areas where privacy is desired.
3. Tempered Glass:
If your painted window is in a high-traffic area or requires extra safety measures, consider using tempered glass. Tempered glass is heat-treated to enhance its strength and durability. It is also more resistant to breakage, making it a suitable choice for both interior and exterior windows.
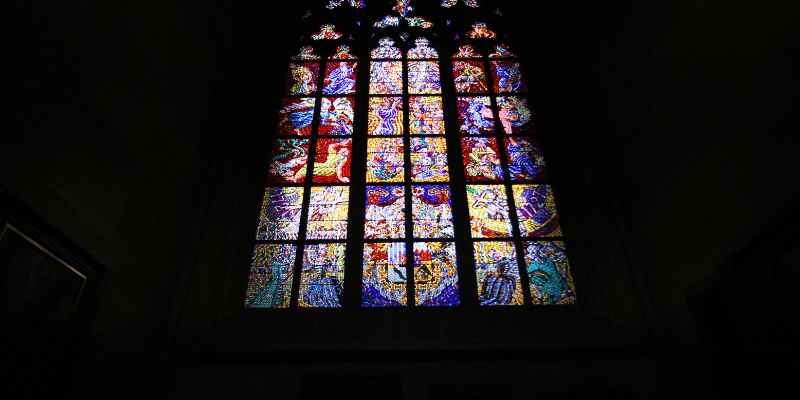
4. Stained Glass:
If you want to add a touch of elegance and color to your windows, stained glass is a gorgeous option. This type of glass is traditionally seen in churches and historic buildings but can also be a stunning addition to residential windows. With painted designs on stained glass, you can create a truly unique and eye-catching visual.
Choosing the right type of glass is an essential step when painting on glass windows. Consider factors such as paint compatibility, window location, transparency, and privacy to determine the most suitable glass option for your project. Whether you opt for float glass, frosted glass, tempered glass, or stained glass, each offers its own distinct advantages for creating beautiful, painted windows. Now that you are armed with valuable information about choosing the right glass, you can move forward confidently in your painting endeavors.
Gathering The Materials
Gathering the right materials is essential when it comes to painting glass windows. Whether you’re a beginner or an experienced artist, having the necessary tools and supplies will ensure a smooth and successful project. In this section, we will discuss the essential tools and supplies needed for painting on glass.
Essential Tools For Painted Glass Windows
Before you begin your project, make sure you have the following tools on hand:
- Glass cleaner: Start by cleaning the glass surface thoroughly to remove any dirt or grime that could affect the paint’s adhesion.
- Painter’s tape: Use painter’s tape to create clean edges and protect the areas you don’t want to paint.
- Paintbrushes: Invest in high-quality, synthetic bristle brushes suitable for glass painting. Various sizes and shapes will allow you to create different effects and details.
- Cotton swabs: Cotton swabs are handy for fixing mistakes or creating small, detailed touches in your design.
- Palette: A palette will help you mix and blend your paint colors easily. You can use a disposable palette or a glass palette if you prefer.
- Palette knife: A palette knife comes in handy when you want to mix larger quantities of paint or create textured effects on the glass.
Supplies Needed For The Project
In addition to the tools mentioned above, you’ll also need the following supplies:
- Glass paint: Choose high-quality, water-based glass paints that are specifically designed for use on glass surfaces. These paints will provide vibrant colors and excellent adhesion to the glass.
- Paint thinner: Keep paint thinner on hand to clean your brushes and palette when necessary.
- Protective finish: Applying a protective finish over your painted glass windows will help seal the paint and protect it from chipping or fading over time. You can choose between a gloss or matte finish, depending on your preference.
- Paint palette or mixing cups: If you prefer, you can use a paint palette or small mixing cups to mix and dilute your paint colors.
- Sponges or rags: Sponges or soft rags are useful for creating textured effects or for blending colors on the glass surface.
- Design templates or stencils: If you’re not confident with your freehand painting skills, design templates or stencils can help you create precise and intricate designs on your glass windows.
By gathering these essential tools and supplies, you’ll be well-prepared to embark on your painted glass window project. The right materials will make the process easier and ensure that your final result is both beautiful and long-lasting.
Preparing The Surface
Before you start painting on glass windows, it’s crucial to prepare the surface properly. This ensures that your paint adheres well and creates a lasting finish. In this section, we will walk you through the essential steps of preparing the surface: cleaning the glass and applying primer.
Cleaning The Glass
Before applying any paint, it is important to clean the glass thoroughly. Follow these steps to get your glass surface sparkling clean:
- Gently remove any dirt or dust particles from the glass using a soft brush or a clean, lint-free cloth.
- Mix a solution of mild dish soap and warm water in a bucket.
- Dunk a sponge or a microfiber cloth into the soapy water and wring out the excess moisture.
- Starting from the top, wipe the glass surface using gentle circular motions, working your way down.
- Rinse the glass with clean water to remove any soap residue.
- Finally, dry the glass with a clean, lint-free cloth to ensure a spotless surface.
Applying Primer
Priming the glass before painting is crucial to promote paint adhesion and prevent peeling or chipping. Follow these steps to apply primer effectively:
- Select a high-quality glass primer compatible with your chosen type of paint.
- Protect the surrounding areas of the glass with painter’s tape or newspaper.
- Stir the primer thoroughly to ensure a smooth consistency.
- Using a small brush or roller, apply a thin and even coat of primer to the glass surface.
- Allow the primer to dry completely as per the manufacturer’s instructions.
- Inspect the primed surface for any imperfections, such as air bubbles or uneven coverage.
- If needed, lightly sand the primed surface with fine-grit sandpaper to smooth out any rough areas.
Once you have completed the crucial step of preparing the surface, you can move forward with confidence to unleash your creativity on the glass windows. The properly cleaned and primed surface ensures better paint adhesion, allowing your artwork to stand the test of time.
Designing Your Window
Looking to paint glass windows? Learn how to transform your windows with paint and create a unique design that adds a touch of style and personality to any space.
Designing your window is an exciting process that allows you to unleash your creativity and add a personal touch to your space. Whether you want to create a whimsical scene or a sophisticated design, there are a few steps to follow for a successful and visually stunning result.
Planning Your Design
Before diving into the actual painting process, it’s crucial to plan your design. Consider the purpose of the window, the surrounding decor, and the effect you want to achieve. Here are a few tips to help you plan your design:
- Identify the theme or style you want to incorporate.
- Think about the colors you want to use and how they will complement the space.
- Consider the level of complexity you’re comfortable with, especially if you’re a beginner.
Once you have a clear vision in mind, it’s time to move on to the next step.
Creating A Sketch Or Template
Creating a sketch or template is an essential step in the window painting process. Not only does it help you visualize the final result, but it also serves as a guide during the painting process. Follow these steps to create a sketch or template:
- Gather your materials, including paper and a pencil.
- Measure the dimensions of your window and transfer them to the paper.
- Start sketching your design, keeping in mind the window shape and size.
- Use a ruler or stencil to create clean lines and precise shapes.
- Experiment with different layouts and compositions until you find the perfect one.
Once you’re satisfied with your sketch or template, it’s time to bring your design to life on the glass.
Painting Techniques
When it comes to painting glass windows, using the right techniques can make all the difference. The right paints and brushes, along with proper application methods, can create stunning works of art that enhance the look of any space. In this section, we will explore the essential painting techniques to help you achieve beautiful results.
Choosing The Right Paints And Brushes
When painting on glass windows, it is crucial to choose the right paints and brushes that are specifically designed for this purpose. Look for glass paints that are transparent or translucent, as they allow light to pass through while providing vibrant colors. Acrylics and enamel paints are popular choices for glass painting.
Additionally, brushes with fine bristles and a pointed tip work best for precision and detail. Liner brushes or small round brushes are ideal for creating thin lines and intricate designs. By selecting the appropriate materials, you can ensure smooth application and long-lasting results.
Applying Different Painting Techniques
There are various painting techniques you can employ to achieve different effects and styles on glass windows. Here are a few commonly used techniques:
- Dry Brushing: This technique involves using a small amount of paint on a dry brush to create a textured or worn-out look. Lightly brush the paint onto the glass surface, focusing on the raised areas to add depth and dimension.
- Sponging: Dip a sponge or a piece of natural sea sponge in the paint and lightly dab it onto the glass surface. This creates a mottled or stippled effect, perfect for achieving a soft, cloudy appearance or adding texture.
- Stenciling: Use stencils to create intricate patterns or designs on the glass surface. Secure the stencil in place and apply paint using a stencil brush or sponge. This technique allows for precise and repetitive patterns, ensuring consistent and professional-looking results.
- Mixing Colors: Experiment with mixing different colors of glass paint to create unique shades and blends. This technique adds depth and visual interest to your artwork.
- Reverse Glass Painting: Instead of painting directly on the front of the glass, try painting on the opposite side. This technique creates a glossy and dimensional effect when viewed from the front, adding a touch of elegance to your artwork.
By incorporating these painting techniques into your glass window art, you can create visually stunning pieces that reflect your creativity and style. Remember to practice, experiment, and have fun with your artwork – the possibilities are endless!
Conclusion
To wrap up, painting on glass windows is an enjoyable and creative activity that can beautify any space. By following the step-by-step guide provided in this blog post, you can achieve stunning results. Remember to choose the right materials, prepare the glass surface properly, and apply the paint with care.
With practice and determination, you’ll be able to create unique designs that will enhance the aesthetic appeal of your windows. Happy painting!