How To Transform Your Veneer Furniture with a Stunning Paint Makeover!
To paint veneer furniture, sand the surface to create a smoother finish and remove any existing paint. Then, apply a primer specifically designed for veneer surfaces and let it dry.
Finally, paint the furniture using a brush or a sprayer, and allow it to dry completely before adding a second coat if necessary.
Choosing The Right Paint
When it comes to painting veneer furniture, choosing the right paint is crucial to achieving a beautiful and durable finish. With so many options available, it can be overwhelming to know where to start. In this section, we will discuss three key factors to consider when choosing the right paint for your veneer furniture: the existing finish, the type of paint, and the color and finish.
Consider The Existing Finish
Before you begin the painting process, take a close look at the existing finish of your veneer furniture. Is it glossy, matte, or somewhere in between? Understanding the current finish will help you determine the level of prep work required for the paint to adhere properly. For example, if the surface is glossy, you may need to lightly sand it or use a primer to create a better surface for the paint to stick to.
Select The Appropriate Type Of Paint
The type of paint you choose for your veneer furniture will depend on several factors, including the desired outcome and the level of durability needed. Generally, latex or acrylic-based paints are excellent choices for veneer furniture as they offer good adhesion, durability, and a wide range of color options. These paints are also quick-drying and easy to clean up, making them ideal for DIY projects. If you prefer a more traditional or vintage look, consider using oil-based paints which provide a smooth and lustrous finish, but they do require longer drying times and proper ventilation.
Choose The Right Color And Finish
Now that you have considered the existing finish and selected the appropriate type of paint, it’s time to choose the right color and finish. When selecting the color, think about the overall look and feel you want to achieve. Do you want your veneer furniture to blend in seamlessly with the existing decor, or are you looking to make a bold statement with a vibrant color? Additionally, consider the finish of the paint. Do you want a glossy finish that reflects light and creates a smooth surface, or a matte finish that adds depth and texture? Take your time and explore different color and finish options to find the perfect combination that will enhance the beauty of your veneer furniture.
Preparing The Surface
To prepare the surface for painting veneer furniture, make sure to clean it thoroughly, remove any existing finish, and sand it gently to create a smooth base for the paint. Applying a primer will help the paint adhere better and ensure a long-lasting finish.
Preparing the surface of veneer furniture is a crucial step in achieving a smooth and flawless paint finish. By following a few simple steps, you can ensure that your painted veneer furniture looks professionally done and stands the test of time. In this section, we will discuss the key steps involved in preparing the surface, including cleaning the furniture thoroughly, sanding the surface, repairing any damages or imperfections, and priming the furniture.
Now, let’s dive into each of these steps to ensure that your veneer furniture is properly prepared for painting.
Clean the furniture thoroughly
Before you start painting a veneer piece, it’s important to clean it thoroughly. By removing any dirt, grime, or grease from the surface, you will ensure that the paint adheres properly and doesn’t peel or chip later on.
To clean the furniture, follow these simple steps:
1. Unplug and remove any hardware or drawers from the piece.
2. Use a mild detergent or dish soap mixed with warm water to gently scrub the surface.
3. Rinse off the soap residue with a clean, damp cloth.
4. Allow the furniture to dry completely before proceeding to the next step.
By cleaning the furniture thoroughly, you’ll create a clean canvas for your paint and improve its overall adhesion.
Sand the surface
After cleaning the furniture, the next step is to sand the surface. Sanding helps to remove any existing finish, roughen up the surface, and create a better bond between the paint and veneer.
Here’s how you can sand the surface of veneer furniture effectively:
1. Start by using a medium-grit sandpaper (around 120 grit) to gently sand the entire surface. Be sure to sand in the direction of the grain to prevent any damage to the veneer.
2. Once you’ve removed the existing finish, switch to a finer-grit sandpaper (around 220 grit) for a smoother finish.
3. Sand any difficult-to-reach areas with the help of sandpaper wrapped around a sanding block or sponge.
4. After sanding, wipe away the dust using a clean, dry cloth or a tack cloth.
Sanding the surface of the veneer furniture will create a slightly roughened texture, allowing the paint to adhere more effectively.
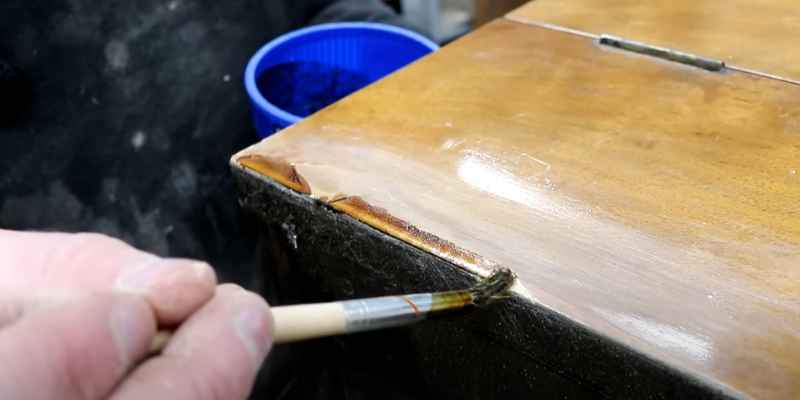
Repair any damages or imperfections
Before painting, it’s essential to inspect the veneer furniture for any damages or imperfections. Repairing these issues will not only improve the appearance of the piece but also ensure that the paint goes on smoothly.
Here’s how to repair damages or imperfections effectively:
1. Fill any cracks, dents, or gouges with a high-quality wood filler. Choose a filler that closely matches the color of the veneer.
2. Allow the filler to dry according to the manufacturer’s instructions.
3. Once dry, sand the filled areas lightly to ensure a seamless finish.
Repairing damages or imperfections will create a smooth surface and prevent any blemishes from showing through the final paint job.
Prime the furniture
Lastly, before applying the paint, it’s crucial to prime the veneer furniture. Priming helps to seal the surface, provide better adhesion for the paint, and prevent any color bleeding or uneven coverage.
Follow these steps to prime the furniture effectively:
1. Choose a high-quality primer suitable for veneer surfaces.
2. Apply the primer evenly using a brush or roller, following the manufacturer’s instructions.
3. Allow the primer to dry completely.
Priming your furniture will create a solid foundation for the paint, ensuring a flawless and long-lasting finish.
By following these steps to prepare the surface of your veneer furniture, you can achieve professional-looking results when painting. Taking the time to clean, sand, repair, and prime will contribute to a successful painting project, enhancing the beauty and durability of your furniture.
Applying The Paint
To paint veneer furniture, start by cleaning the surface and sanding it lightly. Apply a primer before applying the paint in thin, even coats. Finish with a clear sealer for added protection.
Applying the paint to veneer furniture is a crucial step in transforming its appearance. By using the right tools, applying thin and even coats, allowing proper drying time between coats, and considering different techniques for texture or distressing, you can achieve a professional-looking finish. Let’s delve into each of these steps in detail.
Use The Right Tools
To ensure a smooth and flawless paint application on veneer furniture, it is essential to use the right tools. Start by choosing a high-quality synthetic brush or a foam roller specifically designed for painting furniture. These tools will help you achieve better control and precision, resulting in a more professional finish.
Apply Thin, Even Coats
When painting veneer furniture, it is important to apply thin and even coats of paint. This technique helps prevent drips and ensures the paint adheres properly. Begin by lightly sanding the surface to create a rough texture that allows the paint to bond effectively. Then, apply the first coat of paint using long, smooth strokes, working in the direction of the wood grain. Avoid overloading the brush or roller to prevent excess paint buildup.
Allow Proper Drying Time Between Coats
Patience is key when painting veneer furniture. After applying the first coat, allow it to dry completely before applying subsequent coats. This ensures that each layer of paint dries evenly and provides a solid foundation for the next coat. Check the recommended drying time on the paint can, as it may vary depending on the type of paint used. Rushing this step can lead to an uneven finish and compromised durability.
Consider Different Techniques For Texture Or Distressing
While a smooth, painted finish is popular for veneer furniture, you may also consider incorporating texture or distressing techniques for a unique look. One technique involves lightly sanding the painted surface in strategic areas to mimic a worn or aged appearance. This adds character and depth to your furniture. Another option is to use a textured roller or add a glaze to create visual interest.
Remember, by using the right tools, applying thin and even coats, allowing proper drying time between each coat, and experimenting with different techniques for texture or distressing, you can successfully paint veneer furniture and give it a fresh new look. Happy painting!
Finishing Touches
Adding the finishing touches to your painted veneer furniture is what truly completes the transformation. These small but significant details can elevate the overall appearance and durability of your piece. In this section, we will discuss some essential finishing touches that you can apply to your newly painted veneer furniture.
Seal The Paint For Durability
One crucial step in ensuring the longevity of your painted veneer furniture is to seal the paint. A protective sealant not only shields the paint from wear and tear but also enhances its durability. Applying a clear polyurethane sealant is an effective way to protect your furniture from scratches, spills, and fading caused by sunlight exposure. Simply brush on a thin, even coat of sealant and allow it to dry completely before applying subsequent coats. Multiple coats will increase the durability and provide a smooth, glossy finish.
Consider Adding Decorative Elements
To take your painted veneer furniture to the next level, consider adding decorative elements that reflect your personal style. You can choose to stencil intricate designs, use painter’s tape to create geometric shapes, or even experiment with unique patterns. By incorporating these artistic touches, you can transform your furniture into a statement piece that adds character and personality to your living space. Remember to use contrasting colors or metallic paints to make your designs pop!
Replace Or Update Hardware
Another way to enhance the overall look of your painted veneer furniture is by replacing or updating the hardware. Old and worn-out handles, knobs, or pulls can drag down the aesthetic appeal of the piece. By replacing them with new ones, you can instantly give your furniture a fresh and modern look. Consider selecting hardware that complements the color and style of your piece. Whether you prefer sleek and contemporary or vintage-inspired, updating the hardware can make a considerable difference in the overall appearance.
Caring For Your Painted Furniture
Once you have transformed your veneer furniture with a fresh coat of paint, it is important to take proper care of it for long-lasting results. By following a few simple care and maintenance tips, you can ensure that your painted furniture stays beautiful and retains its vibrant color for years to come.
To keep your painted veneer furniture looking its best, regular cleaning is essential. Dust and dirt can accumulate on the surface over time, making the paint appear dull. To prevent this, use a soft, lint-free cloth or a feather duster to gently remove any dust or debris. Avoid using abrasive cleaners or harsh chemicals as they can damage the paint. Instead, opt for a mild soap solution or a furniture cleaner specifically designed for painted surfaces. Simply dampen a cloth with the solution and wipe down the furniture, making sure to dry it thoroughly afterwards.
Exposing your painted veneer furniture to heat or moisture can cause the paint to blister or peel. To prevent this, it is important to avoid placing hot or wet items directly on the surface. Use coasters or heat-resistant mats to protect the furniture from hot dishes, mugs, or pans. If any liquid spills onto the furniture, be sure to wipe it up promptly and thoroughly dry the area to prevent any water damage. By taking these simple precautions, you can safeguard your painted furniture from potential damage and prolong its lifespan.
Conclusion
Painting veneer furniture is a simple and cost-effective way to breathe new life into outdated pieces. By following the proper steps and using the right materials, you can achieve a professional and long-lasting finish. From preparing the surface to applying the primer and paint, this guide has provided you with the necessary information to successfully tackle this DIY project.
So, go ahead and give your old veneer furniture a fresh and modern update!