How to Paint Wood Veneer Cabinets Without Sanding Through
Wood veneer cabinets can be painted successfully, but only with a bonding primer such as Zinsser Bulls Eye 1-2-3 or Kilz — regular sanding past 220-grit risks cutting through veneer that is often just 1/40 inch thick, exposing the substrate underneath. Sand through once and you are left with a visible seam no coat of paint will hide. This guide covers safe sanding depth, the deglosser method for skipping sanding entirely, and which primer and paint actually bond to veneer long-term.
Insert your Affiliate Disclosure reusable block here.
What You’ll Need
Best Cabinet Paint Pick
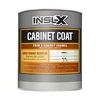
INSL-X Cabinet Coat Urethane Acrylic Semi-Gloss Enamel
A self-leveling enamel built specifically for cabinets and veneer, so it dries harder than general-purpose wall paint.
- Best for: kitchen and bathroom cabinets that see daily handling
- Why we picked it: purpose-built cabinet enamel, not a repurposed wall paint — self-levels to hide brush marks
- Main drawback: longer full-cure time than standard latex before cabinets can be closed firmly
Compare more cabinet-painting supplies
 Option 1 Zinsser Bulls Eye 1-2-3 Primer & Sealer
|
 Option 2 Krud Kutter Gloss-Off Deglosser
|
 Option 3 Rust-Oleum Transformations Cabinet & Trim Paint
|
As an Amazon Associate we earn from qualifying purchases.
- TSP or a mild detergent-and-water solution (degreasing cleaner)
- 220–320-grit sandpaper or a liquid deglosser (see below for which to pick)
- Bonding primer rated for glossy or laminate surfaces
- 100% acrylic semi-gloss or satin enamel paint
- Foam roller (4-inch) or high-quality synthetic brush
- Painter’s tape and a tack cloth
Preparing the Cabinets
Preparation determines whether the paint bonds for years or peels within months. Remove doors, drawers, and hardware first — painting cabinets in place is the most common cause of drips and missed edges. (For prep and priming on other wood surfaces, see our full wood paint guide.)
Cleaning the Surface
Wipe every surface with TSP (trisodium phosphate) or a mild detergent-and-water mix to strip kitchen grease — grease under primer is the single biggest cause of paint chipping on cabinets. Rinse with a damp cloth and let the wood veneer dry completely before touching sandpaper.
📊 Cabinet-grade wood veneer typically runs 1/40 inch to 1/16 inch thick (about 0.6mm–1.6mm) — roughly the thickness of a few sheets of paper. That is the actual reason sanding technique matters here in a way it doesn’t on solid wood.
Sanding Without Cutting Through the Veneer
Use 220-grit sandpaper (not medium grit) and sand only enough to dull the sheen — you are scuffing the finish for adhesion, not removing it. Sand in the direction of the grain with light, even pressure, and stop as soon as the surface looks matte. On edges and corners, where veneer is thinnest and most likely to have already been sanded once before, ease off further. Wipe away dust with a tack cloth before priming.
Skipping Sanding: Deglosser and Chalk Paint Alternatives
If you would rather not risk sanding through at all, a liquid deglosser (also sold as liquid sandpaper) chemically dulls the gloss so a bonding primer can grip without any abrasion. Chalk-style paints are the other no-sand route — their thicker, more porous formula adheres to clean glossy veneer directly, though most still benefit from a stain-blocking primer coat over knots or dark laminate patterns first.
Priming the Surface
Primer is what actually holds the paint to veneer — skip it, and even the best cabinet enamel will eventually chip along the edges where hands touch most.
Choosing a Bonding Primer
A bonding primer is a stain-blocking primer formulated to grip smooth, glossy, or laminate surfaces that ordinary primer slides off of. Look for one labeled for use over laminate or melamine, not just “all-purpose.” Shellac-based and urethane-modified formulas (like white wood primer rated for glossy substrates) bond best on veneer that has never been painted before; water-based bonding primers work fine on veneer that is only lightly scuffed.
Applying the Primer
- Confirm the surface is dust-free: Run a tack cloth over every panel one final time — trapped dust telegraphs through primer as tiny bumps.
- Apply a thin, even coat: Use a foam roller for flat panels and a brush for edges and profiles. Thin coats dry faster and level better than one thick coat.
- Let it dry fully: Most bonding primers need at least 3 hours before recoating and a full 24 hours before the first paint coat, even if the label says the surface feels dry sooner.
- Scuff-sand between primer coats if using two: A quick pass with 320-grit knocks down any raised grain without cutting into the veneer.
Applying the Paint
Paint type and technique matter as much as prep once the primer has cured — the wrong sheen or a rushed second coat is the other common way veneer paint jobs fail early.
Best Paint Type for Veneer Cabinets
Use a 100% acrylic latex enamel in semi-gloss or satin. Semi-gloss wipes clean and resists fingerprints better, which matters most on cabinets that get touched daily; satin hides small imperfections better if the veneer surface isn’t perfectly smooth. Avoid flat or eggshell finishes on cabinets — they mark and stain far more easily.
Technique for a Smooth Finish
- Apply with a 4-inch foam roller on flat surfaces — it lays down paint without the stipple texture a nap roller leaves.
- Use a high-quality synthetic brush only on edges, corners, and profiles a roller can’t reach.
- Lay down two to three thin coats rather than one thick coat — thick coats sag, drip, and take far longer to cure hard.
- Let each coat dry a full 24 hours before recoating; rushing this is the top cause of a tacky, easily-marred final finish.
- Allow 24–48 hours before lightly using doors and drawers, and roughly 30 days before the paint reaches full hardness — avoid heavy scrubbing before then.
Sanding vs. Deglosser vs. Chalk Paint: Which Prep Method to Use
| Prep Method | Sand-Through Risk | Best For |
|---|---|---|
| Light 220-grit sanding | Low if you stop at “matte,” high on edges/corners | Flat veneer panels with a durable finish |
| Liquid deglosser | None — no abrasion at all | Thin, older, or already-sanded veneer edges |
| Chalk-style paint | None — adheres directly to clean gloss | Fastest no-sand, no-primer project (matte look only) |
Common Mistakes to Avoid
Sanding Too Aggressively
Because veneer is only a thin surface layer, heavy sanding — especially with anything coarser than 220-grit, or repeated passes in the same spot — can cut straight through to the substrate underneath. If that happens, the exposed patch will telegraph through paint as a slightly different texture. Once you see a lighter, rougher patch appear while sanding, stop immediately.
Skipping the Primer
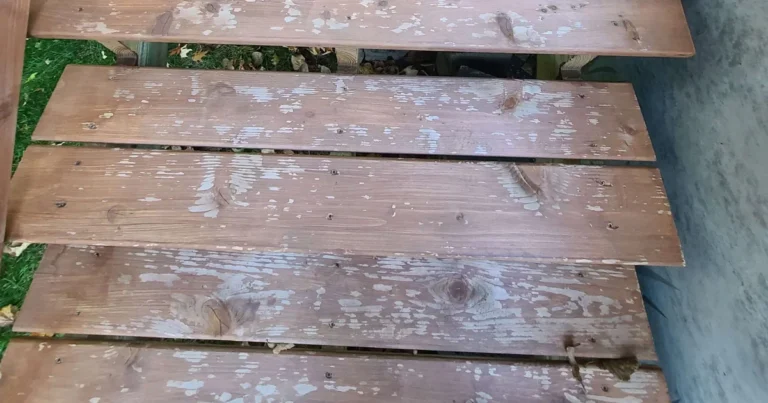
The most common failure on veneer cabinets isn’t bad paint — it’s no bonding primer, or a primer left to dry less than the full recommended time. Paint applied over an under-cured primer looks fine at first and starts peeling at the edges within weeks.
Final Touches
Once the final coat has dried at least 24 hours, remove painter’s tape slowly at a 45-degree angle, pulling back over itself rather than straight up, to keep the paint edge crisp. For high-traffic cabinets, a clear water-based polyurethane topcoat adds real scratch resistance over the enamel — see our guide on stopping painted cabinet paint from chipping for application details and cure times.

Enhancing the Look
New hardware finishes the transformation faster than any other single change. Match hardware finish to the cabinet style — matte black or brushed nickel for a modern painted look, aged brass or bronze for a traditional one — and consider adding crown molding along the cabinet tops for a more finished, built-in appearance. If you want the painted veneer to look intentionally aged rather than flat, see our guide to painting veneer furniture for glaze and distressing techniques that also work on cabinets.
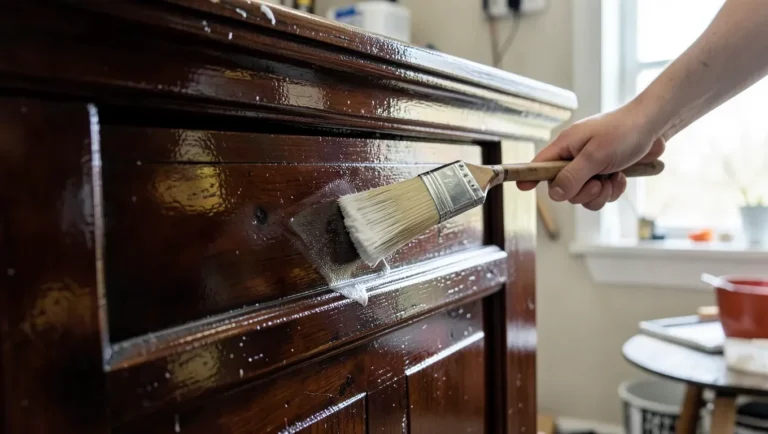
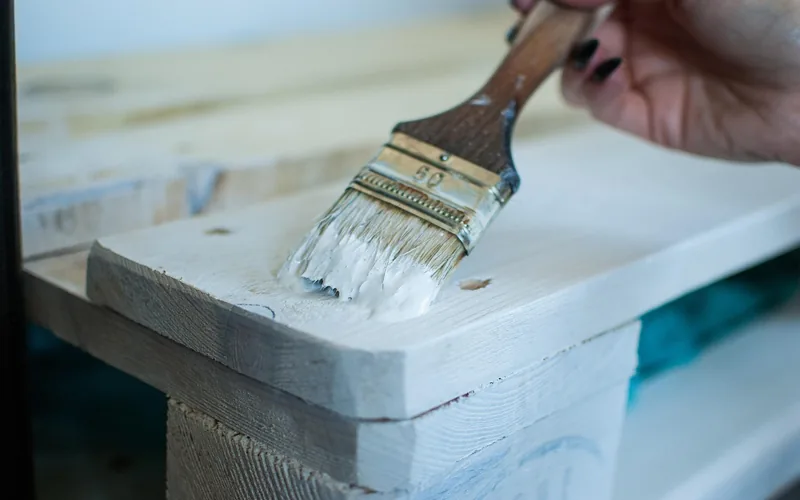
Applying Primer With a Paintbrush
On inset panels, corners, and any spot a roller can’t reach flat, work the primer in with a brush in long, even strokes following the grain direction — the same technique shown below applies whether you’re priming a cabinet door or a small accent panel.
Frequently Asked Questions for How to Paint Wood Veneer Cabinets
What kind of paint do you use on veneer cabinets?
Use a 100% acrylic latex enamel in semi-gloss or satin over a bonding primer. The primer is what makes the paint adhere to veneer — regular wall paint over bare veneer, even good paint, will eventually chip.
How do you get paint to stick to wood veneer?
Clean off grease with TSP, lightly scuff the surface with 220-grit sandpaper or a liquid deglosser, then apply a stain-blocking bonding primer and let it cure a full 24 hours before painting. Skipping any one of these three steps is the most common reason paint fails to stick.
Can wood veneer be painted over?
Yes. Clean the surface, sand lightly with 220-grit or use a deglosser, apply a bonding primer, and let it dry a full 24 hours before applying two to three thin coats of enamel paint.
Can I paint veneer cabinets without sanding?
Yes — use a liquid deglosser or a high-quality bonding primer instead of sanding. This is actually the safer route on thin or previously-refinished veneer, since it removes the risk of sanding through to the substrate.
How long does painted veneer last before it needs redoing?
A properly primed and painted veneer cabinet with a durable enamel topcoat typically holds up for several years of daily use before touch-ups are needed — most early failures trace back to skipped or under-cured primer rather than the paint itself, which is why the primer step above matters more than the paint brand you choose.
Conclusion
Painting wood veneer cabinets comes down to three things: clean the grease off, prep the surface without sanding through the thin veneer layer, and use a real bonding primer before the paint goes on. Get those three right and a semi-gloss acrylic enamel topcoat will hold up to years of daily use.
Sponsored / affiliate links. As an Amazon Associate I earn from qualifying purchases. I may earn additional commission from eligible campaigns.