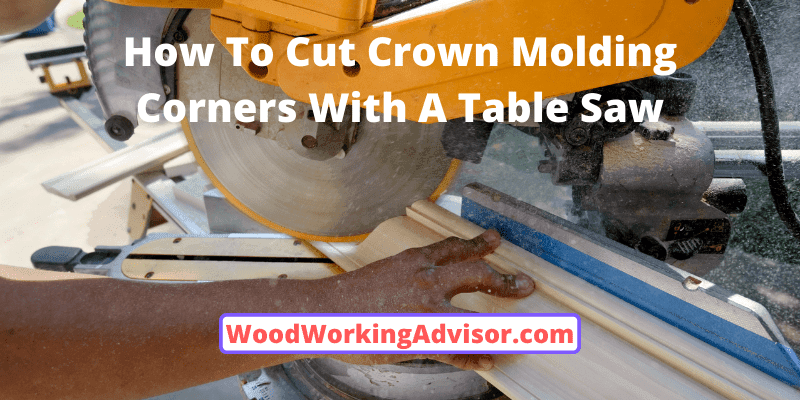
How To Cut Crown Molding Corners With A Table Saw?
Crown molding corner cutting is an easy task to make it accurate with a table saw. You need accuracy in measurement to get the job done properly. For an excellent finishing of your interior walls, crown molding installation is a great part. To make the installation process simple, you have made an exact cut in a good way.
You need a simple guideline to cut crown molding corners with a table saw appropriately, right? Well, I’m going to share my personal experience which can be more useful for you. You may be done with a few extra problems, but the directions make your work hassle-free.
However, in this article, you’re going to get an excellent solution to make a good cut crown molding corners with a table saw. With that, I present all the queries you need to know about it to do. So, don’t delay to follow my guidance.
6 Simple Steps To Cut Crown Molding Corners With A Table Saw:
Here are some simple steps you can take to begin the process of preparation for the intercession. All these directions I have followed while cutting crown mold with a table saw before installation.
Step-1 Equipment Require:
For cutting crown molding corners, you have to collect some equipment. Make sure it’s quality and you have to know the right use of them:
- Pencil;
- Tape Measure;
- Chisel;
- Hammer;
- Square;
- Miter Saw Blade;
- Table Saw;
- Crown Molding.
Step-2 Select The Molding And Molding Corner Design:
The design of the mold should be determined according to the room and place. Separate crown molds should be recommended for all living rooms, dining rooms, drawing rooms, etc. Check in advance which mold you are using for which room. Select the corner angle of the mold according to the crown mold design.
You can make a template the way you want to cut the mold corner. Then follow the template to do the work that can be done very quickly and easily. To create a template, trace the design of the crown mold corner on the paper with a pencil.
Step-3 Measurement Of Crown Molding:
Measurement is required according to the shape of the crown molding corner. Decide first whether you want a round shape or a 45-degree angle shape. The standard angle is a 90-degree corner. For this shape, you have to cut the two sides 45 degrees. Measure and cut the stain on the mold with a pencil. This is a convenient way to put it on the table.
You can measure the mold with the tape measure. To adjust the measurement later, you have to mark it with a pencil. Besides, following the measurement chart is a great strategy to make the project easy. In whatever way, cut exactly.
Step-4 Test The Measurement Of Molding Corners:
Test the measurement of molding corners with a miter saw. You can measure exactly by meter saw. When the right side corner marks from right to left at a 45-degree angle. In the same way, while making the left side corner, mark the angle from bottom to right at 45 degrees.
Set the miter saw below the back side table of the crane in the yard. Place the miter saw at a 45-degree angle to make a 90-degree crown molding corner.
Step-5 Test The Angle:
Check the position of the miter saw and table saw blade. To check if the angle is perfect, cut the edge of the mold and measure it. If you want to keep the angle 45 degrees, measure with geometric tools to see if the angle is 45 degrees.
Now, your crown molding needs to be ready for cutting. You need to measure separately for the inside and outside corners.
Step-6 Make The Cut:
Make sure the crown is not wasted during cutting. According to the measurements, set the mold on the table so that it is cut accurately. Check again and again with a meter gauge. Set the meter slot according to the angle of 45/50/90 degrees.
You know the correct construction and you have to cut the construction accordingly. Cut and notice that fortunately, it was the right angle. Now, you are ready to install your crown mold on your interior walls.
5 Things To Consider Before Cutting Crown Molding Corners With A Table Saw:
You have to consider the 5 things before cutting crown molding corners with a table saw. These things reduce the possibility of error in cutting. Let’s take a look at the instructions:
1. Angle Specification:
Decide the angle at the very beginning of cutting mold. Observe the shape of the mold corner you want to install in your room. This is the first step after collecting the tools of the whole process.
2. Check The Measurement:
Follow the chart and check the measurement which is enough for your crown mold. You can take a look at the chart, which I will show you in the next. For the 30-degree and the 45-degree crown, you have to make a different miter and bevel saw angle. So, you need to find the angle in this way.
3. Set The Miter Saw:
You have to set the miter saw and table saw according to the specific angle. Your miter clock has a specific direction that you need to know thoroughly. See the bevel and miter angle range according to your meter cut. Turn the clock accordingly and set it. In this way, a miter saw or table saw should be prepared for crown molding and corner cutting.
4. Wastage Cutting:
Cut off the extra part at the edge of the mold. The reason for calling it wasted cutting is to cut off the extra except the required part. Uneven and unparallel edges cause the lack of measurement.
5. Test Cut:
If you check with the test cut before the final cut, the chances of making a mistake are reduced. In the test cut, make sure that the measurement and meter setup is correct.
Measurement Chart Of Cutting The Crown Molding Corners With A Table Saw
In the case of the measurement of cutting the crown molding corners with a table saw, you can follow a chart. It is a tricky way to maintain the measurement with the following bevel and miter saw the chart. The whole process will be easier if you know this strategy of measurement.
The main technique of proper cutting is being set correctly according to these two angles of the miter saw and table saw. Follow the below chart to find out which meter bevel and saw should be set at which stage.
For 30 Degree Crown
| Miter Cut | Miter Angle | Bevel Angle |
| 39 | 26.5 | 29.7 |
| 40 | 27.3 | 30.4 |
| 41 | 28.2 | 31.1 |
| 42 | 29.0 | 31.8 |
| 43 | 29.9 | 32.5 |
| 44 | 30.7 | 33.2 |
| 45 | 31.6 | 33.9 |
| 46 | 32.5 | 34.4 |
| 47 | 33.4 | 35.2 |
| 48 | 34.4 | 35.9 |
| 49 | 35.3 | 36.5 |
| 50 | 36.3 | 37.1 |
| 51 | 37.2 | 37.8 |
For 45 Degree Crown
| Miter Cut | Miter Angle | Bevel Angle |
| 39 | 29.8 | 26.4 |
| 40 | 30.5 | 27.0 |
| 41 | 31.6 | 27.6 |
| 42 | 32.5 | 28.2 |
| 43 | 33.4 | 28.8 |
| 44 | 34.3 | 29.4 |
| 45 | 35.3 | 30.0 |
| 46 | 36.2 | 30.4 |
| 47 | 37.2 | 31.1 |
| 48 | 38.1 | 37.7 |
| 49 | 39.1 | 32.3 |
| 50 | 40.1 | 32.8 |
| 51 | 41.1 | 33.3 |
4 Tips That Will Help You To Cut Crown Molding Corners In A Quick Time:
There are many other ways in the market but since you have a table saw, you have to work with it. The tips that will help you to handle the project in a very tricky way in a quick time are given below:
Tip-1 Trace A Template:
Trace a template is a tricky way to avoid measuring the trouble of mold. Before cutting, you should trace a template with a pencil. Take the size of the mold and make a template on a piece of paper with a pencil. This will play a role in matching the accuracy of your measurements later.
Tip-2 Remove Wastage:
You should remove the wastage from the edge of the mold. The edges of the mold may be uneven. They have to be cut and leveled, otherwise, there may be a lack of measurement.
Tip-3 Measurement Chart:
You can follow a measurement chart if you have one. It is easy to determine the accurate cut by matching the miter cut with the size of the table meter angle, and bevel angle. You can also arrange the chart of 36/45/50/60 degree angle as you like. This will allow you to measure your longevity safely
Tip-4 Learn From Expertise:
You can take the help of an expert to acquire full skills in less time. If you learn alone, you will be able to bring perfection through practice. An expert will be able to ask you for perfection in advance. You can learn from experts to do the job accurately in a quick time.
Related Questions:
Why Should Crown Molding Corners Be Accurate While Cutting With A Table Saw?
If the corners are not cut accurately, it will be impossible to install the crown mold. If you want to cut the edge of the crown mold with a table saw, you have to maintain the measurement. Measure and cut the corner of the crown mold at the prescribed angle using a meter gauge. Determine the inside and outside corners. That’s why installing it easily and quickly, cutting off crown molding corners.
Can You Use A Table Saw To Cut Crown Molding Corners?
First, divide it into two equal parts. Then set it under the table saw. Fix meter yard and saw according to angle. You can try to cut some extra parts first to cut the test. Table saws are the best tool for cutting crown molding corners quickly and accurately.
Just know the specifications of the angle and setting up of the miter saw and then cut it accurately. Knowing the skillful use of table saws can make this task easier for you.
What Is The Best Angle For Cutting Crown Molding Corners With A Table Saw?
90 degrees is the standard angle for crown molding. To make the 90-degree angle, you have to cut the two sides 45 degrees. For the right side mold, 45 degrees angle, and for the left side mold 45-degree angle should be kept. You can measure the exception if you want. But the most convenient is 90 degrees angle.
How Long Does It Take To Cut A Crown Mold Corners With A Table Saw?
Spend 12-15 minutes planning before you start cutting the crown mold corners. Then it may take 15-20 minutes to complete the whole process from measuring to the final cut. How much time it takes depends a lot on your skills and experience. However, it does not take a long time to do the job.
Do You Cut Crown Molding Upside Down With A Table Saw?
The flat edge of the mold has to be shaped by a table saw through upside downs cutting. Because it needs to adapt to the corner of the wall. Upside down cutting plays a role in joining the corners of the two molds on either side. So, you should know all about the upside-down cutting in the table saw. Perfection and accuracy are possible with a table saw but with the miter saw you also can be sure of precision.
How Do You Cut Crown Molding With A Table Saw When Corners Are Not Square?
For cutting crown molding in a square shape, you have to use a miter saw. You have to cut 45/45 for 90-degree angle cuts. For the cut, set the miter saw in a proper cutting position. You have to do a minor change in an exact way whatever you want to cut. If you notice the cutting of crown molding corners is not square, you have to measure it with a miter saw.
How Do You Cut Inside Corners On Crown Molding With A Table Saw?
When cutting inside corners with a table saw, mark the cut with a pencil. Set the mold on the table saw. Decide the exact position. Set table saw fence also for cutting support. Decide the angle of the table saw. Then start to cut. To check the cutting, you can measure with geometric tools. And it is the best way to make a proper cut.
Can You Cut Crown Molding Corners With A Table Saw On Your Own?
As an alternative to a miter saw, a table saw can be used to cut crown molding corners. A miter saw is a proper tool for cutting molding corners. As you haven’t any access to cut it with a miter saw, you can do it with a table saw. Although the accurate cut is most commonly possible through a miter saw if you are skilled, you can do this with a table saw too.
What Other Tools Do You Use For Cutting Crown Molding?
Miter saws are great for cutting crown molding. Crown molding corners are used to cut at an exact angle. You have to decide first which angle is perfect for you. Then set the miter saw according to the angle. 45 degrees or 90 degrees are the standard miters saw angle for crown molding cut.
Put the meter clock at the prescribed angle and try to cut the test. After that, cut to the final and see how perfect you are. So, it’s clear that a miter saw is the best tool for cutting crown mold.
Final Thought:
As a carpenter, you should know all about the things to cut crown molding corners with a table saw. I hope the simple guideline is helpful for you to cut with low efficiency. An accurate cutting makes the cutting perfect and you can install it properly. And for this, crown mold will make your room sophisticated and attractive.
Raise your queries about this through comments. Become a professional carpenter through more and more practice. Go ahead with hard work and patience, good luck to you.