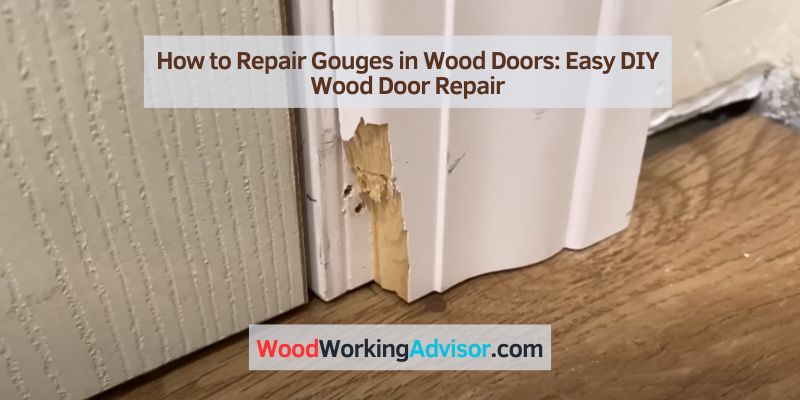
How to Repair Gouges in Wood Doors: Easy DIY Wood Door Repair
To repair gouges in wood doors, start by using wood filler to fill in the gouges. Sand the filled areas until smooth and then refinish the wood to match the original door.
Repairing gouges in wood doors can be a simple process if you follow the right steps. With the right tools and materials, you can restore your wood door to its original condition. We will guide you through the process of repairing gouges in wood doors, helping you to maintain the beauty and functionality of your wooden doors.
Keep reading to learn the step-by-step process and tips for effectively repairing gouges in wood doors.
Understanding Wood Gouges
Identifying The Type Of Wood Gouges
Wood gouges can be categorized into various types based on their depth, length, and severity. Understanding the type of gouge is crucial for determining the appropriate repair method. Common types of wood gouges include:
- Shallow surface gouges: These are surface-level imperfections that may not affect the structural integrity of the wood door.
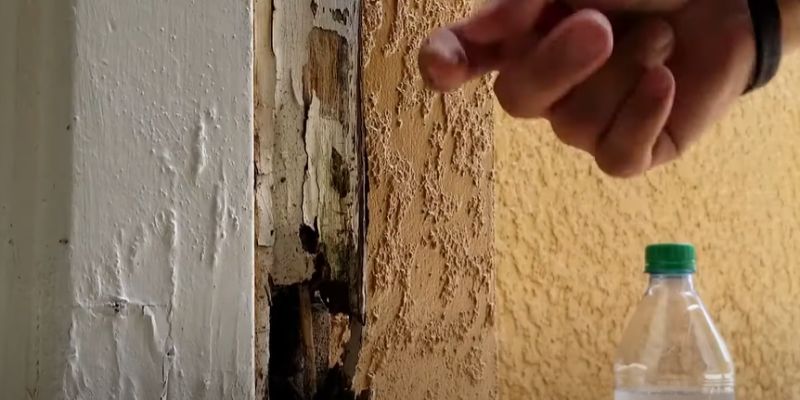
- Deep gouges or cuts: These can significantly compromise the strength and appearance of the wood, requiring more extensive repair techniques.
- Splitting or splintering gouges: These types of gouges can lead to further damage if not addressed promptly.
Impact Of Gouges On Wood Doors
Gouges can have a significant impact on the overall aesthetics and functionality of wood doors. The effects may include:
- Diminished visual appeal: Gouges can detract from the beauty of the wood door, especially if left unaddressed.
- Structural integrity concerns: Deep gouges or splits can weaken the door, compromising its ability to provide security and insulation.
- Potential for further damage: If not repaired, gouges can worsen over time, leading to more extensive and costly repairs.
Preparing The Gouged Area
To repair gouges in wood doors, start by preparing the damaged area. Remove any debris and smooth out the surface to create a clean, level base for the repair. Sand the edges of the gouge to ensure a seamless blend with the surrounding wood for a professional finish.
Cleaning The Gouged Area
Before starting the repair process, it’s important to thoroughly clean the gouged area to remove any debris, dirt, or loose wood particles. Use a soft brush or a vacuum to gently clean the area, ensuring that it’s free from any contaminants that may affect the repair. Additionally, wiping the area with a damp cloth can help to remove any remaining dust or dirt.
Selecting The Right Tools For Repair
Choosing the right tools for repairing gouges in wood doors is crucial for achieving a successful outcome. Some of the essential tools you may need include:
- Wood filler – to fill in the gouged area
- Sandpaper – for smoothing the repaired area
- Putty knife – to apply the wood filler
- Stain or paint – to match the repaired area with the rest of the door
By selecting the right tools, you can ensure that the repair process is smooth and the final result matches the original wood door seamlessly.
Repairing Small Gouges
When it comes to repairing small gouges in wooden doors, the process can be quite straightforward if you have the right tools and materials at hand. Small gouges are relatively easy to fix and can be repaired using wood filler and a few simple steps.
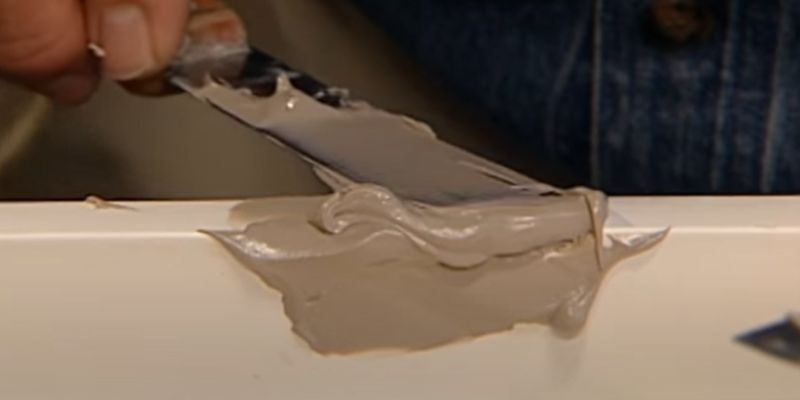
Filling Small Gouges With Wood Filler
If you notice small gouges on your wood door, the first step is to gather the necessary supplies. You will need wood filler, a putty knife, sandpaper, and a clean cloth. Begin by cleaning the gouged area and ensuring it is free from any debris. Then, take a small amount of wood filler and apply it to the gouge using the putty knife. Ensure that the filler completely fills the gouge and is level with the surface of the door. Allow the wood filler to dry completely according to the manufacturer’s instructions.
Sanding And Smoothing The Repaired Area
Once the wood filler has dried, it’s time to sand and smooth the repaired area. Use fine-grit sandpaper to gently sand the filled area, ensuring that it blends seamlessly with the surrounding wood. Be careful not to sand too much or too aggressively, as this can damage the surrounding wood. After sanding, wipe the area clean with a damp cloth to remove any dust or debris.
Repairing Large Gouges
When your wood door has suffered a large gouge, repairing it may seem like a daunting task, but with the right materials and techniques, it can be restored to its former beauty. The key to successfully repairing large gouges in wood doors is to use a durable and long-lasting solution that will seamlessly blend with the natural wood grain. In this section, we will explore the process of using epoxy wood fillers for large gouges and shaping and sanding the epoxy repair to achieve a flawless finish.
Using Epoxy Wood Fillers For Large Gouges
Epoxy wood fillers offer a sturdy and reliable solution for repairing large gouges in wood doors. These specialized fillers are designed to bond strongly with the surrounding wood, providing a seamless and long-lasting repair. When selecting an epoxy wood filler, ensure it is suitable for interior use and compatible with the type of wood your door is made from.
- Clean the gouged area: Use a damp cloth to remove any dust or debris from the gouge.
- Mix the epoxy filler: Follow the manufacturer’s instructions to properly mix the epoxy filler. Ensure it is thoroughly combined for optimal performance.
- Fill the gouge: Carefully apply the epoxy filler to the gouged area, ensuring it fills the entire space and is level with the surrounding wood surface. Use a putty knife to achieve a smooth application.
Shaping And Sanding The Epoxy Repair
After the epoxy wood filler has cured, it’s essential to shape and sand the repair to seamlessly blend with the rest of the door. This process requires precision and attention to detail to ensure a flawless result.
Follow these steps to shape and sand the epoxy repair:
- Use a chisel or razor blade: Carefully shave off any excess epoxy filler that protrudes above the wood surface, ensuring it is level with the door.
- Sand the repair: Begin with a coarse-grit sandpaper to smooth out the repaired area, then gradually move to finer-grit sandpaper for a polished finish. Sand in the direction of the wood grain to maintain a natural appearance.
- Apply a wood finish: Once the repair is sanded to satisfaction, apply a suitable wood finish to protect the repaired area and restore the door’s aesthetic appeal.
Applying Finishing Touches
Gouges in wood doors can be unsightly, but with the right techniques, they can be repaired to look as good as new. Once the gouge has been filled and sanded, applying finishing touches is crucial to ensure a seamless repair and a professional-looking result.
Matching Wood Stain And Finish
When repairing a gouge in a wood door, selecting the right wood stain and finish is essential to seamlessly blend the repaired area with the rest of the door. Here’s how to do it:
- Choose a wood stain that closely matches the color of the door. Test the stain on a small, inconspicuous area to ensure it matches the surrounding wood.
- Using a clean cloth, apply the wood stain to the repaired area, following the wood grain direction for a consistent finish.
- Allow the stain to dry completely before applying a wood finish to protect and seal the repaired area.
Protecting The Repaired Area From Future Damage
After applying wood stain and finish, it’s important to protect the repaired area from future damage to maintain its appearance. Consider the following steps:
- Apply a clear polyurethane sealant over the entire door to provide a protective barrier against scratches and dings.
- Use furniture wax to polish the door’s surface, creating an additional layer of protection and adding a beautiful sheen to the wood.
- Regularly inspect and maintain the door to address any new dings or scratches promptly, preventing further damage to the repaired area.
Frequently Asked Questions On How To Repair Gouges In Wood Doors
How Do You Fix A Wooden Door Gash?
To fix a wooden door gash, start by cleaning the area. Fill the gash with wood filler, then sand it smooth. Finish by staining or painting as needed.
How Do You Get Deep Gouges Out Of Wood?
Use wood filler to fill in the gouges, then sand it smooth. Apply wood stain or finish to match the surrounding wood.
What Is The Best Filler For Wood Doors?
The best filler for wood doors is a high-quality wood filler. It provides a seamless finish and is easy to work with. Look for a filler that matches the color of the wood for a natural appearance. Sand the filled area for a smooth surface before finishing or painting.
How Do You Fix A Wood Gouge?
To fix a wood gouge, clean the area, fill with wood filler, let it dry, sand it smooth, and apply wood finish.
Conclusion
Repairing gouges in wood doors is a manageable task that can be tackled with the right tools and techniques. By following the step-by-step process outlined in this blog post, you can restore your wood doors to their former glory and enhance the overall appearance of your home.
With a little patience and attention to detail, you can achieve professional results and prolong the lifespan of your wood doors. So don’t hesitate to address those unsightly gouges and enjoy the satisfaction of a job well done.