How to Stain Maple: Expert Tips and Tricks for Beautiful Results
To stain maple, begin by sanding the surface and removing any dust. Apply a pre-stain wood conditioner, followed by a stain of your choice using a brush or cloth.
Ensure to wipe off any excess stain and allow it to dry before applying a protective topcoat.
Choosing The Right Stain
When it comes to staining maple wood, finding the right stain can make all the difference in achieving the desired look for your project. Maple wood has unique properties that require careful consideration when choosing a stain. In this article, we will explore the factors to consider and the different stain options available for staining maple wood.
Understanding Maple’s Unique Properties
Before diving into the world of stain options, it’s important to understand the unique properties of maple wood. Maple is known for its tight and dense grain, which can pose a challenge when it comes to stain absorption. Due to its density, maple tends to absorb stain unevenly, resulting in blotchy or streaky finishes.
To overcome this challenge, it’s crucial to prepare the maple wood properly before applying any stain. Sanding the surface with progressively finer grits, starting from a rough grit and moving towards a finer grit, helps to open up the wood pores and promote more even stain absorption.
Exploring Different Stain Options
When selecting a stain for maple wood, consider the desired color, transparency, and level of protection you want to achieve. Here are some stain options to consider:
| Stain Type | Description |
|---|---|
| Gel Stain | Gel stains are ideal for maple wood as they offer controlled color application and minimize blotching. These stains have a thicker consistency, allowing for better color control and more uniform coverage on dense woods like maple. |
| Water-based Stain | Water-based stains are another suitable option for maple wood. These stains are less likely to cause blotching and dry quickly, making them easier to work with. They also provide a wide range of color options to achieve the desired look. |
| Dye Stain | Dye stains are highly transparent, allowing the natural beauty of maple wood to shine through. They penetrate deeply into the wood fibers, providing vibrant colors without obscuring the wood grain. |
Regardless of the stain type you choose, it’s advisable to test the stain on a small, inconspicuous area of the maple wood to assess the color and ensure it achieves the desired result. This way, you can make any necessary adjustments before applying the stain to the entire project.
Remember, proper preparation and application techniques are key to achieving the best results when staining maple wood. Take your time, follow the manufacturer’s instructions, and consider seeking professional advice if needed. With the right stain and techniques, you can enhance the natural beauty of maple wood and create stunning finished projects.
Preparing The Maple Surface
Before staining maple wood, it’s crucial to properly prepare the surface to ensure a flawless and long-lasting finish. This involves a few key steps, including cleaning and sanding the wood, as well as using a pre-stain wood conditioner.
Cleaning And Sanding
Cleaning the maple surface is the first step in preparing it for staining. Using a soft cloth or a clean brush, remove any dust, dirt, or debris that may be present on the wood. This will ensure that the stain adheres evenly to the surface, avoiding any unwanted inconsistencies.
Once the wood is clean, it’s time to sand it. Sanding helps to smooth out any rough areas, imperfections, or previous finish applications that may hinder the absorption of the stain. Choose a fine-grit sandpaper, around 220 to 320 grit, and sand the wood in the direction of the grain. This will result in a uniform surface, ready for staining.
Using Pre-stain Wood Conditioner
To enhance the overall stain absorption and color evenness, consider using a pre-stain wood conditioner before applying the stain to maple wood. A wood conditioner helps to seal any pores or inconsistencies in the wood, ensuring that the stain is absorbed more evenly and preventing blotchiness.
Apply the pre-stain wood conditioner evenly across the entire maple surface, using a clean cloth or brush. Allow it to penetrate the wood according to the manufacturer’s instructions. Once the recommended waiting time has passed, gently wipe off any excess conditioner with a clean cloth.
By following these steps – cleaning and sanding the maple surface and using a pre-stain wood conditioner – you ensure that the maple wood is well-prepared for staining. Taking the time to properly prepare the wood will result in a beautifully stained finish that enhances the natural beauty of maple wood.

Recommended Products For Staining Maple

The thicker gel consistency sits on the surface instead of penetrating unevenly — the main fix for maple’s blotching problem covered above.
Best for: maple furniture and cabinetry where even color matters most.
Why we picked it: controlled color application specifically recommended for dense, tight-grained woods like maple.
Main drawback: longer working time than a water-based stain, needs more patience per coat.

Varathane Pre-Stain Wood Conditioner
Essential prep step before any stain on maple — skipping this is the #1 cause of blotchy results.
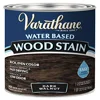
Varathane Water-Based Wood Stain
A water-based alternative that’s less likely to blotch than oil-based stain and dries faster.

Bates Foam Paint Brushes (16-Pack)
Lint-free foam applicators for even stain coverage without brush marks.
As an Amazon Associate, we earn from qualifying purchases.
Applying The Stain
When it comes to staining maple, applying the stain is a critical step that can significantly impact the final appearance of the wood. Achieving an even and consistent application of the stain is essential for a professional-looking finish. In this section, we will discuss the right tools and techniques for applying the stain to maple wood, ensuring a beautiful and uniform result.
Using The Right Tools
Before you begin the staining process, it’s essential to gather the right tools to ensure a smooth and efficient application. The following tools are recommended for applying stain to maple wood:
- Quality synthetic bristle brush
- Clean, lint-free rags
- Stir sticks to stir the stain
- Disposable gloves to protect your hands
Techniques For Even Application
Ensuring an even application of the stain is crucial for achieving a professional-looking finish on maple wood. Follow these techniques to achieve a consistent and uniform result:
- Prepare the wood surface by sanding it to smooth out any imperfections and ensure an even absorption of the stain.
- Thoroughly stir the stain to ensure an even distribution of the color pigments.
- Apply the stain in the direction of the wood grain using a quality synthetic bristle brush, making long, even strokes to prevent streaking.
- After applying the stain, use a clean, lint-free rag to wipe off any excess stain and ensure an even coat across the entire surface.
- Allow the stained wood to dry completely before applying a protective finish to seal and protect the wood.
Achieving The Desired Finish
When it comes to staining maple, achieving the desired finish may seem like a daunting task. However, with the right techniques and a bit of patience, you can create a beautiful, vibrant finish that enhances the natural beauty of the wood. In this article, we will explore two key aspects of achieving the desired finish on maple: adjusting stain intensity and adding a protective top coat.
Adjusting Stain Intensity
To achieve the perfect stain color on maple, it’s important to be able to adjust the intensity of the stain. This allows you to customize the shade and ensure it complements your overall design scheme. Here are a few tips to help you achieve the desired intensity:
- Test the stain on a small, inconspicuous area of the maple to gauge the intensity before applying it all over.
- If the stain appears too light, apply additional coats to deepen the color.
- If the stain appears too dark, gently wipe the surface with a clean cloth to lighten the color.
- Consider diluting the stain with a clear base to achieve a lighter shade if desired.
Adding Protective Top Coat
Once you have achieved the desired stain color, it’s crucial to protect your hard work by adding a protective top coat. This not only enhances the appearance of the maple but also helps to prolong the lifespan of the stain. Take note of these essential steps when applying a protective top coat:
- Make sure the stain is completely dry before applying the top coat. This ensures proper adhesion and prevents any smudging or discoloration.
- Use a high-quality, brush-on polyurethane or lacquer to provide a durable and long-lasting protective layer.
- Apply the top coat with even strokes, following the grain of the wood for a smooth and consistent finish.
- Allow the top coat to dry according to the manufacturer’s instructions before applying additional coats if needed.
Achieving the desired finish on maple is a rewarding process that elevates the natural beauty of the wood. By adjusting stain intensity and adding a protective top coat, you’ll create a stunning look that withstands the test of time. Remember to always follow the manufacturer’s instructions and take your time to ensure the best results. Now you’re ready to tackle your maple staining project with confidence!
Troubleshooting And Final Tips
Have trouble staining your maple wood? These troubleshooting and final tips will help you achieve a smooth, even finish. From preparing the surface to choosing the right stain and application techniques, these tips will ensure your staining project is a success.
Now that you have successfully learned how to stain maple wood and enhance its natural beauty, it’s essential to address any potential issues that might arise during or after the staining process. In this section, we will discuss two common problems – fixing uneven stains and enhancing the grain’s beauty – and provide you with final tips to ensure a flawless finish.
Fixing Uneven Stain
Staining maple wood can sometimes result in uneven color distribution, which can be frustrating. However, with a few simple techniques, you can fix this issue and achieve a uniform appearance. Here’s what you can do:
1. Sand the surface: If you notice uneven staining, sand the surface lightly using fine-grit sandpaper. This will help remove excess stains and even out the color.
2. Apply another coat: If the color variations are minimal, applying an additional coat of stain can help blend the uneven areas. Make sure to follow the manufacturer’s instructions and allow for proper drying time between coats.
3. Use a gel stain: Gel stains are thicker and more forgiving than traditional liquid stains. They adhere better to maple wood and can help eliminate blotchy spots. Consider using a gel stain for a more consistent finish.
4. Blend with a glaze: Another technique to fix uneven stain is to apply a glaze over the stained surface. A glaze can help blend and camouflage any uneven areas, giving your maple wood a harmonious appearance.
Enhancing The Grain’s Beauty
The natural grain patterns of maple wood can be enhanced to create a stunning visual effect. Follow these tips to bring out the beauty of the grain:
1. Precondition the wood: Before staining, use a wood conditioner specifically designed for maple wood. Applying a wood conditioner helps the stain penetrate more evenly, preventing blotchiness and enhancing the grain’s definition.
2. Choose the right stain color: Opt for a stain color that complements the natural warmth and grain of maple wood. Lighter stain colors tend to highlight the grain, while darker colors can provide depth and richness to the wood.
3. Apply multiple coats: To accentuate the grain, consider applying multiple thin coats of stain rather than one heavy coat. This technique allows the stain to seep into the grain, emphasizing its natural beauty.
4. Finish with a clear coat: Once the stain has dried, protect and enhance the wood’s grain by applying a clear coat. Choose a polyurethane or varnish finish for durability and a glossy or satin sheen, depending on your desired final look.
Remember to always test your chosen stain and techniques on a small, inconspicuous area of maple wood before proceeding with the entire project. This will ensure that you achieve the desired results and avoid any surprises.
With these troubleshooting tips and final recommendations, you’re now well-equipped to stain your maple wood furniture, flooring, or any other project with confidence and achieve a stunning finish that highlights the natural beauty of this exquisite wood species. Happy staining!
Credit: www.iheartnaptime.net
Frequently Asked Questions On How To Stain Maple
What Stain Works Best On Maple?
The best stain for maple is one that enhances the natural beauty and grain of the wood. Choose a stain specifically designed for hardwoods and consider a lighter shade to bring out the natural color of the maple.
Why Is Maple So Hard To Stain?
Maple is difficult to stain because of its tight and dense grain structure, which makes it less absorbent. This causes the stain to appear blotchy and uneven on the wood surface. Preparing the wood with a wood conditioner or sanding can help achieve a more even stain application.
Can Maple Be Stained Darker?
Yes, maple can be stained darker to achieve a richer color. Ensure to prepare the wood properly before applying the darker stain for best results.
How Do You Stain Maple To Look Like Cherries?
To stain maple to resemble cherries, follow these steps:
1. Sand the maple surface evenly to prepare it for staining.
2. Apply a pre-stain wood conditioner to prevent blotching.
3. Use a cherry-red oil-based stain and apply it evenly.
4. Allow the stain to penetrate and dry according to the manufacturer’s instructions.
5. Apply a clear protective finish to enhance the cherry-like appearance and protect the wood.
Conclusion
In wrapping up, staining maple can enhance its natural beauty and add a touch of elegance to your furniture or flooring. By following the steps outlined in this guide, you can achieve professional-looking results and give your maple wood a refreshed and polished appearance.
Experiment with different stain colors to find the perfect match for your desired aesthetic. With a little patience and attention to detail, you can transform your maple wood into a stunning centerpiece for any space.