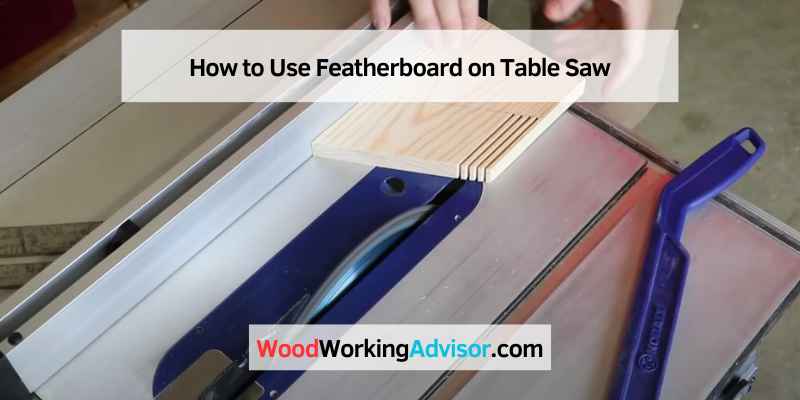
How to Use Featherboard on Table Saw
Every woodworker needs a table saw in their shop. It’s one of the most versatile tools and can make various cuts. When using a table saw, it’s essential to use a feather board to help keep your workpiece steady and supported.
Here’s how to use featherboard on your table saw. First, you’ll need to attach the feather board to your table saw. You can do this by clamping it into place or by using screws.
Once the feather board is attached, position your workpiece against it so the board is pressing against the back or side of the piece. This will help keep it from moving during the cut. Next, adjust the blade height and ensure the fence is parallel to the blade before making your cut.
Once everything is set up correctly, turn on the saw and slowly feed your workpiece through while keeping pressure on the board with your other hand. Keep an eye on both hands as you’re doing this, and be careful not to get too close to the blade or fence. A feather board is a great way to ensure accuracy and safety when using a table saw.
You can make perfect cuts every time with just a few simple steps!
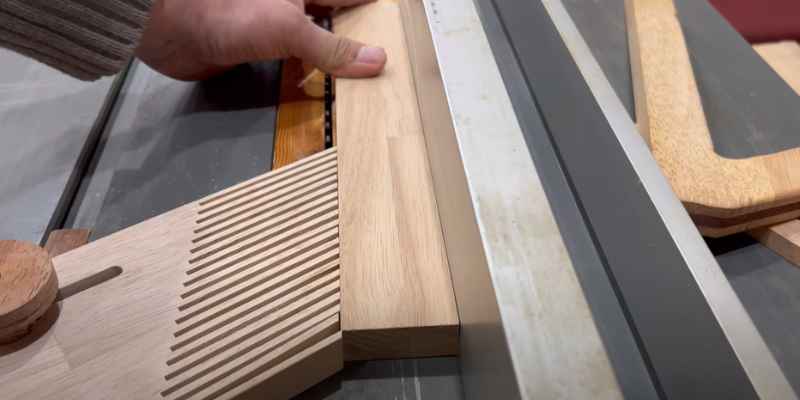
- Position the featherboard on your table saw so the pressure pad is against the fence and the blade between the two runners.
- Adjust the screws on the back of the featherboard to control how much pressure is applied to the fence
- Run your workpiece through the table saw, using the feather board to keep it tight against the
- fence.
How to Use a Featherboard on a Router Table
Use a feather board to make the most precise cuts possible from your router table. A feather board is a tool that applies pressure evenly across a workpiece’s face, keeping it firmly against the router table’s fence. This ensures that your cuts are as accurate as possible.
There are two different types of featherboards: static and adjustable. Static featherboards are simple boards with slots cut into them so they can be attached to the router table fence. Adjustable featherboards have screws or levers that allow you to adjust the pressure applied to the workpiece.
To use a static featherboard, attach it to the fence of your router table so that the slots in the board are aligned with the bit. Then, feed your workpiece through so it rests against both the bit and the weatherboard. As you route your piece, it will be held firmly in place by the pressure from the feathers.
If you’re using an adjustable feather board, set it up in a similar fashion, but make sure to leave enough room behind the feathers to be able to adjust them later on. Once your workpiece is in place, route as usual, but keep an eye on how well it’s staying against both the bit and the fence. If it moves around too much, stop and adjust the tension on your feather board until it’s just right.
Feather Boards for Table Saw
If you’re working with wood, chances are you will need a table saw at some point. And if you’re using a table saw, you might consider using a feather board. Feather boards are attachments that help guide and stabilize your workpiece as it passes through the blade.
Several different types of feather boards are available on the market, but they all serve the same purpose: to keep your workpiece from wobbling or moving unexpectedly as it passes through the blade. Some feather boards even have multiple adjustable fingers that can be positioned to provide extra support for irregularly shaped workpieces. A feather board is relatively simple: attach it to your table saw’s fence (or directly to the tabletop) and adjust the fingers to touch your workpiece as it passes by lightly.
Be sure to double-check that everything is secure before turning on the power! Feather boards can be an invaluable addition to any woodworker’s toolkit, so if you haven’t already invested in one (or more), we highly recommend doing so.
Best Featherboard for Table Saw
Here are a few things to consider when purchasing a feather board for your table saw. The most crucial factor is the size of the throat opening on your saw. You’ll also want to consider the thickness and hardness of the material you’re cutting.
The best featherboard for a table saw has an adjustable throat opening that can accommodate different stock sizes. It’s also made from durable material that won’t dull your blades.
Vertical Featherboard for Table Saw Fence
A vertical feather board is an excellent addition to your fence if you’re looking to get the most out of your table and saw. Here’s what you need to know about them: What is a vertical weatherboard?
A vertical feather board is a jig that mounts to your table saw fence and holds your workpiece vertically as you make cuts. This provides much greater control over the workpiece, allowing for more precise cuts. Why use a vertical weatherboard?
There are several benefits to using a vertical feather board. First, it helps to keep the workpiece from moving around during the cut, which can lead to inaccuracies. Second, it keeps your hands away from the blade, reducing the risk of injury.
Finally, it can help support taller workpieces that might otherwise be unstable on the table saw. How do I use a vertical weatherboard? To use a vertical featherboard, start by mounting it to your table saw fence according to the manufacturer’s instructions.
Then, position your workpiece against the fence and clamp it in place. Once everything is secure, make your cut as usual.
Diy Featherboard
If you’re looking for a unique and exciting way to add some personality to your home, then DIY featherboard is the way to go! This fun and easy project can be done in just a few hours, and it’s sure to make your friends and family take notice. To get started, you’ll need some basic supplies, including wood glue, clamps, sandpaper, paint or stain, and of course, feathers!
You can find all of these items at your local hardware store. Once you have everything gathered, follow these steps:
1. Cut your wood boards to size. Ensure they’re all the same length so your feather board will look excellent even when finished.
2. Apply wood glue along one edge of each board, then clamp them together tightly. Allow the glue to dry completely before moving on to the next step.
3. Once the glue is dry, use sandpaper to smooth out the surface of your weatherboard. This will help ensure an excellent finish once you paint or stain it.
4. Now it’s time for the fun part – adding the feathers!
Begin by hot gluing them along your board’s top edge, ensuring they’re evenly spaced apart. Then continue filling in any gaps until the entire surface is covered. If you want a more rustic look, feel free to leave some wood showing through in between feathers.
Lowe’S Featherboard
Lowe’s is an excellent option if you’re looking for an affordable and easy-to-use feather board. These boards are perfect for use with saws, routers, and other power tools, and they can help you achieve precise cuts while keeping your fingers safe. Lowe’s weatherboards come in various sizes to fit most standard table saw throats, and they’re made from durable plastic that won’t warp or splinter over time.
They also have anti-skid pads on the bottom to keep them firmly in place while you work. To use a Lowe’s weatherboard, align it with the blade of your saw or router bit and secure it with the included screws. Then start your tool and guide it along the board’s edge to make your cut.
When you’re done, remove the board and store it away until next time.
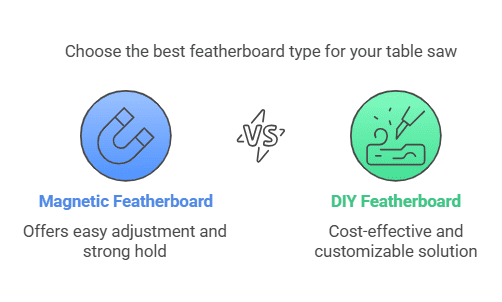
Magnetic Featherboard for Table Saw
If you’ve ever used a table or saw, you know it can be challenging to keep your workpiece steady while making cuts. That’s where a magnetic feather board comes in handy. A feather board has slots or pins that allow you to attach it to your table saw fence.
This supports your workpiece, keeping it from moving around while cutting. A magnetic feather board is even more convenient because it has magnets on the back that allow you to attach it quickly and easily to your table saw fence. No need for clamps or other fasteners – position the feather board where you want it and let the magnets do their job.
When you’re done using the feather board, remove it and store it until next time. If you do any woodworking, a magnetic feather board is an essential tool that will make your life much easier. Check out our selection today and see how handy these things can be!
What is a Featherboard
A feather board is a tool used to help guide wood as it is being cut. It helps to keep the wood from moving around too much and getting damaged in the process. Featherboards come in different sizes and shapes, but they all serve the same purpose.
Some are made of plastic, while others are made of metal. You can usually find them at your local hardware store.

Credit: www.finehomebuilding.com
What Does a Featherboard Do on a Table Saw?
A feather board is a safety device attached to the table saw to help keep your fingers and hands away from the blade. Using a feather board when working with a table saw is essential, as it can help prevent serious accidents.
Where Do You Place a Featherboard on a Table Saw?
When working with a table saw, it’s essential to use a feather board to help keep your workpiece steady and secure. Depending on your cut, there are a few different ways to position a feather board on a table saw. For rip cuts, the feather board should be placed behind the blade, with the leading edge of the board flush against the fence.
For crosscuts, the featherboard should be placed in front of the blade. You can also use two featherboards for extra support – one in front and one behind the edge. No matter which way you place your feather board, ensure that it’s snug against both the edge and fence (or rail) and that all four corners are securely fastened.
How Do You Use a Featherboard in Woodworking?
Woodworking is a process that involves shaping the wood to create pieces or structures. To do this, you will need to use various tools and techniques. One of the essential tools you will need is a weatherboard.
A feather board is a tool that helps keep your workpiece in place while you are working on it. It is essentially a board with feathers or other protrusions that grip the wood and hold it down. This prevents the wood from moving around while you are working on it, making your work much easier and more accurate.
There are two main types of featherboards: clamp onto your workbench and attach to your saw blade guard. Clamp-on featherboards are generally more versatile, as they can be moved around and positioned as needed. However, they can also be more challenging, as you must ensure that the clamps are tight enough without crushing the wood underneath.
Blade-guard featherboards are simpler to use but may not be as adjustable. When using a feather board, always position it so that the feathers point toward the direction of the cut. This will help keep the piece from moving forwards or backward during the amount.
You should also ensure that the feathers are evenly spaced to grip the piece evenly and not cause any unevenness in your cuts.
How Do You Put on a Featherboard?
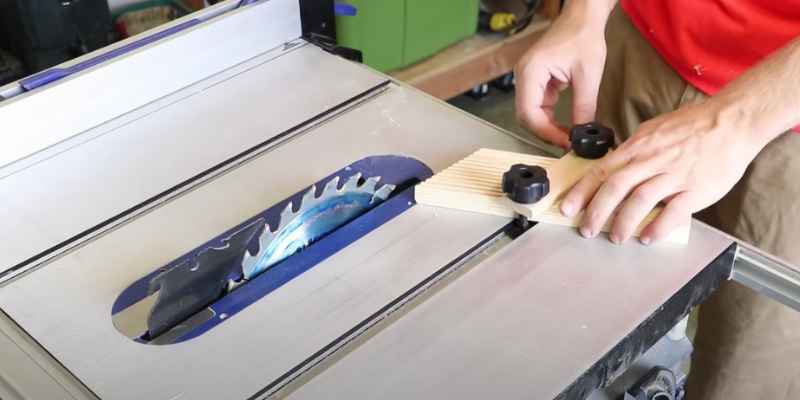
Assuming you would like tips on how to put on a weatherboard: Featherboards help keep stock tight against the fence while you work. There are many different ways that people use featherboards, but here is a general guide on how to put one on:
1) Place the feather board onto the table saw table with the feathers facing towards the blade.
2) Use hold-downs or clamps to secure the feather board in place.
3) Adjust the fence so that it is close to the blade.
4) Run a test cut to ensure that everything is working correctly and that there is no kickback.
Conclusion
If you’re looking for a quick and easy way to add feather boards to your table or saw, look no further than this guide. You can be up and running with weatherboards that will help keep your woodworking projects safe and accurate in just a few simple steps. Plus, once you have the hang of it, using featherboards is a great way to improve the quality of your cuts.