How to Rip a Board Without a Table Saw: Clever Techniques for DIYers
To rip a board without a table saw, you can use a circular saw and a straight edge guide for accuracy. Here is a step-by-step guide on how to do it.
Ripping a board is a common task in woodworking projects, but not everyone has access to a table saw. Whether it’s due to limited space, budget constraints, or other reasons, knowing how to rip a board without a table saw can come in handy.
Thankfully, there is a simple solution using a circular saw and a straight edge guide. By following a few easy steps and taking necessary precautions, you can achieve clean, accurate cuts without the need for a table saw. In this guide, we will walk you through the process of ripping a board with a circular saw, ensuring you achieve the desired result with confidence and precision.
Section 1: Mastering Hand Tools For Board Ripping
Mastering Hand Tools for Board Ripping teaches you how to rip a board without a table saw. Discover efficient techniques using hand tools to achieve clean and precise cuts. Upgrade your woodworking skills with this comprehensive guide.
Mastering Hand Tools For Board Ripping
Whether you’re a woodworking enthusiast or simply need to rip a board without a table saw, mastering hand tools is key to achieving accurate and precise results. Hand tools provide the necessary control and flexibility to tackle different projects. In this section, we will explore why hand tools are important, the essential tools for board ripping, how to choose the right one, and proper hand tool maintenance.
Why Hand Tools?
Hand tools offer several advantages when it comes to ripping a board without a table saw. Here are a few reasons why you should consider using hand tools:
- Portability: Hand tools are lightweight and portable, allowing you to work on projects wherever you need to.
- Affordability: Hand tools tend to be more budget-friendly compared to power tools, making them a great option for those on a tight budget.
- Precision: Hand tools enable better precision and control, especially when it comes to intricate cuts and delicate materials.
- Safety: Using hand tools reduces the risk of accidents associated with power tools, making them a safer option for beginners.
- Skill development: Mastering hand tools improves your woodworking skills and fosters a deeper understanding of the craft.
Essential Hand Tools For Board Ripping
To ensure successful board ripping, it’s essential to have the right tools at your disposal. Here are the essential hand tools you’ll need:
Hand Saw:
- Hand saws come in various types, such as crosscut saws, rip saws, and hybrid saws.
- These saws are designed for different cutting tasks and provide precise control over the cutting process.
- Choose a hand saw with a blade suitable for the type of cut you need to make and the thickness of the board.
Circular Saw:
- Circular saws are versatile power tools that can be used for ripping boards.
- They have a circular blade that allows you to make long, straight cuts quickly.
- Ensure the blade is suitable for ripping cuts, and use a guide or straightedge for accuracy.
Jigsaw:
- Jigsaws are handheld power tools with a reciprocating blade that moves up and down.
- They are ideal for making curved or intricate cuts, and can also be used for straight cuts in thinner boards.
- Choose a jigsaw with the appropriate blade for the material and cut you need to make.
Bandsaw:
- Bandsaws are stationary power tools with a continuous loop of toothed blade.
- They provide excellent control and precision, making them ideal for intricate cuts and rips.
- Use a bandsaw with a blade suitable for the thickness of the board and adjust the fence for accurate cuts.
Choosing The Right Hand Tool
Selecting the right hand tool is crucial for successful board ripping. Consider the following factors when making your choice:
- Type of cut: Determine whether you need to make straight cuts, curved cuts, or a combination of both.
- Thickness of the board: Choose a hand tool that can handle the thickness of the board you are ripping.
- Blade or cutting mechanism: Ensure the tool has the appropriate blade or cutting mechanism for the desired type of cut.
- Personal preference: Consider your familiarity and comfort with different hand tools to choose the one you feel most confident using.
Proper Hand Tool Maintenance
To ensure optimal performance and longevity of your hand tools, proper maintenance is essential. Follow these tips for proper hand tool maintenance:
- Keep tools clean and dry to prevent rust and corrosion.
- Regularly inspect for any damage or wear and replace or repair as necessary.
- Sharpen blades regularly to maintain cutting efficiency.
- Lubricate moving parts to minimize friction and ensure smooth operation.
- Store tools in a dry and organized manner to avoid damage and facilitate easy access.
By mastering the use of hand tools, you can confidently undertake board ripping without relying on a table saw. Having the essential tools, choosing the right one for your needs, and performing proper maintenance will set you up for success in your woodworking projects.

Section 2: Technique 1: Hand Saw Ripping
Learn how to rip a board without a table saw using the hand saw ripping technique outlined in Section 2. Achieve precise and efficient cuts with this method, even without access to a table saw.
Understanding The Hand Saw:
- A hand saw is a versatile tool that can be used for ripping boards when you don’t have access to a table saw.
- It consists of a long, narrow blade with sharp teeth on one edge, designed for cutting wood efficiently.
- Hand saws are available in different types and tooth configurations, allowing you to choose the right one for your project.
- Understanding the basics of using a hand saw for ripping will help you achieve accurate and clean cuts without the need for power tools.
Essential Tips For Hand Saw Ripping:
- Maintain a firm grip on the handle: A secure grip will allow you to have better control over the saw and minimize the risk of injury.
- Choose the right hand saw: Consider factors such as tooth configuration, handle design, and blade length based on the wood you are cutting and your personal preference.
- Use a pencil to mark the cut line: Clear and precise marking is crucial for accurate cuts. Take your time to mark the cut line using a straightedge or a saw guide.
- Apply gentle pressure while cutting: Exerting too much force can cause the saw to bind or wander off the cut line. Let the saw do the work and guide it through the wood with controlled strokes.
- Maintain a steady rhythm: Consistent and rhythmic strokes will help you establish a steady sawing motion, resulting in smoother and more precise cuts.
- Choose the right blade angle: Depending on the type of cut you want to make, you may need to adjust the angle of the saw blade. Experiment with different angles to find what works best for your needs.
Step-By-Step Guide For Hand Saw Ripping:
Marking the Cut Line:
- Measure and mark the desired width of the board on both ends.
- Use a straightedge or a saw guide to draw a straight and accurate cut line.
- Make sure the line is visible and easily distinguishable from other markings on the board.
Making a Starting Groove:
- Start the cut by positioning the saw blade on the waste side of the board, just outside the cut line.
- Apply gentle pressure and make a few light strokes to create a shallow groove along the cut line.
- Keep the saw perpendicular to the board and ensure that the starting groove is straight and accurate.
Ripping Along the Cut Line:
- Once the starting groove is established, steadily guide the saw along the cut line, maintaining a steady rhythm and pressure.
- Focus on keeping the saw blade aligned with the cut line to ensure a straight rip.
- Use long, smooth strokes instead of short, forceful ones to avoid binding or veering off track.
Finishing and Smoothing the Cut:
- When nearing the end of the cut, reduce the pressure on the saw to prevent any potential damage to the wood.
- Take your time to complete the cut carefully, ensuring a clean and smooth finish.
- If necessary, use sandpaper or a hand plane to fine-tune the ripped edge and achieve the desired result.
- Remember, practicing proper technique and maintaining patience and focus are key to successfully ripping a board with a hand saw.
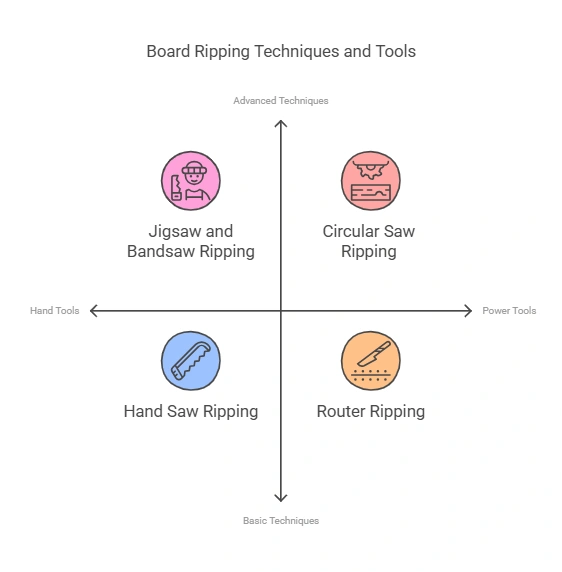
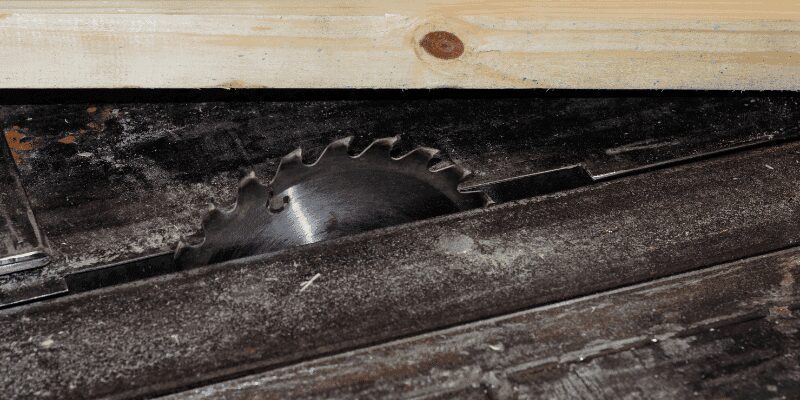
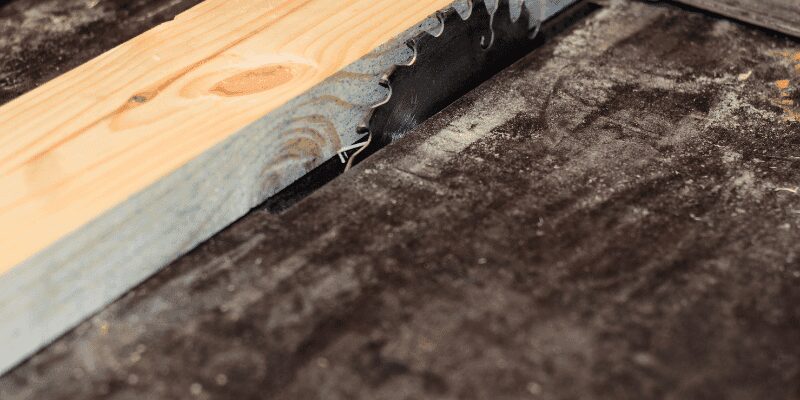
Section 3: Technique 2: Circular Saw Ripping
Learn how to rip a board without a table saw using Circular Saw Ripping in Section 3: Technique 2. Master the step-by-step process for clean and precise cuts with this efficient method.
Technique 2: Circular Saw Ripping
Ripping a board without a table saw may seem challenging, but with the right technique and tools, it can be done. In this section, we will explore the use of a circular saw to rip boards. This method offers versatility and convenience, allowing you to achieve straight and accurate cuts in various situations.
Let’s delve into the advantages and disadvantages of using a circular saw for this task.
Advantages And Disadvantages Of Using A Circular Saw:
Using a circular saw for ripping boards has its own set of advantages and disadvantages. Here are a few to consider:
- Versatility: Circular saws are portable and can be used in different locations, making them a versatile option for ripping boards.
- Accessibility: Unlike table saws, circular saws are more affordable and accessible, making them a popular choice for DIY enthusiasts.
- Compactness: Circular saws are compact and lightweight, allowing for easy maneuverability when ripping boards in tight spaces.
- Cutting Depth Limitations: Circular saws have limitations when it comes to cutting depth, which may require multiple passes on thicker boards.
- Straightness Accuracy: Achieving a perfectly straight cut with a circular saw requires skill and precision, as it relies on manual guidance.
- Safety Precautions: As with any power tool, careful handling and adherence to safety guidelines are crucial when using a circular saw for ripping.
Essential Tips For Circular Saw Ripping:
Before diving into the step-by-step guide for circular saw ripping, here are some essential tips to keep in mind:
- Use a high-quality circular saw blade suitable for rip cuts to ensure clean and precise results.
- Make sure the material you are ripping is properly supported and secured to prevent any movement during the cutting process.
- Measure and mark your cut line accurately before starting, using a straightedge or a clamped-down guide to help guide the circular saw.
- Wear appropriate safety gear, including safety glasses, ear protection, and gloves when operating the circular saw.
Step-By-Step Guide For Circular Saw Ripping:
To rip a board using a circular saw, follow these step-by-step instructions:
Setting up the Circular Saw:
- Ensure the circular saw is fitted with a rip-cutting blade.
- Adjust the saw’s base plate to the desired cutting angle, typically 90 degrees for rip cuts.
- Verify that the saw’s blade is sharp and securely fastened before proceeding.
Adjusting the Cutting Depth:
- Set the cutting depth of the circular saw. It should be slightly deeper than the thickness of the board to ensure a clean cut.
- Adjust the cutting depth by loosening the depth adjustment lever or knob on the saw and aligning it with the desired depth scale.
Guiding the Circular Saw for Straight Cuts:
- Position the circular saw against the board with the blade aligned to the cut line.
- Firmly hold the saw’s handle with one hand and place the other hand on the front edge of the base plate for stability.
- Slowly start the saw and guide it along the cut line, maintaining a steady and controlled motion.
- Apply gentle pressure to ensure proper cutting without forcing the saw through the board.
Finishing and Smoothing the Cut:
- Once the cut is complete, turn off the circular saw and allow the blade to come to a complete stop before removing it from the board.
- Use sandpaper or a wood file to smooth out any rough edges or imperfections along the cut if necessary.
Remember to practice caution and prioritize safety throughout the process. With these steps and essential tips in mind, you’ll be on your way to ripping boards using a circular saw like a pro. Happy ripping!
Section 4: Technique 3: Jigsaw And Bandsaw Ripping
Section 4 introduces Technique 3: Jigsaw and Bandsaw Ripping, a method to rip a board without a table saw. Learn how to effectively use these tools for precise and accurate cuts.
Utilizing The Jigsaw And Bandsaw For Ripping
Ripping a board without a table saw can sometimes be a challenge, but fear not! In this section, we will explore the technique of using a jigsaw and bandsaw for ripping. These versatile power tools can be effective alternatives for achieving straight cuts and making precise rip cuts on your boards.
By following a few essential tips and steps, you’ll be able to rip boards with ease.
Pros And Cons Of Using A Jigsaw And Bandsaw
When it comes to using a jigsaw or bandsaw for ripping boards, there are several advantages and disadvantages to consider:
Pros of using a jigsaw:
Versatility: Jigsaws are known for their ability to make curved cuts, making them suitable for intricate designs or irregularly shaped boards.
Portable: Jigsaws are lightweight and portable power tools, allowing you to work on projects anywhere.
Safety: Compared to table saws, jigsaws have a lower risk of kickback, making them a safer option, especially for beginners.
Cons of using a jigsaw:
Slower Cutting Speed: Jigsaws typically have a slower cutting speed compared to bandsaws or table saws, which can affect productivity.
Less Accuracy: Jigsaws might not produce the same level of precision and accuracy as a table saw or bandsaw, resulting in less smooth cuts.
Pros of using a bandsaw:
Straight Cuts: Bandsaws excel at making straight cuts, offering better precision and accuracy compared to jigsaws.
Thinner Kerf: Bandsaws have a thinner blade, resulting in a narrower cut, which means less material wastage.
Resawing Capabilities: Bandsaws have the ability to resaw boards into thinner pieces, making them ideal for creating veneers or thinner boards.
Cons of using a bandsaw:
Limited Curve Cutting: Bandsaws are not as versatile as jigsaws when it comes to making curved cuts.
Size and Portability: Bandsaws are typically larger and less portable than jigsaws, making them better suited for a workshop environment.
Essential Tips For Jigsaw And Bandsaw Ripping
To ensure successful ripping with a jigsaw or bandsaw, consider these essential tips:
- Choose the right blade: Select a blade specifically designed for ripping. Blades with fewer teeth per inch (TPI) are better suited for faster and rougher cuts, while blades with more TPI provide smoother cuts.
- Mark your cut line: Use a straight edge or a guide to mark the desired cut line on the board, ensuring accuracy.
- Secure the board: Use clamps or a vice to secure the board in place, preventing it from moving during the cutting process.
Step-By-Step Guide For Jigsaw And Bandsaw Ripping
Follow these steps to rip a board using a jigsaw or bandsaw:
Setting up the Jigsaw or Bandsaw:
- Ensure the saw is unplugged or turned off before making any adjustments.
- Install the appropriate blade for ripping.
- Adjust the blade tension and ensure it is properly seated in the blade guides.
- Set the table or work surface to the desired height for comfortable cutting.
Preparing the Board for Ripping:
- Measure and mark the desired width of the rip cut on the board.
- Use a straight edge or guide to draw a straight cutting line along the marked width.
Guiding the Jigsaw or Bandsaw for Straight Cuts:
- Position the jigsaw or bandsaw at the edge of the board, aligning the blade with the marked cutting line.
- Hold the saw firmly with both hands, maintaining control throughout the cut.
- Start the saw and gradually guide it along the marked line, applying gentle pressure to keep the cut straight.
- Take your time and avoid rushing to ensure accuracy and safety.
Finishing and Smoothing the Cut:
- Once the rip cut is complete, inspect the cut for any rough edges or splinters.
- Use sandpaper or a file to smooth out any imperfections, creating a clean and smooth finish.
- By following these steps and utilizing the jigsaw and bandsaw properly, you can successfully rip boards without the need for a table saw. Remember to prioritize safety and take your time to achieve accurate and clean cuts. Happy rip cutting!
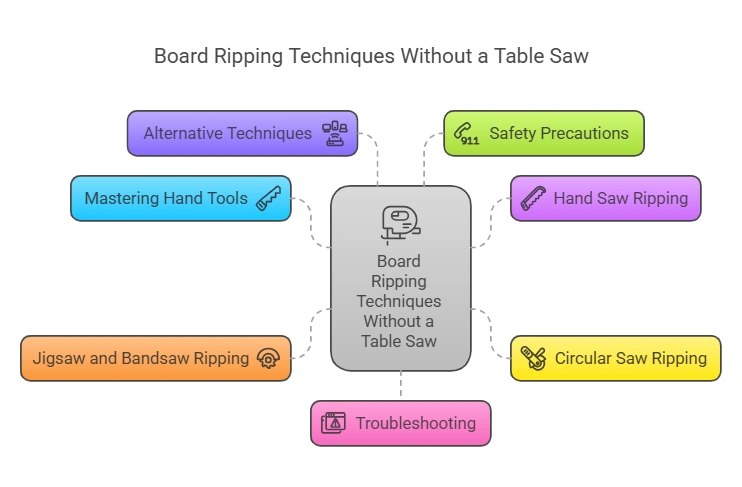
Section 5: Alternative Techniques For Board Ripping
Discover alternative techniques for ripping a board without a table saw in Section 5. Gain valuable insights and step-by-step instructions to successfully accomplish this task using innovative methods.
Rip Board Using A Router
A router can be a versatile tool for board ripping, providing clean and accurate cuts.
With the right bit and technique, you can achieve smooth results without the need for a table saw.
Follow these steps to rip a board using a router:
- Secure the board firmly in place using clamps or a workbench.
- Measure and mark the desired rip width on the board.
- Attach a straight-edge guide to the router base, ensuring it is aligned with the marked line.
- Adjust the router depth to match the thickness of the board.
- Start the router and carefully guide it along the straight edge, using steady and even pressure.
- Repeat the process if necessary, gradually increasing the depth of each pass.
- Finish by sanding the edges for a polished look.
Handheld Planer For Board Ripping
A handheld planer can be a handy alternative for ripping boards, especially for smaller projects or when precision isn’t as critical.
The process involves removing material gradually to achieve the desired width.
Follow these steps to rip a board using a handheld planer:
- Secure the board firmly in place using clamps or a workbench.
- Measure and mark the desired rip width on the board.
- Adjust the depth of the planer blade according to the required thickness.
- Start the planer and carefully guide it along the board, moving in the same direction as the wood grain.
- Take light passes, gradually working your way towards the marked line.
- Repeat the process, checking the dimensions regularly for accuracy.
- Finish by sanding the edges to smooth out any roughness.
Guide Rail Systems For Precision Ripping
Guide rail systems offer a convenient way to achieve precise board ripping without a table saw.
They allow you to create straight and parallel cuts by guiding your tool along the track.
Follow these steps to rip a board using a guide rail system:
- Place the guide rail system on the board, ensuring it is aligned with the desired rip line.
- Secure the guide rail firmly in place using clamps or other suitable methods.
- Choose the appropriate handheld circular saw or jigsaw for the task.
- Align the base of the tool with the guide rail and engage the blade.
- Start the tool and carefully guide it along the rail, maintaining a steady and controlled motion.
- Check the cut regularly and adjust as needed until the desired width is achieved.
- Finish by sanding the edges for a polished finish.
Specialty Handheld Tools For Board Ripping
In addition to the more common tools, there are specialty handheld tools specifically designed for board ripping.
These tools offer unique features and capabilities, making them well-suited for particular ripping tasks.
Some examples of specialty handheld tools for board ripping include:
- Edge trimming saws: Designed for precise trimming and edging of boards.
- Track saws: Similar to circular saws, but with integrated guide rails for enhanced accuracy.
- Miter saws: Ideal for making angled or beveled cuts on boards.
- Reciprocating saws: Versatile tools that can handle various cutting tasks, including board ripping.
Remember to choose the tool that suits your specific needs and always prioritize safety when using any handheld tool for board ripping.
Section 6: Safety Precautions And Best Practices
Section 6: Safety Precautions and Best Practices covers the essential steps to rip a board without a table saw. Learn effective techniques and precautionary measures to safely accomplish this task for all your woodworking projects.
Proper Safety Gear And Equipment:
- Safety goggles: Protect your eyes from flying debris by wearing safety goggles.
- Ear protection: Use earplugs or earmuffs to prevent damage to your hearing from loud power tools.
- Gloves: Wear gloves to protect your hands from cuts and splinters.
- Dust mask: Guard against inhaling harmful dust particles by wearing a dust mask.
- Work boots: Wear sturdy work boots with slip-resistant soles for stability and protection.
Working In A Safe And Well-Lit Environment:
- Adequate lighting: Ensure your workspace is well-lit, either using natural light or artificial lighting.
- Clear the area: Remove any obstacles or clutter from your work area to prevent accidents or tripping hazards.
- Ventilation: If working indoors, ensure proper ventilation to disperse any fumes or dust generated during the process.
Securing The Board For Stability:
- Clamps: Use clamps to secure the board firmly to your work surface, preventing it from moving or shifting unexpectedly.
- Sawhorses: Place the board on sturdy sawhorses, providing a stable work surface and allowing you to rip the board without the need for a table saw.
- Anti-slip mat: Lay down an anti-slip mat underneath the board to provide additional stability and prevent it from sliding while cutting.
Maintaining Focus And Concentration:
- Eliminate distractions: Minimize interruptions and distractions while working to maintain focus and prevent accidents.
- Mental preparation: Before starting, mentally prepare yourself for the task at hand, ensuring you are fully focused on the process.
- Take breaks: If needed, take short breaks to rest and regain concentration, especially during longer cutting sessions.
Safely Handling And Storing Power Tools:
- Read the manual: Familiarize yourself with the proper usage and safety protocols outlined in the tool’s manual.
- Unplug when not in use: Always unplug the power tool after each use to prevent accidental activation.
- Store in a locked area: Keep power tools locked away in a secure location when not in use to prevent unauthorized access or potential accidents.
- Inspect before use: Before using any power tools, inspect them for any signs of damage or defects. Do not use a tool that appears faulty.
By following these safety precautions and best practices, you can rip a board without a table saw in a safe and efficient manner. Remember to prioritize your safety and ensure that you have the necessary equipment and precautions in place before beginning any woodworking task.
Stay focused, be aware of your surroundings, and enjoy the satisfaction of successfully completing your project!
Section 7: Troubleshooting And Common Mistakes
Section 7: Troubleshooting and Common Mistakes offers valuable insights on how to rip a board without a table saw. This section serves as a troubleshooting guide, addressing common mistakes and providing solutions for a seamless board ripping process.
Identifying And Fixing Inaccurate Cuts
When it comes to ripping a board without a table saw, it’s not uncommon to encounter inaccurate cuts. However, fret not! Here are some tips to help you identify and fix those pesky inaccurate cuts:
- Uneven edges: If you notice that the edges of your cut are uneven, it could be due to improper positioning or feed rate. Make sure you are holding the board securely and feeding it steadily through the cutting tool.
- Crooked cuts: Crooked cuts can happen if you’re not maintaining a straight line as you guide the board. Use a straightedge or a guide to ensure a straight and accurate cut.
- Angle deviations: Sometimes, the angle of the cut doesn’t turn out as expected, resulting in uneven edges. Double-check the position of your cutting tool to ensure it is properly set to the desired angle or bevel.
- Blade dullness: A dull blade can cause inaccurate cuts, so it’s essential to keep your cutting tool well-maintained. Sharpen or replace the blade regularly to ensure clean and precise cuts.
Dealing With Tear-Out And Splintering
Tear-out and splintering can be frustrating when ripping a board without a table saw. Here’s how you can handle these issues:
- Use masking tape: Applying masking tape along the cutting line can help minimize tear-out. The tape acts as a protective barrier and prevents the wood fibers from splintering excessively.
- Choose the right blade: Opt for a blade with fine teeth when working with delicate or prone-to-splinter wood types. The finer teeth create cleaner cuts and reduce the risk of tear-out and splintering.
- Score the wood: Before making the full cut, score the wood along the cutting line using a utility knife. This pre-cut creates a groove for the blade to follow, reducing tear-out and splintering.
Realigning Misaligned Cuts
Misaligned cuts can be disappointing, but fear not! Here are a few methods to realign those pesky misaligned cuts:
- Double-check your measurements: Ensure that your measurements are accurate before making the cut. Use a square or measuring tools to verify the dimensions and adjust accordingly.
- Make a new cut: If the misalignment is minor, you can make a new cut to realign the board. Keep in mind to adjust your measurement based on the error from the previous cut.
- Use a jointer or a planer: A jointer or planer can help fix minor misalignments by removing excess material along the width or thickness of the board. This method is helpful if you have some wiggle room for adjustment.
Avoiding Kickbacks And Blade Binding
To ensure your safety and a smooth cutting process, it’s crucial to avoid kickbacks and blade binding. Here are some essential tips:
- Use a riving knife: A riving knife is a safety device that helps prevent kickbacks by keeping the wood from pinching the blade. Make sure it’s properly aligned with the blade for maximum effectiveness.
- Maintain proper feed rate: Feed the board steadily and at a consistent rate to prevent blade binding. Forcing the wood or feeding it too slowly can cause the blade to get stuck, leading to kickbacks.
- Clear the cut area: Remove any debris, offcuts, or other obstacles that may interfere with a smooth cut. Keeping the workspace tidy and free from clutter helps prevent kickbacks and blade binding.
Remember, practice makes perfect, so don’t get discouraged if you encounter challenges along the way. With these troubleshooting tips, you’ll be able to overcome common mistakes and achieve accurate and clean cuts while ripping a board without a table saw!
Section 8: Conclusion
Discover how to rip a board without a table saw in Section 8 of this informative guide. Gain practical tips and techniques to achieve precise cuts using alternative tools. Master the art of woodworking without the need for expensive equipment.
So you want to learn how to rip a board without a table saw? No worries, we’ve got you covered! In this concluding section, we’ll recap the clever techniques we’ve covered throughout this blog post and provide some final tips for successful board ripping without a table saw.
Let’s dive in!
Recap Of Clever Techniques For DIY Board Ripping:
- Circular Saw Technique: Use a circular saw with a guide rail to achieve straight and precise cuts. Ensure that the circular saw blade is set to the correct depth for the board you’re working with.
- Jigsaw Technique: With a jigsaw, you can make intricate cuts on narrower boards. Make sure to use a fine-toothed blade and take your time to maintain control.
- Hand Saw Technique: If you prefer a traditional approach, a hand saw can work wonders. By marking your cut lines and using a speed square as a guide, you can achieve accurate cuts.
- Router Technique: Routers equipped with a straight bit and a straight edge guide can help you rip boards smoothly. Take your time and make multiple passes to reach your desired width.
Final Tips For Successful Board Ripping Without A Table Saw:
- Safety First: Always prioritize safety when working with power tools. Wear appropriate protective gear, follow safety guidelines, and take breaks when needed.
- Measure Twice, Cut Once: Accurate measurements are crucial for successful board ripping. Take your time to measure twice before making any cuts, ensuring that you achieve the desired dimensions.
- Secure Your Workpiece: Whether you’re using clamps or a workbench, securing your workpiece is essential to prevent any accidents or unwanted movements during the cutting process.
- Practice Makes Perfect: Don’t get discouraged if your first attempts don’t turn out flawless. Like any skill, board ripping takes practice. Keep trying, learn from your mistakes, and soon you’ll master the art of ripping boards without a table saw.
And there you have it! With the clever techniques we’ve discussed and these final tips, you’re ready to tackle board ripping without relying on a table saw. Remember, practice, patience, and safety are your best friends on this DIY journey.
Happy board ripping!
Frequently Asked Questions On How To Rip A Board Without A Table Saw
How Do You Rip A Board By Hand?
To rip a board by hand, make a straight line using a measuring tape and pencil. Place a straight edge along the line and score it. Apply even pressure to the edges to split the board.
What Can I Use If I Don’T Have A Table Saw?
You have a few options if you don’t have a table saw. Some alternatives include a circular saw, a jigsaw, or using hand tools like a handsaw or a coping saw.
How Do You Rip A Board Without A Bandsaw?
To rip a board without a bandsaw, use a table saw or circular saw with a straightedge guide.
What Is The Best Tool To Rip A Board?
The best tool to rip a board is a table saw. It allows precise and efficient cutting.
Conclusion
To summarize, ripping a board without a table saw may seem daunting at first, but with the right tools, techniques, and safety precautions, it can be accomplished successfully. By utilizing alternative methods such as a circular saw, jigsaw, or hand saw, you can achieve clean and accurate cuts.
Remember to mark your cut line and use a guide or fence to ensure straightness. Additionally, always prioritize safety by wearing appropriate protective gear and working in a well-lit and clutter-free area. Practice proper cutting techniques, such as applying steady pressure and letting the saw do the work.
Whether you are a beginner or a seasoned woodworker, these methods offer a viable solution when a table saw is unavailable. So, don’t be discouraged if you don’t have a table saw handy – with a little practice and patience, you can still achieve precise results and tackle your woodworking projects with confidence.