Install Wood Burning Stove Pipe: Expert Guide and Tips
To install a wood-burning stove pipe, ensure proper measurements and clearances are followed before assembling. Use appropriate materials for a safe installation.
When adding a wood-burning stove to your home, the process of installing the stove pipe efficiently becomes crucial. Proper installation ensures safety and efficiency in heating your living space. Understanding the necessary steps and guidelines for installing a wood-burning stove pipe is key to a successful project.
This article provides a comprehensive guide on how to install a wood-burning stove pipe correctly and safely. By following the right procedures and precautions, you can enjoy the warmth and ambiance of a wood stove in your home while maintaining safety standards. Let’s delve into the essential steps and tips for a successful wood-burning stove pipe installation.
Choosing The Right Wood Burning Stove Pipe
Installing a wood burning stove pipe requires careful consideration to ensure the right choice. Selecting the appropriate pipe ensures efficient and safe operation, allowing you to enjoy the warmth and cozy ambiance of your wood-burning stove without any worries.
Type Of Stove Pipe
- Single Wall: Basic, budget-friendly option
- Double Wall: Provides extra insulation and safety
- Triple Wall: Highest level of safety; suits intense use
Size And Diameter
Consider the stove’s output & proximity; match pipe size for efficiency.
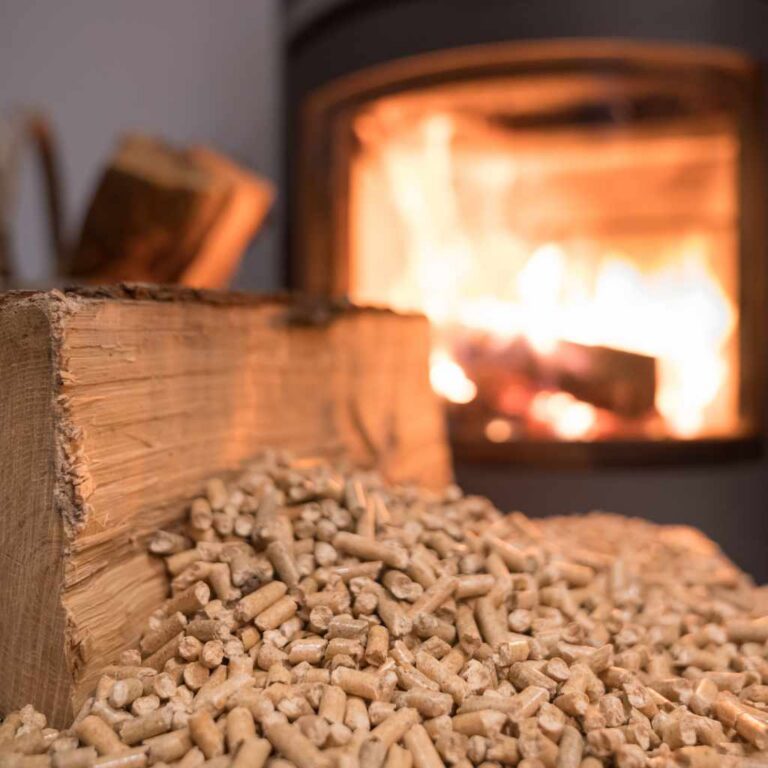
Material Selection
- Stainless Steel: Durable, resistant to corrosion
- Galvanized Steel: Cost-effective; prone to corrosion over time
- Black Steel: Traditional look; must be maintained to prevent rusting
- Cast Iron: Stylish; requires professional installation
Credit: www.fireplacesdirect.com
Preparing For Installation
Prepare for the installation of your wood-burning stove pipe by clearing the area and ensuring proper ventilation. Measure and cut the pipe to fit securely, then test for leaks before firing up your stove.
Inspecting The Area
Inspect the area for potential obstacles and ensure proper ventilation is available.
Gathering The Required Tools
Compile necessary tools: pipe sections, stove, chimney brush, screwdriver, gloves.
Preparing The Stove
Clean the stove interior, remove any debris, and ensure proper alignment for installation.
Installing The Stove Pipe
Installing a wood burning stove pipe is an essential step in setting up your wood stove. The stove pipe acts as a crucial conduit for the smoke and gases produced by the stove, directing them safely out of your home. In this section, we will cover the steps to install the stove pipe properly, ensuring efficient and safe operation of your wood burning stove.
Determining The Pipe Route
Before you begin the installation process, you must determine the best route for the stove pipe. This will depend on various factors, including the layout of your home and any existing chimney or venting systems. Here are a few points to consider:
- Choose the shortest and straightest route possible for the stove pipe. This will minimize bends and maximize efficiency.
- Avoid running the stove pipe through combustible materials, such as walls or ceilings, to reduce the risk of fire.
- Ensure that the pipe route allows for proper clearance from any combustible materials, following the manufacturer’s guidelines.
By carefully considering these factors, you can determine the best pipe route for your wood burning stove, ensuring safe and efficient operation.
Putting Together The Sections
Once you have determined the pipe route, it’s time to assemble the sections of the stove pipe. Most stove pipes come in multiple sections, which need to be connected securely. Follow these steps to put the sections together:
- Start by checking the male and female ends of each section for any damage or deformities.
- Slide the male end of one section into the female end of the adjoining section, ensuring a snug fit.
- Insert the locking tabs or screws provided by the manufacturer to secure the sections together. This will prevent any accidental disconnection.
Ensure that each section is fully engaged and securely fastened before proceeding, as any gaps or loose connections can lead to smoke leakage. Properly assembling the sections of the stove pipe is essential for the safe and efficient operation of your wood burning stove.
Attaching The Pipe To The Stove
The final step in installing the stove pipe is attaching it to the stove itself. This connection is important as it ensures a proper draft and prevents any backflow of smoke. Follow these steps to attach the pipe to the stove:
- Position the stove pipe collar or adapter over the flue opening on the stove’s top or back, depending on the design.
- Secure the collar or adapter to the stove with screws or clamps, ensuring a tight and stable connection.
- Slide the other end of the stove pipe over the collar or adapter, making sure it fits snugly.
- Use screws or clamps to secure the stove pipe to the collar or adapter, ensuring a secure attachment.
Double-check all the connections to ensure they are tight and properly sealed. Any loose connections can lead to smoke leakage, reducing the efficiency of your wood burning stove. By attaching the pipe securely to the stove, you can enjoy a safe and effective wood burning experience.
Proper Venting And Safety Measures
Proper venting and safety measures are crucial when installing a wood-burning stove pipe to ensure optimal function and prevent potential hazards. In this section, we will discuss the key considerations for venting the pipe correctly, using high-quality insulation, and implementing fire safety measures.
Venting The Pipe Correctly
When installing a wood-burning stove pipe, proper venting is essential to ensure the efficient disposal of combustion byproducts. The stove pipe should be installed with the appropriate clearances from combustible materials, following the manufacturer’s guidelines. It is imperative to use compatible components and maintain a sufficient draft for effective venting.
Using High-quality Insulation
High-quality insulation plays a vital role in the installation of a wood-burning stove pipe. Insulating the pipe helps to maintain flue gas temperatures, improve draft efficiency, and reduce the risk of creosote buildup. Utilizing insulation designed for high temperatures is recommended to enhance the safety and performance of the stove pipe system.
Implementing Fire Safety Measures
Implementing fire safety measures is fundamental when installing a wood-burning stove pipe. This includes installing heat shields to protect nearby combustible surfaces, using spark arrestors to prevent the emission of sparks, and regularly inspecting the stove pipe for any signs of wear or damage. Additionally, having a fire extinguisher and carbon monoxide detector nearby is essential for added safety.
Maintaining And Cleaning The Stove Pipe
Maintaining and cleaning the stove pipe is crucial for the safe and efficient operation of your wood-burning stove. Regular inspections and cleaning inside the pipe are essential tasks to ensure that the stove pipe functions properly and that any potential hazards are addressed promptly.
Regular Inspections And Maintenance
Regular inspections of the wood-burning stove pipe are necessary to identify any issues such as cracks, leaks, or blockages. Inspect the pipe for any signs of damage, corrosion, or warping caused by high temperatures.
Additionally, ensure that the pipe is securely attached and that the joints are sealed properly to prevent any leaks. Perform routine maintenance such as tightening the screws or replacing gaskets if needed to maintain the integrity of the pipe.
Cleaning Inside The Pipe
It’s essential to clean the interior of the stove pipe regularly to remove any accumulated soot, ash, or debris. This buildup can obstruct the flow of gases and increase the risk of a chimney fire. Use a chimney brush and rods to clean the inside of the pipe thoroughly.
Make sure to wear protective gear such as gloves and goggles while cleaning the pipe. Avoid using water or liquid cleaners as they can create acidic compounds when mixed with creosote, leading to corrosion of the pipe.
Removing Creosote
Creosote buildup is a common issue in wood-burning stove pipes and poses a fire hazard. Use a creosote remover specifically designed for stove pipes to effectively break down and remove the creosote deposits.
Regularly check for creosote buildup and take necessary measures to prevent its accumulation, such as burning only seasoned wood and ensuring proper airflow to promote efficient combustion and reduce creosote formation.
Credit: allfuelhst.com
Frequently Asked Questions Of Install Wood Burning Stove Pipe
What Is The Correct Way To Install A Wood Stove Pipe?
To install a wood stove pipe, ensure proper clearance, use high-quality materials, follow manufacturer instructions, secure pipe joints, and check for leaks.
Does A Wood Stove Pipe Have To Go Straight Up?
No, a wood stove pipe does not have to go straight up. It can be installed with bends or angles, as long as it meets safety regulations and maintains proper draft and airflow. However, it is recommended to consult a professional for proper installation guidance.
How Much Does It Cost To Install A Wood Stove Pipe?
The cost to install a wood stove pipe varies, but it typically ranges from $500 to $2000. Factors such as materials, labor, and the complexity of the installation can impact the total cost. It’s best to consult with a professional for an accurate estimate.
Does The Crimped End Of Stove Pipe Go Up Or Down?
The crimped end of stove pipe should go up to connect with the next section. This creates a secure fit and prevents any debris or water from entering the pipe. It also helps to direct the flow of air and gases in the correct direction.
Conclusion
To summarize, installing a wood burning stove pipe is a practical and efficient way to heat your home while creating a cozy ambiance. By following the proper installation steps, you can ensure safer and more effective use of your wood burning stove.
Remember to choose the right type and size of pipe, properly secure and seal the connections, and follow local building codes and regulations. With a well-installed wood burning stove pipe, you can enjoy the warmth and comfort it brings for years to come.