Is Wood Ash Good For Tomato Plants? Essential Proven Secrets
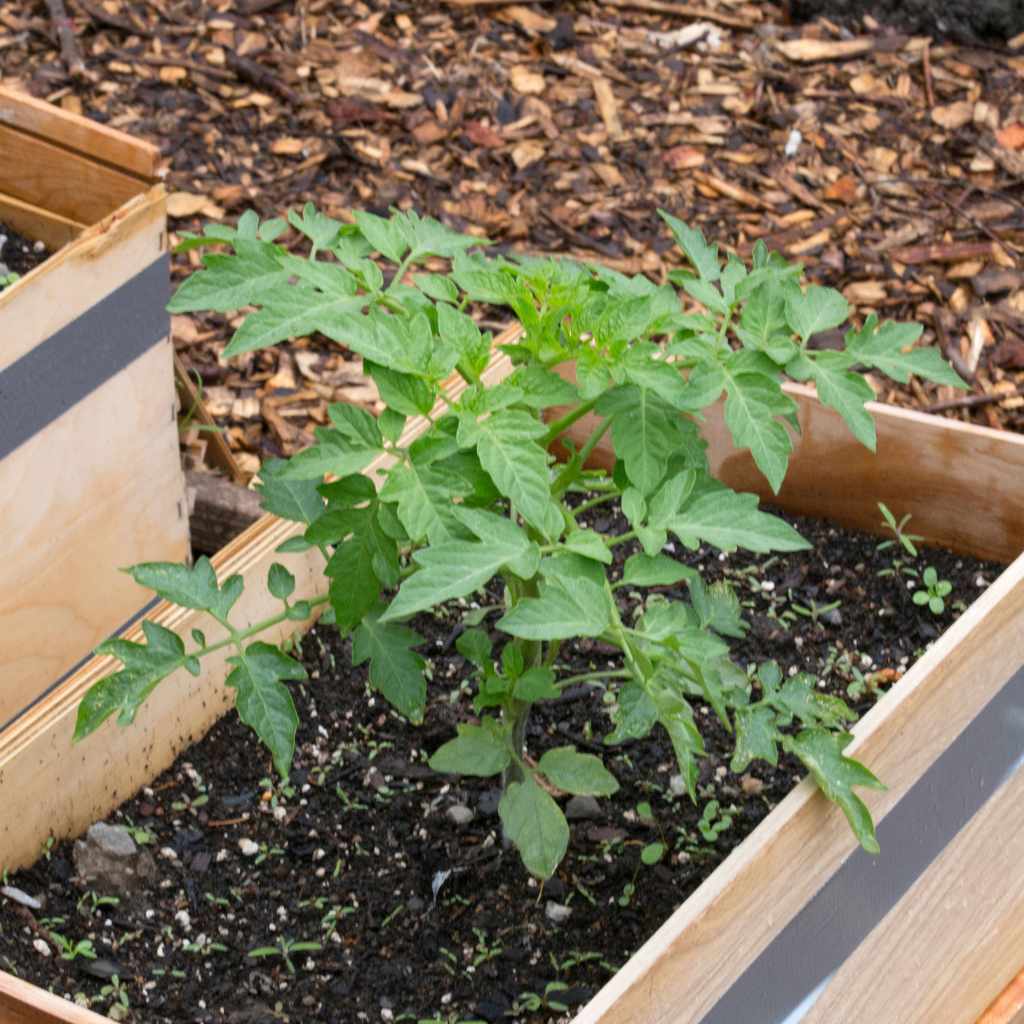
Yes, wood ash can be very good for tomato plants as it provides essential potassium and lime, which supports strong fruiting and sweet flavor. However, success means using very small amounts of ONLY clean, hard, untreated wood ash, applied correctly according to soil needs to avoid alkalinity issues.
Unlocking Garden Gold: Is Wood Ash Good For Tomato Plants? Essential Proven Secrets
When you’re trimming out old projects in the workshop or burning scrap wood safely, you’re usually left with a pile of gray, dusty remains: wood ash. As a DIY and gardening enthusiast, you know it feels wasteful to toss that soil right into the trash. So, using resources from around the workshop to support the project in the garden makes wonderful sense! People often wonder if this dusty byproduct works great as a soil amendment for their prized tomatoes. It’s a hot topic, but the simple answer is yes, wood ash often helps tomatoes thrive. This helpful guide will show you exactly how to use your ash correctly without hurting your garden, ensuring you unlock safe, powerful results for sweet, bountiful tomatoes this year. Let’s jump in!
Why Gardeners Are Buzzing About Wood Ash
Wood ash has a long history as a natural soil upslope power-up. Think of it like reclaimed lumber—seemingly used up, but actually built with great potential. Primarily, plant nutrition is about Nitrogen (N), Phosphorus (P), and Potassium (K/Potash). Commercial fertilizers spell this out, but wood ash steps in with huge help on the K side.
The Nutrient Breakdown of Wood Ash
Wood ash isn’t completely balanced power. You won’t fix a deep nitrogen deficiency with this dusty goodie. However, wood ash shines in replenishing something crucial for fruiting vegetables: Potassium.
| Primary Nutrient | How It Helps Tomatoes |
|---|---|
| Potassium (K) | Encourages strong disease resistance and vital fruit development (which greatly affects flavor and yield). |
| Calcium (Ca) / Lime | Helps neutralize acid in the soil, directly fighting something gardeners dread: Blossom End Rot (BER). |
| Magnesium (Mg) | A tiny bit less, though an often needed component to keep leaves healthy and green. |
If your soil is naturally quite acidic (acidic soil is actually a common issue in many regions), adding wood ash slightly raises the pH, moving your dirt toward a neutral sweet spot where tomatoes happily absorb nutrients.
The Big Caution: Type of Wood Matters Most
Safety first, always. Before you even consider sneaking a shovel full towards your tomato rows, you have to confirm what wood created the ash. Not all ash is gold.
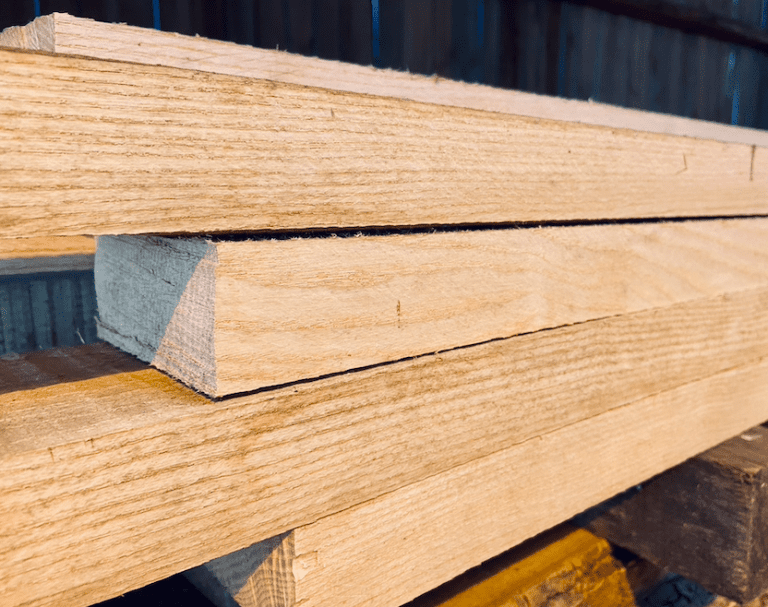
Only ash from hardwood, like oak, maple, or ash (the non-flaming conversational kind in most cases!), should ever be safely introduced to your garden beds. Why? Because these woods usually burn cleaner and contain higher values of vital minerals that plants use.
Never, ever use ash from synthetic, treated lumber. This is crucial:
Treated Wood Ash: Contains things like copper or arsenic preservatives. Using this permanently poisons your soil, making future clean gardening impossible or deeply expensive to reverse.
Soot Mixed Ash: Ash gathered from chimneys or fireplaces that regularly burn household trash, painted materials, or processed card stock often contains contaminants invisible to the eye. Stick strictly to ash made from natural firewood only. For reliable data on soil needs, check university extensions like a Cooperative Extension Service for local soil contamination levels that might impact the overall safe makeup of your compost or amended soil.
Knowing the source isn’t just good idea; it’s paramount for healthy eating!
This leads us straight into the most crucial step: knowing your soil before you dose it with too much alkaline wood ash. Adding too much rapidly ruins the environment tomatoes really love.

The Golden Ratio: Essential Secrets to Applying Wood Ash Safely
The mistake most new gardeners make is reading two brief online tips, grabbing a whole paint can of ash, and stirring it willy-nilly around healthy, happy plants. That leads to disaster. Tomatoes need just the right balance, or overly alkaline soil causes huge growth struggles.
Secret #1: Soil Test Before You Sprinkle
This is the builder’s secret: always test your foundation before adding support materials. For wood ash application, testing your soil pH levels is your absolute requirement roadmap of how much (if any) ash to use.
Tomatoes thrive best in soil with a slightly acidic to neutral pH—ideally sitting between $6.0$ and $6.8$ (USDA official reports show the upper limits for vegetable health).
If your test kit (easy to find at nearly any garden center for just a few bucks) shows your soil pH much lower than $6.0$, ash offers an excellent, slow-release lime to bring it up gently. If your pH is already $7.0$ or higher, you must skip the wood ash completely right now, because adding already alkaline ash on top of alkaline soil locks up necessary iron and micronutrients your plant needs. Acid soils? Ash gets a thumbs-up. Neutral or already soggy? Take it away.
Testing is the key that unlocks safe and successful application every single time, cutting out 90% of failure for beginners.
Key Application Steps for Tomatos
Getting the application technique right prevents shocking your newly established plants and ensures gradual nutrient release. Don’t worry; this method is wonderfully simple once you know the steps intended for transplanting.
1.
Test the pH first. (We cannot stress this enough—make this your first entry on your gardening checklist.)
2.
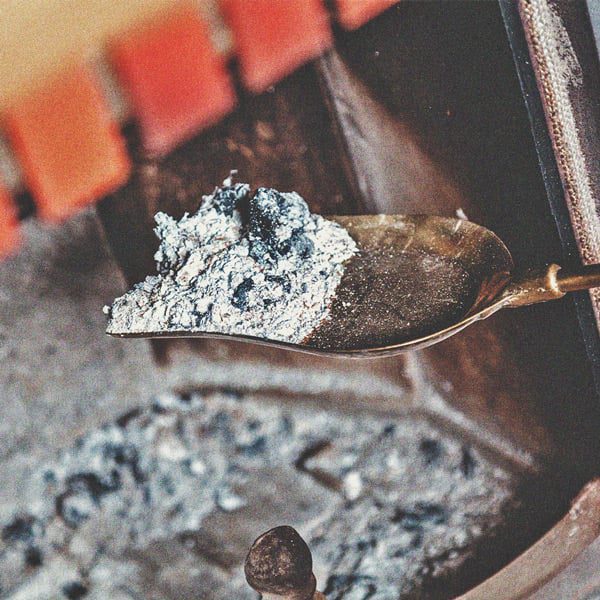
Harvest and Store the Right Ash: Burn only dried, clean hardwood on low heat to produce fine, light-gray powder. Store unused, completely cool, ash sealed tightly away from moisture.
3.
Determine Dosage (based on soil test): Never over-apply potash sources. See the table below for a highly safe guide for small garden plots.
0.
Mix Before Planting Beds Only: Wood ash works best when lightly incorporated one time a year into the top $6$ inches of bare soil prior to starting your new tomato crop (early spring or amending potting soil mediums only!). If you are adding ash mid-season, double the area needing adjustment, because roots can be surprisingly sensitive to caustic changes.
5.
Do NOT create ash rings: Do not draw a thick circle ($$band$$) of visible ash right around the stem. The concentrated lye-action can burn delicate early roots just out of planting depth. Light, even scatter and rake immediately for the deepest safety.
6.
Never Combine Directly with Composting Manure: High-potassium and nitrogen sources can be too harsh if dumped in a tight mixture. Incorporate in separate stages over several weeks, or apply wood ash material away the finished compost pile.
How Much Wood Ash is Too Much? Beginners Rate Chart
Since heavy metal contamination is generally not an issue for pure, home kiln ash used according to standard recommendations, the concern shifts wholly to $text{pH}$ imbalance (making the soil too alkaline or “sweet”). This guideline is safely conservative for an average homeowner garden area used only yearly:
| Current Soil pH Rating | Recommended Wood Ash Application | Goal |
|---|---|---|
| Under $5.5 text{ (Very Acidic)}$ | Add or gentle till in $1 text{ lb}$ per $30 text{ sq. ft.}$ once per season now maximum. | Gently increase pH towards $6.5$. |
| $5.6$ to $6.0 text{ (Moderately Acidic)}$ | Restrict to less than $0.5 text{ lb}$ per $40 text{ sq. ft.}$ max (Use sparingly). | Monitor $text{pH}$ closely over one year. |
| $6.1$ to $7.0 text{ (Neutral/Ideal for Tomatoes after one season adjustment)}$ | STOP. Zero wood ash addition needed this year. | Maintain currently balanced nutrients. Plant food needed instead. |
| $7.5 text{ and Above (Alkakine)}$ | Absolute zero wood ash for three crop cycles plus. Use materials like vinegar dilution cautiously OR sulfate instead. | Avoid harmful salinity and high $text{pH}$. |
If you grow tomatoes in heavy containers or specialty raised pirate boxes full of store-bought sterilized mixes (those often start around $text{pH}$ $6.2$), the need for any lime product like ash is very low or non-existent unless you are adding significantly alkaline municipal water regularly. Know your medium!
Wood Ash vs. Commercial Fertilizers: When to Pick Ash
It’s easy to dump a bag of 10-10-10 granular fertilizer. Wood ash is slower, organic, and fits better into closed-loop maintenance cycles—common goals for folks who have found that handy satisfaction DIY woodworking methods bring.
Pros and Cons for Tomato Growers
When weighing manufactured options against this humble wood byproduct created right under your roof tile scraps after a winter burning session:
Pros (Wood Ash):
-
- Excellent Potassium Source: Potash builds strong roots and sweeter final fruit more reliably than synthetic additives, as it works slowly.
- The environmental cost is near zero; it stops waste and reduces strain on manufactured inputs. Compare this zero-waste process to how one handles wood project screws—why replace a good reusable?
- It’s Calcium/Lime: Perfect side bonus for dealing gently with Blossom End Rot naturally over time through moderate $text{pH}$ adjustment.
- It’s usually free and easy access if you already burn firewood for heating or ambiance.
<ul
Empty structure that mimics woodworking scraps efficiency must be valued highly in frugal maintenance—utilizing existing waste streamlines workshop maintenance just like simple tool care saves huge purchasing budgets across projects. For technical studies supporting the long-term impact on soil matrices using organic carbon sources, check out academic research often reported via state geological surveys or agrarian resource sharing sites provided by public university outreach branches about site rejuvenation studies, like those maintained by many United States Geological Survey (USGS) data repositories focused on low resource management in home gardening scenarios.
Look through best horticultural practice guides. Many confirm wood ash’s $text{3+}$ months solubility and slow nutrient release compared to the near-immediate “burn potential” of synthetic soluble fertilizers.
Cons (Wood Ash):
-
-
- Imbalanced Nutrition: Adds almost no usable Nitrogen or Phosphorus—your commercial fertilizers provide what ash lacks.
- Slow Action: You won’t see lightning 3-day results on deficiencies with ash; its role is long-term soil conditioning.
- Salt Risk: Over-application creates sodium buildup, causing root dryness and poor water regulation.
- Absolutely Unusable if Timber Was Coated or Treated: The primary safety blocker shared above.
-
The Verdict for Beginner Success
Use treated high-quality, pure hardwood ash as a yearly pre-planting soil balancer, especially if tests show acidic soil needs a $pH$ nudge. Then, focus your watering cans/granular feeds toward standard fertilizers (like those focusing on $text{N P K}$ ) specifically labelled for tomatoes during the fruiting stage. Wood ash supports the baseline; feed optimizes top growth.
Recognizing the Symptoms: When Ash Use Might Backfire
If a brand-new gardener dives straight into ash heavy-handed usage, there are signs that the environment has flipped against the tomato’s favor. Just as sanding too hard exposes raw, fragile wood fibers, too much ash upsets the delicate soil chemistry.
Signs Your Soil is Too Alkaline (pH Too High)
If you see these yellowing clues after applying wood ash last season or early spring, stop adding it now:
Chlorosis Pattern: Foliage starts yellow but retains bright green veining. This classic look points sharply to two linked micronutrient lock-ups: Iron and Manganese deficiency. Tomato roots grown in soil testing at $text{pH}$ $7.0+$ cannot successfully pull those tiny nutritional building blocks out of the dirt dust.
Patchy Slow Growth: Seedlings struggle greatly but don’t look technically diseased. They just quit advancing along the reliable growth trajectory you expect while the plants surrounding them succeed.
Stubborn, Pale Leaves Despite Fertilizing: You add regular, age-appropriate plant food designed to make leaves dark and rich, but those efforts feel wasted. If you have addressed the Nitrogen / overall nutrition elsewhere, the problem is likely a structure block—often a wildly elevated $text{pH}$ brought on by over-using lime sources (including ash).
If performance monitoring shows the soil swung $>7.0$ sweet. The fix is simpler; you reverse alkalinity with manageable acidity.
How to Safely Lower Overly Alkaline Soil (Temporary Fixes)
If you identify symptom above, pull back totally on ash and try one of these safe, quick-aid measures:
-
-
- Apply Pine Needles or Composted Oak Leaves: These bulk organic materials break down yearly, gently imparting just $0.1$ to $0.3$ points back to the acid $text{pH}$ range yearly at best. They also create wonderful, loamy structure in a bed.
- Use Ammonium Sulfate: $20$ pounds of pure $text{N}$ in this chemical form releases sulfuric acids upon decay, serving only temporary pH reversal by buffering agents. Crucially, this feeds them nitrogen while lowering $text{pH} $—this is the only time aggressively applying a specialized fertilizer might treat an operational problem. Consult university guides closely about actual $text{LBS/acre}$ equivalents safely applicable in your small-plot context.
-
This measured approach mirrors taking precise cuts in joint woodworking: measure twice, cut once! Slow intervention saves the whole crop structure.
Beyond the Soil Plane: Other Uses for Post-Project Ash
You’re an efficient DIY guru; why stop at the tomato bed foundation? Once you ensure 10,000 parts safety compliance, clean, pure fireplace ash offers secondary gentle applications often very similar to agricultural lime used in farming for centuries.
Remember the primary caveats: hardwood only. Cold ash only. Check supplier safety if using purchased pellets.
A Gentle Compost Accelerator Booster
When tossed lightly (and infrequently—think monthly, NOT weekly) onto the raw components of your compost pile (greens and browns), soft powdery ash can slightly speed those high-heating microbial actions. The added potassium slightly ramps up microbial activity because it acts as mild chemical kick, helping decomposition proceed. Aim never to add more than a teaspoon depth mixed into three inches of existing carbon material. Apply cautiously to prevent locking up minerals.
Pest Deterrent near Vulnerable Beds
Anecdotally many seasoned gardeners relate great preventative success around younger, tender beds (not just tomatoes): Slugs famously despise crawling across sharp, dry dust. Dusting a protective thin crescent around your staked tomato setup can help deter soft-bodied ground feeders that tend to tunnel or climb your growing stakes early in the season. Don’t dust under a predicted rain shower though, as the wash-off is usually effective, but the remainder can become problematic slippery glaze when dried heavy. Avoid coating large stems during the main season growth.
This isn’t a fertilizer use; this purely serves as a light, inert barrier agent. Just sweep it away again near late summer when it simply dusts under leaves inertly.
Essential Tools and Records for Aspiring Ash Amendments
To apply wood ash successfully, minimize effort just like you minimize time spent fiddling with square clamps versus accurate measuring; efficiency reigns over guesswork. Gather these essential items right across from your tool tote or drying timber stack:
Chemical Soil Test Kit (Essential): Either a simple chemical comparison kit OR sending samples to your Cooperative Extension lab if you garden consistently across acreage beds. This determines need/dosage (Secret #1).
Freshwater Bucket/Sprayer: In case you accidentally concentrate ash pockets during light raking; you need rapid flushing water availability near the garden patch perimeter fence immediately afterwards.
A Dust Mask/Respirator: Handle the dusty material safely; ash can be very gritty entering nasal passages causing irritation during application. Never forget this simple safety perimeter tool used for orbital sanding goes double here when handling base dirt amendments.
Logbook $/Rake or Trowel: $ Keep neat records describing application rates found acceptable and what tomatoes responded best (e.g.,” $0.5text{ lb}$ tilled into a patch adjacent garden section $text{Feb 15}$, yields seem great 18/19!”). Consistency is crafting reliability.
The safety around the raw supply often relates very much to keeping your external sourcing records, something every careful builder excels at ensuring downstream quality.
Expert Tip: Before incorporating, wear disposable work gloves. Even small irritations cause huge issues when trying to run jigsaws later! Treat fine wood chemistry with the same detail as handling fine sandpaper grades. We want predictable chemical safety working down to the finest soil fraction!
Frequently Asked Questions for Beginner Gardeners (Quick Answers)
These short Q&A segments address the quick friction points many beginners have when wanting eco-friendly ways forward fast.
Q1: When is the best time of year to add wood ash near tomatoes?
Wood ash is a corrective, slow-acting soil treatment best applied in the early spring—$4text{ to } 6$ weeks before you plan to plant your carefully sourced seedlings outdoors. This dormant period ensures the necessary leaching and mild dissipation of alkaline impact fully dissolves into the environment, rather than shocking planted roots.
Q2: Can I substitute wood ash for a calcium supplement (like gypsum) to fight Blossom End Rot?
Partially; wood ash contains calcium, which supports $text{Ca}$ absorption necessary to stop Black End Rot. However, adding ash for the sole purpose of calcium delivery is unreliable because you might overdo other nutrient balancing ($text{pH}$). Use ash proactively because of mild acidity issues, and feed specifically for calcium deficiency if the rot already starts despite correction effort.
Q3: Is commercial barbecue briquette ash safe for tomatoes?
No. Store-bought lighter-fluid soaked or chemically bound charcoal briquettes are formulated totally differently than pure hardwood combustion products and should never go into garden soil. Stick to true byproduct ash only resulting from clean, untreated wood combustion. Check US EPA guidelines frequently concerning burn/disposal advice of household materials becoming environmental supplements near food crops.
Q4: Will adding wood ash attract bad pests to the garden or look weird throughout summer?
Pure, dry wood ash correctly watered in is inert; it will not typically attract major summer garden pests that look outside pests like raccoons toward food attractives. The only visible remnant should be incorporated dusty dirt after the incorporation period. Avoid thick, surface application coatings in summer weather near fruiting because dust blowing equals messy clean on ripe fruit skin.
Q5: If my potatoes are done for the year, can I dump leftover ash in that bed right now?
This depends significantly on what you test for next year’s rotation. Since potatoes utilize massive amounts of potash like the high needs tomatoes experience, areas previously heavily successful via high-potash feeding already have huge residual inputs. Best practice demands testing before you dump another amendment until you know next season’s chosen crop requires the same $pH$ adjustment. Otherwise, hold it; wait until spring planting time near a truly highly acidic soil test spot.
Q6: If I keep ash under a leaky tarp and it got wet, can I still use it near my zucchini patch later?
Avoid wetting ash before scheduled application to maintain structural integrity; wet ash becomes highly caustic. If ash got damp outdoors where rain infiltrated heavily, its effectiveness may reduce or it could rapidly leach usable components making an already hard-to-judge ratio completely unknown—best not to trust that portion for nutrient-based amendment efforts. Trash only chemically compromised, high-moisture or foreign-material-contaminated household ash products following local waste guidelines.
Q7: If I only burned pine, should I forget using that ash for my garden bed?
Even harder wood ash is superior. Pine burns efficiently but can leave different mineral residues. While pure fresh pine is not an absolute hard NO* like painted wood, gardeners should greatly decrease expectations for needed calcium raise and avoid frequent application rates. If you burned very little—it is typically okay in one small test sample, applied barely above ground-zero ($less than $half cup per $text{10ft} $ row)— but high alkaline yield potential is just generally lower overall compared to proper ash. If testing suggests acidity, use your scarce pine ash as a soil layer below other bulk non-alkaline compost.
Sealing the Project: A Confident Start to Greener Tomatoes
For us home craftsmen, we deeply respect turning limited resource streams into profitable and fulfilling end results. Seeing that little pile of fine, gray wood ash change the $text{pH}$ balance successfully just enough so that your heavy tomato harvest—sweetening thanks to that boosted Potassium—is amazing garden sense.
Wood ash is your secret, safe, slow-release potassium and calcium support—not your only major power source. Approach it scientifically: test your soil often (just $5$ minutes testing makes all the DIY difference in results), recognize that hardwoods are king, and apply in tiny amounts during pre-planting prep time only, away from established plants. Build your garden bed incrementally utilizing waste materials smartly, keeping safety registers tight on contaminant use.
With that essential knowledge locked down, you are equipped to use wood ash accurately. Now you need confidence in doing the precise follow-through applications during pruning and netting installation. Happy growing; your sweet tomatoes await your clean, reasoned, environmentally efficient growing methods! Don’t hesitate to rely on tested parameters next growing season, and watch those fruit yields improve significantly through foundational soil care.