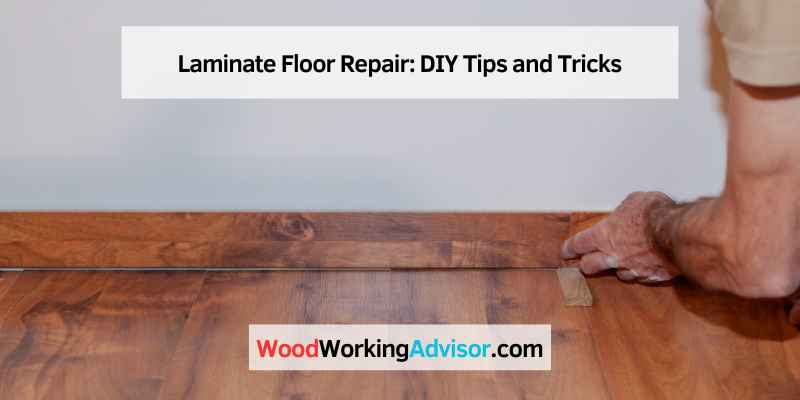
Laminate Floor Repair: DIY Tips and Tricks
To repair laminate floor, find a touch-up or repair kit in a matching color to the damaged area. It’s easy to touch up scratches with a floor repair kit or replace the damaged boards with new ones as needed.
Laminate flooring is an affordable and durable alternative to hardwood floors, but it is still susceptible to damage over time. Whether you have scratches, chips or water damage to your laminate flooring, there are simple ways to repair it with a little effort.
By following the tips and tricks from experts, you can restore your laminate flooring to its original beauty and prolong its lifespan.
Common Issues With Laminate Flooring
Laminate flooring can suffer from a number of common issues such as water damage, scratches, and chipping, but these problems can be repaired with a floor repair kit. You can easily fix your laminate floor by trimming the expansion gap, ensuring the underlay is fitted correctly, and fixing any water damage to the planks.
It’s also possible to replace a damaged flooring plank and repair chips. Trusted local services like Floor Coverings International Lakeway in Austin, TX can help you with laminate floor repairs.
Laminate flooring is a popular choice for homeowners because of its durability and low maintenance. However, like any flooring material, it is not impervious to damage. Here are some common issues with laminate flooring that you might encounter:
Scratches and Chips
One of the most common issues with laminate flooring is scratches and chips. These can be caused by furniture legs, pet claws, or hard-soled shoes. While minor scratches can be buffed out with a laminate repair kit, deeper scratches and chips may require replacing the affected plank. It is important to keep your laminate flooring clean by sweeping or vacuuming regularly to prevent debris from causing further damage.
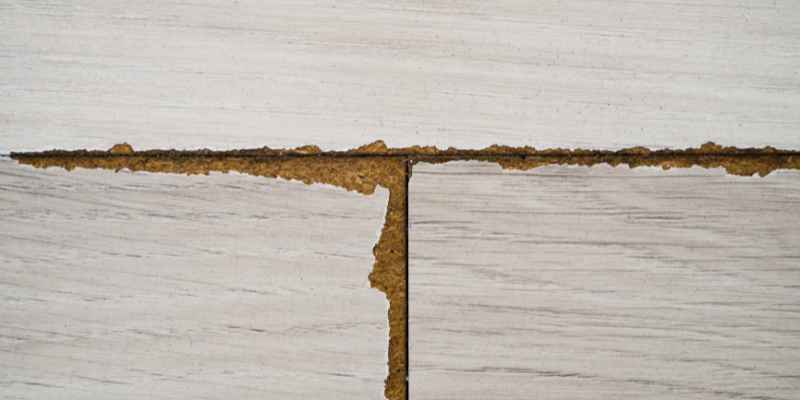
Water Damage
Excessive moisture or standing water can cause laminate flooring to warp, buckle, or swell. This can happen if a spill is not cleaned up promptly or if there is a plumbing issue in your home. If your laminate flooring has suffered water damage, it is important to address the problem immediately before the damage becomes more extensive. You may need to replace the affected planks or even the entire floor if the damage is severe enough.
Lifting and Buckling
Laminate flooring can lift or buckle if the subfloor is not level, or if there is excessive moisture or humidity in the room. This can cause gaps or bubbles to form between the planks, making the floor unstable and potentially hazardous. If you notice any lifting or buckling in your laminate flooring, you should have it inspected by a professional who can identify and address the underlying cause of the problem. In some cases, you may need to have the affected planks replaced.
In conclusion, while laminate flooring is a popular choice for its durability and low maintenance, it is not impervious to damage. Regular maintenance and prompt attention to any issues can help prolong the life of your laminate flooring and prevent further damage.
Diy Laminate Floor Repair Kits
When laminate flooring gets damaged, DIY laminate floor repair kits can be an effective solution. These kits usually come with putty in matching colors to mix and match with your floor, making it a simple and affordable way to repair chips or scratches.
With proper use, these kits can help keep your floors in top shape for a long time.
Diy Laminate Floor Repair Kits: How To Choose The Right Kit
When it comes to repairing minor damage on your laminate flooring, using a DIY laminate floor repair kit is an excellent option. However, with so many options available in the market, it can be challenging to choose the right one. Here are some tips for selecting the best kit for your needs:
- Choose a kit that matches the color and texture of your laminate flooring
- Consider the type and extent of the damage
- Check the contents of the kit to ensure it comes with all the necessary tools, including putty, filling material, and a scraper
Using The Kit To Repair Minor Damage
Once you have chosen the right kit, using it to repair minor damage is a straightforward process. Follow these steps:
- Clean the damaged area and remove any loose debris
- Apply the filling material or putty to the damaged area, ensuring an even application
- Use the scraper to smooth out the area and remove any excess material
- Allow the repair to dry according to the kit instructions
- Finally, sand the repaired area lightly to ensure a smooth finish
Replacing A Damaged Flooring Plank
If the damage to your laminate flooring is severe, you may need to replace a damaged plank. Follow these steps to replace it:
- Remove the damaged plank by carefully lifting it using a chisel or pliers, being careful not to damage the surrounding planks
- Measure the dimensions of the damaged plank and cut a new one to size. Remember to leave a 1/4 inch gap along the walls to allow for expansion
- Carefully insert the replacement plank into the floor, ensuring it is properly aligned and clicks into place
In conclusion, with the right laminate floor repair kit and a little bit of DIY know-how, you can quickly and easily fix minor damage to your laminate flooring, saving you time and money while keeping your floors looking their best.
Repairing Laminate Floor Scratches And Chips
Fixing scratches and chips on laminate floors is easy with a DIY repair kit. Find a matching color kit and follow the manufacturer’s instructions. Consider hiring a professional to assess and fix the problem if it’s more severe.
Laminate floors are known for their durability and resistance to scratches and chips, but accidents can still happen. If you have a laminate floor with scratches or chips, you don’t necessarily have to replace the entire floor. Repairing laminate floor scratches and chips can be a simple DIY project that saves you both time and money. In this section, we’ll show you how to assess the damage, the materials you’ll need, and the step-by-step process to repair your damaged laminate flooring.
Assessing The Damage
Before starting any repair work, you need to assess the damage to your laminate floor. If the scratches are shallow and not very noticeable, they can be easily repaired. If the scratches are deep or there are chips on your laminate floor, you might need to replace the damaged plank. Check the manufacturer’s instructions to see how to replace laminate planks. Also, inspect the surrounding planks to see if they are damaged or warped.
Materials Needed
The materials required for repairing laminate floor scratches and chips are readily available and affordable. Here are some materials you’ll need to repair the damage to your laminate floor:
- Laminate floor repair kit
- Clean cloth
- Vacuum cleaner
- Wood glue
Step-by-step Repair Process
Now that you have assessed the damage and gathered the required materials, it’s time to repair your damaged laminate floor. Here is a step-by-step process for fixing laminate floor scratches and chips:
- First, clean the damaged area and surrounding planks with a vacuum cleaner or broom to remove all the loose dirt and debris.
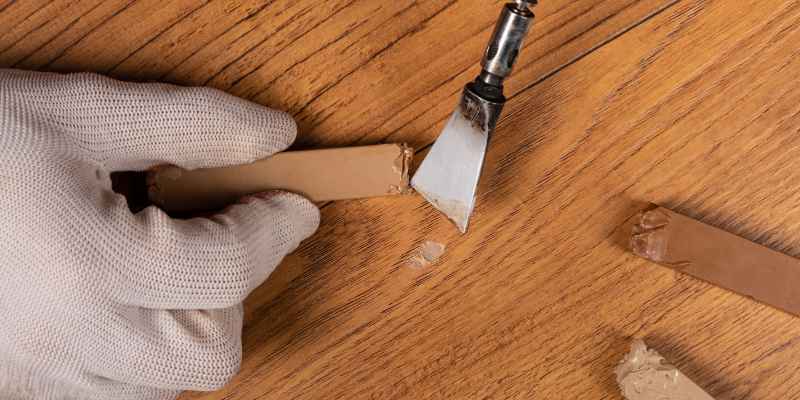
- Take the repair kit and mix the putty according to the instructions given in the kit.
- Use a putty knife to apply the putty over the damaged area, ensuring it is level with the surrounding floor.
- Wipe off any excess putty and let it dry for a few hours.
- Once the putty is dry, sand the surface with a fine-grit sandpaper until it’s smooth and leveled with the surrounding floor.
- Using a clean cloth, remove all sandpaper residue and dust from the area.
- Apply a small amount of wood glue on the edges of the repair area to seal the putty and avoid moisture from getting into the laminate floor.
- Let the glue dry, and you’ve successfully repaired your laminate floor!
In conclusion, laminate floor repair can be a simple DIY project with minimal effort and cost. By following these easy steps, you can effectively repair laminate floor scratches and chips, keeping your floors looking new and polished.
Repairing Water Damaged Laminate Flooring
Repairing water damaged laminate flooring can be a tricky endeavor. It’s important to take swift action and remove any excess water immediately. You may need to replace a portion of the damaged flooring with a matching plank or consider a complete replacement depending on the extent of the damage.
ow to repair water damaged laminate flooring can save you from expensive replacements. Water damages the fiberboard core and the laminate surface of your flooring, which can lead to swelling, warping, and separation of planks. But before you start the repair process, you need to assess the damage, gather the necessary materials, and follow the step-by-step repair process for a successful outcome. Let’s dive into each of these steps in detail.
Assessing The Damage
Before you start repairing the water damaged laminate flooring, you need to determine the extent of the damage. If the damage is severe, you might have to replace a few planks or sections of the flooring. However, if the damage is minor, you can repair it instead of replacing it. Check if the boards are warped or bubbled, or if there are any discolorations or mold growth. If you notice any of these signs, it’s an indication that your laminate flooring is water damaged and needs repair.
Materials Needed
To repair the water damaged laminate flooring, you need some materials, which include:
- Laminate floor repair kit in a matching color
- Replacement planks (if necessary)
- Circular saw or a handsaw
- Replacement underlayment (if necessary)
- Hammer and chisel
- Carpenter’s glue
- Weighing tool such as a stack of books or a heavy object
Step-by-step Repair Process
Once you have assessed the damage and gathered the necessary materials, you can start the repair process. Here are the steps:
- Remove the water-damaged boards or planks using a circular saw or handsaw, depending on the complexity of the job.
- Remove the underlayment and clean the subfloor surface thoroughly.
- Replace the underlayment with a new one if necessary.
- Cut replacement planks to match the size of the ones you removed.
- Apply carpenter’s glue to the tongue and groove of the new planks and insert them into place.
- Place a heavy object on the replaced area and leave it for 24 hours to ensure proper bonding.
- Trim the excess part of the new planks using a circular saw or handsaw and sand the rough edges.
Follow these steps, and you can repair water damaged laminate flooring like a pro. With some effort and patience, you can save money and time while restoring your floor to its former glory.
Fixing Lifting And Buckling Laminate Flooring
Fixing lifting and buckling on laminate flooring can help keep your floors in top shape. Ensure your underlay is fitted correctly, trim your expansion gap around the room, fix any water damage and seek the help of a trusted expert to assess and fix the problem.
You can also use a floor repair kit for scratches and chips.
Laminate flooring often gets damaged due to various reasons such as moisture, heavy furniture, and improper installation. Lifting and buckling is a common problem that affects the appearance and functionality of your laminate flooring. If you notice any lifting or buckling, it is important to assess the problem before it gets worse. Here are some steps to fix lifting and buckling laminate flooring.
Assessing the Problem
Before repairing your laminate flooring, you should assess the extent of the damage. Check if the lifting or buckling is caused by moisture or missing expansion gaps. Moisture can cause swelling and warping of the planks, while missing expansion gaps limit the movement of the planks, leading to buckling.
Trimming the Expansion Gap
Trimming the expansion gap around the perimeter of the room can help release the tension on the planks and prevent buckling. Use a circular saw or handsaw to cut a small section of the plank adjacent to the wall, followed by the baseboard. Make sure to leave a gap of at least 1/4 inch to allow for expansion and contraction.
Checking the Underlay
The underlay plays a crucial role in the durability and stability of your laminate flooring. Make sure it is properly installed and provides a moisture barrier against concrete subfloors. Replace any damaged or missing sections of the underlay, and use a sealant to close the gaps to keep moisture out.
Fixing Water Damage
If your laminate flooring has water damage, it is important to fix it promptly to prevent further damage. Remove the damaged planks and dry the subfloor thoroughly before installing new planks. Use a waterproof laminate flooring sealant around the edges of the planks and under the baseboards to prevent moisture from seeping in.
In conclusion, fixing lifting and buckling laminate flooring requires proper assessment of the problem, trimming of the expansion gap, checking the underlay, and fixing water damage. If you are unsure of how to repair your laminate flooring, it is best to seek the help of a professional. With these steps, you can restore the beauty and functionality of your laminate flooring and avoid costly repairs in the future.
Preventing Future Laminate Flooring Damage
If you have invested in laminate flooring, you will want to ensure that it lasts as long as possible. The good news is that with proper maintenance and care, laminate flooring can last for many years. In this section, we will cover some essential techniques to help prevent future damage.
Proper Maintenance Techniques
One of the best preventative measures you can take to protect your laminate flooring is by implementing proper maintenance techniques. Here are some tips to help you maintain your laminate flooring:
- Regularly clean your laminate flooring with a damp mop or cloth
- Never use wet mops or steam cleaners on your laminate flooring, as this can cause damage
- Avoid using abrasive cleaning products or tools that can scratch your laminate flooring
- Immediately clean up any spills or stains to prevent moisture damage
- Use furniture pads or floor protectors under furniture legs to avoid scratches and dents when moving furniture
- Keep your laminate flooring dry by promptly drying up any spills or leaks
Avoiding Damage When Moving Furniture
Moving furniture can cause scratches and dents to your laminate flooring if not done carefully. Here are some tips to help you avoid damaging your laminate flooring when moving furniture:
- Always lift and carry furniture when moving it, instead of dragging it across the laminate flooring
- Use furniture sliders or lift the furniture and place it on a dolly or a piece of carpet to move it across the laminate flooring
- Avoid sliding heavy furniture on the laminate flooring as this can leave scratches and damage the flooring
- Use floor protectors under the furniture legs to avoid dents and scratches when moving furniture
By following these simple tips, you can help prevent any future damage to your laminate flooring, and ensure it lasts for many years to come.
Frequently Asked Questions On Laminate Floor Repair
Can Laminate Flooring Be Repaired?
Yes, laminate flooring can be repaired. Scratches can be touched up with a floor repair kit that can match the color of your flooring. Damaged planks can also be replaced by cutting out the damaged board and installing a new one.
It is also recommended to assess and fix the underlying issue causing the damage, such as water damage or incorrect underlay installation.
How Do You Fix A Laminate Floor That Is Lifting?
To fix a lifting laminate floor, assess and fix any issues causing water damage, ensure proper underlay installation, and trim the expansion gap. Get a trusted expert to help you with the assessment and repair. You can also replace the damaged plank or use a repair kit that matches your floor’s color.
Can You Replace One Piece Of Laminate Flooring?
Yes, you can replace one piece of laminate flooring. To do so, you will need to remove the damaged piece, purchase a replacement piece that matches your existing flooring, and install the new piece according to the manufacturer’s instructions. It is recommended to get a trusted expert to help you with this process.
How Do You Repair Chipped Laminate Flooring?
To repair chipped laminate flooring, get a repair kit in a matching color and apply it to the damaged area. If the damage is severe, you may need to replace the damaged boards. Check your underlay is fitted correctly, fix any water damage, and trim your expansion gap around the room.
Conclusion
Laminate floors can be easily repaired with the right tools and a little bit of know-how. Whether it’s scratches, water damage, or chipped planks, there are various methods to fix the issue. It’s always a good idea to seek professional help for bigger repairs or if you are unsure about the process.
By following a few simple steps, your laminate floor can look as good as new in no time.