
How to Master Perfect 4X4 Cuts with Your Circular Saw
To cut a 4×4 with a circular saw: Mark the desired cut line on the wood. Adjust the saw blade depth to about 1/8 inch deeper than the thickness of the wood.
Hold the saw firmly and slowly guide it along the cut line, making sure to keep both hands on the saw for stability and control. Cutting a 4×4 with a circular saw may seem like a daunting task, but with the right technique, it can be done safely and accurately.
Whether you are a DIY enthusiast or a professional woodworker, knowing how to cut a 4×4 efficiently can save you time and effort. We will guide you through the steps to effectively cut a 4×4 using a circular saw. From marking the cut line to ensuring proper blade depth, we will cover all the essential details for a successful cut. So, let’s dive in and discover how to cut a 4×4 with a circular saw like a pro.
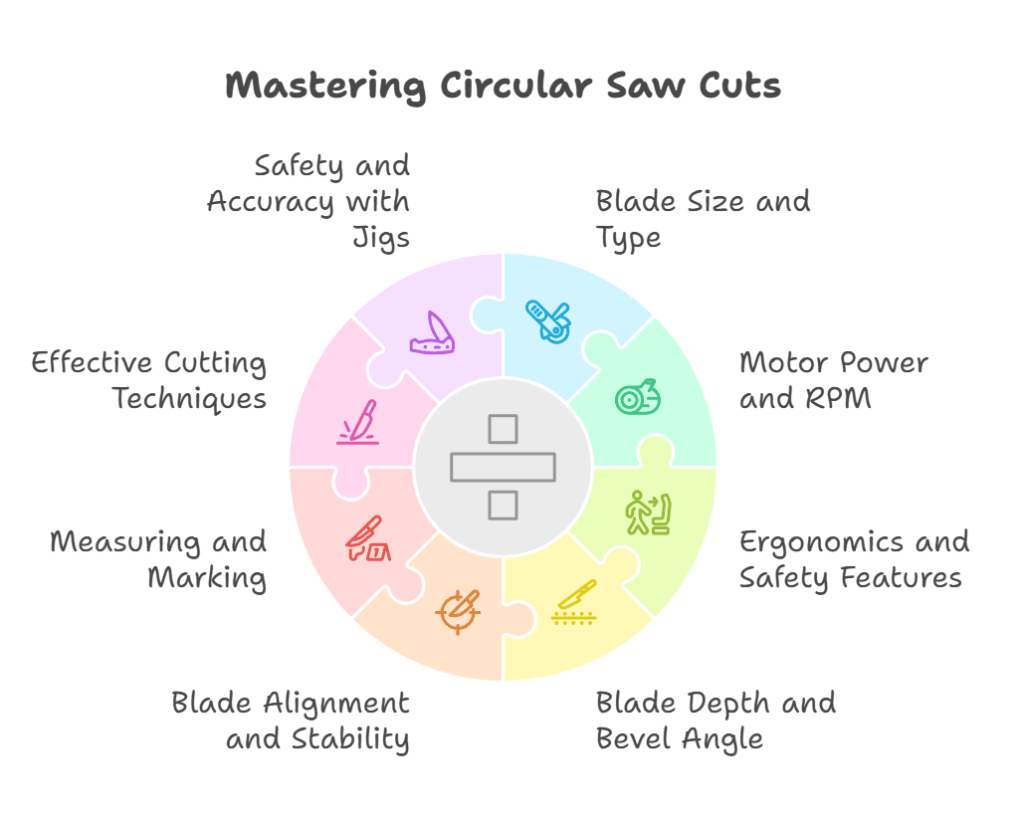
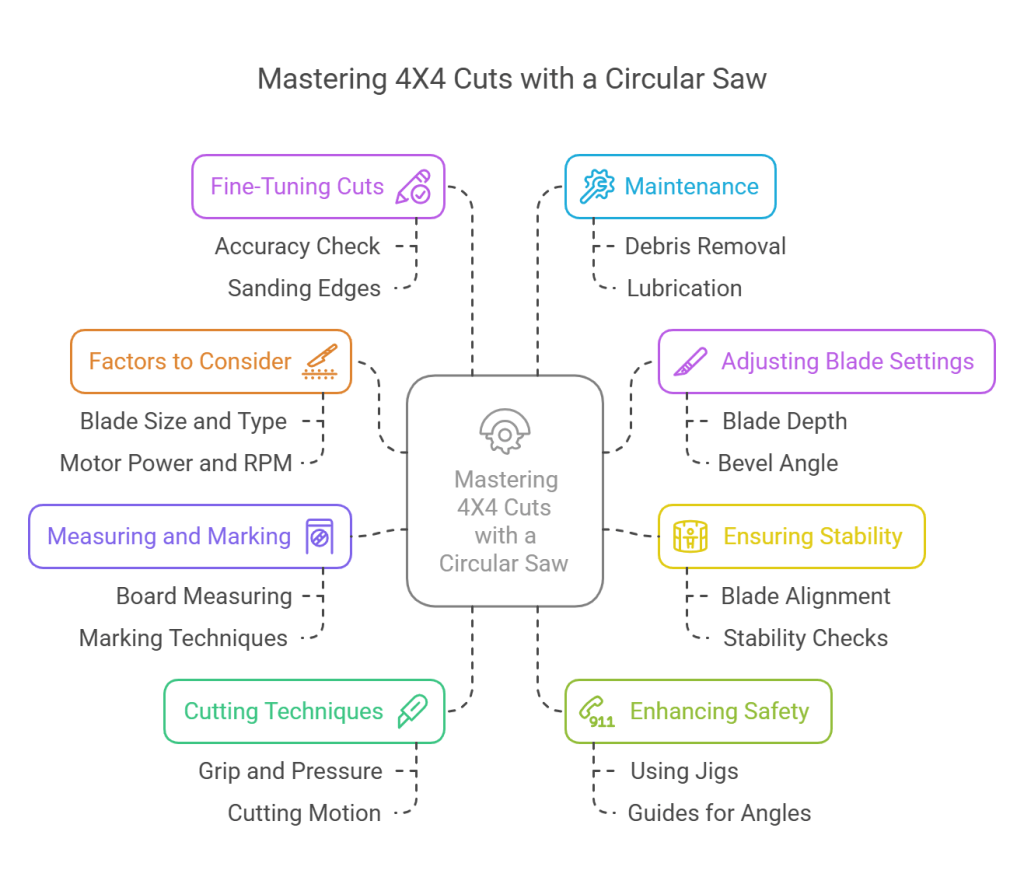
Factors To Consider For Efficient And Precise Cuts
To efficiently and accurately cut a 4×4 with a circular saw, there are several factors you should consider. These include using the appropriate blade, ensuring a stable work surface, measuring and marking the cut line, and using proper techniques like maintaining a steady grip and following a straight line.
When it comes to cutting 4×4 lumber with a circular saw, there are several important factors you need to consider in order to achieve efficient and precise cuts. Making the right choices when it comes to the following elements will not only help you complete your project successfully but also ensure your safety.
Blade Size And Type
To achieve accurate cuts when working with 4×4 lumber, the size and type of the blade you choose for your circular saw are crucial. Here are some factors to consider:
- Blade size: Opt for a circular saw blade with a diameter of at least 7 1/4 inches to ensure that it can cut through the entire thickness of the 4×4 lumber effectively.
- Tooth count and configuration: For clean and smooth cuts, choose a blade with a higher tooth count. Blades with alternate top bevel (ATB) or triple-chip grind (TCG) tooth configurations are ideal for cutting wood.
- Carbide-tipped blades: Consider investing in carbide-tipped blades as they are more durable and can withstand the rigors of cutting through dense lumber like 4x4s.
Motor Power And Rpm
The power and speed of the circular saw’s motor directly influence its cutting performance. Here’s what you need to know:
- Motor power: Opt for a circular saw with a motor power rating of at least 15 amps to ensure sufficient cutting power. A higher horsepower motor will make your cuts more effortless and decrease the chances of stalling.
- RPM (Rotations Per Minute): Choose a circular saw with an adjustable RPM setting. This allows you to adjust the speed of the blade based on the type and thickness of the 4×4 lumber you are cutting. Higher RPMs are generally better for smoother cuts.
Ergonomics And Safety Features
Aside from the technical specifications, the ergonomics, and safety features of a circular saw play a significant role in ensuring both efficient and safe cuts. Consider the following:
- Grip and handle design: Look for a circular saw that offers a comfortable grip and ergonomic handle design. This will provide better control and reduce fatigue during prolonged cutting sessions.
- Safety features: Choose a circular saw that comes equipped with essential safety features like a blade guard, a blade lock, and a safety switch. These features are designed to prevent accidents and protect you from potential hazards.
Achieving efficient and precise cuts when working with 4×4 lumber requires careful consideration of blade size and type, motor power and RPM, as well as the ergonomics and safety features of the circular saw. By keeping these factors in mind, you can ensure optimal performance, accurate cuts, and a safer woodworking experience.

Credit: www.amazon.com
Adjusting Blade Depth And Bevel Angle
To cut a 4×4 with a circular saw, adjust the blade depth to slightly more than the thickness of the wood. Set the bevel angle to zero degrees for a straight cut, or adjust for angled cuts. Remember to always prioritize safety and wear protective gear.
Determining The Appropriate Depth
When it comes to cutting 4×4 with a circular saw, one of the most crucial factors to consider is the depth of the blade. Determining the appropriate depth ensures a clean and accurate cut. Here are some steps to help you get it right:
Keep in mind a standard 7-1/4 inch blade tops out around 2-1/2 inches deep — well short of a 4×4’s full 3.5-inch thickness — so see our breakdown of exactly how much a 7-1/4 inch blade can cut on a 4×4 before assuming one pass will finish the job.
- Measure the thickness of the 4×4 piece you want to cut. This will help you determine the required blade depth.
- Adjust the blade depth on your circular saw to match the thickness of the 4×4. Most circular saws have a lever or knob that allows you to set the depth.
- Place the circular saw on a flat surface, aligning the blade with the marked cutting line on the 4×4.
- Hold the saw firmly with both hands and switch it on.
- Slowly lower the blade onto the 4×4, allowing it to penetrate the wood gradually.
- Go at a steady pace and maintain control over the saw throughout the cutting process.
- Once you’ve completed the cut, switch off the saw and wait for the blade to stop spinning before removing it from the wood.
Setting the bevel angle accurately:
In addition to adjusting the blade depth, setting the bevel angle correctly is essential for angled cuts on a 4×4 with a circular saw. Follow these steps to ensure precise bevel cuts:
- Determine the desired bevel angle for the cut.
- Locate the bevel adjustment lever or knob on your circular saw. This is usually found on the front or back of the saw near the blade.
- Loosen the lever or turn the knob to allow the base plate to tilt.
- Use a protractor or angle guide to measure and set the desired bevel angle. Ensure it aligns with the marked cutting line on the 4×4.
- Once the bevel angle is set, tighten the lever or knob to secure the base plate in place.
- Practice the cut on a scrap piece of wood to ensure the desired bevel angle is achieved.
- After verifying the accuracy of the bevel angle, proceed to make the cut on the actual 4×4 piece.
Remember, adjusting the blade depth and bevel angle accurately are vital for achieving clean and precise cuts when working with a circular saw. Take your time, follow these steps, and always prioritize safety when operating power tools.
Ensuring Blade Alignment And Stability
To ensure accurate cuts when using a circular saw on 4×4 lumber, it’s crucial to maintain proper blade alignment and stability. This prevents rough edges and promotes clean, precise cuts.
Aligning The Blade Parallel To The Saw Base
Before cutting a 4×4 with a circular saw, it is crucial to ensure that the blade is aligned parallel to the saw base. This alignment will help you achieve accurate and precise cuts. Here are the steps you can follow to align the blade properly:
Step 1: Start by unplugging the circular saw and preparing a flat and stable surface to work on.
Step 2: Loosen the bevel lock lever or knob on your circular saw to release the base and expose the blade.
Step 3: Place a speed square or any straight edge against the blade and parallel to the saw’s base.
Step 4: Gradually adjust the bevel lock lever or knob until the blade and the straight edge align perfectly.
Step 5: Tighten the bevel lock lever or knob to secure the blade and maintain its alignment.
Ensuring that the blade is parallel to the saw base is crucial for making accurate and safe cuts. Take the time to align the blade properly before moving on to the next steps.
Checking For Any Wobbling Or Vibrations
To ensure stability during the cutting process, it is essential to check for any wobbling or vibrations in the circular saw. These can lead to inaccurate cuts or even pose a safety risk. Here’s how you can check for wobbling or vibrations:
Step 1: Ensure the circular saw is placed on a stable surface and securely held.
Step 2: Start the saw and slowly increase the speed to its maximum level.
Step 3: Watch out for any visible wobbling or vibrations in the blade while it is spinning.
Step 4: If you notice any wobbling or vibrations, immediately turn off the saw and unplug it.
Step 5: Check the blade for any damage or debris that may be causing the issue.
Step 6: If the blade appears to be in good condition, recheck the blade alignment to ensure it is parallel to the saw base.
Step 7: Tighten any loose screws or parts on the circular saw before attempting to cut again.
Regularly checking for any wobbling or vibrations in your circular saw is important to maintain stability and ensure accurate cuts. By following these steps, you can help prevent any potential issues and ensure a smooth cutting experience.
Measuring And Marking The 4X4 Board
Learn how to measure and mark a 4×4 board accurately before cutting it with a circular saw. Master this essential technique for successful woodworking projects.
Accurately measuring and marking the 4×4 board is crucial before making your cut with a circular saw. This ensures precision and helps achieve the desired outcome. Here are the steps to follow:
Using square and measuring tape for accurate measurements:
- Begin by laying the 4×4 board on a stable surface, ensuring it is free from any obstructions.
- Place a square against one end of the board to make sure it is perfectly perpendicular to the rest of the board.
- Use a measuring tape to determine the desired length of your cut. Take your time to double-check the measurements, as precision is key for a clean cut.
Marking the cut line clearly:
- Once you have determined the correct length, make a small mark on the board using a pencil or marker.
- To ensure accuracy, make a mark on all four sides of the board, as this helps align the saw blade precisely.
- Connect the marks on all four sides using a straightedge or a square. This creates a clear and visible line that guides the saw during the cutting process.
Remember, taking the time to measure and mark the 4×4 board accurately before making your cut is essential for achieving a clean and precise result. With these steps in mind, you can confidently move on to the next stage of cutting the 4×4 board with a circular saw.
Employing Effective Cutting Techniques
Discover how to effectively cut a 4X4 with a circular saw using precise and efficient techniques. Master the art of achieving clean and accurate cuts with these step-by-step instructions.
Maintaining A Firm Grip On The Saw
To ensure safety and precision while cutting a 4×4 with a circular saw, it is crucial to maintain a firm grip on the tool. By doing so, you reduce the risk of accidents and achieve better control over the cutting process.
Here are a few tips to help you maintain a secure grip:
- Hold the circular saw with both hands, making sure your dominant hand firmly grips the main handle while your other hand holds the auxiliary handle.
- Position your thumbs on top of the saw, parallel to the handle, providing additional stability.
- Keep your arms extended and elbows slightly bent to maintain balance and control throughout the cut.
- Wear appropriate protective gloves to enhance your grip and minimize vibrations.
- Maintain proper body posture, with your feet shoulder-width apart and firmly planted on the ground.
Applying Steady And Controlled Pressure
Another vital aspect of cutting a 4×4 with a circular saw is applying steady and controlled pressure. This helps you achieve clean and accurate cuts, preventing any damage to the material or the saw itself. Follow these guidelines to apply the right pressure:
- Start by aligning the circular saw’s blade with the marked cutting line on the 4×4.
- Begin the cut with a slow and smooth motion, allowing the blade to penetrate the wood gradually.
- Apply constant but gentle pressure on the saw, letting the tool do the work rather than forcing it.
- Maintain a consistent cutting speed throughout the process, avoiding sudden changes that could lead to uneven cuts.
- Remember to release the pressure once you’ve finished the cut to prevent any kickback.
Utilizing The Proper Cutting Motion
Using the correct cutting motion is crucial to ensuring clean and precise cuts when working with a circular saw. By following the proper technique, you can minimize splintering and achieve smooth results. Here’s how to do it:
- Before starting the cut, adjust the saw’s cutting depth to match the thickness of the 4×4.
- Begin the cut from the edge of the wood, allowing the blade to make initial contact smoothly.
- Use a smooth, continuous motion to guide the circular saw along the marked cutting line.
- Avoid leaning into the saw or exerting excessive pressure, as this can throw off the cutting line and compromise the accuracy of the cut.
- Maintain a steady pace while moving the saw forward, ensuring a controlled and even cut.
- Finally, follow through until the blade has completely exited the wood to prevent any tear-out on the exit side of the cut.
By maintaining a firm grip, applying steady pressure, and utilizing the correct cutting motion, you can confidently cut a 4×4 with a circular saw. Practice these techniques, prioritize safety, and enjoy the precise cuts you achieve. Happy cutting!

Enhancing Safety And Accuracy With Jigs And Guides
Discover how to enhance safety and accuracy while cutting 4x4s with a circular saw by using jigs and guides. These essential tools provide stability and precision, making your woodworking projects easier and more efficient. Say goodbye to uneven or wobbly cuts, and enjoy greater confidence in your craftsmanship.
When it comes to cutting 4x4s with a circular saw, using jigs and guides can greatly enhance both safety and accuracy. These tools help you maintain a straight and precise cut, ensuring your project turns out just right. In this section, we will explore two essential methods for using jigs and guides to achieve excellent results: creating a custom saw guide for straight and precise cuts, and utilizing a clamp-on guide for angle cuts.
Creating A Custom Saw Guide For Straight And Precise Cuts:
- A custom saw guide allows you to make accurate and straight cuts on your 4x4s, ensuring precision every time.
- Start by measuring the desired width of your cut and marking it on the 4×4 with a pencil or a marker.
- Attach a straight piece of scrap wood or plywood to the 4×4, aligning it with the marked line.
- Secure the guide firmly using clamps, ensuring it stays in place during the cutting process.
- Position the circular saw against the guide, making sure the blade aligns perfectly with the marked line.
- Start the saw and guide it steadily along the wood, allowing the guide to keep the saw in line and create a straight and precise cut.
Using A Clamp-On Guide For Angle Cuts:
- A clamp-on guide is particularly useful when making angle cuts on your 4x4s, providing stability and accuracy.
- Start by setting the desired angle on your circular saw’s bevel adjustment, making sure it is secure.
- Measure and mark the starting and ending points of the angle cut on the 4×4 with a pencil or a marker.
- Attach the clamp-on guide to the 4×4, aligning it with the marked line for the angle cut.
- Tighten the clamps to secure the guide in place and ensure it remains stable throughout the cutting process.
- Position the circular saw against the guide, ensuring that the blade aligns perfectly with the marked line.
- Start the saw and guide it steadily along the wood, allowing the clamp-on guide to keep the saw in line and create an accurate angle cut.
Remember, using jigs and guides not only enhances safety but also improves the accuracy of your cuts when working with a circular saw. Be sure to follow these methods carefully to achieve straight and precise results, making your projects shine.
Fine-Tuning And Finishing The 4X4 Cuts
Discover the effective technique for cutting 4×4 lumber with a circular saw. Master the art of fine-tuning and finishing your cuts with precision, ensuring a clean and professional result.
After making the initial cuts on your 4×4 using a circular saw, it’s time to fine-tune and finish those cuts to ensure accuracy and smoothness. This step is crucial to achieve the desired outcome for your project. Here’s what you need to do:
Checking The Cut For Accuracy And Smoothness:
- Inspect the cut line: Carefully examine the cut line to ensure it is straight and aligned with your markings. Any deviations should be addressed before moving forward.
- Measure for precision: Use a measuring tape or ruler to confirm that your 4×4 is cut to the desired dimensions. This will help you avoid any setbacks later on.
- Check for rough edges: Run your hand along the cut edges to feel for any roughness. These can be smoothed out to enhance the overall finish of your project.
Sanding Or Filing Any Rough Edges:
- Begin with coarse sandpaper: Start by using a coarse-grit sandpaper to remove any rough areas on the cut edges. This will help even out the surface.
- Follow with finer grits: Gradually switch to finer grit sandpaper to achieve a smoother finish. This process will eliminate any remaining roughness and create a polished look.
- Be mindful of corners: Pay extra attention to the corners of your 4×4, as they tend to have sharper edges. Carefully sand or file these areas until they are smooth and safe to handle.
By fine-tuning and finishing your 4×4 cuts, you ensure that your project will have accurate dimensions, smooth edges, and an overall professional appearance. Take the time to complete this step, as it can make a significant difference in the final result.
Happy crafting!
Cleaning And Lubricating The Saw Regularly
Regular cleaning and lubrication of your circular saw is vital for optimal performance when cutting 4×4 wood. This simple maintenance routine helps prolong the lifespan of your saw, ensuring smooth and efficient cuts every time.
Regular cleaning and lubrication of your circular saw is crucial to maintain its performance and prolong its lifespan. Over time, debris and dust can accumulate on the saw’s surfaces and moving parts, hindering its efficiency. By following these steps, you can effectively clean and lubricate your circular saw:
Removing Debris And Dust Buildup
- Inspect the saw for any visible debris, such as wood chips or sawdust. Use a brush or compressed air to remove these particles from the surface.
- Pay special attention to the saw’s vents and motor housing, as dust can accumulate in these areas. Utilize a small brush or a compressed air canister to thoroughly clean these components.
- Take an extra moment to inspect the saw’s blade guard and depth adjustments, ensuring they are free from any obstructions or build-up.
- If necessary, remove the blade from the saw and clean it separately. Use a blade cleaner or a mixture of water and mild soap to gently scrub away any residue. Be cautious not to damage the blade during this process.
Applying Lubrication To Moving Parts
- Identify the key moving components of the saw that require lubrication, such as the blade arbor, depth adjustment mechanisms, and pivot points.
- Choose a high-quality lubricant designed specifically for power tools, such as a silicone-based oil or a dry lubricant spray.
- Apply a small amount of lubricant to each moving part, ensuring even coverage. Be careful not to over-lubricate, as excess oil or spray can attract dust and debris.
- Work the lubricant into the moving parts by manually operating the saw, allowing the oil to distribute evenly.
- Wipe away any excess lubricant with a clean cloth to prevent buildup and ensure a clean working environment.
By regularly cleaning and lubricating your circular saw, you can maintain its efficiency and prevent premature wear or damage. Taking these proactive steps will not only enhance your cutting experience but also extend the longevity of your saw. Remember to follow the manufacturer’s guidelines when selecting lubricant and performing maintenance.
Your circular saw will thank you with smooth and precise cuts for years to come.
Properly Storing The Circular Saw
To properly store your circular saw, make sure to keep it in a dry and secure location, preferably in a case or on a designated shelf. This will protect the saw’s blade and ensure its longevity. As for cutting 4x4s with a circular saw, use a carbide-tipped blade, measure and mark the cut accurately, and apply steady and controlled pressure during the cutting process for clean and precise results.
It’s essential to store your circular saw properly to ensure its longevity and maintain its performance. Here are some guidelines to follow for storing your circular saw:
Using a case or storage system to protect the saw:
- Invest in a sturdy case or storage system specifically designed for circular saws. This will protect the saw from dust, moisture, and accidental damage.
- Ensure that the case or storage system has foam padding or compartments to keep the saw securely in place, preventing any movement during transportation or storage.
- Make sure to clean the saw thoroughly and remove any sawdust or debris before placing it in the case or storage system.
- Store any additional accessories, such as extra blades or wrenches, in the designated compartments provided in the case. This will help keep everything organized and easily accessible.
Storing the saw in a dry and secure location:
- Find a dry and well-ventilated area to store your circular saw. Moisture can cause rust or damage to the saw’s motor, so it’s imperative to keep it away from humid or damp environments.
- Avoid storing the saw near any water sources or areas prone to leaks, such as basements or attics.
- If possible, store the saw in a locked cabinet or toolbox to prevent unauthorized access and ensure its security.
- Consider using a wall-mounted storage rack specifically designed for circular saws. This will not only save space but also provide easy access whenever you need to use it.
Remember, proper storage of your circular saw will enhance its longevity and maintain its performance, ensuring that it always works efficiently when you need it. By investing in a case or storage system and storing the saw in a dry and secure location, you can keep your circular saw in optimal condition for years to come.

Frequently Asked Questions On How To Cut 4X4 With Circular Saw
How Do You Cut A 4X4 With A Circular Saw?
To cut a 4×4 with a circular saw, start by measuring and marking the cut line. Set the blade depth to just below the thickness of the 4×4. Place the saw on the wood, aligning the blade with the cut line.
Hold the saw firmly and slowly push it through the wood, following the marked line. Always wear safety goggles and gloves when working with power tools.
What Type Of Blade Do I Need To Cut A 4X4 With A Circular Saw?
To cut a 4×4 with a circular saw, you’ll need a blade specifically designed for cutting through wood. Look for a blade with a high tooth count, like 24 to 40 teeth per inch, as this will provide cleaner and smoother cuts.
Additionally, ensure that the blade is suitable for the size of your circular saw and has a carbide tip for extended durability.
Can I Use A Regular Circular Saw To Cut A 4X4?
Yes, you can use a regular circular saw to cut a 4×4. However, it is important to ensure that the saw’s motor is powerful enough to handle the task and that the blade is suitable for cutting through wood. Additionally, always practice proper safety measures, such as wearing safety goggles and using a proper cutting guide, to ensure a successful and safe cut.
Conclusion
To sum up, cutting a 4×4 with a circular saw is a task that can easily be accomplished by following a few simple steps. First, ensure you have the right blade for the job and secure your workpiece firmly in place.
Remember to take the necessary safety precautions and wear protective gear. Once you are ready, make slow and steady cuts, allowing the saw to do the work. Take your time and be patient to avoid any mishaps. By adhering to these guidelines, you can confidently tackle any 4×4 cutting project with a circular saw.
Whether you are a seasoned DIY enthusiast or a beginner, this method is efficient and effective. Remember to prioritize safety and follow the recommended techniques to achieve precise and clean cuts. Now that you have the knowledge and tools, go ahead and put them to good use.
Happy cutting!