Polyurethane Oil vs. Water Based: A Beginner’s Guide
I remember my first woodworking project—a wobbly little shelf for my books. I wanted it to shine and last forever, but picking between polyurethane oil vs water based confused me. Should I choose the warm glow of oil-based or the clear, quick-drying water-based? Don’t worry if you’re feeling the same way! In this guide, I’ll explain both in simple words, share easy tips from my experience, and help you choose the right one for your project—whether it’s a table, floor, or craft. Let’s dive in and make your wood look amazing!
What Is Polyurethane?
Polyurethane is a clear liquid you brush or spray on wood to protect it. It’s like a shield that stops scratches, water, and stains. There are two main types: oil-based polyurethane and water-based polyurethane. Each works differently, and picking one depends on your project. I learned this the hard way when I used the wrong one on my shelf and had to sand it off!
Why Polyurethane Oil vs Water Based Matters
Oil-based polyurethane uses oil to carry the protective stuff. It gives wood a warm, golden glow but takes longer to dry. Water-based polyurethane uses water instead. It dries clear and fast but might need more coats. Knowing the difference helps you get the look and strength you want. For example, I used oil-based for a cozy table and water-based for a bright white shelf.
Oil-Based Polyurethane: The Basics
Oil-based polyurethane is thick and strong. It’s great for things like tables or floors that get a lot of use. Here’s what you need to know:
- Look: Adds a warm, amber glow to wood.
- Dry Time: Takes 12–24 hours per coat to dry.
- Smell: Strong and stinky, so you need good air flow.
When I refinished my dining table, oil-based gave it a rich, classic look. But I had to open all the windows because of the smell!
Water-Based Polyurethane: The Basics
Water-based polyurethane is thinner and clearer. It’s perfect for projects where you want the wood’s natural color to shine. Here’s the scoop:
- Look: Dries clear, no yellow tint.
- Dry Time: Dries in 2–4 hours, so you can add coats faster.
- Smell: Barely any smell, safe for indoor use.
I used water-based on a white-painted box. It kept the color bright and was easy to clean up with soap and water.
Comparing Oil vs Water Based: A Simple Table
Here’s a quick look at how they stack up. This table helped me decide for my projects!
Table 1: Oil vs Water-Based Polyurethane Comparison
| Feature | Oil-Based Polyurethane | Water-Based Polyurethane |
|---|---|---|
| Color | Warm, amber glow | Clear, no yellowing |
| Dry Time | 12–24 hours per coat | 2–4 hours per coat |
| Smell | Strong, needs ventilation | Low, almost odorless |
| Durability | Very tough, great for floors | Tough, but may need more coats |
| Cost | Cheaper, ~$15/gallon | Pricier, ~$30/gallon |
Caption: Use this table to pick the best polyurethane for your project.
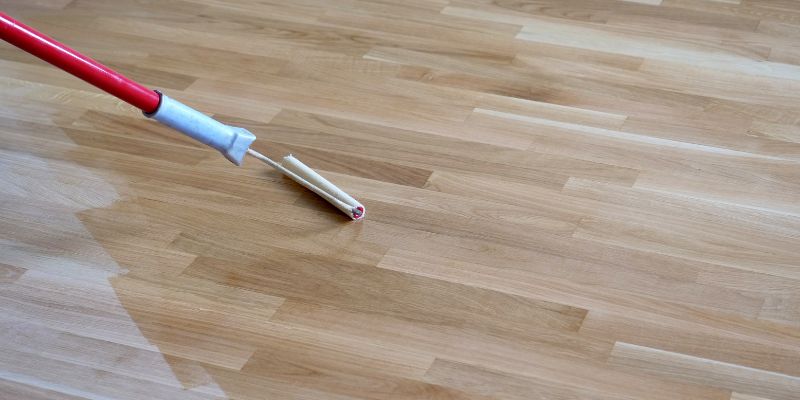
How to Apply Polyurethane: Easy Steps
Applying polyurethane is simple if you follow these steps. I’ve done this on tables, shelves, and even a birdhouse! Here’s how:
- Sand the Wood: Use sandpaper to make it smooth. I start with 120-grit, then 220-grit.
- Clean the Surface: Wipe away dust with a damp cloth. Dust ruins the finish!
- Apply First Coat: Use a brush or rag. Go slow to avoid bubbles.
- Wait and Sand: Let it dry (check the can for times), then sand lightly with 220-grit.
- Add More Coats: Two to three for oil-based, four to six for water-based.
Tip: Always work in a clean, well-lit space. Dust is your enemy!
Tools You Need for Polyurethane
You don’t need fancy tools. Here’s what I use:
- Brush or Rag: A foam brush works for both types. Rags are great for wiping on thin coats.
- Sandpaper: 120-grit and 220-grit for smoothing.
- Cleaner: Mineral spirits for oil-based, soap and water for water-based.
- Gloves and Mask: Protect your hands and lungs, especially with oil-based.
Table 2: Tools and Costs for Polyurethane
| Tool/Material | Cost (Approx.) | Where to Buy |
|---|---|---|
| Foam Brush | $1–2 | Hardware store |
| Sandpaper (220-grit) | $5/pack | Home Depot |
| Mineral Spirits | $10/quart | Lowes |
| Water-Based Poly | $30/gallon | Online or stores |
Caption: These affordable tools make polyurethane projects easy.
Benefits and Drawbacks of Each Type
Both types protect wood, but they have pros and cons. Here’s what I’ve learned:
Oil-Based Polyurethane
- Pros: Super durable, fewer coats needed, warm glow.
- Cons: Long dry time, strong smell, yellows over time.
I love oil-based for my oak table because it looks rich and handles daily use. But the smell meant I had to stay out of the room for a day!
Water-Based Polyurethane
- Pros: Dries fast, low smell, stays clear.
- Cons: Needs more coats, less durable for heavy use, costs more.
Water-based was perfect for my kid’s toy box. It dried fast, and I didn’t worry about fumes.
Alternatives to Polyurethane
Sometimes, polyurethane isn’t the best choice. Here are other finishes I’ve tried:
- Varnish: Tough like oil-based but smells strong. Good for outdoor furniture.
- Lacquer: Dries super fast but scratches easily. Great for small crafts.
- Wax: Easy to apply, but not as tough. I used it on a decorative tray.
For a sunny porch table, I’d pick varnish over polyurethane for better UV protection.
My Top Tips for Using Polyurethane
After years of woodworking, here are my favorite tips:
- Stir, Don’t Shake: Shaking adds bubbles that ruin the finish.
- Test First: Try polyurethane on scrap wood to check the color.
- Ventilate: Open windows for oil-based to avoid headaches.
- Thin Coats: Thick coats drip and look messy.
Visual Idea: A diagram showing how to brush polyurethane evenly could help beginners avoid streaks. Another idea is a photo of oil vs. water-based finishes on the same wood type to show color differences.
Common Mistakes to Avoid
I’ve messed up plenty of projects! Here’s what to watch out for:
- Skipping Sanding: Rough wood makes the finish look bad.
- Rushing Coats: Wet polyurethane ruins the layer below.
- Ignoring Safety: Oil-based fumes are strong—wear a mask and gloves.
Table 3: Common Polyurethane Mistakes
| Mistake | Why It’s Bad | How to Fix It |
|---|---|---|
| Not Sanding | Rough, uneven finish | Sand with 220-grit first |
| Applying Wet Coats | Sticky, cloudy finish | Wait for full dry time |
| No Ventilation | Fumes cause dizziness | Open windows, use a fan |
Caption: Avoid these mistakes for a smooth, shiny finish.
Cost-Saving Ideas
Polyurethane can be pricey, but I’ve found ways to save:
- Buy in bulk: A gallon costs less per ounce than a quart.
- Use a rag: It’s cheaper than brushes and works well for thin coats.
- Check sales: Stores like Home Depot often discount polyurethane.