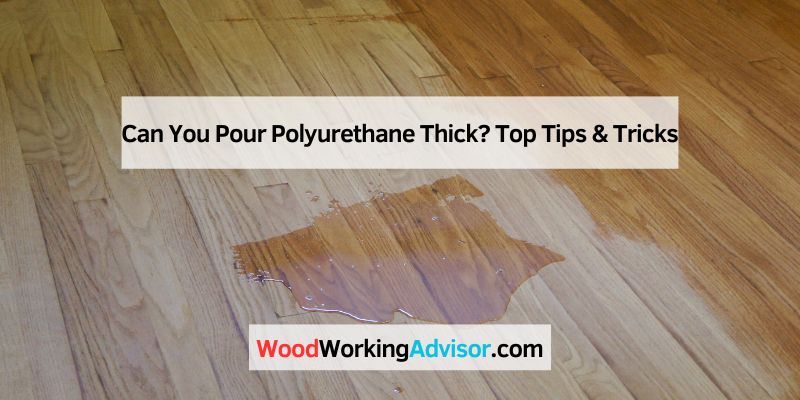
Can You Pour Polyurethane Thick? Top Tips & Tricks
Yes, you can pour polyurethane thick, but doing so may lead to uneven curing and a less durable finish. It’s essential to apply it in thinner layers for optimal results.
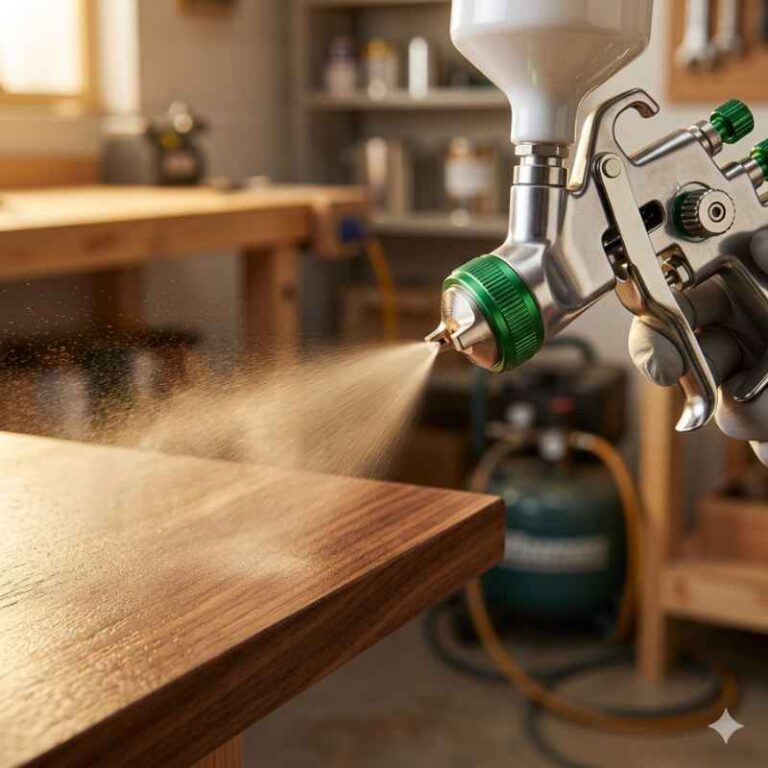
Polyurethane is a versatile finish used to protect wood surfaces. Its durability makes it a popular choice for furniture, floors, and crafts. Pouring polyurethane thick may seem appealing for quick coverage, but it can result in problems. Thick applications can create bubbles, uneven surfaces, and longer drying times.
Proper technique enhances the beauty and longevity of your project. Thin layers allow better adhesion and a smoother finish. Understanding the right method ensures you achieve a professional look and feel. For best outcomes, always follow the manufacturer’s recommendations on application thickness. This approach not only preserves the integrity of the finish but also enhances the overall aesthetic.
Introduction To Polyurethane
Polyurethane is a versatile material. It comes in liquid and foam forms. This substance is popular for both industrial and DIY projects. It offers durability and flexibility. Understanding its properties is crucial for effective use.
Qualities Of Polyurethane
Polyurethane has several key qualities that make it ideal for many applications:
- Durability: It resists wear and tear.
- Flexibility: It can bend without breaking.
- Water Resistance: It protects against moisture damage.
- Adhesion: It sticks well to various surfaces.
- UV Resistance: It withstands sunlight without degrading.
Common Uses In DIY And Woodworking
Polyurethane is popular in DIY and woodworking projects. Here are some common uses:
- Finishing: Used as a protective topcoat for wood.
- Sealing: Fills gaps and prevents moisture entry.
- Adhesive: Bonds wood pieces together strongly.
- Foam Padding: Provides cushioning for furniture.
- Coating: Adds a glossy finish to surfaces.
Many people choose polyurethane for its effectiveness. This material enhances the longevity of projects.
Thickness Considerations
Thickness considerations are vital when working with polyurethane. The thickness affects the final result and durability. Understanding the right thickness helps achieve optimal results. Below are key factors to consider.
Ideal Thickness For Various Projects
Different projects require different thicknesses of polyurethane. Here are some guidelines:
| Project Type | Recommended Thickness |
|---|---|
| Wood Finishing | 1-2 coats, each 2-4 mils |
| Countertops | 1/8 inch for best durability |
| Floor Coating | 1/16 inch for protection |
| Arts and Crafts | 1-2 mils for a smooth finish |
These recommendations ensure a strong, durable finish. Always consider the specific needs of your project.
Risks Of Pouring Too Thick
Poor application can lead to several issues. Here are some risks of pouring polyurethane too thick:
- Cracking: Thick layers may not cure evenly.
- Wrinkling: Excess material can cause surface irregularities.
- Long Drying Time: Thick layers take longer to dry.
- Poor Adhesion: Thick coats may peel or chip easily.
Pay attention to the thickness during application. It ensures a smooth and durable finish.
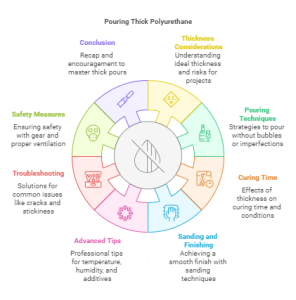
Preparation For Thick Polyurethane Application
Proper preparation is key for successful thick polyurethane application. This ensures a smooth finish and better adhesion. Follow these steps to prepare effectively.
Surface Preparation Essentials
Surface preparation is crucial for thick polyurethane. A clean and smooth surface promotes better results. Here are the steps to prepare your surface:
- Clean the Surface: Remove all dirt and grease.
- Sanding: Use sandpaper to smooth the surface.
- Repair Imperfections: Fill any cracks or holes.
- Dust Removal: Wipe down with a damp cloth.
Ensure the surface is completely dry before applying polyurethane. Moisture can affect adhesion.
Selecting The Right Polyurethane Product
Choosing the right polyurethane product is essential. Different types suit various applications. Here’s a simple guide:
| Type of Polyurethane | Best For | Finish Options |
|---|---|---|
| Oil-Based | Wood floors, furniture | Gloss, satin |
| Water-Based | Indoor projects, quick drying | Clear, matte |
| Aliphatic | High-traffic areas | Glossy |
Check the label for specific application instructions. This guarantees the best results for your project.
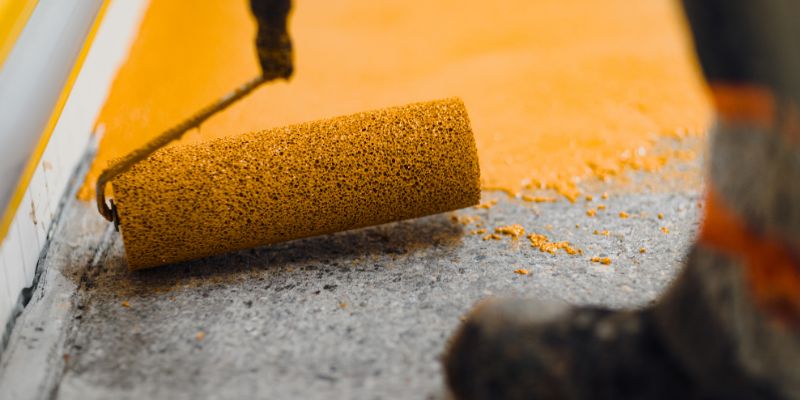
Pouring Techniques
Mastering pouring techniques is vital for a flawless finish. Different methods can enhance the thickness of polyurethane. Understanding these techniques helps avoid common pitfalls.
Layering Strategy For Thickness
Using a layering strategy can help achieve the desired thickness. Here are key points to consider:
- Start with a thin base layer.
- Allow it to cure before adding more layers.
- Each layer should be 1/8 inch thick.
- Use a level to ensure even application.
This method helps prevent cracking and peeling. Patience is crucial for successful layering.
Avoiding Bubbles And Imperfections
Bubbles can ruin the appearance of your project. Follow these tips to minimize imperfections:
- Mix slowly to reduce air intake.
- Use a heat gun to pop any surface bubbles.
- Pour from a low height to limit splashing.
- Work in a dust-free environment.
Pay attention to temperature. Cooler temperatures can lead to more bubbles. A warm workspace helps create a smooth finish.
Curing Time And Conditions
Curing time is crucial for polyurethane finishes. It affects the durability and appearance of the final product. Knowing how thickness impacts curing time helps in planning your project effectively.
Impact Of Thickness On Curing Time
Thickness plays a significant role in how long polyurethane takes to cure. Thicker layers require more time to dry completely. Here’s a quick overview:
| Layer Thickness (inches) | Curing Time (hours) |
|---|---|
| 1/16 | 2-4 |
| 1/8 | 4-8 |
| 1/4 | 8-12 |
Thicker applications can lead to issues like:
- Longer drying times
- Increased risk of bubbles
- Poor adhesion
Optimal Environment For Curing
The environment significantly affects curing time. Factors to consider include:
- Temperature: Ideal range is 70°F to 80°F.
- Humidity: Keep it below 50% for best results.
- Airflow: Ensure good ventilation to promote drying.
Creating the right conditions helps achieve a hard, smooth finish. Avoid applying polyurethane in damp or cold areas.
Sanding And Finishing
Sanding and finishing are vital steps for a great polyurethane application. Proper technique enhances the final look. It ensures a durable and smooth surface. Follow the tips below for best results.
Sanding Between Layers
Sanding between polyurethane layers is important. It creates a smooth bond. Here are some key points:
- Use fine-grit sandpaper, typically 220-grit.
- Wait for the layer to dry fully before sanding.
- Sand lightly to avoid damaging the previous layer.
- Clean the surface after sanding to remove dust.
Follow these steps for each layer. This practice enhances adhesion and finish quality.
Achieving A Smooth Finish
A smooth finish makes a project stand out. Here are some tips to achieve it:
- Apply thin coats of polyurethane.
- Use a high-quality brush or foam applicator.
- Work in long, even strokes.
- Allow adequate drying time between coats.
Consider this table for common finishing tips:
| Tip | Description |
|---|---|
| Thin Coats | Thin layers dry faster and reduce runs. |
| Quality Tools | Good brushes or applicators improve the finish. |
| Dry Time | Proper drying prevents smudges and imperfections. |
Following these tips leads to a professional-looking finish. Enjoy the process and admire your work!
Advanced Tips For Professionals
Professionals often seek ways to improve their polyurethane application. Understanding the nuances of pouring polyurethane can lead to better results. Here are some advanced tips to enhance your technique.
Temperature And Humidity Control
Temperature and humidity significantly affect polyurethane’s performance. Proper control can lead to smoother finishes and faster curing times.
- Ideal Temperature: Maintain temperatures between 70°F to 85°F.
- Humidity Levels: Keep humidity below 60% for best results.
- Pre-Conditioning: Pre-condition materials to match room temperature.
Check the following table for temperature and humidity effects:
| Temperature (°F) | Humidity Level (%) | Effect on Polyurethane |
|---|---|---|
| Below 60 | Above 60 | Slower curing time |
| 70 – 85 | Below 60 | Optimal curing and finish |
| Above 85 | Any | Risk of bubbling |
Using Additives For Enhanced Properties
Additives can improve polyurethane’s performance. They enhance flexibility, durability, and drying time.
- Flow Control Additives: Help achieve a smoother finish.
- Accelerators: Speed up drying time significantly.
- Stabilizers: Prevent yellowing over time.
Consider these tips when using additives:
- Follow manufacturer recommendations for dosing.
- Test on a small area first.
- Mix thoroughly to ensure even distribution.
Troubleshooting Common Issues
Polyurethane can cause some problems during application. Understanding these issues helps achieve a smooth finish. Here’s how to fix common problems like cracks, bubbles, and sticky surfaces.
Fixing Cracks And Bubbles
Cracks and bubbles can ruin your project. Here are steps to address these issues:
- Identify the Cause: Cracks may come from fast drying. Bubbles often form from mixing too quickly.
- Sand the Area: Use fine-grit sandpaper to smooth the surface.
- Apply a New Coat: After sanding, apply a thin coat of polyurethane. Make sure to spread it evenly.
- Use a Heat Gun: Carefully apply heat to release trapped air bubbles.
Dealing With Sticky Or Uncured Polyurethane
Sticky or uncured polyurethane can be frustrating. Follow these tips to resolve the issue:
- Check Temperature: Ensure the working area is warm enough. Ideal temperature is around 70°F (21°C).
- Humidity Levels: High humidity can slow curing. Aim for 50% humidity or lower.
- Wait Longer: Allow more time for curing. Sometimes, it needs extra hours or even days.
- Remove Sticky Residue: Lightly sand the sticky area. Then, reapply a thin coat of polyurethane.
Keep these tips handy. They can help save your project and ensure a smooth finish.
Safety Measures And Best Practices
Using polyurethane safely is crucial. Follow these safety measures to protect yourself and your environment.
Protective Gear And Ventilation
Wearing the right protective gear is essential. It keeps you safe from harmful chemicals in polyurethane.
- Gloves: Use chemical-resistant gloves.
- Mask: Wear a respirator to avoid inhaling fumes.
- Goggles: Protect your eyes from splashes.
- Clothing: Wear long sleeves and pants to cover skin.
Proper ventilation is key. It helps reduce harmful fumes in the air.
- Open windows and doors for fresh air.
- Use fans to increase airflow.
- Work outdoors when possible.
Safe Disposal Of Polyurethane Products
Disposing of polyurethane safely is important. Follow these guidelines for safe disposal:
| Disposal Method | Description |
|---|---|
| Local Hazardous Waste Facility | Drop off unused polyurethane at a facility. |
| Follow Local Regulations | Check local laws for specific disposal rules. |
| Avoid Regular Trash | Do not throw polyurethane in the regular trash. |
These steps help protect the environment. Be responsible with your materials.
Conclusion: Mastering Thick Polyurethane Pours
Mastering thick polyurethane pours opens doors to creative possibilities. Understanding the right techniques makes the process easier. This section highlights key takeaways and encourages experimentation.
Recap Of Key Takeaways
- Thickness Matters: Thicker pours can lead to better finishes.
- Mixing Techniques: Proper mixing ensures consistent results.
- Temperature Control: Ideal temperatures enhance curing and adhesion.
- Layering: Multiple thin layers can yield better outcomes than one thick layer.
- Use of Additives: Additives can improve flow and reduce bubbles.
Encouragement To Experiment And Learn
Don’t hesitate to try different techniques. Every project is a chance to learn. Here are some tips for experimentation:
- Start with small projects to test your skills.
- Document your mixing ratios for future reference.
- Adjust temperatures based on your environment.
- Try various additives to see their effects.
- Seek feedback from peers for improvement.
Embrace the journey of mastering thick polyurethane pours. Your creativity will shine through your work.
Frequently Asked Questions
Can You Apply Polyurethane Thickly?
Yes, you can apply polyurethane thickly, but it’s not recommended. Thick layers can lead to uneven drying and bubbling. It’s better to apply multiple thin coats for a smoother finish. This also enhances durability and reduces the risk of defects.
Always follow the manufacturer’s instructions for the best results.
What Happens If You Pour Polyurethane Too Thick?
Pouring polyurethane too thick can cause several issues. It may not cure properly, resulting in a tacky surface. Additionally, thick applications can trap air bubbles, creating imperfections. To avoid these problems, stick to thin layers. This method ensures a more consistent and durable finish for your project.
How Thick Should A Polyurethane Coat Be?
A polyurethane coat should ideally be 2-3 mils thick. This thickness allows for proper curing and minimizes defects. Applying multiple thin coats is recommended over a single thick layer. Each coat should be allowed to dry completely before applying the next.
This ensures a smooth and long-lasting finish.
Can You Sand Between Polyurethane Layers?
Yes, sanding between polyurethane layers is advisable. It helps create better adhesion for subsequent coats. Light sanding with fine-grit sandpaper smooths the surface and removes imperfections. Ensure the previous layer is fully cured before sanding. This practice enhances the overall finish and durability of your project.
Conclusion
Pouring polyurethane thick can yield beautiful results, but it requires careful technique. Always consider the product’s specific guidelines to avoid issues. Ensuring proper application will lead to a smooth, durable finish. With practice and patience, you can achieve stunning outcomes in your projects.
Happy crafting!