PVC Primer and Glue: How to Use Them Right
PVC primer softens the pipe surface so PVC cement can chemically weld it to the fitting — it’s not glue, it’s a two-step solvent weld. Skip the code-required purple color and a leak-free joint can still fail inspection. This guide covers the correct step-by-step application, the purple-primer code rule, and real cure times by pipe size.
Insert your Affiliate Disclosure reusable block here.
Quick Answer
Apply purple primer to soften both surfaces, then apply PVC cement within about 10 seconds while the primer is still wet. Push the pipe into the fitting with a quarter turn and hold for 30 seconds. Small pipes (½″-1¼″) reach handling strength in 15-30 minutes; wait 24-72 hours before pressurizing the line, longer in cold or humid weather.
What’s the Difference Between PVC Primer, Cement, and Glue?
Best Primer + Cement Combo Pick
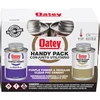
Oatey PVC Clear Cement & Purple Primer Handy Pack – $11.49
A matched 4 oz. primer + 4 oz. cement pair from the same manufacturer — exactly the “match your primer and cement” pairing this guide recommends, and enough for a typical repair or small fixture install.
- Best for: small repairs, single fixture installs, DIY irrigation fixes
- Why we picked it: code-visible purple primer paired with a cement rated for the same joint, no guessing on compatibility
- Main drawback: 4 oz. cans run out fast on a whole-system re-pipe — buy the pint size for bigger jobs
Compare more PVC gluing essentials
 Option 1 Libraton Ratchet PVC Cutter – $25.99
|
 Option 2 Heavy-Duty Nitrile Gloves (6 Mil) – $14.44
|
 Option 3 NoCry Anti-Fog Safety Glasses – $13.98
|
As an Amazon Associate we earn from qualifying purchases.
PVC cement is a solvent weld, not an adhesive — it doesn’t just stick to the pipe, it chemically softens and dissolves the top layer of both the pipe and fitting so they fuse into one continuous piece of plastic as it cures. PVC primer is a solvent that comes first: it cleans the pipe of dirt, dust, and manufacturing coatings, then begins softening the plastic so the cement can bite in deeper on the first try instead of skating across a hard, unprepared surface.
Calling it “glue” is the industry’s shorthand, not the chemistry. A true adhesive bonds two surfaces together at a seam. Solvent weld cement erases the seam — which is exactly why a properly primed-and-cemented PVC joint is often stronger than the pipe itself when it fails a stress test. See our full glue and adhesives guide library for other bonding jobs beyond PVC pipe.
Essential Tools, Materials, and Safety Gear
Gather everything before you start — PVC cement sets in seconds, so hunting for a rag mid-joint ruins the connection.
- PVC primer (purple, for code-visible joints) and PVC cement rated for your pipe’s schedule
- A pipe cutter or fine-tooth hacksaw and a deburring tool or utility knife
- Clean, dry rags or paper towels — denatured alcohol works well for stubborn grease or ink markings
- A tape measure and marker for alignment lines
- Chemical-resistant gloves, safety goggles, and ventilation — see the safety note below
Choosing the Right PVC Primer
Primer comes in three practical types, and the color isn’t cosmetic — it’s often a code requirement, not a preference.
- Purple primer — required by many U.S. plumbing codes (IPC/IRC sections referencing ASTM D2855) on pressure and DWV systems specifically so a building inspector can visually confirm primer was used without cutting the joint open. Skip it on a code-inspected job and you may be told to redo the connection even if it doesn’t leak.
- Clear primer — chemically identical, but leaves no visible proof. Fine for non-inspected irrigation or drainage runs; risky anywhere an inspector signs off on the work.
- Low-VOC primer — formulated for tighter ventilation requirements or local air-quality rules; check it’s rated for your pipe’s pressure class before substituting it in a code job.
Match the primer and cement to the same manufacturer and pipe schedule where possible — mixing brands is usually fine chemically, but mismatched cure-time charts on the cans is how people under- or over-wait on curing.
Step-by-Step: How to Apply PVC Primer and Cement
Work through these steps in order — once cement touches the pipe you have seconds, not minutes, to make the connection.
- Dry-fit first: push the pipe into the fitting without any product and check it seats about two-thirds of the way in with firm resistance. Mark a reference line across both pieces so you can realign them fast once cement is applied.
- Clean and deburr: wipe both surfaces with a dry rag (or denatured alcohol for grease/ink) and remove any burr left by the cutter — a burr blocks full contact and is a common cause of a joint that leaks at the socket.
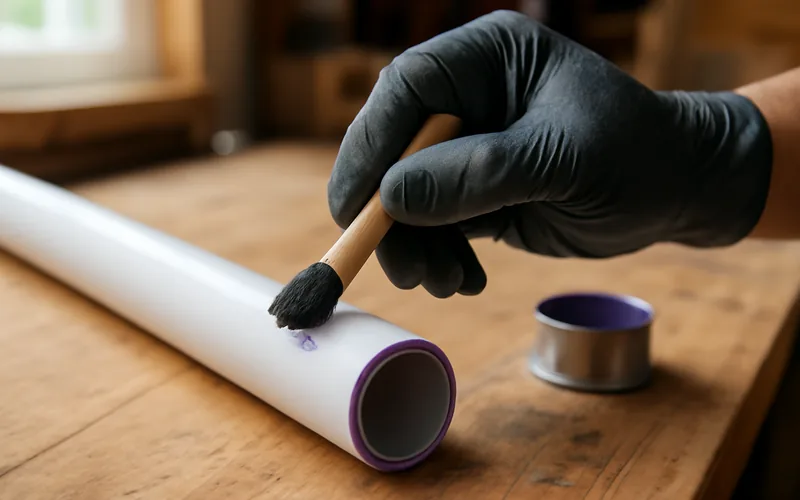
- Apply primer to both surfaces: coat the outside of the pipe and the inside of the fitting fully. Let it sit for about 10 seconds — long enough to soften, not long enough to fully dry.
- Apply cement immediately: spread an even coat of cement over both primed surfaces while the primer is still wet. Don’t wait — primer that dries loses its softening effect.
- Join with a quarter turn: push the pipe fully into the fitting, twisting about a quarter turn as you go to spread cement evenly, then align to your reference marks.
- Hold for 30 seconds: the joint will try to push itself back out as trapped cement pressurizes — hold firm pressure the entire time, not just an initial push.
- Wipe excess, then leave it alone: clean squeeze-out from the joint immediately, then don’t test, move, or pressurize it until it’s cured (see the chart below).
Real PVC Cure Times by Pipe Size (Not Just “Wait 24 Hours”)
Most articles give one blanket number for cure time. Real cure time depends on pipe diameter and temperature, and manufacturers publish exact charts for a reason — pressurizing too early is the single most common cause of a “it leaked after it seemed fine” callback.
| Pipe Size | 60–100°F (Cure Before Pressure Test) | 40–60°F | Below 40°F |
|---|---|---|---|
| ½″ – 1¼″ | 15 minutes (up to 180 psi) | 20 minutes | 60 minutes |
| 1½″ – 3″ | 30 minutes | 2 hours | 4 hours |
| 4″ – 5″ | 2 hours | 16 hours | contact manufacturer |
| 6″+ | 8 hours | 24+ hours | contact manufacturer |
These figures assume 60% relative humidity or less and pressures at or below what’s listed — in damp or humid weather, add roughly 50% more cure time. For a full breakdown of set time versus cure time and cold-weather adjustments, see our complete PVC cure time guide. Working with ABS pipe instead? ABS cement cures on a different schedule — check our ABS and PVC cement cure time guide before you pressurize an ABS line. Data table source: Oatey, PVC Glue Drying and Curing Times.
Common Mistakes and How to Avoid Them
Most failed PVC joints trace back to one of these five mistakes, not a bad batch of cement.
- Skipping the dry fit: the first time pipe and fitting meet should never be with wet cement already on them — you need to know it seats correctly beforehand.
- Letting primer dry before cementing: once primer flashes off, its softening effect is gone. If more than 15-20 seconds pass, re-prime.
- Not twisting during insertion: a straight push without the quarter-turn leaves cement unevenly distributed, creating a gap at the socket that shows up as a slow leak weeks later.
- Letting go too soon: the joint pushes itself back out under internal pressure for the first 15-30 seconds. Letting go at 5 seconds is a common cause of a joint that looks fine but isn’t fully seated.
- Pressurizing before the real cure time: “it felt solid” at 20 minutes isn’t the same as fully cured — use the chart above, not a guess.
If a joint does leak after curing, don’t try to add more cement over a cured joint — it won’t bond to already-hardened plastic. Cut it out and replace the fitting with a fresh dry fit, primer, and cement application.
Frequently Asked Questions
Can I use PVC glue for other materials?
No, not reliably. PVC cement is formulated to chemically fuse PVC plastic specifically, so it doesn’t create a true solvent weld on metal, wood, or most other plastics. For bonding PVC to ABS pipe, see our ABS-to-PVC compatibility guide — the two plastics need a specific transition cement, not standard PVC cement alone.
Can you glue PVC without primer?
Yes, technically — the cement will still weld the joint. But skipping primer means the cement can’t soften the surface as deeply first, so the bond is measurably weaker, and on any code-inspected job (pressure or DWV) skipping the required purple primer can fail inspection outright, even on a joint that tests leak-free.
Is purple primer required by code?
In many U.S. jurisdictions, yes, for pressure-rated and DWV systems — codes referencing ASTM D2855 require a visible primer specifically so an inspector can confirm it was used without disassembling the joint. Clear primer is chemically identical but won’t satisfy a visual inspection. Always confirm the exact rule with your local building department, since amendments vary by state and county.
How long does it take for PVC glue to dry?
Small pipes (½″-1¼″) reach handling strength in about 15-30 minutes at room temperature, but full cure — safe to pressurize — takes 2 to 72 hours depending on pipe size and temperature. See the chart above for exact figures by diameter.
Is primer necessary before using PVC glue?
It’s strongly recommended and, on many inspected jobs, legally required. Primer cleans the surface and begins softening the plastic so cement penetrates deeper on first contact, producing a measurably stronger, more leak-resistant joint than cement alone.
Can PVC glue be used for outdoor applications?
Yes — properly primed and cemented PVC joints hold up to sun, rain, and temperature swings once fully cured. UV exposure over many years can make exposed PVC pipe itself brittle, so paint or wrap long-term outdoor runs; the cemented joints themselves aren’t the weak point.
Why does my PVC joint have a gap or won’t seat fully?
Usually a burr left by the cutter, an out-of-round pipe end, or cement that started skinning over before you finished pushing the pipe in. Deburr every cut, dry-fit before priming, and move from primer to cement to insertion without pausing.
“Below 40°F, cure time can double or even triple.”
Understanding how PVC primer and cement actually work — and respecting the real cure times rather than a rough guess — is what separates a joint that passes inspection and holds for decades from one that fails at the worst possible time. Match your primer color to your local code, follow the sequence above without pausing between steps, and let the chart do the waiting for you.
Sponsored / affiliate links. As an Amazon Associate I earn from qualifying purchases. I may earn additional commission from eligible campaigns.