Rafter Screws: Do They Meet Code? (SDWC Load Ratings vs. Ties)
A rafter screw is a long structural screw, usually about 6 inches, that ties a rafter or truss to the wall top plate without a metal bracket. Simpson rates one SDWC15600 screw at 615 lb of uplift in Douglas fir or southern pine, and its H1A hurricane tie at 545 lb, so one screw and one tie are close, not a 2-to-1 gap. This guide covers when the IRC lets you skip a rated connector, what the published load numbers are, and how to drive the screws.
Quick Answer
Only a screw with an evaluation report for rafter-to-plate uplift counts as a rafter screw. One Simpson SDWC15600 is rated 615 lb in DF/SP and 485 lb in SPF/HF, roughly level with an H1A tie at 545 lb and 470 lb. Where the uplift on a rafter is 200 lb or less, the IRC lets you toe-nail instead.
What Are Rafter Screws?
Best Rafter-to-Plate Screw Pick
 |
FastenMaster TimberLOK 6-inch Heavy-Duty Wood Screw (50-count), $46.00 A hex-head structural screw with a published rafter-to-top-plate uplift table (DrJ report 1105-02), sold in a box small enough for a single shed or garage roof.
|
As an Amazon Associate we earn from qualifying purchases.
Rafter screws are fully threaded structural screws that join a rafter or truss to the double top plate under it. The difference from a deck screw or a cabinet screw is paperwork as much as steel: the Simpson SDWC Truss screw is code listed in IAPMO UES ER-262 and was tested to ICC-ES AC233 (the screw) and AC13 (wall and roof-to-wall assemblies), which is how Simpson can publish an uplift number for it.
A generic screw has no such number, so an inspector has nothing to approve. If you are choosing fasteners for a different job, such as casework, our guide to screws for cabinets covers the opposite case, where length and head style matter and a structural rating does not.
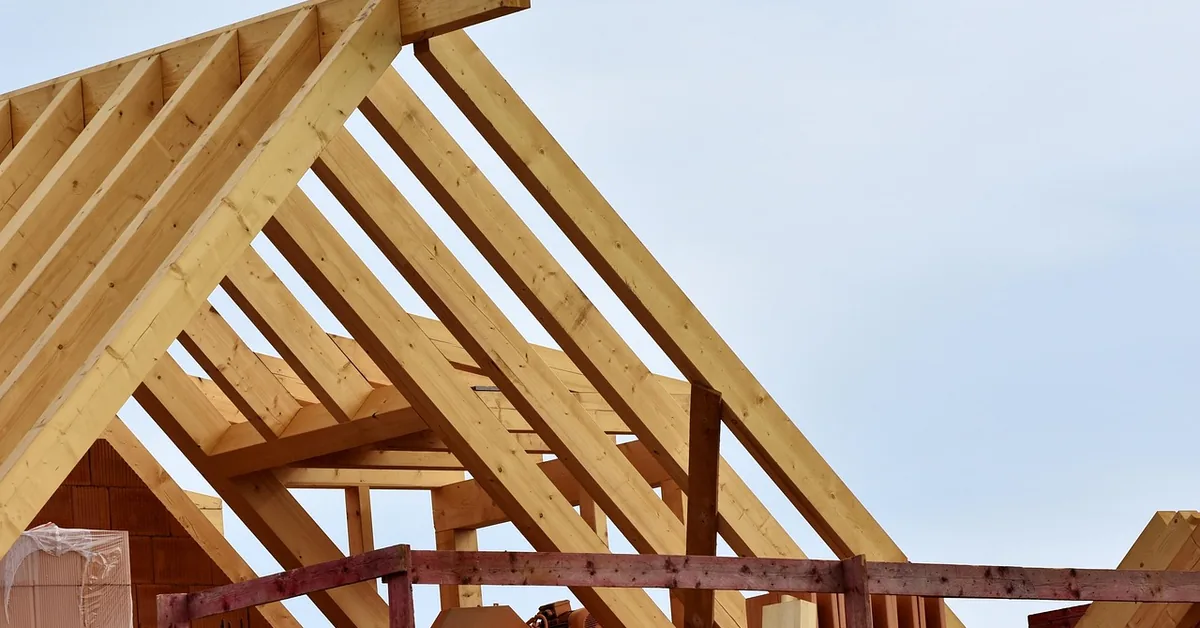
Roof framing is also where you will meet this connection on small projects. A DIY lean-to shed has rafters bearing on a wall plate, and the same question applies: what holds the roof down in a storm?
Do Rafter Screws Meet Code?
They can, but only through the product’s own report. Simpson lists the SDWC for 2018 and 2021 IRC and IBC use in most common wood framing applications. FastenMaster’s TimberLOK is covered by DrJ report 1105-02, titled for uplift and lateral resistance of trusses and rafters attached to the tops of walls, last revised February 2026. Both reports apply to walls built to IRC Section R602, and both assume you follow the install steps exactly.
Not every structural screw has a rafter-to-plate value. GRK’s RSS screws are covered by ICC-ES ESR-2442, which says the screws may be used under the IRC when an engineered design is submitted under Section R301.1.3. The text of that report does not mention rafters, trusses, top plates or hurricane ties at all, so there is no off-the-shelf uplift number to pull from it. An RSS screw is a good framing screw, but it is not a drop-in hurricane tie replacement.
When Do You Actually Need an Uplift Connector?
IRC Section R802.11.1, as printed in the 2018 code, lets rafters and trusses spaced no more than 24 inches on center connect to the wall with the Table R602.3(1) fastener schedule when the uplift force per rafter or truss is 200 lb or less, as read from Table R802.11. There is a second path: the same toe-nail connection is allowed if the basic wind speed is 115 mph or less, the exposure is B, the roof pitch is 5:12 or steeper and the span is 32 feet or less. Past those limits, you need a connector rated for the calculated uplift.
The toe-nail itself is specific: Table R602.3(1) calls for three 16d box nails (3-1/2 by 0.135 inch) or three 10d common nails (3 by 0.148 inch) per rafter or truss, two on one side and one on the other. That is the baseline a rafter screw or tie replaces once uplift passes 200 lb.
Check before you build: code editions and local wind amendments differ, and uplift is a structural safety item. Confirm the edition your jurisdiction adopted, and have your building department or a licensed engineer approve the connector and the uplift number for your roof.
Rafter Screws vs. Hurricane Ties: The Published Uplift Numbers
A common claim online is that two screws beat a hurricane tie by almost double. The manufacturers’ own tables do not show that. For a rafter-to-plate connection, one screw lands in the same range as one tie, and the real differences are in how each one gets installed and inspected.
| Connector | Allowable uplift, DF/SP | Allowable uplift, SPF/HF | Where the number comes from |
|---|---|---|---|
| Simpson SDWC15600, 1 screw | 615 lb | 485 lb | Simpson SDWC data sheet, roof-to-wall table |
| FastenMaster TimberLOK 4 or 6 inch, 1 screw | 540 lb (Douglas fir-larch), 620 lb (southern pine) | 420 lb | DrJ report 1105-02, Table 2, 1.60 column |
| Simpson H1A hurricane tie | 545 lb | 470 lb | Simpson 2024 wood connector catalog |
| Older Simpson H1 hurricane tie | 480 lb | not stated | Simpson engineering blog on the H1 re-rating |
Allowable (ASD) loads for one connector at the 1.60 wind and seismic load-duration level, the basis Simpson uses for its SDWC and H1A figures. The H1 figure comes from a blog post that does not state its duration basis, so treat that row as a rough guide only. These are published catalog values, not a design for your roof.
Read the table by species. SPF and hem-fir framing cuts every number, which is why SDWC drops from 615 lb to 485 lb. A shed framed with SPF studs from a big-box store belongs in the right-hand column, not the left.
Two details change the math. First, the SDWC can be used in each ply of a 2-ply or 3-ply rafter or truss, but the uplift value for each screw is then multiplied by 0.90. Second, Simpson’s own SDWC literature says the screw fastens the rafter to the top plate only. The top plate still has to be tied to the studs below, either with structural sheathing designed for uplift or with a metal connector on the same side of the wall, and Simpson names the H2.5A, TSP and MTS12 as suitable. Quote a 615 lb screw all you want; the load path is only as strong as the weakest link in that chain.
Screws do have real advantages. They drive from inside the attic or wall, you can fasten before or after the sheathing goes on, and a head sitting flush in the top plate does not interfere with drywall. Ties give an inspector a visible bracket with a nail pattern to count. Pick the one that suits the access you have.
Choosing the Right Rafter Screw
The numbers above come from three different families of screw, so match the product to the connection rather than to a brand name.
- Simpson SDWC15600: 0.152 inch minor diameter, 6 inches long with a 5-3/4 inch thread, T30 six-lobe drive and a cap head that countersinks into the top plate. The kit includes a metal guide tool that sets the installation angle.
- FastenMaster TimberLOK: a hex-head screw sold in 4 and 6 inch lengths, with one shared uplift table. The report requires at least 2 inches of penetration into the rafter or truss, and rafters at least 1-1/2 inches wide.
- GRK RSS or RSS JTS: good for engineered wood-to-wood connections, but treated as an engineered-design product under the IRC, as covered above.
- Coating and exposure: these screws sit inside the wall and attic, so interior-rated finishes are fine. Check the report before using any of them in a wet or exposed location.
Price is worth shopping. When we pulled Amazon listings through the Creators API on October 7, 2026, listings for the SDWC15600-KT (a 50-screw kit) ranged from about $56 to $289 depending on the seller, so compare the per-screw cost before you order.
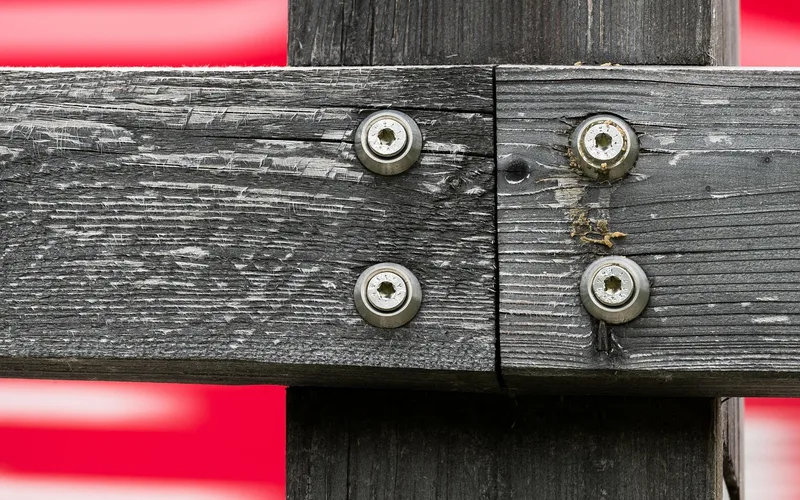
If you are pairing a structural screw with ordinary wood screws elsewhere in the assembly, our pilot-hole drill size guide covers the standard wood screw side. Structural screws like the SDWC are self-tapping and are driven without a pilot hole in standard framing lumber, per the manufacturer.
How to Install Rafter Screws
Always follow the instructions for the specific product, because the angle, edge distance and drill requirements differ between brands. The figures below come from the Simpson SDWC data sheet and the FastenMaster report.
- Find your uplift number: read the force per rafter from IRC Table R802.11, your truss drawings or your engineer, then choose a connector with a higher allowable load.
- Check the framing: a double top plate, rafters at least 1-1/2 inches wide, and a species group that matches the table you are using.
- Mark the screw position: keep the point at least 1/2 inch from the plate edge. For TimberLOK, line it up within 1/4 inch of the centerline of the rafter’s narrow edge.
- Drive at the right angle: Simpson’s optimal SDWC angle is 22 degrees, within a 10 to 30 degree range, and rafters up to a 12:12 pitch must have a birdsmouth cut. TimberLOK calls for 20 to 30 degrees from vertical. Use the T30 bit for SDWC, and Simpson recommends an 18V or stronger cordless drill.
- Seat the head flush: the SDWC head should countersink fully into the double top plate, and the whole shank must end up inside wood.
- Finish the load path: make sure the top plate is tied to the studs, as described above.
Common Mistakes to Avoid
- Using a screw with no evaluation report: no report means no approved uplift value, whatever the shank diameter.
- Skipping the calculation: the answer to one screw, two screws or a tie comes from your wind speed, span and spacing, not from a rule of thumb.
- Quoting the SPF number as DF/SP: the same screw drops about 20 percent in softer framing, and a lot of big-box lumber is SPF.
- Mixing ratings between brands: a 615 lb SDWC rating tells you nothing about another maker’s screw.
- Forgetting the plate-to-stud connection: the screw ends at the top plate, and the plate needs its own path to the studs.
Uplift is one load path. If you also need to confirm that a beam can carry the roof load, our wood beam load capacity guide covers that separate calculation, and for floor decks see subfloor screw spacing, which has a different load path and code section entirely.
Frequently Asked Questions on Rafter Screws
What screws are used for rafters?
Code-listed structural screws are used for rafters, such as the Simpson Strong-Drive SDWC Truss screw or the FastenMaster TimberLOK, each with its own published load table. A general-purpose wood screw has no tested uplift value for this connection.
Do truss screws meet code?
Yes, when the specific product has a current evaluation report for the connection. The Simpson SDWC Truss screw is listed under IAPMO UES ER-262 and tested to ICC-ES AC233 and AC13, and the TimberLOK has DrJ report 1105-02 for rafter and truss to top plate uplift. Your building department still has to accept the report and the load you calculate.
What are truss screws?
Truss screws are long, fully threaded structural screws, about 6 inches, driven at an angle through the bottom of a rafter or truss into the top plate it sits on. They replace a metal hurricane tie, and the manufacturer’s evaluation data gives the allowable uplift and lateral load for each screw.
How do you install rafter screws?
Drive each screw at the manufacturer’s angle, about 20 to 30 degrees, from the inside of the wall through the top plate into the rafter or truss, with the head flush. Keep at least 1/2 inch from the plate edge, use the bit and drill the instructions call for, and follow the manufacturer’s spacing and edge distances.
Can you use regular wood screws instead of rafter screws?
No. A regular wood screw has no tested uplift rating for a rafter-to-plate connection, so an inspector has nothing to approve. Use a screw that has an evaluation report for this connection, or a hurricane tie.
Conclusion
A code-listed rafter screw is a legitimate way to tie a roof down, and one screw sits in the same range as a hurricane tie: 615 lb for an SDWC against 545 lb for an H1A in Douglas fir or southern pine. The decision comes down to your calculated uplift, your framing species, and whether the top plate is tied to the studs, not to a claim that screws beat ties.
Sponsored / affiliate links. As an Amazon Associate I earn from qualifying purchases. I may earn additional commission from eligible campaigns.