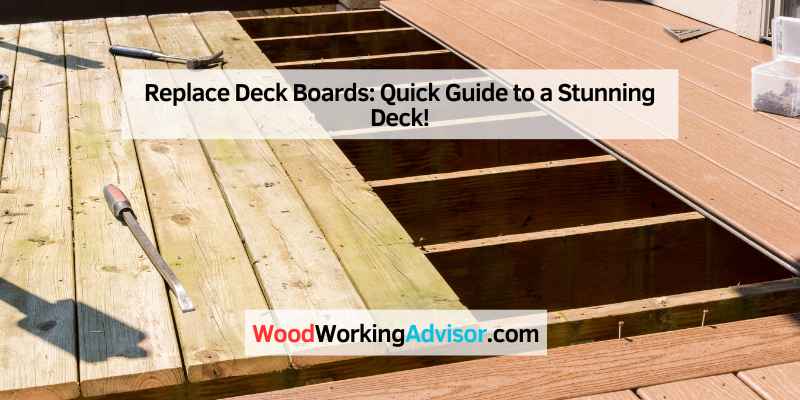
Replace Deck Boards: Quick Guide to a Stunning Deck!
To replace deck boards, begin by removing the damaged boards with a pry bar. Install new boards by securing them with deck screws for stability.
Deck boards endure wear and tear from weather, foot traffic, and age. Over time, they can become warped, splintered, or discolored. Replacing these boards is essential for safety and aesthetic appeal. This process revitalizes your outdoor space and prevents further damage.
Knowing how to replace deck boards can save you money on professional repairs. It also allows you to customize your deck according to your preferences. With the right tools and materials, you can achieve a fresh and inviting look. Get ready to enjoy your deck once again by following these straightforward steps to ensure a successful replacement.
Introduction To Deck Renovation
Deck renovation breathes new life into your outdoor area. Over time, decks can wear out. Cracks and splinters can appear. Replacing old deck boards is a smart choice. It enhances safety and improves aesthetics. A fresh deck makes your home inviting.
Revitalize Your Outdoor Space
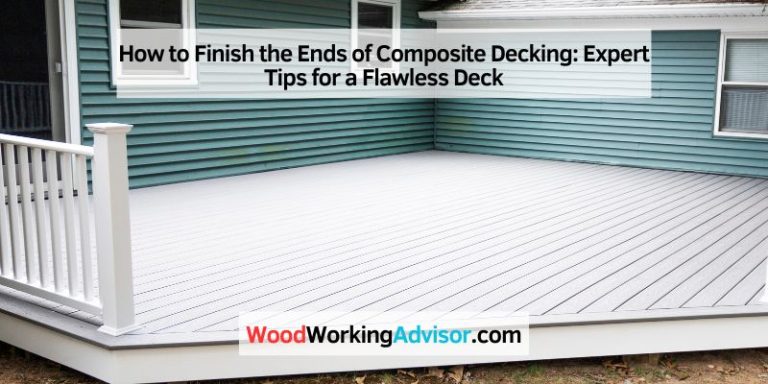
Replacing deck boards can transform your outdoor space.
- Choose durable materials like composite or hardwood.
- Consider modern designs for a stylish look.
- Add lighting options for evening use.
New boards can change the deck’s entire feel. A bright, clean deck invites relaxation and fun. Friends and family will love gathering on it.
Benefits Of Updating Deck Boards
Updating deck boards offers many advantages:
| Benefit | Description |
|---|---|
| Increased Safety | New boards reduce risks of falls and injuries. |
| Enhanced Appearance | A fresh look improves your home’s curb appeal. |
| Higher Property Value | Updated decks attract potential buyers. |
| Low Maintenance | Modern materials require less upkeep. |
Investing in new deck boards pays off in comfort and beauty. Enjoy a deck that looks great and lasts long.
Signs It’s Time For New Deck Boards
Your deck enhances outdoor enjoyment. Over time, deck boards wear out. Knowing when to replace them keeps your space safe and beautiful. Here are key signs that indicate it’s time for new deck boards.
Visible Wear And Damage
Check your deck for obvious signs of wear. Look for:
- Cracks: Small cracks can lead to bigger problems.
- Splinters: Splintered boards can hurt your feet.
- Discoloration: Faded or stained boards look unappealing.
- Warping: Curved or bent boards can cause safety issues.
Use a simple inspection method to check your deck:
- Walk on the boards.
- Look for soft spots.
- Check for signs of mold.
These signs show your deck boards need replacement.
Safety Concerns With Old Decking
Safety is a top priority for any deck. Old decking can pose risks, including:
- Increased Slipperiness: Weather can make boards slick.
- Structural Weakness: Rotted boards may collapse.
- Insect Infestation: Termites and ants can damage wood.
- Uneven Surfaces: Tripping hazards can lead to injuries.
Address these safety concerns quickly. Regular maintenance helps, but sometimes replacement is necessary. Keep your outdoor space safe and enjoyable for everyone.
Selecting The Right Materials
Choosing the right materials for your deck boards is essential. The right choice affects durability, maintenance, and overall look. Two main types dominate the market: wood and composite decking. Understanding their differences helps make the best decision.
Wood Vs. Composite Decking
Both wood and composite decking have unique features. Here’s a quick comparison:
| Feature | Wood Decking | Composite Decking |
|---|---|---|
| Cost | Generally cheaper upfront | Higher initial cost |
| Appearance | Natural look | Variety of colors and textures |
| Life Span | 10-15 years | 25-30 years |
| Splitting/Splintering | Can splinter easily | No splintering |
| Environmental Impact | Renewable resource | Made from recycled materials |
Durability And Maintenance Considerations
Durability and maintenance vary significantly between wood and composite options.
- Wood Decking:
- Requires regular sealing and staining.
- Prone to rot, insects, and weather damage.
- Needs replacement every 10-15 years.
- Composite Decking:
- Minimal maintenance needed.
- Resistant to fading, staining, and mold.
- Lasts 25-30 years with little upkeep.
Choosing between wood and composite decking depends on your needs. Consider budget, aesthetics, and maintenance. Making an informed choice ensures a beautiful, long-lasting deck.
Tools And Supplies Needed
Replacing deck boards requires the right tools and supplies. Proper equipment ensures a smooth and efficient process. Below, we break down essential tools, safety gear, and best practices for your project.
Essential Tools For The Job
- Circular Saw – For cutting new deck boards to size.
- Drill – To create holes and drive screws.
- Measuring Tape – For accurate measurements of the boards.
- Chalk Line – To mark straight cutting lines.
- Level – Ensures boards are even and straight.
- Screwdriver – For tightening screws securely.
- Pry Bar – To remove old boards easily.
- Fasteners – Use corrosion-resistant screws or nails.
Safety Gear And Best Practices
| Safety Gear | Purpose |
|---|---|
| Safety Goggles | Protect eyes from debris. |
| Work Gloves | Protect hands from splinters. |
| Dust Mask | Prevent inhalation of dust. |
| Steel-Toed Boots | Protect feet from heavy objects. |
Follow these best practices for safety:
- Always wear safety gear.
- Check tools for damage before use.
- Work in a well-ventilated area.
- Keep the work area clean and organized.
- Be aware of your surroundings.
Removing Old Deck Boards
Removing old deck boards is essential for deck maintenance. It ensures safety and enhances the overall look. This process can be straightforward with the right tools and approach.
Step-by-step Removal Process
- Gather Tools: You will need a pry bar, hammer, and a drill.
- Inspect the Deck: Look for loose or damaged boards. Identify which boards need removal.
- Remove Fasteners: Use a drill or screwdriver to take out screws or nails.
- Lift the Board: Insert the pry bar under the board. Gently lift to break the seal.
- Pull Away: Carefully pull the board away from the frame.
- Check Underneath: Inspect for any hidden damage or pests.
Disposal Of Old Materials
Disposing of old deck boards properly is crucial. Follow local guidelines for disposal.
- Reuse: Consider reusing boards for other projects.
- Recycle: Check if your area has recycling programs for wood.
- Landfill: If disposal is necessary, use a local landfill.
| Disposal Method | Description |
|---|---|
| Reuse | Use old boards for smaller projects. |
| Recycle | Find a recycling center for wood. |
| Landfill | Dispose of materials at a local landfill. |
Preparing The Deck Structure
Before replacing deck boards, prepare the deck structure. A solid structure ensures durability. Proper preparation prevents future issues. Check all components carefully. This section highlights essential steps to take.
Inspecting The Joists
Start by inspecting the joists. Joists are the beams that support your deck. Look for signs of damage:
- Cracks or splits
- Rot or decay
- Insect infestations
Use a flashlight to check hard-to-see areas. Tap the joists with a hammer. Listen for hollow sounds. This indicates damage.
Replace any damaged joists. Use treated lumber for better protection. Ensure they are level before proceeding.
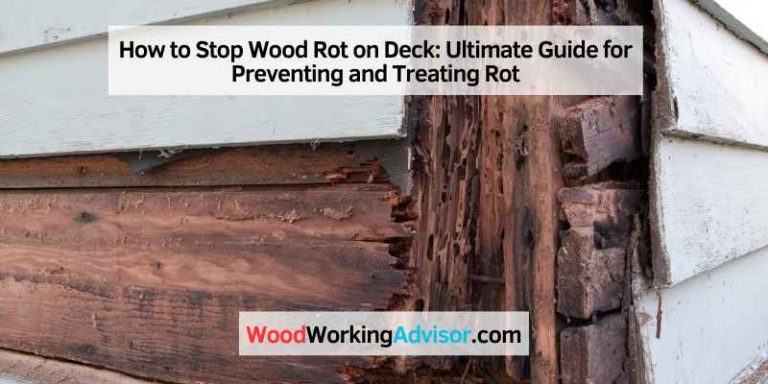
Preventing Future Rot And Damage
Prevent future rot and damage with these tips:
| Tip | Description |
|---|---|
| Seal the Wood | Apply a quality wood sealer. |
| Improve Drainage | Ensure water flows away from the deck. |
| Regular Maintenance | Inspect and clean your deck regularly. |
| Use Composite Materials | Consider composite boards for longevity. |
These steps help maintain a healthy deck structure. Focus on protecting your investment.
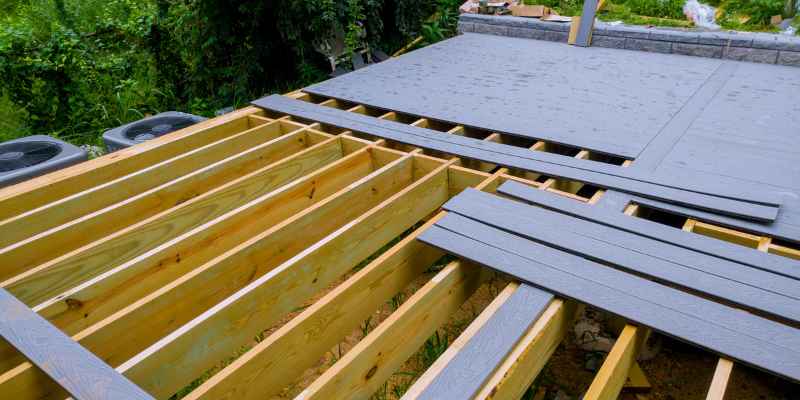
Installing New Deck Boards
Replacing deck boards can greatly enhance your outdoor space. New boards improve safety and aesthetics. This process requires careful planning and execution.
Board Alignment And Securing Techniques
Proper alignment is crucial for a sturdy deck. Here are some steps to ensure your boards are aligned correctly:
- Start at a Corner: Begin with one corner of the deck.
- Use a Straight Edge: Lay a straight edge along the first board.
- Check for Gaps: Ensure no gaps between the boards.
- Secure with Screws: Use deck screws instead of nails.
Deck screws provide better holding power. They resist warping and corrosion. Aim for a 1-2 inch distance from the edges of each board.
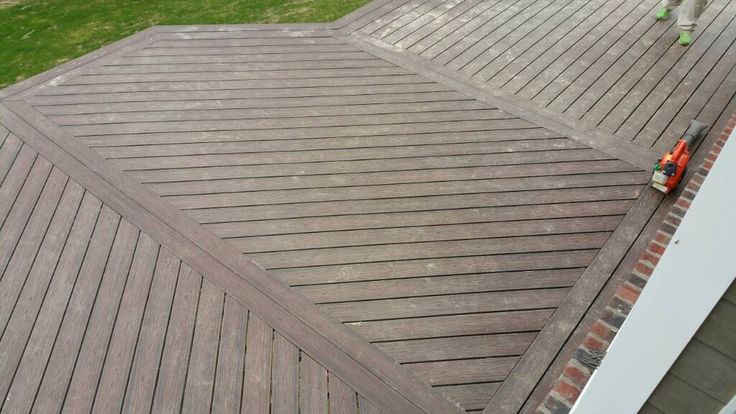
Spacing And Cutting For A Professional Finish
Spacing is vital for water drainage and expansion. Follow these tips for perfect spacing:
- Use Spacers: Place spacers between each board.
- Standard Gap: Maintain a 1/8 inch gap.
Cutting boards accurately ensures a neat look. Here’s how to cut:
- Measure Twice: Always double-check your measurements.
- Use a Circular Saw: For straight cuts, a circular saw works best.
- Smooth Edges: Sand down any rough edges.
These steps help achieve a professional finish. Your deck will look great and last longer.
Finishing Touches And Maintenance
After replacing deck boards, focus on the finishing touches and maintenance. Proper care ensures your deck lasts longer and looks great. Simple steps can keep your deck in top shape.
Sealing And Staining For Longevity
Sealing and staining protect your deck from weather and wear. Here’s how:
- Choose the right sealant: Look for weather-resistant options.
- Apply stain: Select a color that enhances wood grain.
- Follow instructions: Read the manufacturer’s guidelines carefully.
Consider the following table for sealing and staining tips:
| Task | Frequency | Best Time |
|---|---|---|
| Seal the deck | Every 1-3 years | Spring or Fall |
| Stain the deck | Every 2-3 years | Dry, warm days |
Routine Care For A Lasting Deck
Regular maintenance keeps your deck beautiful. Follow these simple steps:
- Clean regularly: Sweep leaves and debris weekly.
- Wash the surface: Use a deck cleaner every season.
- Inspect boards: Look for signs of damage or rot.
- Remove stains: Treat spills immediately to prevent stains.
With these maintenance tips, your deck will shine for years.
Troubleshooting Common Issues
Replacing deck boards can lead to some common issues. Understanding how to troubleshoot these problems can save time and effort. Here are some common issues and their solutions.
Addressing Squeaky Boards
Squeaky boards can be annoying. They usually indicate loose boards or improper installation. Follow these steps to fix squeaky boards:
- Locate the Squeak: Walk on the deck to find the exact spot.
- Check for Loose Screws: Tighten any loose screws or nails.
- Add Wood Glue: Apply wood glue between the board and joist.
- Use Shims: Insert shims where needed for extra support.
These simple steps can help eliminate squeaks effectively.
Fixing Minor Imperfections Post-installation
Minor imperfections can occur after installation. These may include gaps, uneven boards, or discoloration. Here’s how to address these issues:
- Gaps: Fill gaps with a deck filler or caulk.
- Uneven Boards: Use a sander to smooth out uneven areas.
- Discoloration: Clean the boards with a wood cleaner.
For more severe imperfections, consider replacing the affected boards.
| Issue | Solution |
|---|---|
| Squeaky Boards | Tighten screws, add wood glue, or use shims. |
| Gaps | Fill with deck filler or caulk. |
| Uneven Boards | Smooth with a sander. |
| Discoloration | Clean with wood cleaner. |
Addressing these issues promptly keeps your deck looking great.
Costs And Budgeting For Your Deck Project
Planning a deck project involves understanding costs. Knowing what to expect helps you budget wisely. Replace deck boards is a key part of this process. Let’s explore how to estimate costs and save money.
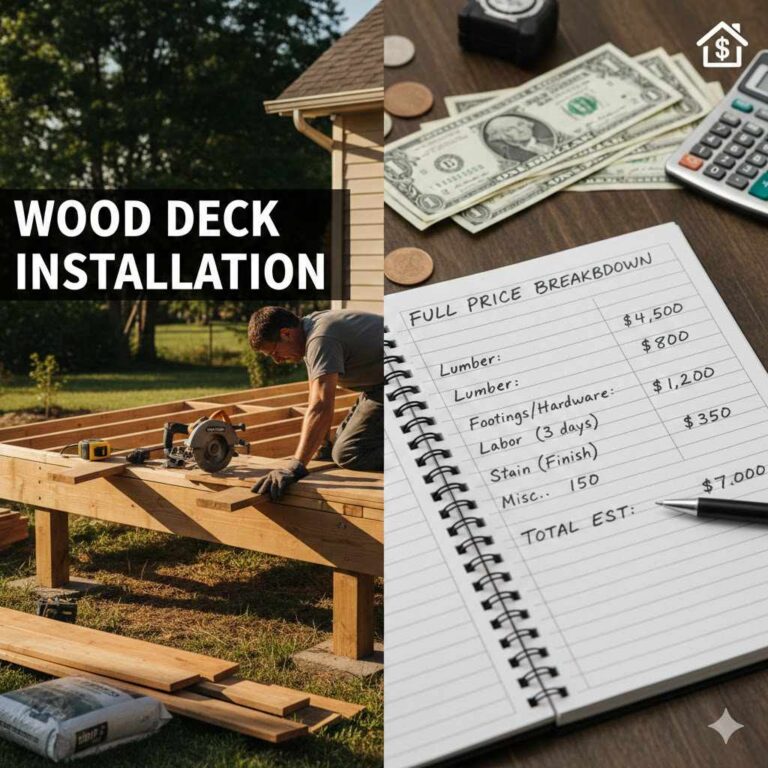
Estimating Material And Labor Costs
Understanding your budget starts with estimating costs. Here are the main factors to consider:
- Material Costs: Prices vary based on wood type and quality.
- Labor Costs: Professional installation can add to your budget.
- Deck Size: Larger decks require more materials and labor.
Here’s a simple table to help you estimate costs:
| Item | Average Cost |
|---|---|
| Pressure-Treated Wood | $2 – $5 per sq. ft. |
| Cedar Wood | $3 – $7 per sq. ft. |
| Composite Decking | $5 – $10 per sq. ft. |
| Labor | $30 – $70 per hour |
Tips For Saving Money Without Compromising Quality
Saving money is possible without sacrificing quality. Here are some tips:
- DIY: Take on the project yourself if possible.
- Buy in Bulk: Purchase materials in larger quantities for discounts.
- Off-Season Purchases: Buy materials during off-peak seasons for better deals.
- Choose Durable Materials: Invest in quality materials to reduce long-term costs.
- Reuse Existing Materials: Salvage usable boards or hardware from your old deck.
These strategies help you stay within budget. Quality doesn’t always mean high costs. Smart choices make a big difference.
Hiring Professionals Vs. DIY Approach
Deciding whether to hire professionals or tackle a deck board replacement yourself can be tough. Each option has its pros and cons. Understanding these can help you make the best choice.
When To Call In The Experts
Some situations clearly call for professional help. Here are key indicators:
- Complex Designs: Intricate patterns need skilled hands.
- Time Constraints: Busy schedules may not allow DIY efforts.
- Safety Concerns: Working with heavy materials can be dangerous.
- Permits Required: Local laws may need professional licenses.
Calling in experts ensures quality work. They have experience, tools, and knowledge. This can save time and stress.
Resources And Guides For DIY Enthusiasts
For those who prefer a DIY approach, many resources exist. Use them to gain confidence and skills:
| Resource Type | Description |
|---|---|
| Online Tutorials | Step-by-step videos showing the entire process. |
| DIY Books | Comprehensive guides covering techniques and materials. |
| Forums | Communities sharing tips and experiences. |
| Workshops | Local classes teaching hands-on skills. |
Follow these resources to enhance your DIY skills. Research materials, tools, and techniques before starting.
Choose wisely between professionals and DIY. Both paths can lead to a beautiful deck.
Showcasing Your Renovated Deck
After replacing your deck boards, it’s time to show off your hard work. A well-styled deck enhances your outdoor space. It becomes a perfect spot for relaxation and gatherings.
Styling And Decor Ideas
Transform your renovated deck into a stunning outdoor oasis. Here are some easy styling tips:
- Outdoor Rugs: Use colorful rugs to define spaces.
- Furniture: Choose weather-resistant furniture for comfort.
- Plants: Add potted plants for a fresh vibe.
- Lighting: String lights create a magical atmosphere.
Consider these themes to match your style:
| Theme | Description |
|---|---|
| Coastal | Use blues and whites for a beachy feel. |
| Rustic | Incorporate wooden elements and earthy tones. |
| Modern | Sleek lines with minimal decor for a chic look. |
Hosting The Perfect Deck Gathering
Gather friends and family on your newly renovated deck. Create a fun and inviting atmosphere.
- Set Up Comfortable Seating: Ensure everyone has a spot to relax.
- Plan a Menu: Choose easy-to-eat foods like finger foods.
- Provide Drinks: Offer a variety of beverages for everyone.
- Entertainment: Consider games or music for enjoyment.
Remember these tips for a successful gathering:
- Keep the deck clean and tidy.
- Arrange seating for easy conversation.
- Use candles or lanterns for evening events.
Frequently Asked Questions
How Do I Know When To Replace Deck Boards?
Look for signs of rot, warping, or splintering. If the boards feel soft or have visible mold, it’s time to replace them. Regular inspections every season can help catch issues early. Replacing damaged boards ensures safety and extends the life of your deck.
What Materials Are Best For Deck Board Replacement?
Composite, PVC, and hardwood are popular choices. Composite boards resist fading and require low maintenance. PVC is waterproof and durable, while hardwood offers a classic look. Choose a material that fits your budget and maintenance preferences for optimal results.
Can I Replace Deck Boards Myself?
Yes, replacing deck boards is a DIY-friendly project. Ensure you have the right tools, such as a saw, drill, and safety gear. Follow manufacturer guidelines for best practices. However, if you’re unsure, consider hiring a professional for assistance.
How Long Does It Take To Replace Deck Boards?
The time required depends on the size and condition of your deck. A small deck may take a few hours, while a larger one could require several days. Plan for potential complications, such as removing old boards. Proper preparation can speed up the process significantly.
Conclusion
Replacing deck boards can significantly enhance your outdoor space. It improves safety and boosts curb appeal. Regular maintenance ensures your deck lasts longer and looks great. Don’t hesitate to tackle this project. With the right tools and materials, you can achieve impressive results.
Enjoy your revitalized deck for years to come!