Should I Put Polyurethane Over Painted Cabinets? Unlock Durability!
Yes, you can put polyurethane over painted cabinets. Ensure the paint is fully cured and choose the right type of polyurethane for best results.
Applying polyurethane over painted cabinets can enhance durability and provide a protective layer. This clear finish guards against scratches, moisture, and wear, ensuring your cabinets last longer. It also adds a subtle sheen, improving the overall appearance. Before starting, it’s crucial to prepare the surface properly.
Clean any dust or grease, and verify that the paint has cured completely. Choosing the right polyurethane—water-based or oil-based—will affect the final look and drying time. Always test a small area first to ensure compatibility. With the right approach, you can elevate your painted cabinets, combining beauty with resilience.
Introduction To Polyurethane Over Painted Cabinets
Applying polyurethane over painted cabinets can enhance their durability. This clear finish protects against scratches and stains. It adds a glossy look, making cabinets more appealing. Many homeowners wonder if this step is necessary. Understanding the benefits and concerns helps in making an informed choice.
Benefits Of Adding A Protective Layer
Adding polyurethane provides several advantages:
- Enhanced Durability: Protects against everyday wear and tear.
- Stain Resistance: Shields cabinets from spills and stains.
- Easy Cleaning: Smooth surface allows for quick wipe-downs.
- Improved Aesthetics: Adds a beautiful sheen to the finish.
- Long-lasting Protection: Extends the lifespan of painted cabinets.
Common Concerns And Myths
Many myths surround the use of polyurethane on painted surfaces:
- Myth 1: Polyurethane will yellow over time.
- Myth 2: It will peel off easily.
- Myth 3: It’s too difficult to apply.
- Myth 4: Only oil-based polyurethane can be used.
Understanding these myths helps clear confusion. With proper application, polyurethane can be a perfect choice.
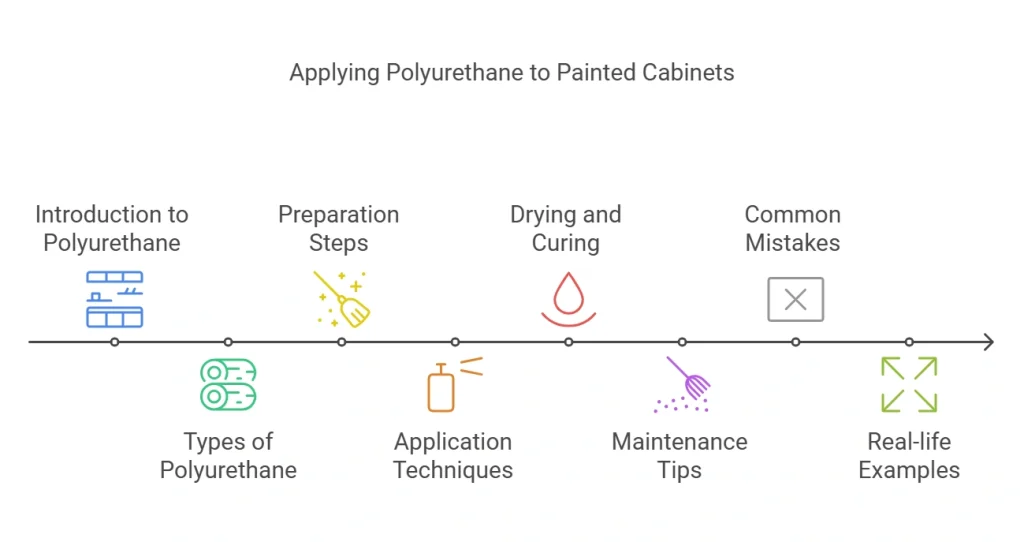
Types Of Polyurethane Suitable For Cabinets
Choosing the right polyurethane for painted cabinets is crucial. It protects the finish and enhances durability. Two main types are available: oil-based and water-based. Each has unique properties and benefits. Understanding these types helps you make the best choice.
Oil-based Vs. Water-based
Both oil-based and water-based polyurethanes have distinct features. Below is a comparison to help you decide:
| Feature | Oil-Based Polyurethane | Water-Based Polyurethane |
|---|---|---|
| Drying Time | Longer drying time | Faster drying time |
| Odor | Stronger odor | Low odor |
| Durability | More durable | Less durable |
| Yellowing | Tends to yellow over time | Remains clear |
| Cleanup | Requires solvents | Water cleanup |
Oil-based polyurethane is ideal for high-traffic areas. It provides excellent protection but has a strong odor. Water-based polyurethane is easy to apply and cleans up with water. Choose based on your needs and preferences.
Choosing The Right Finish: Glossy, Satin, Or Matte?
The finish of your polyurethane impacts the look of your cabinets. Here are the main options:
- Glossy: Provides a shiny, reflective surface. Best for modern styles.
- Satin: Offers a soft sheen. Balances elegance and practicality.
- Matte: Delivers a non-reflective finish. Great for a rustic or vintage look.
Consider the room’s lighting and decor. Glossy finishes show imperfections easily. Satin finishes are the most popular choice. Matte finishes hide fingerprints and smudges well.
Choosing the right polyurethane and finish is vital. It protects your cabinets and enhances their beauty. Make informed decisions for lasting results.
Preparation Steps For Application
Preparing your painted cabinets for polyurethane is crucial. Proper preparation ensures a smooth finish and long-lasting results. Follow these steps for the best outcome.
Cleaning And Sanding The Surface
Cleaning and sanding are vital steps. They help the polyurethane adhere well. Here’s how to do it:
- Gather Supplies: Use a mild cleaner, soft cloths, and fine-grit sandpaper.
- Clean the Cabinets: Wipe the cabinets with a damp cloth. Use the cleaner to remove grease and dirt.
- Sanding: Lightly sand the surface with fine-grit sandpaper. This helps create a rough surface for better adhesion.
- Dust Removal: Wipe the surface again to remove dust.
Tackling Dust And Ensuring A Smooth Base
Dust can ruin your finish. Follow these steps to tackle dust effectively:
- Use a Tack Cloth: This cloth picks up dust well. Wipe down the entire surface thoroughly.
- Check for Imperfections: Look for any scratches or spots. Sand them down lightly.
- Final Wipe: Do a final wipe with a clean cloth. Ensure the surface is completely dust-free.
These preparation steps are essential. They guarantee a beautiful finish for your painted cabinets.

Application Techniques For Best Results
Applying polyurethane over painted cabinets requires careful technique. The right method ensures a smooth, durable finish. Two popular options are brushing and spraying. Each has its strengths and weaknesses. Understanding these can help you make the best choice.
Brush Vs. Spray: Pros And Cons
| Method | Pros | Cons |
|---|---|---|
| Brush |
|
|
| Spray |
|
|
Tips For Avoiding Drips And Streaks
Drips and streaks can ruin your project. Follow these tips for a flawless finish:
- Choose the right product: Use a high-quality polyurethane.
- Thin layers: Apply in thin, even coats.
- Work quickly: Avoid letting the product sit too long.
- Maintain a wet edge: Keep edges wet for a smooth transition.
- Sand between coats: Lightly sand between each layer.
- Use proper lighting: Good light helps spot imperfections.
Following these techniques ensures a beautiful, lasting finish. Invest time in your application method for the best results.
Drying Time And Curing Process
Understanding the drying time and curing process of polyurethane is crucial. Proper application leads to a durable finish on your painted cabinets. Knowing the difference between drying and curing helps you plan your project effectively.
Patience Is Key: Drying Vs. Curing
Many people confuse drying and curing. Both processes are important but serve different purposes.
- Drying: This refers to the time it takes for the surface to feel dry. Typically, this can take from a few hours to a day, depending on conditions.
- Curing: This is the complete hardening of the finish. Curing can take several days or even weeks.
It’s crucial to wait for both processes to complete. Rushing can lead to scratches and damage. Always follow the manufacturer’s recommendations for best results.
Factors Affecting Drying Time
Several factors influence the drying time of polyurethane over painted cabinets:
| Factor | Effect on Drying Time |
|---|---|
| Temperature | Higher temperatures speed up drying. |
| Humidity | High humidity slows down drying. |
| Airflow | Good airflow promotes faster drying. |
| Coat Thickness | Thicker coats take longer to dry. |
Monitor these factors to ensure optimal results. Adjust your workspace for better drying conditions. Keep the area well-ventilated. This helps speed up the drying process.
Maintenance Tips For Longevity
Proper maintenance ensures your painted cabinets last longer. Use these tips to keep them looking new and fresh. Regular care prevents damage and wear over time.
Routine Cleaning Practices
Cleaning your cabinets regularly is essential. Use the right methods to avoid damage. Follow these simple steps:
- Use a soft cloth or sponge.
- Mix warm water with a few drops of mild dish soap.
- Gently wipe the surfaces.
- Dry immediately with a clean cloth.
Avoid abrasive cleaners. They can scratch the surface. Regular cleaning helps maintain the finish.
Dealing With Wear And Tear
Even with care, wear and tear happen. Address issues quickly to prevent further damage. Here are some tips:
- Inspect regularly: Check for chips or scratches.
- Touch up paint: Use matching paint to fix small areas.
- Reapply polyurethane: Consider a new coat every few years.
- Handle with care: Open doors and drawers gently.
These steps keep your cabinets in great shape. Protect your investment with regular maintenance.
Common Mistakes To Avoid
Applying polyurethane over painted cabinets can enhance their beauty. Avoiding common mistakes ensures a smooth finish and durability. Here are the key mistakes to steer clear of.
Skipping Prep Work
Proper preparation is crucial for success. Skipping this step can lead to problems. Here’s what to remember:
- Clean the surface: Remove dust and grease.
- Sanding: Lightly sand the paint for better adhesion.
- Repair damages: Fill in any chips or scratches.
Neglecting prep work can cause the polyurethane to peel off. Always take time to prepare your cabinets.
Applying Too Thick Or Too Thin Layers
The thickness of the polyurethane layer matters. Both too thick and too thin can create issues. Follow these tips:
| Layer Thickness | Possible Issues |
|---|---|
| Too Thick | Drips, uneven finish, long drying time |
| Too Thin | Insufficient protection, quicker wear |
Use a brush or roller for even application. Aim for thin, even coats. Allow each layer to dry fully before applying the next.
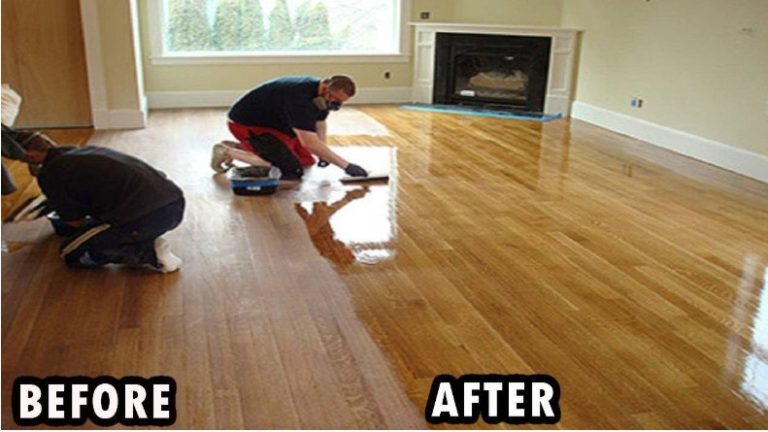
Real-life Examples And Success Stories
Many homeowners have transformed their painted cabinets with polyurethane. These real-life examples show how effective this process can be. Let’s explore some amazing transformations and hear from satisfied customers.
Before And After Transformations
Visual changes can be stunning. Check out these examples:
| Before | After |
|---|---|
 |
 |
 |
 |
 |
 |
Each transformation highlights the shine and durability of polyurethane. Painted cabinets look fresh and new. The results speak for themselves!
Testimonials From Satisfied Homeowners
Homeowners love the results of using polyurethane. Here are some testimonials:
- Sarah M.: “My cabinets look brand new! The shine is incredible!”
- John T.: “I didn’t think my old cabinets could look this good!”
- Emily R.: “The finish is smooth and easy to clean. I’m so happy!”
These stories show the positive impact of polyurethane on painted cabinets. Homeowners enjoy enhanced aesthetics and protection. They appreciate how easy it is to maintain their beautiful cabinets.
Frequently Asked Questions
Should I Use Polyurethane On Painted Cabinets?
Yes, applying polyurethane over painted cabinets can enhance durability. It adds a protective layer that resists scratches and stains. Ensure the paint is fully cured before application. Choose a compatible polyurethane for best results, and consider a satin or semi-gloss finish for an appealing look.
What Type Of Polyurethane Is Best For Cabinets?
Oil-based polyurethane is often recommended for cabinets. It offers excellent durability and a rich finish. However, water-based options are quicker to dry and have less odor. Choose based on your project’s needs and desired finish. Always check compatibility with the paint used on your cabinets.
How Long Does Polyurethane Take To Dry On Cabinets?
Polyurethane typically takes 24 hours to dry on cabinets. However, full curing can take up to a week. Conditions like humidity and temperature can affect drying time. Always follow the manufacturer’s guidelines for the best results. Patience ensures a smooth, durable finish.
Can I Apply Polyurethane Directly To Paint?
Yes, you can apply polyurethane over painted surfaces. Ensure the paint is completely dry and cured. Lightly sand the painted surface for better adhesion. This helps the polyurethane bond effectively. Always use a compatible product for optimal results and a professional finish.
Conclusion
Applying polyurethane over painted cabinets can enhance durability and aesthetics. It protects against wear and tear while maintaining the paint’s vibrant look. Choose the right type of polyurethane to achieve the best results. A well-finished cabinet can transform your space, making it both functional and beautiful.
Invest in quality for lasting appeal.