Sanding Between Coats of Paint: Grit Guide by Paint Type
Sanding between coats of paint means a light scuff with 220-grit or finer paper, enough to dull the sheen and level drips so the next coat bonds. It is not always mandatory: Sherwin-Williams says glossy surfaces should be sanded dull, while a smooth surface recoated on time can skip it. This guide covers recoat times from three maker data sheets, the right grit, the spray paint timing trap, and dresser technique.
What You’ll Need
Best Between-Coats Sandpaper Pick
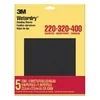 |
3M Wetordry Sandpaper, 5 Sheets, Assorted 220/320/400 Grit, $6.37 One pack covers the 220, 320 and 400 steps in the grit table below, and the paper is made for wet or dry use, so it works for the wet-sanding option this guide explains.
|
As an Amazon Associate we earn from qualifying purchases.
A short kit covers nearly every job on trim, doors or furniture. For broader prep and product picks across paint types, see our wood painting hub.
- 220, 320 and 400-grit sandpaper or sanding sponges
- A sanding block for flat areas, or a sponge for curves and edges
- A tack cloth or a lint-free microfiber cloth
- A bucket of water and a towel if you wet sand with wet-or-dry paper
- A dust mask and eye protection
Do You Need to Sand Between Every Coat of Paint?
No, not every time, but more often than the “skip it” advice suggests. The data sheets we read treat sanding as surface prep for glossy or hard finishes, and Benjamin Moore specifically calls for light sanding between coats on cabinetry. Sanding is optional only on a smooth, evenly dried coat that is recoated on schedule.
When You Can Skip Sanding
Skip it when the previous coat is smooth, free of drips and dust, and you are recoating within the window on the can. The next coat bonds to the fresh film without help, and sanding a perfect coat only adds risk of cutting through it.
When Sanding Is Required
Sand when the surface is glossy, hard or already cured past the recoat window, and whenever you can see or feel drips, dust nibs or brush ridges. Sherwin-Williams states that glossy surfaces should be sanded dull, and Benjamin Moore says to sand glossy alkyds before applying Advance over them.
Recoat Time vs Sanding Time: What the Data Sheets Say
Most guides treat the recoat time as the moment it is safe to sand. The sheets do not say that. They publish a recoat time, which is when the next coat can go on, and separate notes about when the film reaches full hardness. A coat can be ready for paint long before it is hard enough to sand cleanly.
| Product (at 77F / 50% RH unless noted) | Touch | Recoat | Full hardness or cure |
|---|---|---|---|
| Sherwin-Williams ProClassic Acrylic-Alkyd Semi-Gloss | 1-2 hours | 4 hours | Sheen stated at 24 hours and 30 days |
| Benjamin Moore Advance Waterborne Alkyd Semi-Gloss 793 | 4-6 hours | 16 hours | Up to 30 days; avoid heavy abrasion for 3-5 days |
| Rust-Oleum Painter’s Touch 2X Ultra Cover spray (70F / 50% RH) | 20 minutes | Within 1 hour or after 48 hours | Fully dry in 24 hours |
Two things stand out. Benjamin Moore’s sheet says humidity or cooler temperatures will prolong dry, recoat and cure times, so a 16-hour recoat can stretch in a damp garage. And the 4-hour and 16-hour figures belong to different paints that look similar on the shelf, which is why one number from a blog post cannot be trusted for your can.
The practical test is simple: if the sandpaper clogs or the paint rolls into crumbs, the film is too soft, and you should wait longer.
“Light sanding between coats allows for a smoother finish.”
Benjamin Moore, Advance Waterborne Alkyd Semi-Gloss 793 data sheet, cabinetry section
The Spray Paint Trap: Why 1 to 48 Hours Is a Dead Zone
Spray paint breaks the usual rules. For Painter’s Touch 2X Ultra Cover, Rust-Oleum says to apply a second coat or clear coat within 1 hour or after 48 hours. Recoat in between and you risk a wrinkled finish, a failure that sanding cannot fix. The sheet also says smooth, hard or glossy finishes should be scarified by sanding, which is why a coat you let sit past 48 hours needs a scuff first. Our guide on spray paint on wood covers surface prep and coverage.
Grit Guide: What Sandpaper to Use Between Coats
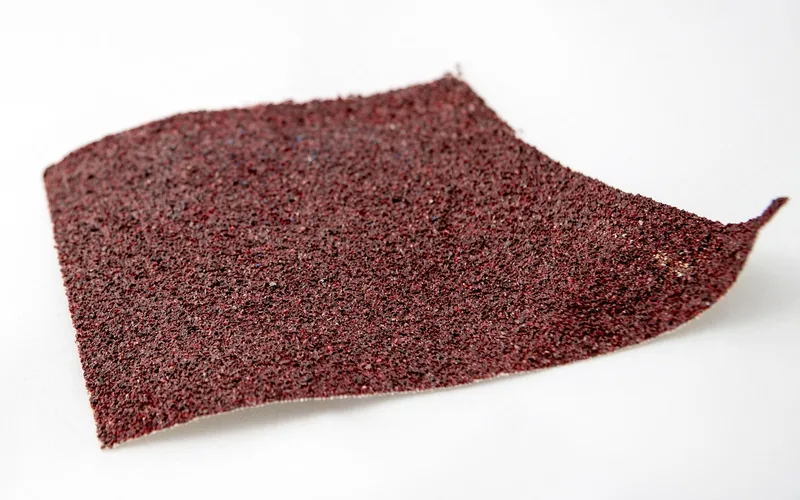
Grit is the size of the abrasive particles: the lower the number, the coarser the paper. Between coats you want fine paper that dulls the sheen without cutting through to the layer underneath. Data sheets rarely name a between-coat grit, so these steps combine the two figures makers do publish with common practice.
| Coat stage | Grit | Basis | Best for |
|---|---|---|---|
| Roughening bare or glossy surface before priming | 220 or coarser | Benjamin Moore, cabinetry prep | Giving primer something to grip |
| Between primer and first color coat, or to level drips | 220 | Common practice; 3M sells 220 for between coats | Knocking down raised grain and drips |
| Between color coats | 320 | 3M Between Coats sponge is sold in 320 | General smoothing |
| Before the final coat on gloss or semi-gloss | 400 | 3M Wetordry 400 is sold for between coats | A smooth base for the last coat |
Wet Sanding vs Dry Sanding Between Coats
Wet sanding uses wet-or-dry paper with water. It keeps loose dust down and gives a fine, even scuff, which helps on glossy finishes where dust shows. Dry sanding is faster and fine for most paint jobs, but follow it with a tack cloth to lift loose grit before the next coat. Whichever you pick, let a wet-sanded surface dry completely first.
Sanding Between Coats by Paint Type
The scuff that suits a waterborne trim paint is wrong for a lacquered or oil-based finish, and priming rules differ again. Here is what the sheets we read say for each type. For primer choices, see our wood primer and undercoat comparison.
| Paint type | What the maker sheet says | Our take |
|---|---|---|
| Waterborne acrylic-alkyd (Sherwin-Williams ProClassic) | Recoat 4 hours; glossy surfaces should be sanded dull | Scuff with 220 to 320 if the old coat is glossy; otherwise a light de-nib is enough |
| Waterborne alkyd (Benjamin Moore Advance) | Recoat 16 hours; sand glossy alkyds first; light sanding between coats on cabinets | Plan for an overnight wait, then 220 to 320 for a smoother result |
| Spray enamel (Rust-Oleum Painter’s Touch 2X) | Recoat within 1 hour or after 48 hours; scarify smooth or glossy finishes | Skip the sanding inside the 1-hour window; scuff after 48 hours |
| Primer (Zinsser Bulls-Eye 1-2-3) | Recoat in 1 hour | Sand only to remove nibs or rough spots before the topcoat |
If you are working with a clear finish rather than paint, the rules shift again. See our guide to sanding between coats of stain for wipe-on and clear finishes.
How to Sand Between Coats of Paint, Step by Step
The same seven steps apply to a wall, a door or a furniture piece. Only the grit and the sanding tool change.
- Wait out the recoat time: Let the coat dry for at least the recoat time on the can, 4 hours for Sherwin-Williams ProClassic or 16 hours for Benjamin Moore Advance at 77F and 50% humidity.
- Check the film is hard: Press a fingernail into a hidden spot: if it dents or the paint feels tacky, wait longer before sanding.
- Find the flaws: Look across the surface with a raking light to spot drips, dust nibs and brush ridges.
- Pick the grit: Use 220-grit on drips and rough areas, then 320 or 400-grit for a final smoothing pass.
- Sand lightly: Use light, even pressure until the sheen goes dull and flat, not until you see the layer underneath.
- Remove all dust: Wipe the surface with a tack cloth or a damp microfiber cloth and let it dry fully.
- Recoat: Apply the next coat as soon as the surface is clean and dry so new dust does not settle on it.
How to Sand a Painted Dresser or Other Furniture Between Coats
Sand a painted dresser between coats with 220 to 320-grit sanding sponges rather than stiff paper. The sponge flexes around drawer edges, routed details and corners without gouging the paint, which is the biggest risk on furniture. Use a lighter touch than you would on a flat door.
Remove the hardware, or tape it off, before sanding. Focus on drips that pool along bottom edges and inside corners, which show up as ridges under the final coat. For prep and repaint steps beyond sanding, see our guide to painting wood furniture and our walkthrough on how to refinish wood furniture from bare wood.
Sanding Old Painted Furniture Safely
Both the Rust-Oleum and Benjamin Moore sheets carry a warning that scraping or sanding old paint may release lead dust. Rust-Oleum advises a NIOSH-approved respirator and cleanup with a HEPA vacuum and a wet mop. If a piece is old and the paint history is unknown, test it before you sand.
Common Mistakes to Avoid
Most sanding-between-coats problems come from one of five mistakes.
Over-Sanding
Pressing hard or using too coarse a grit can cut through the coat and weaken adhesion. On furniture, edges and corners are the usual casualties because paint is thinnest there.
Sanding Before the Coat Is Hard
Sanding a coat that has only passed its recoat time can gum up the paper and tear the film. Check the hidden spot first, and add time when the room is cool or humid.
Recoating Spray Paint Between 1 and 48 Hours
This is the one spray mistake that sanding cannot rescue. Follow the can: recoat within the first hour or wait out the 48 hours, then scuff before painting.
Skipping Primer on Bare or Glossy Wood
Painting bare wood or a slick old finish without primer makes every coat work harder, and sanding will not fix poor adhesion caused by a missing primer coat. See our sandpaper grit guide for wood for the prep stage before priming.
Not Removing Dust Before Recoating
Dust left on the surface gets trapped under the next coat and feels gritty even when you cannot see it. Wipe with a tack cloth, or use one of the tack cloth alternatives we compared.
Frequently Asked Questions
Do you have to sand between every coat of paint?
No. Sanding is not a universal requirement, but glossy surfaces should be sanded dull before recoating, according to Sherwin-Williams, and a light sanding between coats gives a smoother finish on cabinets, according to Benjamin Moore. Skip it only when the surface is smooth and the next coat goes on inside the recoat window.
What grit sandpaper should I use between coats of paint?
Use 220-grit or finer. Benjamin Moore names 220 grit or coarser for roughening cabinets before priming, and 3M sells 220, 320 and 400-grit Wetordry sheets for sanding between coats of paint. Start at 220 on rough or dripped areas and move to 320 or 400 for a final smoothing pass.
How long should you wait before sanding between coats of paint?
Wait at least the data sheet recoat time, then confirm the paint is hard rather than gummy. At 77F and 50% humidity that is 4 hours for Sherwin-Williams ProClassic acrylic-alkyd and 16 hours for Benjamin Moore Advance. Cool or humid rooms take longer, so test a hidden spot first.
What happens if you don’t sand between coats of paint?
On a glossy or hard surface the next coat can fail to grip, and any drips, dust nibs or brush ridges stay visible under the final coat. On rough or dripped areas it also leaves a texture you can feel. Smooth, matte surfaces recoated on time usually bond without sanding.
Do you need to sand between coats of spray paint?
Not if you recoat inside the window. Rust-Oleum Painter’s Touch 2X says to apply a second coat within 1 hour or after 48 hours. After 48 hours, scuff the surface with sandpaper first. Between 1 and 48 hours, wait.
Can you wet sand between coats of paint?
Yes, with wet-or-dry paper, which is built to be used with water. Wet sanding keeps dust down and gives a fine scuff, but the surface must be fully dry before the next coat goes on. Use 320 to 400-grit wet-or-dry paper and keep the pressure light.
Conclusion
Match the grit to the coat stage, respect the recoat window on your own can, and wipe away every trace of dust before the next coat. For spray paint, remember the 1-hour and 48-hour rule, because no amount of sanding fixes a wrinkled coat.
Sponsored / affiliate links. As an Amazon Associate I earn from qualifying purchases. I may earn additional commission from eligible campaigns.