How to Make Wood Inlay Strips: Cutting, Banding & Gluing Guide
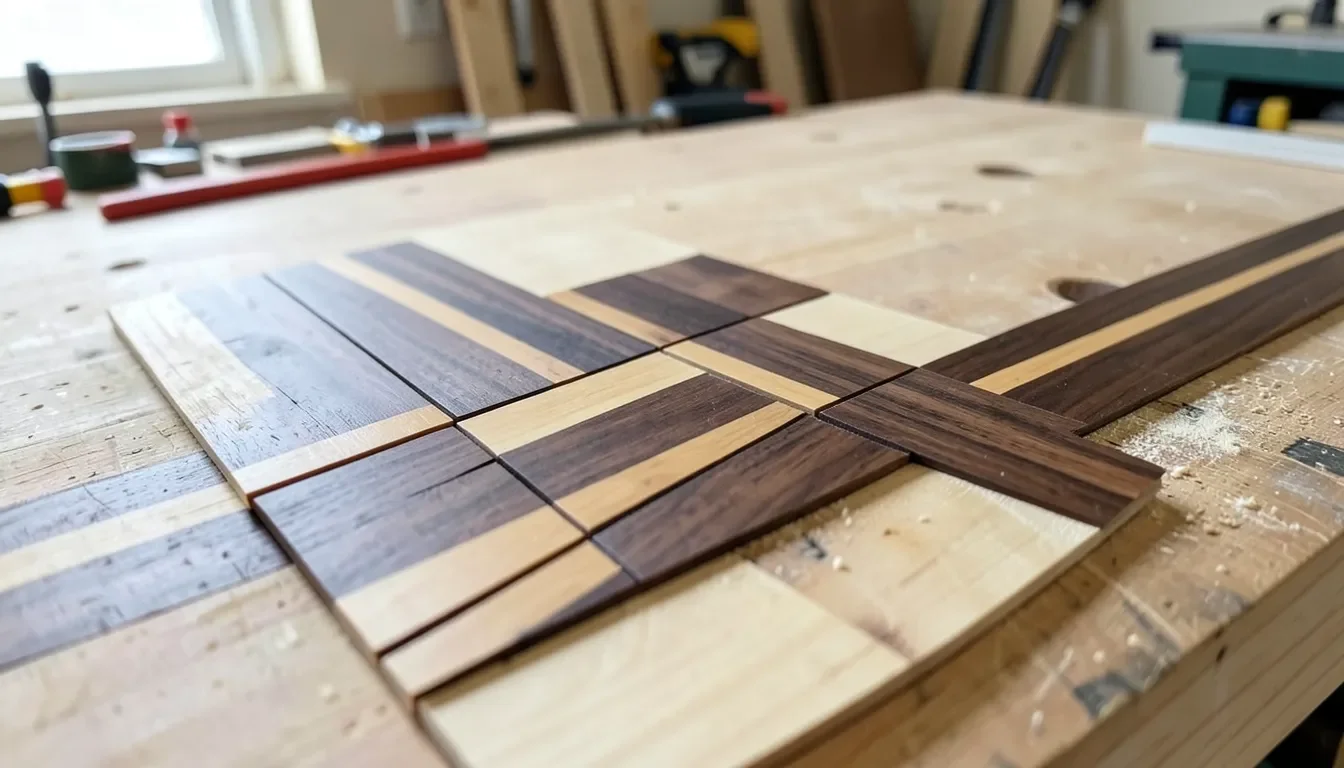
To make wood inlay strips, mill two or more contrasting hardwoods to the exact same thickness, rip them into narrow strips (1/16″ to 1/8″ wide is typical), then glue the strips into a blank that you resaw into thin banding before fitting it into a routed groove. The cutting itself isn’t the hard part — keeping every strip precisely the same width and thickness is, since a banding blank built from mismatched strips shows every gap once it’s glued down and sanded flush.
Below is the full process, including the diagonal “diamond banding” technique that turns plain contrasting strips into the chevron pattern you’ve probably seen edging antique boxes and tabletops — a step most beginner tutorials skip entirely.
What You’ll Need to Make Wood Inlay Strips
Best Jig for Ripping Consistent Inlay Strips
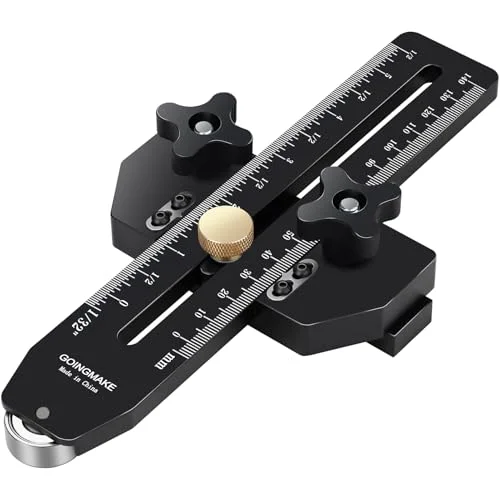 |
GOINGMAKE Thin Rip Jig Table Saw Guide – $29.99 Slides in your miter slot and rides a one-way roller bearing against the workpiece, so you can rip a whole stack of same-width inlay strips without a push stick ever passing near the blade.
|
Beyond the saw itself, you’re working with small, thin stock, so the supporting gear matters more than it would for furniture-scale cuts:
- Table saw or band saw — a band saw wastes less wood per cut (a thinner kerf), which matters when you’re ripping a dozen strips from one board.
- Thickness planer or drum sander — every strip needs to start from stock of identical thickness, or the finished banding will have a visible step.
- Thin-rip jig or push block — see the pick above; a shop-made version works too, built from a scrap of plywood with a stop block screwed to the fence.
- PVA wood glue (Titebond or similar) for gluing strips into blanks, plus enough clamps to cover the full length of the glue-up.
- Card scraper or cabinet scraper for leveling the finished banding flush without sanding through the thin veneer face.
- Safety glasses and push sticks — narrow offcuts are exactly the kind of thin, light material that can get thrown by a blade, so never rip the last piece freehand.
Step 1: Pick and Mill Your Contrasting Woods
Contrast is what makes an inlay read as a pattern instead of a smudge, so pair woods from opposite ends of the color range. Maple, holly, or birdseye maple give you a clean light strip; walnut, wenge, or padauk give you a dark one. Cherry sits in the middle and works as a third accent color if you want a three-tone band rather than a simple two-tone stripe.
Whatever species you pick, joint one face and one edge flat, then run every board through the planer together, in the same pass, so they all land at the identical final thickness. Doing this separately by species is the most common reason a finished banding blank ends up with a visible ridge between strips — a 0.005″ mismatch is invisible on its own but very obvious once it’s glued next to a contrasting color.
One caution on wood choice: oily tropical species like teak or cocobolo look striking but resist standard PVA glue. If you want to use one as an accent strip, wipe the mating glue surfaces with acetone or lacquer thinner right before glue-up to cut the surface oil, or switch to an epoxy for that joint.
Step 2: Ripping Strips to a Consistent Width
Set your rip fence (or the thin-rip jig above) to the strip width you need — usually 1/16″ to 3/16″ for banding that will get resawn again later, or up to 1/4″ if the strips are going in as-is without further slicing. Rip all of your light-wood strips first, then reset the fence by the same measured offset and rip the dark strips, so every strip in the batch matches within a few thousandths.
This is where a dedicated thin strip jig earns its keep: standard push sticks can’t grip stock this narrow safely, and a fence-mounted jig lets the offcut fall clear of the blade instead of trapping it between the blade and the fence, which is the actual kickback risk with thin ripping.
The Diamond Banding Technique
Plain alternating strips give you parallel stripes. To get the diamond or “barberpole” chevron pattern seen on higher-end boxes and tabletop borders, you cut across the grain of the striped assembly instead of along it:
- Glue your alternating light and dark strips face to face into a single striped block, clamped tight, and let it cure fully overnight.
- Square one end of the block, then slice it crosswise at a consistent angle — 30–45 degrees off square is typical — into thin wafers a few inches long. A miter gauge with a stop block keeps every angle identical.
- Flip every other wafer end-for-end before regluing them edge to edge. Because each wafer is now a mirror image of its neighbor, the diagonal stripes meet and reverse direction at each seam, forming the zigzag diamond pattern.
- Once that second glue-up cures, resaw or plane the whole assembly down to your final banding thickness — typically 1/16″ to 1/8″.
The cuts have to be precise here, because any drift in the angle compounds across the length of the strip. It’s normal to glue, slice, and reglue a section two or three times on a first attempt before the diamonds line up cleanly — budget extra stock accordingly rather than trying to stretch one glue-up across an entire tabletop border.
Gluing and Clamping the Strip Bundle
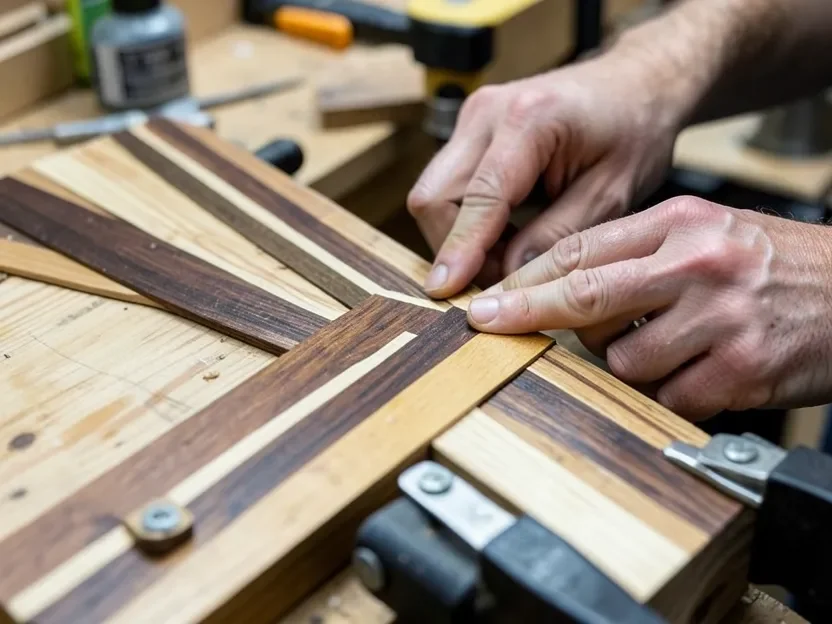
Spread glue thinly and evenly on every mating face — too much glue squeezes out and can telegraph as a thin dark line between strips once finished, especially under light-colored woods like maple. Clamp across the full length of the bundle, working from the center outward, and use scrap cauls above and below the strips so clamping pressure doesn’t crush or bow the thin stock.
Leave the glue-up clamped for at least an hour before handling and a full 24 hours before resawing or planing it — PVA glue reaches working strength quickly but needs the full cure time before you put it under the stress of a saw blade or planer knives.
Fitting Strips Into a Groove
Rout the receiving groove slightly narrower than your banding thickness — a hair of resistance when you press-fit the strip means less gap-filling glue and a tighter finished seam. Dry-fit the entire length before adding glue, then work in short sections: apply glue to the groove, press the strip in, and tap it flush with a scrap wood block rather than a metal hammer face.
Once the glue cures, pare any proud edges down with a chisel or card scraper before sanding, working from a low grit like 120 up through 220 in the direction of the surrounding wood’s grain, not the inlay’s. If you’re working on inlay that’s already installed and just needs a loose section reglued or a chipped piece patched rather than a whole new strip made from scratch, that’s a different repair process — see our wood inlay repair guide for re-gluing, fill-stick, and veneer-patch techniques.
Finishing the Inlay
Scrape and sand the inlay flush with the surrounding surface before any finish goes on — sanding after finishing tends to cut through the thin face veneer of the inlay strips and leave a dull patch. A wiping varnish or clear shellac shows off the color contrast better than an oil finish, which can darken the lighter strips enough to mute the contrast you spent time building.
Let the wood acclimate to your shop’s humidity for a few days before final gluing if it’s coming from a different storage environment — strips that are still equalizing moisture content are the most common cause of hairline gaps opening up weeks after a project looks finished.
Common Mistakes to Avoid
- Mixing planer passes. Milling each species to thickness on a separate day or setting introduces the small mismatches that show up as ridges once strips are glued edge to edge.
- Too much clamping pressure on thin stock. Strips this narrow can bow or crack under a clamp pad without a caul spreading the pressure.
- Skipping the acclimation period. Gluing strips straight from a cold garage into a heated shop is a common cause of gaps opening later.
- Routing the groove too wide. A loose-fitting groove needs gap-filling glue, which shows as a visible line once the finish goes on.
Frequently Asked Questions
What is wood inlay and how is it made?
Wood inlay is a decorative technique where thin pieces of contrasting wood, shell, or metal are set into a recessed groove cut in a larger piece of wood to form a pattern. Strips are milled to a consistent thickness, ripped narrow, glued into blanks, then resawn into thin banding that gets fitted into the groove, glued, and sanded flush.
What’s the difference between making inlay strips and repairing existing inlay?
Making inlay strips means milling and cutting your own banding stock from raw lumber to build a new pattern. Repairing inlay means fixing loose, cracked, or missing pieces in inlay that’s already installed in a piece of furniture or flooring — a different set of techniques covered in our wood inlay repair guide.
What tools do I need to make wood inlay strips?
You’ll need a table saw or band saw for ripping strips, a thickness planer or drum sander to true up thickness, a thin-rip jig or push block to safely cut narrow strips, wood glue and clamps for assembling banding, and a scraper or card scraper for leveling the finished inlay flush.
What types of wood work best for inlay strips?
Choose hardwoods with tight, stable grain and strong color contrast — maple or holly for light strips, and walnut, wenge, or padauk for dark strips. Avoid oily exotics like teak for glue-up strips unless you wipe the glue surfaces with acetone first, since natural oils weaken a standard PVA glue bond.
Conclusion
Making your own wood inlay strips comes down to two habits: mill everything to identical thickness before you cut a single strip, and don’t rush the glue cure between steps. Once those two things are locked in, the diamond banding technique above is well within reach for anyone comfortable with a table saw — and it’s the detail that separates a hand-made inlay border from a store-bought one.
Sponsored / affiliate links. As an Amazon Associate I earn from qualifying purchases. I may earn additional commission from eligible campaigns.