Your Ultimate Guide to the Summers Heat Wood Burning Stove
Hey there! If you’re cozying up to the idea of a wood burning stove to warm your home, you’ve probably come across the Summers Heat brand. Let me tell you, as someone who’s spent countless evenings curled up by the fire, there’s something magical about a wood stove’s glow. It’s not just about heat—it’s about creating a welcoming vibe in your home. Today, I’m diving deep into the world of Summers Heat wood burning stoves. I’ve explored their features, used them, and even tackled their quirks. So, grab a cup of coffee, and let’s talk about why these stoves are a fantastic choice for your home, how to use them, and how to keep them running smoothly.
Why Choose a Summers Heat Wood Burning Stove?
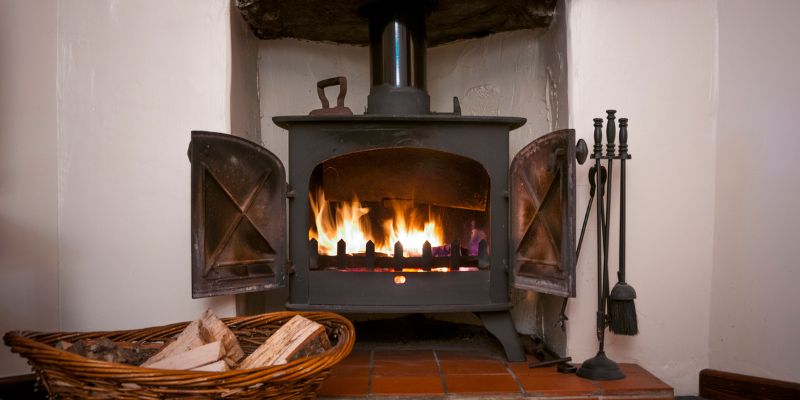
I remember the first time I saw a Summers Heat stove in action at a friend’s cabin. The warmth filled the room, and the crackle of the fire was so soothing. Summers Heat, a line from England Stove Works, has been crafting wood stoves for decades. They’re known for blending efficiency, affordability, and durability. These stoves are designed for folks like you and me—people who want reliable heat without breaking the bank.
What sets Summers Heat apart is their focus on practical design. They offer models that fit small cabins, large homes, or even mobile homes. Whether you’re heating a cozy 800-square-foot space or a sprawling 2,000-square-foot house, there’s a model for you. Their stoves meet EPA standards, which means they burn cleaner and more efficiently than older models. This is a big deal if you care about the environment or just want to save on firewood.
Another thing I love is their versatility. You can find Summers Heat stoves that burn logs, and some models even double as cooktops. Imagine simmering a pot of chili while the stove warms your home—talk about multitasking! Plus, their stoves are built to last, with heavy-duty steel and cast-iron components. I’ve seen these stoves hold up for years with proper care, which I’ll get into later.
Key Features of Summers Heat Wood Burning Stoves
Let’s break down what makes these stoves special. When I first started researching Summers Heat, I was impressed by how they pack so many features into an affordable package. Here’s what you get:
- EPA-Certified Efficiency: Most Summers Heat stoves boast efficiency ratings above 70%. This means more heat from less wood, which saves you money and trips to the woodpile.
- Large Fireboxes: Many models have spacious fireboxes that hold logs up to 18 inches. This translates to longer burn times—sometimes up to 8 hours—before you need to reload.
- Air Wash System: The glass doors stay cleaner thanks to an air wash system that circulates air to reduce soot buildup. I love being able to see the flames without scrubbing the glass every week.
- Mobile Home Approval: Some models are certified for mobile homes, which is great if you’re in a smaller or non-traditional space.
- Optional Blowers: Adding a blower can push warm air further into your home. I added one to my stove, and it made a huge difference in heating my whole living room.
Here’s a quick comparison of popular Summers Heat models to give you a sense of their range:
| Model | Heating Capacity | Firebox Size | Key Features | Best For |
|---|---|---|---|---|
| 55-SHPCB120 | Up to 2,000 sq. ft. | 2.0 cu. ft. | Blower included, EPA-certified | Large homes |
| 55-SHPCB90 | Up to 1,500 sq. ft. | 1.6 cu. ft. | Compact design, mobile home approved | Small homes or cabins |
| 55-SHPCB150 | Up to 2,500 sq. ft. | 2.4 cu. ft. | High output, long burn time | Big spaces or frequent use |
These features make Summers Heat stoves a solid pick for anyone looking to add warmth and charm to their home. But let’s talk about how to actually use one.
How to Use a Summers Heat Wood Burning Stove Safely
Using a wood stove for the first time can feel a bit daunting. I remember my first attempt—let’s just say there was more smoke than fire! But once you get the hang of it, it’s straightforward. Here’s how I set up and use my Summers Heat stove to keep things safe and efficient.
Step 1: Choose the Right Firewood
The key to a good fire is seasoned hardwood. Oak, maple, or ash are my go-tos. Seasoned means the wood has been dried for at least 6-12 months, with a moisture content below 20%. Wet wood creates smoke, creosote buildup, and less heat. I always check my logs with a moisture meter to be sure. Stack your wood off the ground, covered but well-ventilated, to keep it dry.
Step 2: Build the Fire
Start with crumpled newspaper or fire starters at the bottom of the firebox. Add small, dry kindling in a crisscross pattern. I like to use thin sticks or split wood for this. Once the kindling catches, add a couple of small logs, leaving space for air to flow. Open the air vents fully to get the fire going strong. Light the kindling from the bottom, and soon you’ll have a nice bed of embers.
Step 3: Maintain the Fire
Once the fire is established, add larger logs—two or three at a time work best. Don’t cram the firebox; airflow is crucial. Adjust the air vents to control the burn. I usually close the primary vent (bottom) slightly after 10 minutes to slow the burn and open the secondary vent (top) to keep the flames clean. This reduces smoke and maximizes heat. A stove thermometer is a game-changer here. Aim for a temperature between 260°F and 460°F for the best burn.
Step 4: Reload and Monitor
Reload every 30-60 minutes, depending on your stove’s size and heat needs. I always add logs when there’s a good bed of coals. Never leave the stove unattended with the door open, and keep flammable items like curtains or furniture at least 36 inches away. A fireproof hearth mat is a must, especially if you have kids or pets.
Step 5: Put Out the Fire Safely
When it’s time to let the fire die out, close the air vents almost completely. This slows the burn and lets the fire burn down to coals. I never fully extinguish a fire with water—it can damage the stove. Instead, let it burn out naturally, then scoop ashes into a metal container with a lid. Store it outside, away from anything flammable.
Safety is huge with wood stoves. I always keep a carbon monoxide detector nearby and have my chimney swept annually to prevent creosote buildup, which can cause chimney fires. Trust me, a little caution goes a long way.
Maintaining Your Summers Heat Wood Burning Stove
Maintenance is where a lot of folks slip up, but it’s not hard if you stay on top of it. I learned this the hard way when I skipped a chimney cleaning and ended up with a smoky mess. Here’s how I keep my Summers Heat stove in top shape.
Daily Maintenance
- Remove Ashes: Don’t clean out all the ash—leave about an inch in the firebox to insulate the base and help the next fire start. Scoop excess ash into a metal bucket when the stove is cool.
- Clean the Glass: Use a damp cloth dipped in ash to wipe the glass door. It’s a surprisingly effective trick. For stubborn soot, use a stove glass cleaner like Rutland White Off.
- Check the Door Seal: A tight seal keeps the fire efficient. I do the “paper test” monthly: close a piece of paper in the door. If it pulls out easily, the seal needs replacing.
Seasonal Maintenance
- Chimney Cleaning: Hire a certified chimney sweep every fall. They’ll check for creosote, cracks, or blockages. I schedule mine in summer to beat the rush.
- Inspect Components: Look for rust, warped baffles, or worn gaskets. My Summers Heat stove has a lifetime warranty on the body, but consumables like seals wear out over time.
- Clean the Exterior: Wipe the stove and flue pipe with a damp cloth to remove dust. If you’re not using the stove in summer, cover it to protect it from humidity.
Long-Term Care
- Store Properly: If you don’t use your stove in summer, clean it thoroughly and store any removable parts (like an Ecofan) in a dry place. I keep my firewood stacked in a ventilated shed to stay dry.
- Check the Flue: Make sure the flue pipe is secure and free of rust. A chimney cowl can keep rain out, which I added after a wet summer caused some corrosion.
Regular maintenance keeps your stove efficient and safe. It also extends its life, saving you money in the long run.
Using Your Summers Heat Stove in Summer
You might think a wood stove is only for winter, but I’ve found ways to make my Summers Heat stove useful year-round. Here’s how I get creative with it in the warmer months.
Cooking on the Stove
Some Summers Heat models have flat tops perfect for cooking. I’ve made everything from soups to steaks on mine. Cast-iron pans work best—they handle the heat and cook evenly. On cool summer evenings, I’ll light a small fire to simmer a pot of stew. It saves electricity and adds a rustic charm to dinner. Just be careful not to overfire; small, controlled fires are key in summer.
Decorating Around the Stove
When the stove’s not in use, it becomes a focal point for decor. I place potted plants or candles on top to bring some greenery indoors. You can also drape a light, summery throw over the hearth or add a stack of colorful books. It keeps the stove from looking out of place in warm weather.
Preventing Rust
Lighting a small fire every few weeks in summer keeps moisture at bay. I learned this after noticing some rust on my flue one year. A quick 20-minute fire after heavy rain dries out the system. If you don’t want to light it, a chimney cowl is a great investment to keep water out.
These tricks make the stove a versatile part of your home, even when it’s 80°F outside.
Environmental Benefits of Summers Heat Stoves
One thing I appreciate about Summers Heat stoves is their eco-friendly design. Wood is a renewable resource, unlike fossil fuels. When you burn seasoned hardwood, the carbon dioxide released is offset by the carbon absorbed by trees as they grow. It’s not perfect, but it’s a step toward sustainability.
Modern Summers Heat stoves emit up to 70% less particulate matter than older models, thanks to their secondary combustion systems. This means cleaner air for your neighborhood. I also love that I’m not relying on electric or gas heat, which cuts down on my utility bills and my carbon footprint. Just make sure to source your firewood sustainably—local suppliers or your own property are ideal.
Tips for Maximizing Efficiency
After years of using my Summers Heat stove, I’ve picked up some tricks to get the most heat for the least effort:
- Use a Stove Fan: A heat-powered fan (like an Ecofan) sits on top of the stove and circulates warm air. It’s a game-changer for even heating.
- Burn Small, Hot Fires: Big, smoldering fires waste wood and create smoke. Smaller, hotter fires burn cleaner and heat better.
- Insulate Your Home: A well-insulated home holds heat longer. I added weatherstripping to my windows, and it made a noticeable difference.
- Monitor Temperature: A stove thermometer helps you keep the fire in the sweet spot (260°F-460°F). Too low, and you get smoke; too high, and you risk damage.
These tips have saved me countless logs and kept my home cozy without cranking the stove too hard.
Common Mistakes to Avoid
I’ve made my share of mistakes with my wood stove, so let me save you some trouble:
- Burning Wet Wood: It’s tempting to use fresh-cut logs, but they’ll smoke up your house and clog your chimney. Always use seasoned wood.
- Overloading the Firebox: Stuffing too many logs in at once chokes the fire and reduces efficiency. Stick to a few logs at a time.
- Skipping Chimney Cleaning: I learned this the hard way. Creosote buildup is a fire hazard. Get that chimney swept yearly.
- Ignoring Safety Clearances: Keep furniture and flammables at least 36 inches away. I once had a rug too close, and let’s just say it was a close call.
Avoid these pitfalls, and your Summers Heat stove will be a reliable companion for years.
Why I Love My Summers Heat Stove
After exploring every nook and cranny of my Summers Heat wood burning stove, I can honestly say it’s one of the best investments I’ve made for my home. It’s more than just a heater—it’s a gathering spot for family, a conversation starter, and a way to make any evening feel special. The warmth, the crackle, the glow—it’s hard to beat. Plus, knowing I’m using a renewable resource and saving on energy bills feels pretty good too.
Whether you’re a first-time stove owner or a seasoned pro, Summers Heat offers a reliable, efficient, and affordable way to heat your home. With a bit of care and some know-how, your stove can be the heart of your home, winter or summer. So, go ahead—light that fire, cook that stew, or just enjoy the cozy vibes. You won’t regret it.

FAQs About Summers Heat Wood Burning Stoves
How often should I clean my Summers Heat stove?
Clean the glass and remove excess ash weekly during heavy use. Leave about an inch of ash in the firebox for insulation. Have your chimney swept at least once a year, ideally before the heating season.
Can I use my Summers Heat stove in a mobile home?
Yes, certain models like the 55-SHPCB90 are approved for mobile homes. Always check the manual and follow local codes for safe installation.
What’s the best wood to burn in a Summers Heat stove?
Hardwoods like oak, maple, or ash are ideal. They should be seasoned for 6-12 months with a moisture content below 20% for clean, efficient burns.
How long can a Summers Heat stove burn on one load?
Depending on the model, you can get 6-8 hours of burn time with a full load of seasoned hardwood. Larger fireboxes, like in the 55-SHPCB150, may last longer.
Is it safe to leave my Summers Heat stove burning overnight?
Yes, if you take precautions. Let the fire burn down to coals, close the air vents almost completely, and ensure the door is secure. Never leave it unattended with the door open, and keep a carbon monoxide detector nearby.
Can I cook on my Summers Heat stove?
Some models with flat tops are great for cooking. Use cast-iron cookware for best results, and keep fires small to avoid overheating in summer.
How do I prevent rust on my stove in summer?
Light a small fire every few weeks to evaporate moisture, or install a chimney cowl to keep rain out. Store the stove in a dry place if not in use.