Table Saw Featherboard DIY: Boost Your Woodworking Accuracy!
To DIY a table saw featherboard, gather wood, cut slots, attach bolts, and adjust pressure. Creating a homemade featherboard for your table saw is a cost-effective way to improve safety and precision in your woodworking projects.
By following a few simple steps, you can customize the featherboard to fit your specific needs and enhance the quality of your cuts. We will discuss the materials and tools required, the step-by-step process of building a DIY featherboard, and some tips for optimizing its performance.
Whether you are a woodworking enthusiast or a professional carpenter, incorporating a homemade featherboard into your workshop can greatly improve the accuracy and consistency of your cuts. Let’s delve into the details of this practical and versatile accessory.
Selecting Materials
When creating a DIY featherboard for your table saw, selecting the right materials is key to its effectiveness and durability. From wood choice to hardware selection, each component plays a crucial role in the overall functionality of your featherboard.
Choosing The Right Wood
Opt for hardwoods like oak or birch for their durability and resistance to wear. Avoid softwoods that may warp or splinter over time. Utilizing a sturdy and stable wood will ensure your featherboard remains sturdy during use.
Selecting The Proper Hardware
When it comes to hardware, opt for high-quality components that can withstand the rigors of the workshop. Choose T-nuts and bolts that fit securely into your wood, providing a tight grip. Ensure the adjustment mechanism is smooth and precise for easy positioning.
Design And Measurements
Crafting your own table saw featherboard allows you to customize the design and measurements to fit your specific woodworking needs. DIYing a featherboard tailored to your table saw enhances safety and precision, empowering you to produce accurate and quality cuts for your projects.
Design and Measurements are crucial when creating a Table Saw Featherboard DIY. Taking accurate measurements is key for a successful project. It’s essential to begin by creating a blueprint.
Creating A Blueprint
Creating a blueprint lays the foundation for your project.
It helps you visualize the design before starting the construction.
Detailed sketches will guide you throughout the process.
Include dimensions and specifications in your blueprint.
Ensure your blueprint is clear and easy to follow.
Taking Accurate Measurements
Accurate measurements ensure a precise fit for your featherboard.
Use a reliable measuring tape for precision.
Measure multiple times to avoid errors.
Record measurements in a notebook for reference.
Double-check all measurements before cutting any materials.
Construction Process
When it comes to constructing a table saw featherboard, the construction process involves a few key steps such as cutting the wood and attaching the hardware. It’s important to follow these steps carefully to ensure the featherboard is effective and safe to use.
Cutting The Wood
Begin by cutting the wood to the appropriate dimensions for the featherboard. Measure the width of the table saw miter slot and the height of the saw blade to determine the size of the featherboard. Use a saw to cut the wood, ensuring it’s straight and even.
Attaching The Hardware
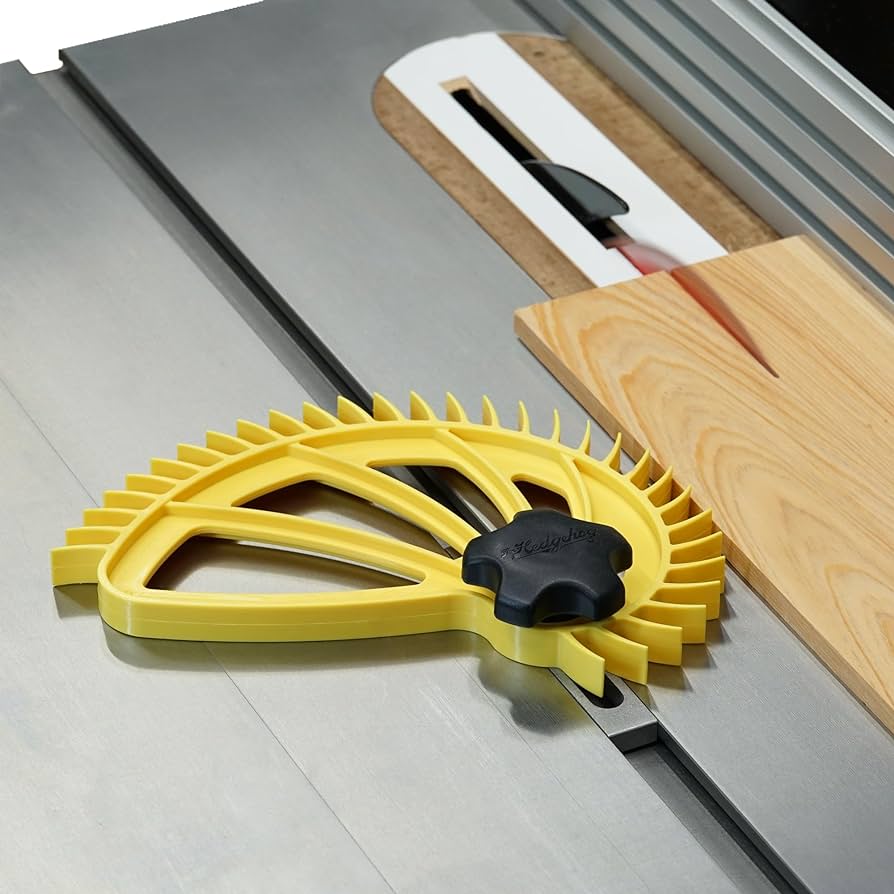
Next, attach the hardware to the wood to complete the featherboard. Drill holes in the wood to accommodate the hardware, ensuring they are positioned properly to provide the necessary pressure and support. Use screws or bolts to secure the hardware in place, ensuring it’s tight and secure.
Credit: www.leevalley.com
Featherboard Adjustments
When it comes to using a table saw featherboard, the adjustments you make play a crucial role in achieving accurate and safe cuts. By understanding how to properly set the correct pressure and maintain flexibility, you can optimize the performance of your featherboard and ensure smooth operations.
Setting The Correct Pressure
Setting the correct pressure on your featherboard is essential to keep your workpiece tightly secured against the fence and table. To do this, start by positioning the featherboard next to the blade, ensuring that the fingers of the featherboard are pressed against the workpiece.
Once in position, adjust the pressure by tightening or loosening the mounting knobs or bolts on the featherboard mechanism. It’s important to strike a balance between a snug fit and the ability to smoothly feed the stock through the blade. A general rule of thumb is to tighten the knobs until the featherboard keeps the workpiece in place without excessive force, but without hindering its movement.
Maintaining Flexibility
Flexibility is key when it comes to featherboard adjustments. Different projects may require varying degrees of pressure, and having a flexible featherboard allows you to adapt to these changing needs. Instead of using rigid materials for your featherboard, consider utilizing materials like high-density plastic or rubber, which offer more flexibility.
In addition, some featherboards are equipped with adjustable fingers that can be individually positioned to better accommodate the width and thickness of the stock. This feature further enhances the flexibility of the featherboard, making it suitable for a wide range of woodworking tasks.
Regularly inspect and clean your featherboard to maintain its functionality and flexibility. Over time, sawdust or debris can accumulate in the featherboard mechanism, leading to difficulties in adjusting the pressure and reducing its effectiveness.
In conclusion, by setting the correct pressure and maintaining flexibility, you can optimize your table saw featherboard’s performance. Remember to regularly inspect and clean your featherboard to ensure it remains in top-notch condition for accurate and safe cuts.
Safety And Usage Tips
Enhance safety and performance with a DIY table saw featherboard. Secure wood pieces for accurate cuts, preventing kickback risks. Easy to make and essential for precision woodworking projects.
Ensuring Secure Fixation
Properly securing your featherboard to the table saw is essential for safe and effective use. Here are some tips to ensure secure fixation:
- Position the featherboard firmly against the workpiece before tightening the knobs or bolts.
- Make sure the featherboard is parallel to the direction of the cut for optimal support.
- Check that the featherboard is securely locked in place and does not shift during operation.
- Adjust the featherboard as needed to maintain consistent pressure against the workpiece.
- Regularly inspect the featherboard for any signs of wear or damage, and replace if necessary.
Using The Featherboard Effectively
Using a featherboard properly can greatly enhance the safety and accuracy of your table saw operations. Follow these tips for effective usage:
- Place the featherboard before the blade, ensuring that it applies pressure against the workpiece towards the fence.
- Adjust the featherboard height to align with the top of the workpiece for optimal control.
- When working with narrow or thin stock, use multiple featherboards on either side of the blade to prevent kickback.
- Maintain constant pressure against the workpiece, but avoid excessive force that can cause binding or kickback.
- Keep your hands and fingers away from the blade at all times, utilizing the featherboard to guide the workpiece.
- Practice proper feeding technique, pushing the workpiece firmly against the featherboard and the table saw fence.
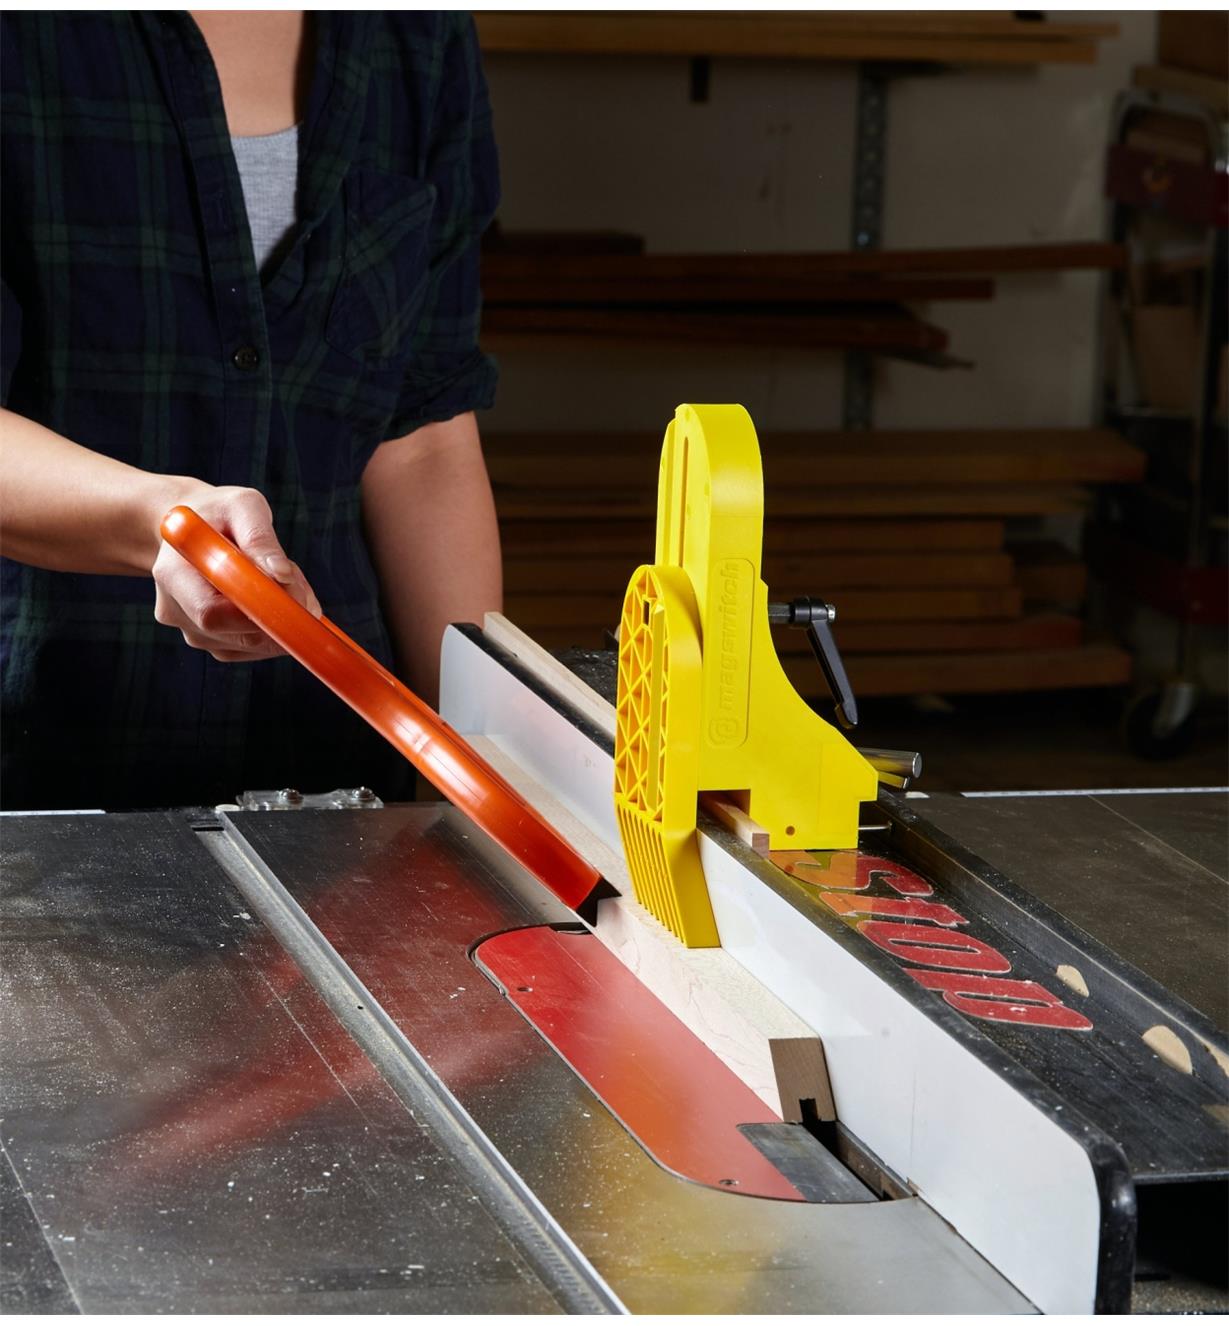
Using a table saw featherboard can significantly improve safety and precision in your woodworking projects. By ensuring secure fixation and utilizing the featherboard effectively, you can reduce the risk of kickback and achieve more accurate cuts. Remember to always prioritize safety, inspect your equipment regularly, and follow proper usage techniques.

Credit: www.amazon.com
Frequently Asked Questions On Table Saw Featherboard Diy
How Do You Make A Diy Table Saw Featherboard?
To make a DIY table saw featherboard, you will need plywood, a ruler, a drill, and screws. Measure the desired width and height of your featherboard, then cut the plywood accordingly. Drill holes for the screws and attach the featherboard to your table saw’s fence.
Adjust the position to ensure proper support while cutting.
What Is The Purpose Of A Table Saw Featherboard?
A table saw featherboard is a safety device used to help guide and hold the workpiece against the table saw’s fence. It prevents kickback and ensures accurate and consistent cuts by applying pressure parallel to the fence. This ensures that the workpiece stays firmly against the fence, preventing it from slipping or moving during cutting.
How Does A Table Saw Featherboard Work?
A table saw featherboard works by applying consistent pressure against the workpiece, pushing it towards the fence and preventing it from moving or slipping. The feather-like fingers on the featherboard help hold the workpiece securely while guiding it through the saw blade.
This ensures safer and more accurate cuts.
Conclusion
Creating your own table saw featherboard can greatly improve the safety and precision of your woodworking projects. With the right materials and attention to detail, this DIY project is accessible to woodworkers of all skill levels. By following the steps outlined in this guide, you can enhance your workshop experience and create professional-quality results.