Mastering the Temperature for Wood Burning Pen: Your Guide to Perfect Pyrography
Hey there! If you’ve ever wondered about the right temperature for wood burning pen to create stunning designs, you’re in the right place. As someone who’s spent countless hours experimenting with pyrography, I’m excited to share everything I’ve learned about getting those perfect burns. Whether you’re a beginner or a seasoned artist, understanding temperature control is key to unlocking your creativity. Let’s dive into this fiery world together!
What Is Pyrography and Why Temperature Matters
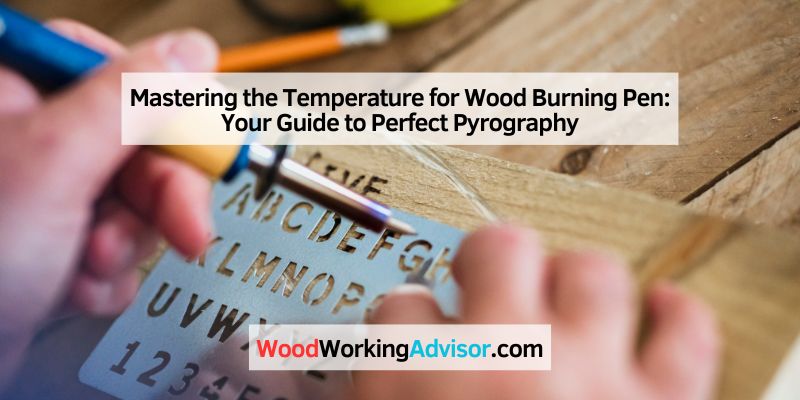
I remember the first time I picked up a wood burning pen. The smell of scorched wood and the thrill of creating something unique hooked me instantly. Pyrography, or wood burning, is the art of using a heated pen to etch designs onto wood, leather, or other surfaces. But here’s the thing: the temperature for wood burning pen can make or break your project.
Temperature affects how dark or light your burn is, the depth of the mark, and even the texture of your design. Too hot, and you’ll scorch the wood or create uneven lines. Too cool, and your pen won’t leave a mark. Finding the sweet spot is crucial, and it starts with understanding your tools and materials.
Types of Wood Burning Pens and Their Temperature Ranges
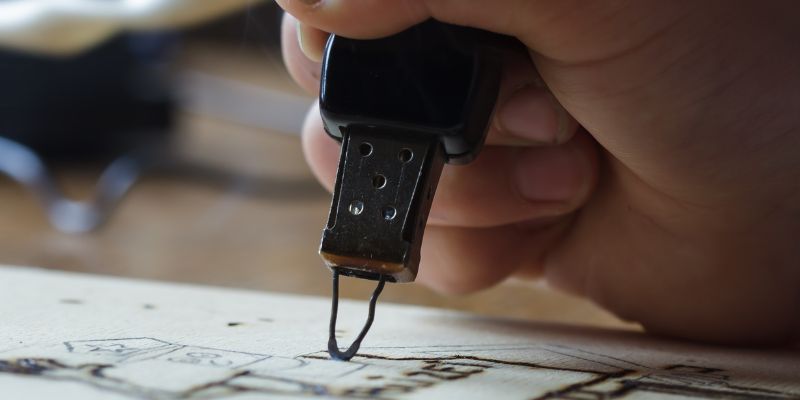
Not all wood burning pens are created equal. I’ve tried a few over the years, and each type has its own temperature quirks. There are two main types: solid-point pens and variable-temperature pens.
Solid-point pens are like the trusty old cars of pyrography. They have a fixed temperature, usually around 600–900°F. They’re great for beginners because they’re simple, but you can’t adjust the heat. Variable-temperature pens, on the other hand, are like modern electric vehicles with all the bells and whistles. They let you dial in the exact temperature for wood burning pen, typically ranging from 200°F to 1100°F.
Here’s a quick table to break it down:
| Type of Pen | Temperature Range | Best For |
|---|---|---|
| Solid-Point Pen | 600–900°F | Simple designs, beginners |
| Variable-Temperature Pen | 200–1100°F | Detailed work, advanced projects |
When I started, I used a solid-point pen. It was affordable, but I quickly realized I needed more control for intricate designs. That’s when I switched to a variable-temperature model, and it was a game-changer.
How Wood Type Affects Temperature Choice
One thing I learned early on is that not all wood burns the same. Softwoods like pine or cedar are easier to burn but can scorch quickly if your pen is too hot. Hardwoods like oak or maple need higher temperatures to leave a mark but give you crisp, clean lines.
For softwoods, I usually keep the temperature for wood burning pen between 400–600°F. This prevents burning too deep or causing charring. For hardwoods, I crank it up to 700–900°F for bold, defined lines. If you’re working on something like basswood, which is a pyrography favorite, aim for 500–700°F for a smooth finish.
Here’s a tip: always test on a scrap piece of the same wood before starting your project. I’ve ruined a few pieces by diving in too quickly, and trust me, it’s heartbreaking to mess up a design you’ve spent hours sketching.
Choosing the Right Temperature for Your Design
The design you’re creating plays a big role in picking the right temperature for wood burning pen. Are you going for fine lines, shading, or bold outlines? Each requires a different approach.
For delicate lines or lettering, I keep my pen around 400–500°F. This gives me precision without burning too deeply. Shading is trickier—you’ll want a slightly higher temperature, around 600–700°F, and a lighter touch to create smooth gradients. For bold, dark burns, like tribal patterns or silhouettes, I push the temperature to 800°F or more.
One mistake I made early on was using the same temperature for everything. I ended up with uneven burns and a lot of frustration. Now, I adjust the heat based on the effect I’m after, and my designs look so much better.
Tips for Controlling Temperature Like a Pro
Temperature control isn’t just about setting a number—it’s about technique, too. Here are some tips I’ve picked up over the years:
- Start Low and Adjust Up: If you’re unsure, begin with a lower temperature and increase gradually. It’s easier to darken a line than to fix a scorch mark.
- Keep Your Tip Clean: A dirty tip can mess with heat transfer. I wipe mine with a damp sponge or use a cleaning pad every 10–15 minutes.
- Move Steadily: Lingering too long in one spot can cause overburning, even at a moderate temperature. Keep your hand moving smoothly.
- Use a Rheostat: If your pen doesn’t have built-in temperature control, a rheostat can help regulate power. I got one for my old solid-point pen, and it made a huge difference.
I also recommend investing in a pen with a digital temperature display. It takes the guesswork out of finding the perfect temperature for wood burning pen. My current setup has one, and I can’t imagine going back.
Safety Tips for Working with High Temperatures
Wood burning is fun, but it’s also, well, burning. Safety is a big deal. I’ve had a few close calls, like accidentally touching a hot tip (ouch!), so here’s what I do to stay safe:
- Always work in a well-ventilated area. The fumes from burning wood can be irritating.
- Use a heat-resistant surface or stand for your pen when it’s not in use.
- Keep a glass of water nearby to cool your tip if needed.
- Wear heat-resistant gloves if you’re working for long periods.
- Never leave your pen plugged in unattended.
One time, I got distracted and left my pen on a wooden table. Let’s just say I have a permanent “art piece” on that table now. Learn from my mistakes!
Common Mistakes and How to Avoid Them
We all mess up sometimes, especially when starting out. Here are some common mistakes I’ve made with the temperature for wood burning pen and how to avoid them:
- Using Too High a Temperature: This leads to charred, uneven burns. Always start lower than you think you need.
- Ignoring Wood Grain: Burning against the grain can cause jagged lines. Follow the grain for smoother results.
- Not Practicing First: I can’t stress this enough—test your temperature on scrap wood first.
- Rushing the Process: Pyrography takes patience. Move slowly and let the heat do the work.
When I was new, I’d crank the heat up thinking it’d make things faster. Instead, I ended up with blotchy designs and a lot of sanding to do. Slow and steady wins the race here.
Advanced Techniques for Temperature Mastery
Once you’ve got the basics down, you can start playing with advanced techniques. I love experimenting with texture and depth by varying the temperature for wood burning pen. For example, layering light burns at 400°F with darker ones at 700°F can create a 3D effect.
Another trick is using different tips at different temperatures. A fine-point tip at a low temperature is great for details, while a broad chisel tip at a higher temperature can fill in large areas quickly. I also like mixing media—adding colored pencils or stains after burning to enhance the design. Just make sure your wood is cool before applying anything.
Choosing the Right Wood Burning Kit for Temperature Control
If you’re shopping for a wood burning kit, look for one with good temperature control. I started with a cheap kit, and while it got the job done, the lack of adjustability was limiting. Now, I use a variable-temperature kit with multiple tips and a digital display. Brands like Walnut Hollow and Razertip are solid choices.
Here’s what to look for:
- Adjustable temperature range (at least 200–1000°F).
- Interchangeable tips for versatility.
- A comfortable grip for long sessions.
- A reliable stand to keep your workspace safe.
Investing in a good kit makes controlling the temperature for wood burning pen so much easier and opens up more creative possibilities.
How to Maintain Your Wood Burning Pen
Your pen is your trusty sidekick, so take care of it. I clean my tips regularly to keep them in top shape. A wire brush or sandpaper works wonders for removing carbon buildup. If your pen has a temperature control unit, check the cords for wear and tear. I had to replace a frayed cord once, and it was a hassle I could’ve avoided with regular checks.
Store your pen in a dry place to prevent rust, and always unplug it when not in use. A well-maintained pen ensures consistent temperatures and better results.
Exploring Other Materials with Your Wood Burning Pen
Wood isn’t the only canvas for pyrography. I’ve had fun burning designs onto leather, cork, and even gourds. Each material needs a different temperature for wood burning pen. Leather, for example, burns well at 300–500°F, while gourds might need 600–800°F.
Be careful with synthetic materials like plastic or treated wood—they can release toxic fumes. Stick to natural materials and always test your temperature first. My favorite non-wood project was a leather journal cover I burned with a Celtic knot design. It took some trial and error, but the result was worth it.

Wrapping Up: Unleash Your Creativity with Confidence
I hope this guide has sparked your excitement for pyrography as much as it’s reignited mine. Mastering the temperature for wood burning pen is all about practice, patience, and a little experimentation. Whether you’re etching a simple nameplate or creating a detailed masterpiece, the right temperature can bring your vision to life. Grab your pen, test those temperatures, and let your creativity burn bright. You’ve got this!
FAQs
What is the best temperature for a wood burning pen?
The best temperature for wood burning pen depends on your material and design. For softwoods, use 400–600°F. Hardwoods need 700–900°F. For fine details, stick to 400–500°F, and for bold lines, go up to 800°F. Always test on scrap material first.
Can I use a wood burning pen on materials other than wood?
Yes, you can burn on leather, cork, or gourds. Leather works best at 300–500°F, while gourds need 600–800°F. Avoid synthetic materials, as they can release harmful fumes.
How do I avoid burning too deeply with my wood burning pen?
Start with a low temperature for wood burning pen, around 400°F, and move your pen steadily. Test on scrap wood to find the right heat. A light touch also helps prevent deep burns.
Why does my wood burning pen leave uneven marks?
Uneven marks can happen if your tip is dirty or your temperature is too high. Clean your tip regularly and adjust the temperature for wood burning pen to match your material and design. Consistent hand movement also helps.
How do I clean my wood burning pen tip?
Use a wire brush or sandpaper to gently remove carbon buildup from the tip. You can also wipe it with a damp sponge while it’s warm (but not hot). Keeping the tip clean ensures even burns.