Best Wood for Wood Burning Crafts: Basswood, Birch & What to Avoid
Wood for wood burning crafts: basswood is the standard choice thanks to its fine, closed grain and pale color that make burned lines stand out clearly, usually run at a heat setting around 5–6. Birch is the next-best option — slightly harder, which means crisper detail once you’re past the basics. Skip resinous, open-grained woods like cedar, oak, and knotty pine for anything detailed; the sap and grain cause uneven, splotchy burns.
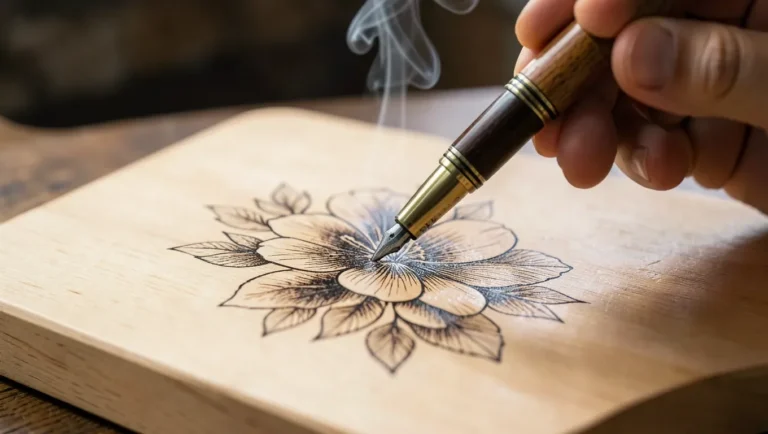
Pyrography — the craft of burning designs into wood with a heated tool — lives or dies by the blank you start with. The wrong wood fights you the whole way: strong grain lines pull the tip off your design, sap pops and smokes, and dark or oily woods swallow the contrast that makes a burned line readable. Below is what actually holds up under the tip, how to prep it, and where a lot of “beginner-friendly wood” advice mixes up firewood characteristics with what pyrography actually needs.
Introduction To Wood Burning Crafts
Best Basswood for Pyrography
 |
Basswood Sheets, 16 x 12 x 1/8 in, 10-Pack – $24 Pre-sanded, closed-grain basswood — the same wood pro pyrography artists reach for, ready to burn straight out of the pack.
|
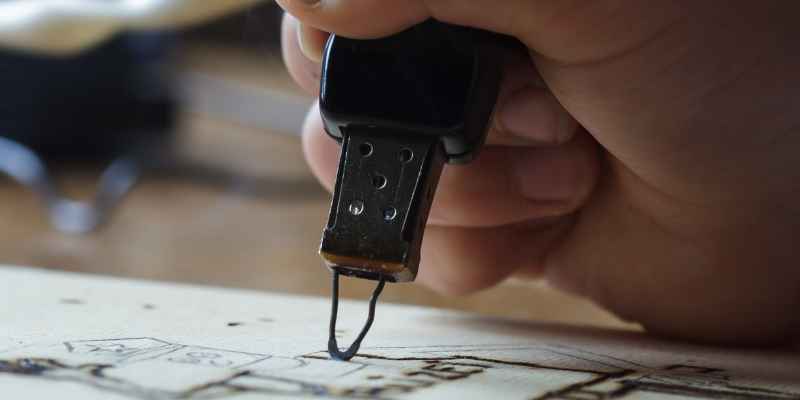
Wood burning crafts are a unique way to create art. This craft uses heat to burn designs into wood. It is also known as pyrography. Artists can make beautiful pieces with just a few tools. Many people enjoy this craft for its simplicity and creativity.
The Art Of Pyrography
Pyrography is the art of decorating wood with fire. It involves using a heated tool to burn designs. The tool can create various effects based on temperature and pressure. This craft can be used for:
- Wall art
- Wooden gifts
- Home decor
- Personalized items
Artists can use different types of wood for pyrography. Common choices include:
| Type of Wood | Features |
|---|---|
| Basswood | Soft, easy to burn, smooth finish |
| Pine | Lightweight, affordable, distinct grain |
| Birch | Strong, fine texture, holds detail well |
Popularity And Applications
Wood burning crafts have gained popularity over the years. Many people enjoy making personalized gifts. Pyrography is also used in workshops and classes. The craft is suitable for:
- Beginners
- Experienced artists
- Kids’ activities
Events like craft fairs often showcase wood burning art. This craft allows for endless creativity. Artists can explore various styles and techniques.
Selecting The Right Wood
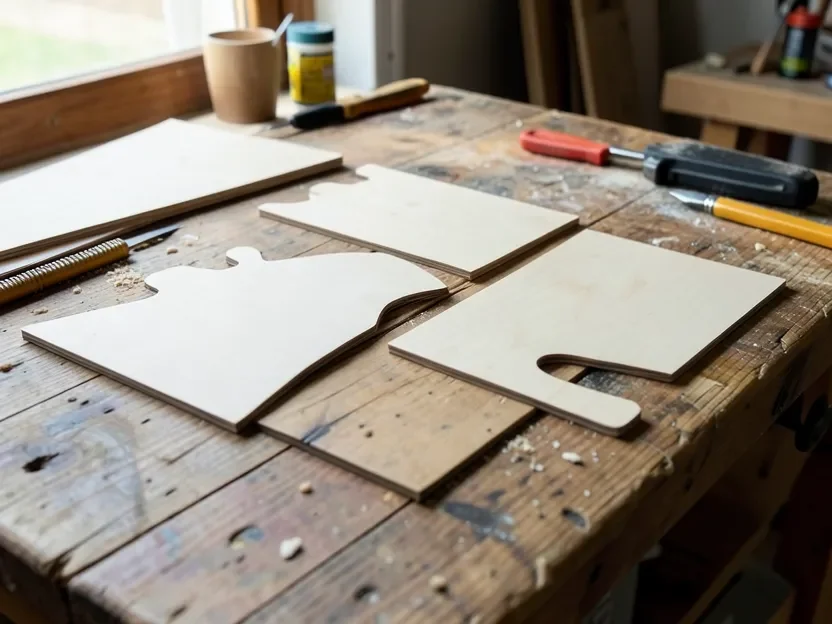
Choosing the right wood is crucial for wood burning crafts. Different types of wood affect the burning process and the final look of your project. Here’s how to select the best wood for your needs.
Soft, Closed-Grain Woods Vs Hard, Open-Grain Woods
For pyrography specifically — not firewood — the wood you want is soft with a tight, closed grain, not just “soft” in general. Here’s the real trade-off:
| Type of Wood | Characteristics | Best Uses |
|---|---|---|
| Soft, closed-grain (basswood, birch plywood, aspen) |
|
|
| Hard, open-grain (oak, cedar, knotty pine) |
|
|
Grain Patterns And Textures
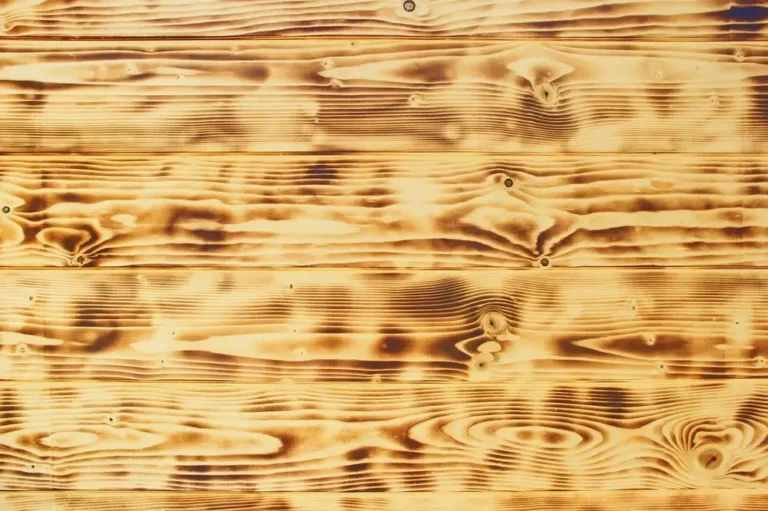
A “well-defined” or prominent grain is usually a problem for pyrography, not a feature — it makes the burn track unevenly instead of following your design. Here’s how the common options actually behave:
- Basswood: Almost no visible grain, burns evenly — the safest choice for detailed work.
- Birch (plywood): Fine, tight grain; slightly harder, which holds crisp detail once you’re comfortable with the heat.
- Pine (clear, knot-free): Usable for simple, rustic designs, but knots and sap pockets will scorch unevenly — pick boards without visible knots.
- Oak / Cedar: Strong, open grain and (in cedar’s case) natural oils fight fine linework and cause splotchy, inconsistent burns — better left for other projects than detailed pyrography.
Choose a smooth, tight-grained blank for anything with fine detail. Save the bold-grained woods for rustic, low-detail pieces where a little unevenness fits the look.
Top Picks For Wood Burning
Choosing the right wood is essential for successful wood burning. Different types of wood offer unique characteristics. Here are some top picks that every wood burner should consider.
Basswood For Beginners
Basswood is a favorite among beginners. It is soft, easy to carve, and widely available.
- Light color allows for clear designs.
- Absorbs heat evenly, making it ideal for burning.
- Minimal grain pattern ensures smooth burning.
This wood responds well to different tools. It’s perfect for practice and experimentation.
Birch For Brightness
Birch wood shines with a beautiful, light color. It has a fine texture that enhances designs.
- Bright surface creates vibrant images.
- Holds detail well for intricate work.
- Durable, making it suitable for various projects.
This wood burns with a pleasant aroma. It adds an extra touch to your crafting experience.
Walnut For Richness
Walnut offers deep, rich colors. It is perfect for advanced wood burning projects.
- Dark tones create stunning contrasts.
- Unique grain patterns add character.
- Sturdy wood provides durability for lasting pieces.
Walnut works well for detailed artwork. It elevates your wood burning creations.
Preparing Wood For Pyrography
Preparing wood for pyrography is crucial for great results. Proper preparation enhances the design and longevity of your art. Follow these steps to get your wood ready for burning.
Sanding Techniques
Sanding is the first step in preparing wood. It smooths the surface and removes imperfections. Use the right grit for the job.
- Coarse Grit (80-120): Removes rough spots.
- Medium Grit (150-220): Smooths the surface.
- Fine Grit (240+): Prepares for final touches.
Always sand in the direction of the grain. This prevents scratches and ensures a clean finish. Check the surface after each sanding step. Make sure it’s smooth to the touch.
Cleaning And Priming Surfaces
After sanding, clean the wood surface thoroughly. Dust and debris can interfere with pyrography. Use a soft cloth or a tack cloth for best results.
Priming is optional but can enhance your artwork.
| Type of Primer | Benefits |
|---|---|
| Clear Primer | Preserves natural wood color. |
| White Primer | Brightens colors and contrasts. |
| Colored Primer | Adds a base color for designs. |
Apply primer evenly with a brush or spray. Let it dry completely before starting your pyrography project.
Tools Of The Trade
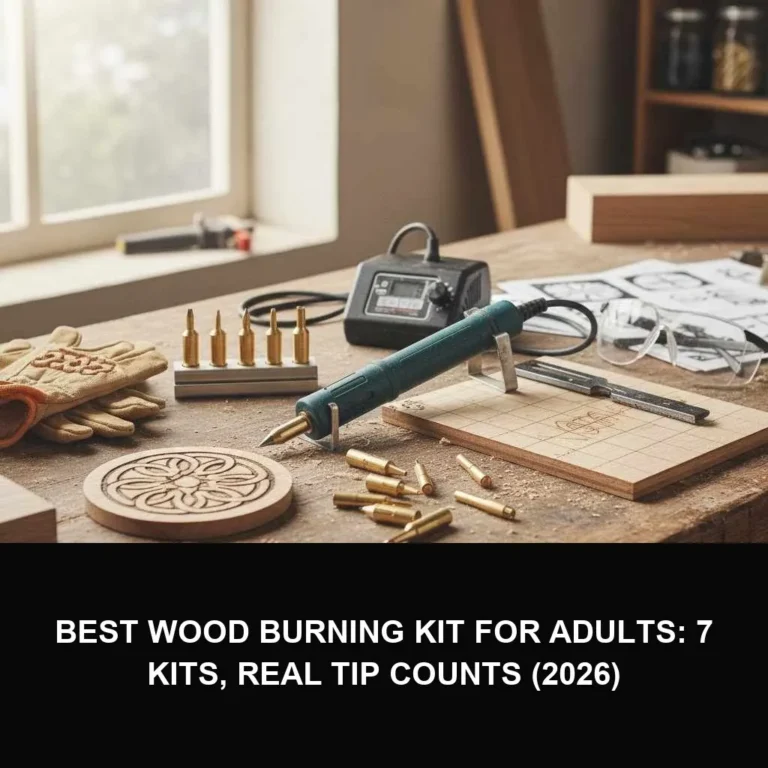
Creating beautiful wood burning crafts requires the right tools. Each tool plays a vital role in ensuring precision and quality. A wood burning pen, temperature control, and various tips are essential for every wood artist. Let’s explore these crucial tools.
Types Of Wood Burning Pens
Wood burning pens come in different styles. Here are the most common types:
- Standard Pens: Basic and easy to use.
- Adjustable Pens: Allow temperature changes for different techniques.
- Professional Pens: Offer advanced features for experienced users.
Each pen type serves a unique purpose. Choose one based on your skill level and project needs.
Temperature Control For Precision
Temperature control is key in wood burning. It affects how deep the burn goes. Here are some benefits of having temperature control:
| Temperature Control | Benefits |
|---|---|
| Adjustable Settings | Customize burn depth for different effects. |
| Consistent Heat | Ensures even burning and less chance of mistakes. |
| Versatility | Use for various wood types and techniques. |
Using the right temperature ensures stunning results. Invest in a pen with solid temperature control for the best experience.
Techniques For Better Burnings
Enhancing your wood burning crafts requires specific techniques. These methods improve the quality of your burnings. Mastering these techniques will elevate your art.
Shading And Texturing Tips
Shading adds life to your wood burning projects. Use these tips for effective shading:
- Vary the pressure: Light pressure creates soft shades.
- Use different tools: Different tips create unique textures.
- Layer your burns: Build up shades gradually for depth.
Experiment with these techniques to find your style. Texturing enhances the overall look of your piece.
Creating Depth And Dimension
Depth and dimension make your wood burning stand out. Here are some ways to achieve this:
- Contrast colors: Darker areas create a 3D effect.
- Use overlapping shapes: This adds visual interest.
- Incorporate shadows: Shadows bring realism to your art.
Practice these techniques. They will help you create stunning wood burning crafts.
Finishing Your Wood Burning Projects
Finishing your wood burning projects is crucial. It enhances the beauty and protects your artwork. Proper finishing ensures your project lasts longer. Follow these steps for a stunning finish.
Sealing And Protecting Your Work
Sealing your wood burning projects protects them from damage. It prevents moisture and dirt from ruining your art. Here are some ways to seal your work:
- Use a clear sealant spray.
- Apply a brush-on sealer.
- Consider using wax for a natural finish.
Always choose a product that dries clear. This keeps your design visible. Follow the manufacturer’s instructions for the best results.
Choosing The Right Finish
Selecting the right finish is vital for your project. Different finishes create different looks. Here’s a quick overview:
| Finish Type | Appearance | Durability |
|---|---|---|
| Matte Finish | Soft, non-reflective look | Good for indoor items |
| Semi-Gloss Finish | Slight shine, enhances colors | Moderate durability |
| Gloss Finish | High shine, vibrant colors | Very durable, good for outdoor use |
Consider the purpose of your project. Choose a finish that matches your style. Test different finishes on scrap wood first. This helps you decide which one is best.
Troubleshooting Common Issues
Wood burning crafts can be exciting. Yet, problems may arise during your projects. Knowing how to troubleshoot can save time and frustration. Here are tips to avoid and fix common mistakes.
Avoiding And Fixing Mistakes
Errors can happen, especially for beginners. Here are some common mistakes and how to fix them:
| Mistake | Solution |
|---|---|
| Too much pressure on the tool | Use light pressure for clean lines. |
| Inconsistent burning | Check tool temperature. Adjust as needed. |
| Not enough practice | Practice on scrap wood first. |
| Using the wrong wood type | Select softwoods for easier burning. |
Dealing With Warping And Cracking
Wood can warp or crack during projects. This can ruin your design. Here’s how to deal with these issues:
- Choose the right wood: Use kiln-dried wood. It is less likely to warp.
- Store wood properly: Keep wood in a cool, dry place.
- Moisture control: Avoid high humidity areas.
- Pre-treat the wood: Apply a wood conditioner before burning.
For minor cracks, use wood glue. Clamp the area until dry. This can restore your project’s integrity.
Advanced Pyrography Ideas
Explore innovative techniques in pyrography. Enhance your wood burning projects. Use these advanced ideas to create stunning artwork. Let your creativity shine!
Coloring Techniques
Adding color can transform your pyrography pieces. Here are some effective coloring methods:
- Watercolor Pencils: These are excellent for adding delicate hues. Simply color over the burned design.
- Alcohol Inks: Use these for vibrant and bold colors. They blend easily on wood surfaces.
- Paints: Acrylic paints work well. Choose colors that complement your designs.
- Stains: Wood stains can enhance the natural grain. They provide a rich finish.
Experiment with different combinations. Create depth and contrast in your artwork.
Mixed Media And Layering
Combine pyrography with other art forms. This adds texture and visual interest. Here are some ideas to try:
- Collage: Add paper, fabric, or metal to your design.
- 3D Elements: Attach small wooden pieces for dimension.
- Textured Backgrounds: Use sculpting paste or gesso before burning.
- Layering Techniques: Burn multiple layers for a rich effect. Start with light designs and build up.
Mixing materials opens new possibilities. Let your imagination guide you.
Caring For Your Wood Burning Art
Caring for your wood burning art keeps it beautiful and intact. Proper maintenance ensures your creations last for years. Follow these tips to protect your artwork from damage and wear.
Maintenance Tips
- Clean Regularly: Use a soft, dry cloth to wipe dust.
- Avoid Water: Keep wood away from moisture. Water can warp it.
- Store Properly: Place artwork in a cool, dry place.
- Handle Carefully: Avoid dropping or knocking it over.
Long-term Preservation
To keep your wood burning art looking fresh:
- Seal the Surface: Use a clear varnish or wood finish.
- Avoid Direct Sunlight: Sun can fade colors over time.
- Inspect Regularly: Check for signs of wear or damage.
- Repair Promptly: Fix any cracks or chips quickly.
| Care Method | Purpose |
|---|---|
| Regular Cleaning | Removes dust and prevents buildup. |
| Sealing | Protects against moisture and scratches. |
| Proper Storage | Prevents physical damage and warping. |
Frequently Asked Questions
What Types Of Wood Are Best For Burning Crafts?
For pyrography, basswood and birch plywood are best — their fine, closed grain burns evenly at a moderate heat setting (around 5–6 on most pens) so lines come out clean. Avoid resinous woods like cedar and knotty pine for detailed work; the sap causes uneven, splotchy burns rather than a clean line.
Can I Use Treated Wood For Burning Crafts?
No, treated wood contains chemicals that are harmful when burned. These chemicals can release toxic fumes and pollutants. Always opt for untreated, natural wood to ensure safety during your wood burning crafts.
How To Prepare Wood For Burning Crafts?
Sand progressively up to 220–320 grit, then wipe the surface with a barely damp cloth to raise the grain and let it dry fully before sanding lightly one more time. Skipping this step is the most common reason a burn comes out fuzzy or uneven instead of crisp.
Is Wood Species Important For Wood Burning?
Yes — species affects grain visibility, how much heat you need, and how much resin or sap is in the wood. Oily, resinous woods like cedar and knotty pine tend to burn inconsistently and smoke more, so most pyrography artists stick to basswood or birch for anything with fine detail.
Conclusion
Choosing the right wood for burning crafts is essential for quality results. Consider factors like wood type, grain, and moisture content. Each choice impacts your project’s durability and appearance. Embrace your creativity and experiment with different woods. Enjoy the satisfying journey of crafting with wood, enhancing your skills along the way.
Sponsored / affiliate links. As an Amazon Associate I earn from qualifying purchases. I may earn additional commission from eligible campaigns.