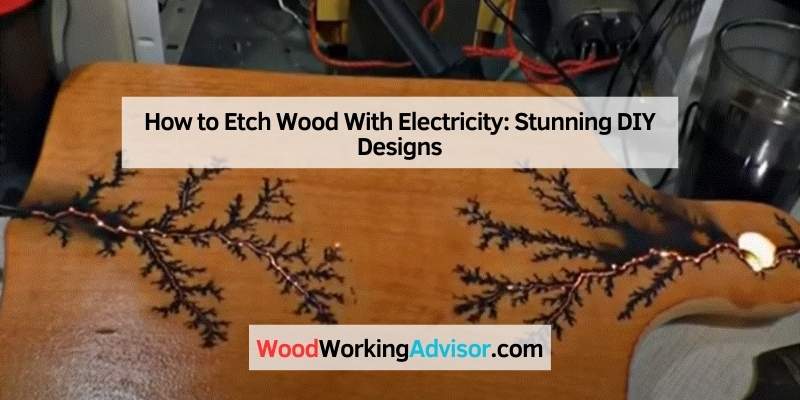
Etching Wood With Electricity Is Dangerous — What You Need to Know First
To etch wood with electricity, use a wood-burning tool or a DIY electro-etching device. Connect a power source to a conductive pen and apply it to the wood surface.
Etching wood with electricity is a fascinating method to create intricate designs. This technique combines creativity with basic electrical knowledge, making it accessible to many. Whether you’re a hobbyist or a seasoned craftsman, electric etching offers endless possibilities for personalization.
The process involves using a conductive material to transfer electric current onto the wood, resulting in stunning patterns. With the right tools and safety precautions, anyone can explore this innovative approach to wood art. Dive into the world of electric wood etching and transform ordinary pieces into extraordinary works of art.
⚠️ Serious Safety Warning — Please Read Before Continuing
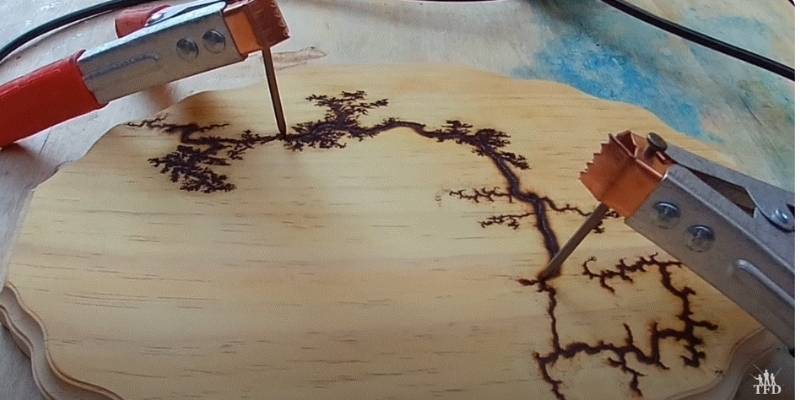
Lichtenberg (fractal) wood burning uses extremely high voltage — often from a modified microwave oven transformer — passed through wood soaked in a conductive solution. This is not a minor burn hazard: it is genuinely lethal. At least 33 documented deaths have occurred in the US since 2017 from people attempting this technique, along with many additional serious injuries.
The American Association of Woodturners (AAW) bans demonstrating this technique or selling equipment for it at AAW events and in AAW publications specifically because of the fatality risk.
The danger is electrocution, not just burns — mains-level voltage passing through a person can kill in seconds, even from what feels like brief or minor contact. We strongly recommend against building or using homemade high-voltage equipment for this technique. If you choose to proceed anyway, this should only be with a properly isolated, purpose-built commercial device, under qualified electrical supervision, and never while alone.
Introduction To Wood Etching With Electricity
Wood etching with electricity creates beautiful designs on wooden surfaces. This method uses a low-voltage current to burn patterns into the wood. The heat from the electricity causes a reaction with the wood fibers. This results in a darkened area that forms the design.
The technique is safe and fun, but preparation is key. Always wear protective gear, like gloves and goggles. Ensure the workspace is clean and dry. Use a stable power source to avoid accidents. Check all tools for safety before starting the process.
With proper care, wood etching can be an enjoyable hobby. It allows for creativity and unique artwork.
Why We Don’t Publish The Etching Setup Steps
Earlier versions of this page described mixing a conductive solution (water with salt or baking soda), connecting a power supply and electrodes to wood, and adjusting the voltage until the surface etched. We removed those steps. This is the same underlying setup as Lichtenberg (fractal) wood burning — at least 33 documented deaths have occurred in the US since 2017 from people attempting it, and the American Association of Woodturners bans demonstrating the technique at AAW events for that reason. Wearing gloves and goggles does not make this safe; the danger is electrocution from current passing through the conductive solution and the person holding the tool, not just a burn you can shield against with PPE.
Two facts worth knowing:
- A GFCI outlet does not protect you. It monitors the transformer’s primary (input) wiring. The lethal output comes from the secondary coil, which is galvanically isolated from that circuit — the GFCI cannot detect a fault on the output side and will not trip.
- Unplugging the power source does not make it safe to touch. A capacitor paired with a high-voltage transformer stores a charge and can deliver a lethal shock long after the unit is disconnected from the wall.
A Safer Way To Etch Or Burn Designs Into Wood
If you want branching or etched-looking designs in wood without wiring a power supply to a conductive solution:
- Pyrography (wood-burning) pen. Freehand branching or etched-style patterns at low, safe voltage.
- CNC laser engraver. Load or design a pattern and let the laser etch it in — no current passes through the workpiece or operator.
Safe Alternative: Pyrography Pen Kit
The YIHUA 930-IV Pyrography Wood Burning Pen Kit lets you freehand etched, branching-style designs at low voltage — no power supply, electrodes, or conductive solution required.
VIEW ON AMAZONDesigning Your Artwork
Choosing the right design is key to creating stunning wood art. Simple shapes work well for beginners. Use patterns that inspire you and fit your style. Consider nature, geometric shapes, or even personal symbols.
To transfer your design onto wood, start with tracing paper. Place the paper over your design and trace it with a pencil. Then, secure the tracing paper on the wood surface. Use a ballpoint pen to trace over the lines. Press firmly to leave an imprint on the wood.
For a more advanced method, consider using carbon paper. Place the carbon paper under your design. Trace over the lines to transfer the image directly onto the wood. This method ensures a clear outline for etching.
Finishing Touches
Start by carefully cleaning the etched wood. Use a soft brush to remove dust. A damp cloth helps remove any residue. Make sure the surface is dry before proceeding.
Sealing your artwork protects it from damage. Choose a clear wood finish or sealant. Apply it evenly using a brush or cloth. Allow it to dry completely before using the wood.
Regular maintenance keeps your artwork looking great. Wipe it with a dry cloth to remove dirt. Avoid using harsh chemicals that can damage the surface.
Inspiring Project Ideas
Creating personalized gifts with wood etching is a special touch. Use names or dates to make it unique. Friends and family will love these thoughtful creations.
Enhance your home decor with stunning etched wood pieces. Wall art, coasters, or picture frames can add charm. Choose designs that match your style.
Explore artistic expressions through wood etching. Create custom signs or decorative panels. This technique allows for endless creativity and fun.
Frequently Asked Questions
How Does Electricity Etch Wood?
Electricity etches wood by passing a high-voltage current through a conductive solution (often salt water or baking soda water) painted onto the surface, burning branching patterns into the wood. This is the Lichtenberg/fractal burning technique, and it is genuinely dangerous — at least 33 documented deaths in the US since 2017 have been linked to it. A pyrography pen achieves a similar etched look safely, without conductive solution or high voltage.
What Materials Do I Need For Wood Etching?
We don’t recommend the power-source-and-electrodes approach, given the documented fatality risk. For safe etched/branching designs, all you need is a pyrography (wood-burning) pen and, optionally, design templates or carbon paper to transfer a pattern first.
Is Wood Etching Safe?
Not the high-voltage electrical version — at least 33 documented deaths in the US since 2017 are linked to this technique, and PPE like gloves and goggles does not protect against electrocution. A GFCI outlet does not protect you either, because the lethal output comes from a secondary coil isolated from the circuit a GFCI monitors. A pyrography pen, by contrast, is genuinely safe when used as directed.
Can I Etch Any Type Of Wood?
While many wood types can be etched, softer woods are generally preferred. Woods like pine, cedar, and basswood yield better results. Hardwoods can also be etched but may require more power and time. Always test on a small area first to gauge how the wood reacts.
Conclusion
Etching wood with electricity opens up a world of creativity. This technique allows you to personalize projects easily. By following the steps outlined, you can achieve stunning results. Remember to prioritize safety and practice on scrap wood first. Embrace this art form to enhance your woodworking skills and create unique pieces.