What Grit Sandpaper to Remove Paint From Wood? Best Grits by Job
For removing paint from wood, use a medium or coarse grit sandpaper. Removing paint from wood requires the use of sandpaper with a suitable grit.
Depending on the thickness and type of paint, a medium or coarse grit sandpaper can effectively strip the paint from the wood surface. Sandpaper with a grit between 60 and 100 is ideal for removing paint as it provides enough abrasion to remove the old paint layers without damaging the wood.
However, it is essential to test the sandpaper on a small, inconspicuous area of the wood to ensure it does not cause any damage or scratches. Additionally, using a circular or random orbital sander can make the process more efficient and consistent. Remember to wear protective gear, such as a mask, goggles, and gloves, when sanding to avoid inhaling harmful dust particles and protect your skin.
Understanding Grit Sandpaper
Grit sandpaper is essential for removing paint from wood. Understanding the appropriate grit level ensures effective paint removal without damaging the surface.
What Is Grit Sandpaper?
Grit sandpaper is a common tool used to remove paint from wood during refinishing or restoration projects. It consists of abrasive particles embedded in a paper backing. These particles vary in size and coarseness, known as grit, which determines the level of abrasion provided by the sandpaper.
How Does Grit Affect Sanding?
The grit of sandpaper determines how aggressively it removes material during sanding. Lower grit sandpapers have larger abrasive particles and are more coarse, providing faster material removal but leaving a rougher finish. Higher grit sandpapers have smaller particles and are finer, resulting in smoother finishes with slower material removal.
Types Of Grits And Their Uses
Grits commonly used for removing paint from wood encompass a wide range. Here are the most popular grits and their recommended uses:
| Grit | Uses |
|---|---|
| 60-80 | To quickly remove paint or varnish, especially on rough surfaces or stubborn areas. |
| 100-120 | To smooth out rough surfaces after initial paint removal or for preparing the wood for a new finish. |
| 150-220 | To achieve a smooth finish, gradually reducing the visibility of scratches or imperfections left by coarser grits. |
| 320 and higher | To create a fine finish, removing any remaining scratches or surface imperfections and readying the wood for staining or painting. |
Remember, the selection of grit sandpaper depends on the condition of the wood or the desired outcome. Starting with a lower grit and gradually progressing to finer grits helps achieve the desired level of smoothness and removes the paint effectively.

Choosing The Right Grit Sandpaper
When it comes to removing paint from wood, choosing the right grit sandpaper is essential. The right grit will help you achieve the desired results without damaging the wood surface. In this section, we will discuss how to assess the paint layers, determine the desired finish, match the grit to the wood type, and consider the best options for power sanding.
Assessing The Paint Layers
Before you start sanding, it’s important to assess the paint layers on the wood surface. This will help you determine the best grit sandpaper to use for effective paint removal. Here’s how you can assess the paint layers:
- Inspect the wood for multiple layers of paint. A heavily painted surface may require a coarser grit sandpaper.
- Look for any loose or peeling paint. This indicates that the paint is failing and can be easily removed with a finer grit sandpaper.
- Check if the paint is oil-based or water-based. Oil-based paint tends to be more durable and may require a coarser grit, while water-based paint can be removed with a finer grit sandpaper.
Determining The Desired Finish
Before choosing the grit sandpaper, it’s crucial to determine the desired finish of the wood surface. The desired finish will dictate the type of sandpaper grit you should use. Here are some common desired finishes and the recommended grit sandpaper:
| Desired Finish | Recommended Grit Sandpaper |
|---|---|
| Smooth and bare wood | 80-120 grit sandpaper |
| Ready for staining or painting | 150-180 grit sandpaper |
| Preparation for a glossy finish | 220 grit sandpaper or higher |
Matching The Grit To The Wood Type
The type of wood you are working with also plays a role in choosing the appropriate grit sandpaper. Softer woods, such as pine or cedar, require a finer grit sandpaper, while harder woods, like oak or maple, can withstand a coarser grit. Here are some general recommendations for matching the grit to the wood type:
- Softwoods (e.g., pine, cedar): 120-150 grit sandpaper
- Hardwoods (e.g., oak, maple): 80-120 grit sandpaper
Considerations For Power Sanding
If you plan to use a power sander for paint removal, there are a few considerations to keep in mind. Power sanding can be more efficient and less labor-intensive, but it can also remove material quickly if not used correctly. Here are some tips for power sanding:
- Start with a lower grit sandpaper and gradually work your way up to a higher grit.
- Keep the sander moving at all times to avoid creating gouges or uneven spots.
- Use a dust mask and eye protection to stay safe.
- Take breaks to allow the sander and wood to cool down.
By considering the paint layers, desired finish, wood type, and power sanding options, you can confidently choose the right grit sandpaper to effectively remove paint from wood while preserving the integrity of the surface. Remember to always follow proper safety precautions and practice proper sanding techniques for optimal results.
Techniques For Removing Paint From Wood
Discover effective techniques for removing paint from wood with the right grit sandpaper. Achieve smooth and flawless results by choosing the appropriate sandpaper grit for optimal paint removal.
Preparing The Surface
Before you begin removing paint from wood, it is important to prepare the surface properly. This ensures better adhesion of paint-removing materials and reduces the risk of damaging the wood. Take the following steps to prepare the surface:
- Clean the wood surface using a mild detergent and water solution. This removes any dirt, grease, or grime that may affect the paint removal process.
- Scrape off any loose or chipped paint using a paint scraper or putty knife. Be gentle to avoid gouging the wood.
- Smooth out rough areas or imperfections with sandpaper. Use a coarser grit (around 80 or 120) for this step.
Hand Sanding
If you prefer a hands-on approach or working on smaller areas, hand sanding is a viable option. Here’s what you need to know:
- Start with medium-grit sandpaper, such as 120 or 150, to remove the majority of the paint. Apply even pressure and work in the direction of the wood grain.
- Gradually transition to finer grit sandpaper, like 220 or 320, to achieve a smooth surface and remove any remaining traces of paint.
- Consider using sanding blocks or sponges to enhance grip and provide more control during the sanding process.
- After sanding, remove the dust using a tack cloth or a soft brush.
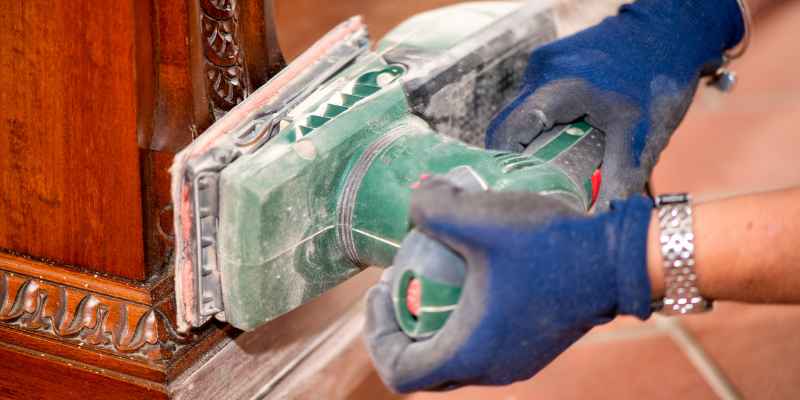
Power Sanding
If you have a large area to cover or prefer a faster approach, power sanding can be a great option. Here’s how:
- Choose a power sander suitable for wood surfaces, such as a random orbital sander or a belt sander.
- Start with a coarser grit sandpaper, like 80 or 100, to remove paint quickly. Move the sander smoothly in the direction of the wood grain.
- Switch to finer grit sandpaper, such as 120 or 150, for a smoother finish and to remove any remaining paint particles.
- Always wear protective gear, including goggles and a dust mask, to safeguard your eyes and respiratory system.
Using Sanding Aids
To make the paint removal process more effective and efficient, consider utilizing sanding aids. Here are some options:
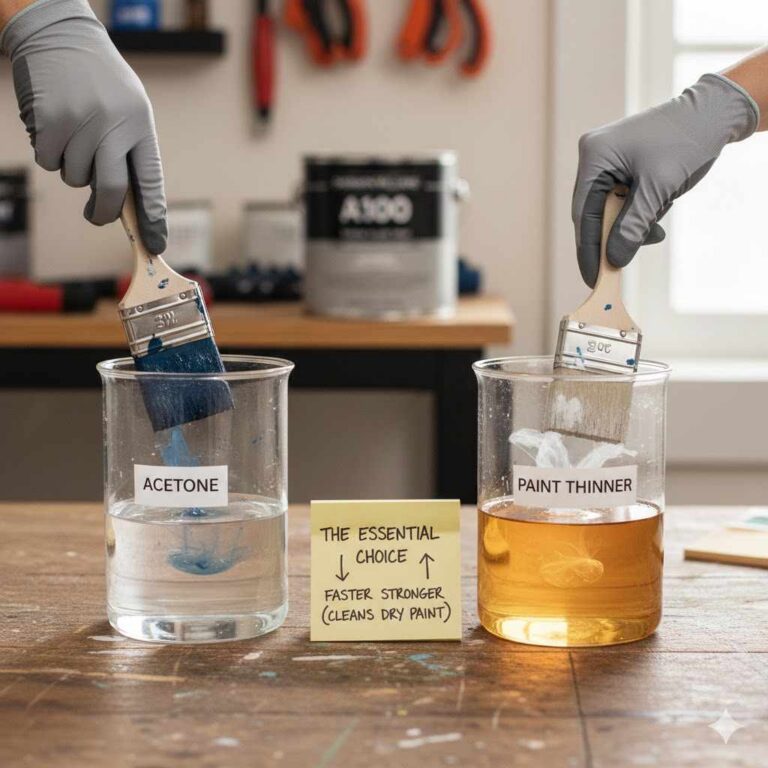
- Chemical paint strippers: Apply these products to the wood surface, follow the manufacturer’s instructions, and use scrapers or brushes to remove softened paint.
- Heat guns: Gently heat the paint using a heat gun, then scrape it off with a paint scraper. Take caution to avoid scorching the wood or causing fire hazards.
- Infrared paint removers: These devices emit infrared heat to soften the paint, making it easier to scrape off. They are often used by professionals for larger projects.
Avoiding Common Mistakes
When removing paint from wood, it is essential to avoid common mistakes that can lead to disappointing results or damage the wood. Here are some things to keep in mind:
- Avoid using sandpaper with too coarse a grit, as it can leave deep scratches on the wood.
- Do not apply excessive pressure while sanding, as it may create uneven surfaces and damage the wood grain.
- Never forget to wear appropriate protective gear, such as gloves, to protect your hands from chemicals and prevent injuries.
- Do not forget to clean up the dust generated from sanding to avoid it settling back onto the wood prior to refinishing.
Tips For Effective Paint Removal
Looking for effective tips on removing paint from wood? Choosing the right grit sandpaper is crucial for successful paint removal. Discover the best options and techniques to restore your wooden surfaces to their original beauty.
Safety Precautions
Removing paint from wood can be a messy and potentially hazardous task. It is important to take certain safety precautions to protect yourself and those around you. Before you begin, make sure to wear protective clothing, including safety goggles, a dust mask, and gloves, to shield yourself from potential harm. Additionally, ensure that your work area is well-ventilated to minimize the inhalation of paint particles and dust. Taking these safety measures will help you complete the task without any accidents or health risks.
Working In Sections
When removing paint from wood, it is essential to work in small, manageable sections. This approach allows you to focus on one area at a time and prevents you from feeling overwhelmed. Start by identifying the size of the wooden surface you want to strip, and divide it into smaller sections accordingly. By doing this, you can maintain control over the paint removal process and ensure a more thorough job.
Controlling Dust
Dust is an inevitable byproduct of sanding the wood to remove paint. Controlling dust is vital to maintaining a clean and safe working environment. One effective way to minimize dust is to attach a dust bag to your sanding equipment. This will collect the majority of the dust as you work, preventing it from spreading throughout the surrounding area. Additionally, consider using a vacuum cleaner to further eliminate any residual dust on the wood surface. By keeping the dust under control, you can focus on the task at hand with minimal disruptions.
Finishing Touches
After successfully removing the paint from the wood, it’s time to focus on the finishing touches. Use a finer grit sandpaper to smooth out the wood surface and remove any remaining paint residue. This step is crucial for achieving a polished and even finish. Take your time during this stage to ensure that the wood is properly prepared for any future treatments or coatings.
Cleaning And Maintaining Sandpaper
To optimize the effectiveness of your sandpaper, it is important to clean and maintain it properly. When you notice that your sandpaper is becoming clogged with paint particles or losing its abrasive texture, clean it by tapping it gently against a hard surface or using a wire brush. This will remove the excess debris and allow you to continue using the sandpaper effectively. Remember to store your sandpaper in a dry and secure place to prevent any damage or contamination.
By following these tips for effective paint removal, you can ensure a successful project while keeping yourself safe and minimizing any potential for damage to the wood.
Frequently Asked Questions For What Grit Sandpaper To Remove Paint From Wood
What Is The Best Grade Sandpaper For Removing Paint?
The best grade sandpaper for removing paint is typically a coarse grit like 60 or 80.
Will 40 Grit Sandpaper Remove Paint?
Yes, 40 grit sandpaper can remove paint effectively. Its coarser texture makes it ideal for stripping away layers of paint from surfaces. However, it is important to use caution and apply even pressure to prevent damage to the underlying material.
What Sandpaper To Sand Down Paint?
Use a coarse-grit sandpaper, such as 80 or 100, to sand down paint. This will help remove the top layer effectively.
Is It Better To Sand Or Strip Paint?
Stripping paint is better when dealing with multiple layers or lead-based paint. Sanding is more suitable for small areas and less messy. Consider the condition of the surface and the type of paint before deciding.
Conclusion
To effectively remove paint from wood, it is important to use the right grit sandpaper. Choosing the appropriate grit depends on the condition and type of wood you are working with. Whether it is rough or delicate, coarse or fine, understanding the different types of sandpaper grits is crucial.
By selecting the correct grit, you can achieve smoother surfaces and enhance your woodworking projects. So, next time you need to remove paint from wood, remember to select the suitable grit sandpaper for optimal results.