Which Way Should You Lay Wood Flooring?
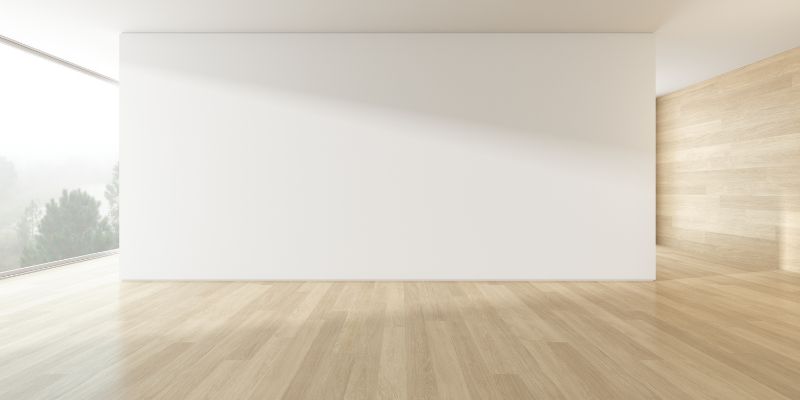
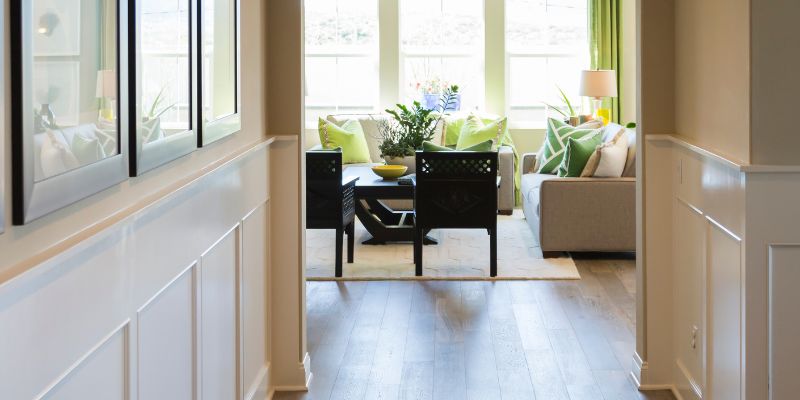
Lay wood flooring in the direction of the longest wall in the room. By aligning the planks parallel to the longest wall, you create a visually appealing and spacious environment.
Additionally, this layout helps to minimize the amount of cuts and waste during installation. Wood flooring offers timeless beauty and durability, making it a popular choice for homeowners. Whether you opt for solid hardwood, engineered wood, or laminate, properly laying the flooring enhances the overall aesthetic and functionality of your space.
We will discuss the various factors to consider when deciding which direction to lay your wood flooring and provide some tips for a successful installation. So, let’s dive in and find the best way to lay your wood flooring.
Familiarity Wood Flooring
Wood flooring can be laid in different directions, such as parallel or perpendicular to the longest wall. The chosen direction can impact the overall look and feel of the room, so it is essential to consider factors like room size, shape, and natural light before making a decision.
Type Of Wood Flooring
Choosing the right type of wood flooring is crucial for a successful flooring installation. There are several different types of wood flooring available, each with its own unique characteristics and appeal. Here are a few popular options:
- Hardwood Flooring: Hardwood flooring is a timeless choice that never goes out of style. It’s made from solid wood and offers a natural and warm feeling to any space. Hardwood floors come in various species, including oak, maple, and walnut, each with its own distinctive grain patterns and color variations.
- Engineered Wood Flooring: Engineered wood flooring is made from layers of plywood topped with a hardwood veneer. It combines the beauty of hardwood with enhanced durability and resistance to moisture. This type of flooring is perfect for areas prone to humidity and temperature fluctuations.
- Laminate Flooring: Laminate flooring is a cost-effective alternative to hardwood. It consists of multiple layers, including a high-density fiberboard core and a photographic layer that resembles wood grain. Laminate flooring is durable, low-maintenance, and available in a wide range of styles.
Benefits Of Wood Flooring
Wood flooring offers numerous benefits that make it a popular choice among homeowners. Here are a few advantages:
- Durability: Wood flooring is known for its exceptional durability and longevity. With proper care and maintenance, it can last for decades, making it a wise investment.
- Enhanced Aesthetics: Wood floors add warmth, charm, and elegance to any space. They come in a variety of colors, finishes, and patterns, allowing homeowners to choose a style that complements their interior design.
- Improved Indoor Air Quality: Unlike carpets, wood floors do not trap dust, pollen, or allergens. This makes them an excellent choice for individuals with respiratory conditions or allergies.
- Easy Maintenance: Wood flooring is relatively easy to clean and maintain. Regular sweeping and occasional mopping are usually sufficient to keep the floors looking pristine.
- Increased Home Value: Wood flooring is a desirable feature that can increase the value of your home. It is often considered a selling point by potential buyers.
 Wood Flooring” width=”800″ height=”400″ />
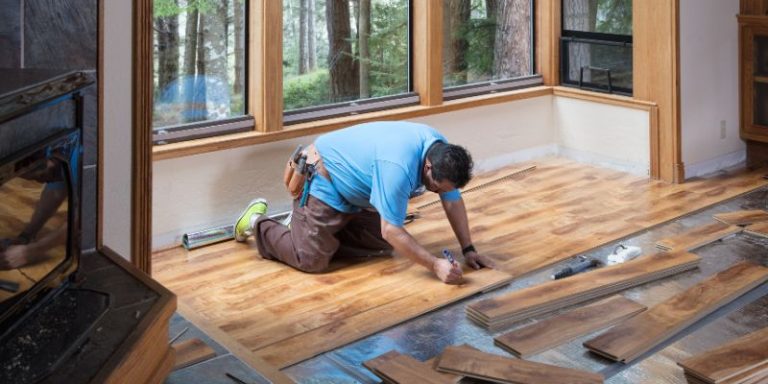
Considerations For Wood Flooring Installation
When it comes to installing wood flooring, there are several important considerations that can greatly impact the final result. To ensure a successful installation that will look beautiful and stand the test of time, it’s essential to pay attention to subfloor preparation, the direction of the flooring, and moisture and humidity levels.
Subfloor Preparation
Proper subfloor preparation is crucial for a smooth and long-lasting wood flooring installation. Before laying the wood planks, it is important to make sure the subfloor is clean, dry, and level. Here are some key steps to follow:
- Remove any existing flooring and clean the subfloor of any debris or adhesive residue.
- Inspect the subfloor for any areas that are uneven or damaged, and make necessary repairs or replacements.
- Check for moisture issues by using a moisture meter, and address any high levels of moisture before installing the wood flooring.
- Ensure the subfloor is level by using a leveling compound or plywood underlayment if necessary, as a flat surface will prevent the wood planks from warping or cupping.
Direction Of The Flooring
The direction in which the wood flooring is laid can have a significant impact on the overall look and feel of the space. There are a few factors to consider when determining the appropriate direction:
- The main entrance of the room: Choosing a layout that runs parallel to the main entrance can create an inviting and visually appealing appearance.
- The shape and size of the room: In longer, narrower rooms, laying the planks parallel to the shorter walls can make the space appear wider.
- The natural light source: Installing the floorboards perpendicular to the direction of the natural light source can accentuate the wood’s natural patterns and enhance the overall aesthetic.
- Personal preference: Ultimately, the direction of the flooring should align with your personal style and preference.
Moisture And Humidity
Wood is susceptible to changes in moisture and humidity levels, making it crucial to consider these factors during the installation process. Here’s what you need to know:
- Acclimate the wood: Allow the wood planks to acclimate to the room’s humidity and temperature before installation. This process helps minimize the potential for expansion, contraction, or other issues.
- Control the room’s humidity: Maintain a consistent humidity level in the room where the flooring will be installed. Use a humidifier or dehumidifier, if needed, to keep the moisture within the recommended range specified by the manufacturer.
- Provide proper ventilation: Ensure the room has proper ventilation to prevent moisture build-up, which can lead to mold, mildew, and damage to the wood flooring.
By keeping these considerations in mind and following the necessary steps, you can achieve a successful and visually appealing wood flooring installation that will last for years to come.
Determining The Ideal Layout
When it comes to wood flooring, the layout you choose can significantly impact the overall aesthetics and functionality of a room. Determining the ideal layout involves careful consideration of various factors, such as the room’s shape and size, the natural light available, and maintaining consistency with adjacent rooms. By addressing these key aspects, you can create a well-thought-out layout that enhances the beauty and functionality of your wood flooring.
Assessing The Room’s Shape And Size
The shape and size of a room play a crucial role in determining how the wood flooring should be laid. It’s important to assess these aspects before making any decisions, as they can affect the visual perception and flow of the space. For instance, long and narrow rooms often benefit from the installation of wood planks parallel to the longest wall, as this can make the room appear wider. On the other hand, square or rectangular rooms may benefit from a diagonal or herringbone layout to add visual interest and break up the linear design.
Considering The Room’s Natural Light
The natural light in a room can also influence the way wood flooring should be laid. It’s crucial to consider how the light enters the space and whether it creates any shadows or highlights. For rooms with ample natural light, a horizontal layout can accentuate the space’s brightness and create a sense of openness. Alternatively, in rooms with limited natural light, a vertical layout can help add visual height and make the room appear brighter. By carefully considering the impact of natural light, you can choose a wood flooring layout that enhances the room’s atmosphere.
Maintaining Consistency With Adjacent Rooms
When deciding on a wood flooring layout, it’s important to maintain consistency with adjacent rooms. This ensures a seamless transition and harmonious flow throughout your home. Consider the layout of the adjoining rooms and try to align the direction of your wood flooring with the main lines of sight. This creates a cohesive look and avoids awkward transitions at doorways or room entrances. By maintaining consistency, you can create a sense of unity and continuity, enhancing the overall appeal of your wood flooring.
The Different Laying Patterns
In the world of wood flooring, there are various laying patterns to consider, each with its own unique aesthetic appeal. Choosing the right laying pattern can elevate the visual appeal of your space and create a stunning focal point. In this article, we will explore the different laying patterns you can choose from when installing wood flooring.
Straight Lay
The straight lay is the most common and straightforward pattern for wood flooring installation. Planks are laid parallel to each other in a straight line, creating a clean and classic look. This pattern is ideal for rooms with square or rectangular dimensions, as it can visually elongate the space.
Diagonal Lay
The diagonal lay adds a touch of sophistication and visual interest to your space. Planks are installed at a 45-degree angle to the walls, creating a diamond-like pattern. This pattern is suitable for both traditional and modern settings and can make smaller rooms appear more spacious.
Herringbone Lay
The herringbone lay is a timeless and elegant choice for wood flooring. Planks are placed in a zigzag pattern, resembling the bones of a herring. This pattern adds texture and visual depth to any room, making it a popular choice for high-end interiors. Whether you opt for a light, natural finish or a darker stain, the herringbone pattern never fails to impress.
Chevron Lay
The chevron lay is similar to the herringbone pattern but creates a more uniform and continuous look. Planks are installed at an angle to form a V shape, resulting in a seamless and geometric design. This pattern is perfect for contemporary and minimalist spaces, adding a touch of sophistication and style.
To make an informed decision about which laying pattern to choose, consider the overall style and dimensions of your space, as well as your personal taste. Each pattern offers a unique visual impact that can transform any room into a stunning showcase of wood flooring. Whether you prefer the classic straight lay, the diagonal elegance, the intricate herringbone, or the sleek chevron, there is a pattern that will perfectly complement your design vision.
Matching Wood Flooring With Room Decor
When it comes to choosing wood flooring, it’s important to consider how it will match with your room decor. The right wood species, colors, and finishes can enhance the overall aesthetics of your space, creating a harmonious and inviting atmosphere. In this article, we will explore the different aspects of matching wood flooring with room decor to help you make the best decision.
Choosing The Right Wood Species
Before you dive into selecting the color and finish of your wood flooring, it’s crucial to choose the right wood species. Each species has its own unique characteristics, such as color variations, graining patterns, and durability. Here are a few popular wood species and their qualities:
| Wood Species | Qualities |
|---|---|
| Oak | Durable, versatile, and available in various shades |
| Maple | Hard and features a pale, uniform color |
| Walnut | Elegant and rich in color, may darken over time |
| Hickory | Extremely durable and known for its distinct grain patterns |
Coordinating Colors And Finishes
After selecting the right wood species, it’s time to consider the colors and finishes that will complement your room decor. Here are some tips to help you coordinate:
- Consider the existing color palette of the room and select wood flooring that either matches or contrasts with those colors.
- If you have a small room, opting for lighter wood tones can create an illusion of space.
- For a warm and cozy atmosphere, choose darker wood tones.
- Take into account the natural lighting in the room.
- Consider the finish of the wood flooring, such as matte, semi-gloss, or high-gloss.
- Take samples of the wood species and finishes and compare them with your existing decor to see if they harmonize well.
Remember, the goal is to create a cohesive look that brings all the elements of your room together seamlessly. By choosing the right wood species, coordinating colors, and finishes, you can achieve a stunning and well-designed space that reflects your personal style and enhances the overall ambiance of your home.
Professional Vs. DIY Installation
When it comes to installing wood flooring, one of the key decisions you’ll need to make is whether to hire a professional installer or take the DIY route. There are pros and cons to both options, and understanding them can help you make an informed choice that aligns with your priorities and budget. In this section, we’ll delve into the advantages and considerations associated with hiring a professional installer.
Hiring A Professional Installer
If you’re looking for a smooth, hassle-free installation process, hiring a professional installer is the way to go. Here’s why:
- Expertise and experience: Professional installers have the necessary training and experience to handle various types of wood flooring installations with precision. They understand the proper techniques, tools, and materials needed to achieve a flawless result.
- Time-saving: Professionals can complete the installation in a timely manner, saving you from the time-consuming and potentially stressful process of doing it yourself. With their efficiency, you can have your new flooring installed quickly, minimizing disruptions to your daily routine.
- Quality craftsmanship: Professional installers have honed their skills over years of practice, resulting in high-quality workmanship. They know how to address common issues that may arise during the installation process and can ensure that your wood flooring looks exceptional and performs well.
- Warranty and insurance: Reputable professional installers often provide warranties on their work, giving you additional peace of mind. Additionally, they usually have liability insurance, which protects you in the event of accidental damage during the installation.
If you are considering installing wood flooring on your own, it’s important to be prepared and informed. Follow these tips for a successful DIY installation:
1. Gather The Right Tools And Materials:
Before starting your installation, make sure you have all the necessary tools and materials. This includes a miter saw, nail gun, measuring tape, adhesive, underlayment, and, of course, your chosen wood flooring.
2. Acclimate Your Wood Flooring:
Wood flooring needs time to adjust to the indoor environment. Leave the packaged flooring in the room where it will be installed for a few days to allow it to acclimate to the temperature and humidity.
3. Prep The Subfloor:
Ensure that your subfloor is clean, level, and free from any imperfections. This will provide a stable base for the wood flooring and help prevent future issues.
4. Follow Installation Guidelines:
Read and follow the manufacturer’s installation guidelines carefully. Each type of wood flooring may have specific requirements in terms of subfloor preparation, adhesive application, and installation technique.
5. Take Your Time:
Installing wood flooring is a meticulous process that requires attention to detail. Take your time to properly measure, cut, and install each piece. Rushing through the installation can result in mistakes and a less-than-desirable outcome.
6. Seek Guidance If Needed:
If you encounter any challenges during the installation, don’t hesitate to seek guidance from experts or reputable online resources. Getting advice from professionals can help you overcome hurdles and ensure a successful installation.
Whether you decide to hire a professional installer or take the DIY route, now you have a clearer understanding of the advantages and considerations associated with each option. Choose the approach that aligns with your priorities, budget, and confidence in your own abilities to achieve the wood flooring installation of your dreams.
Caring For Wood Flooring
When laying wood flooring, it’s important to consider the direction. Opting for a horizontal layout can make a space feel wider and more open, while a vertical orientation can give the illusion of a higher ceiling. Take into account the room’s shape and size to determine the best way to lay your wood flooring.
Regular Cleaning And Maintenance
Regular cleaning and maintenance are essential for maintaining the beauty and longevity of your wood flooring. By following a few simple steps, you can keep your floors looking their best for years to come.
1. Sweep or vacuum regularly
To prevent the buildup of dirt and debris, it’s important to sweep or vacuum your wood floors regularly. Use a soft-bristle broom or a vacuum cleaner with a hardwood floor attachment to avoid scratching the surface. Aim to do this at least once a week, or more frequently in high-traffic areas.
2. Use a damp mop
When it comes to mopping, it’s important to use a damp mop rather than a wet one. Excessive moisture can damage the wood, so wring out your mop thoroughly before using it. You can also use a spray bottle to lightly mist the floor with a mixture of water and a gentle wood floor cleaner.
3. Wipe up spills immediately
Accidents happen, but it’s crucial to clean up spills as soon as possible to prevent moisture from seeping into the wood. Use a cloth or paper towel to blot up the spill, and then clean the area with a damp cloth to remove any residue. Avoid using harsh chemicals or abrasive cleaners, as they can damage the finish.
Dealing with Scratches and Damage
Even with proper care, your wood flooring may develop scratches or other types of damage over time. Fortunately, there are steps you can take to address these issues and restore the beauty of your floors.
1. Buff out minor scratches
If you notice minor scratches on your wood flooring, you can often buff them out with a soft cloth and a wood floor cleaner. Apply the cleaner to the cloth and gently rub it into the scratches until they become less noticeable. Remember to always follow the manufacturer’s instructions when using any cleaning product.
2. Fill in deeper scratches
For deeper scratches, you may need to use a wood filler. Choose a filler that matches the color of your floor and apply it to the scratch with a putty knife. Smooth out the excess filler and let it dry according to the manufacturer’s instructions. Once dry, sand the area lightly to ensure a smooth finish, and then apply a protective topcoat if necessary.
3. Seek professional help for extensive damage
If your wood flooring has extensive damage, such as deep gouges or water stains, it may be best to seek professional help. A hardwood flooring specialist can assess the damage and recommend the best course of action, whether it’s sanding, refinishing, or replacing certain sections of the floor.
Conclusion
Ultimately, the direction in which you lay your wood flooring is a personal choice that depends on the layout and aesthetics of your space. Whether you opt for a traditional longways pattern or a more unique diagonal or herringbone design, it’s crucial to consider functionality and visual appeal.
By following the guidelines and considering factors such as room size, natural light, and the flow of foot traffic, you can make an informed decision and ensure that your wood flooring enhances the overall look and feel of your home.