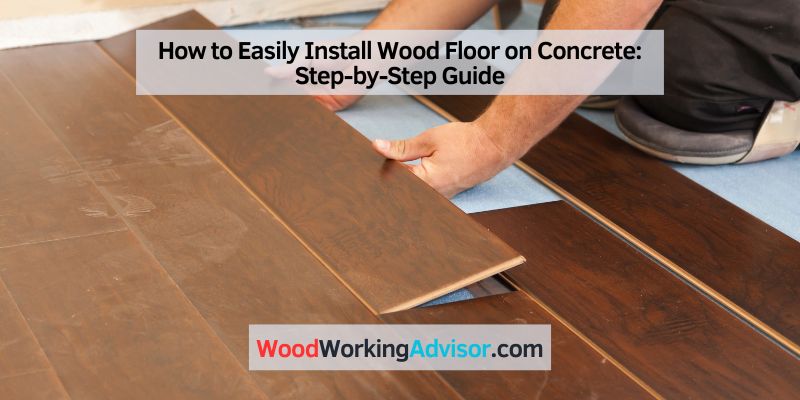
How to Easily Install Wood Floor on Concrete: Step-by-Step Guide
To install wood floor on concrete, first, make sure the surface is clean and dry. Then, apply a moisture barrier, lay down a plywood subfloor, and secure the wood flooring with adhesive or nails.
Installing wood flooring on concrete can be a challenging task, but with the right tools and techniques, it is possible to achieve a beautiful and durable result. Whether you are looking to update the floors in your home or embark on a new construction project, this guide will provide you with the essential steps to successfully install wood floor on concrete.
By following these instructions, you can ensure a long-lasting, visually appealing wood floor that adds warmth and elegance to any space. So let’s dive into the process and learn how to transform your concrete surface into a stunning hardwood floor.
Preparing The Concrete Surface
Before you can install wood floor on concrete, it is crucial to prepare the concrete surface properly. This preparation involves checking for moisture, cleaning the concrete, and smoothing the surface. By following these steps, you can ensure a solid foundation for your wood floor and prevent any future issues.
Checking For Moisture
Making sure the concrete is dry is essential for a successful wood floor installation. Excess moisture can cause the wood to warp, buckle, or develop mold and mildew. To check for moisture, you can perform a simple test using plastic sheeting and tape:
- Start by cutting a square piece of plastic sheeting, around 2 feet by 2 feet.
- Place the plastic sheeting flat on the concrete surface, ensuring it is completely sealed around the edges.
- Leave the plastic sheeting undisturbed for 24 hours.
- After 24 hours, remove the sheeting and check for any condensation or moisture on the underside of the plastic.
If you notice any moisture, it is crucial to address the issue before proceeding with the wood floor installation. You may need to use a dehumidifier, apply a moisture barrier, or consult a professional for further assistance.
Cleaning The Concrete
To ensure proper adhesion of the wood floor to the concrete surface, it is important to clean the concrete thoroughly. Follow these steps to clean the concrete:
- Remove all furniture, rugs, and debris from the area.
- Use a broom or vacuum to remove loose dirt, dust, and debris.
- Prepare a cleaning solution by mixing mild detergent with warm water.
- Using a mop or scrub brush, scrub the concrete surface with the cleaning solution.
- Rinse the concrete with clean water.
- Allow the concrete to dry completely before proceeding.
By cleaning the concrete surface thoroughly, you will ensure proper bonding of the wood floor adhesive and minimize the risk of any contaminants interfering with the installation process.
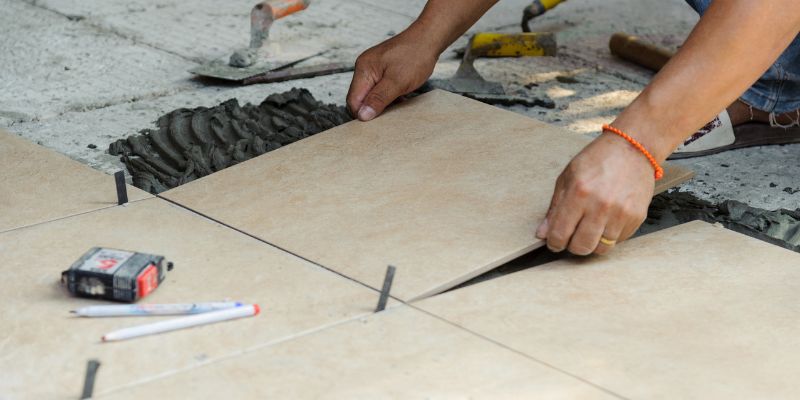
Smoothing The Surface
After checking for moisture and cleaning the concrete surface, the next step is to smooth the surface to create a level and even base for the wood floor. Depending on the condition of the concrete, you may need to fill in any cracks or uneven areas. Here’s how:
- Inspect the concrete for any cracks, holes, or unevenness.
- Fill any cracks or holes with a concrete patching compound.
- Use a trowel to spread the compound evenly and smooth out the surface.
- If the concrete is significantly uneven, you may need to use a self-leveling compound to create a smooth surface.
- Follow the manufacturer’s instructions for mixing and applying the self-leveling compound.
- Allow the compound to dry and cure as per the manufacturer’s recommendations.
By taking the time to smooth the concrete surface, you will ensure a level and stable foundation for your wood floor. This step is crucial to prevent any issues with the installation and guarantee a long-lasting and beautiful wood floor.
Installing The Moisture Barrier
When it comes to installing wood floors on concrete, one crucial step you can’t afford to skip is installing a moisture barrier. Concrete is porous and can release moisture, which can damage the wood flooring over time. A moisture barrier helps create a shield between the concrete and the wood, preventing moisture from seeping into the floor.
Before you start installing the moisture barrier, it’s important to choose the right one for your project. There are various types of moisture barriers available, such as plastic sheeting, vapor barriers, and moisture-resistant underlayments. Consider factors like your budget, the level of moisture in your concrete, and the type of wood flooring you’re installing.
Once you have selected the appropriate moisture barrier, the next step is cutting and laying it onto the concrete surface. Start by measuring the dimensions of the area where you’ll be installing the wood floor. Cut the moisture barrier slightly larger than the measured area to ensure it overlaps the edges.
After laying the moisture barrier, it’s essential to seal the seams properly. This will prevent any moisture from seeping through the gaps and reaching the wood floor. Use a moisture-resistant tape or adhesive to seal the seams securely. Make sure to press down firmly to create a tight seal.
By taking the time to install a moisture barrier correctly, you can ensure the longevity and durability of your wood floor. Remember, this extra step will protect your investment and save you headaches in the future.
Laying The Wood Flooring
Learn how to install wood flooring on concrete with these easy steps. Transform your space with a stylish and timeless look that will enhance any room.
Acclimating The Wood
Once you have prepared the concrete surface and installed the underlayment, it is time to move on to the next crucial step: acclimating the wood flooring. Acclimation is the process of allowing the wood to adjust to the temperature and humidity levels of the room where it will be installed. This is important because wood is a natural material that can expand or contract based on its environment.
Before you begin laying the wood flooring, make sure to acclimate it for at least 72 hours in the room where it will be installed. This gives the wood enough time to adjust and reduce the chances of future problems such as warping or buckling. Open the boxes of wood planks and spread them out across the room, leaving small gaps between each plank to ensure proper airflow.
Installing The Underlayment
Once the wood is acclimated, it’s time to install the underlayment. The underlayment serves as a buffer between the wood flooring and the concrete surface, providing insulation, moisture protection, and soundproofing.
To begin, roll out the underlayment material across the entire floor area, ensuring it extends up the edges of the room. Secure the underlayment by using adhesive or double-sided tape. This will prevent it from shifting during the installation process. When overlapping the underlayment rolls, be sure to adhere them firmly together using the adhesive or tape.
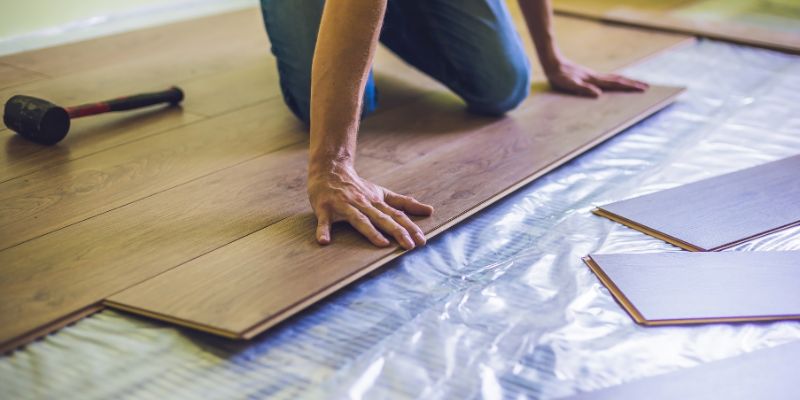
Installing The Wood Flooring
With the underlayment in place, it’s now time to start laying the wood flooring. Begin by choosing your starting point, ideally along a straight wall or in the center of the room for a balanced look. Place spacers between the wood planks and the walls to allow for expansion.
Start laying the first row of wood planks by applying adhesive to the bottom side of each plank. Press each plank firmly onto the underlayment, making sure it is securely attached. Use a rubber mallet to gently tap each plank into place, ensuring a snug fit. Continue this process, row by row, until the entire floor is covered.
Remember to stagger the joints between rows to create a seamless and visually appealing installation. This can be achieved by cutting the first plank of each new row to varying lengths, ensuring the joints are not aligned. Use a saw to carefully cut the wood planks to the desired length.
As you progress, periodically check if the wood planks are level, using a straight edge or level. If needed, adjust the planks by adding or removing adhesive to achieve a flat and even surface.
Now that you know the proper steps for laying wood flooring on concrete, you can confidently get started on your project. Just keep in mind the importance of acclimating the wood, installing the underlayment, and ensuring a precise installation. With careful planning and execution, you’ll enjoy a beautiful and durable wood floor that adds warmth and charm to your space.
Finishing Touches
Get ready to add the finishing touches to your home with a wood floor installation on concrete. Discover the step-by-step process to achieve beautiful and durable wood flooring that will transform your space. From preparing the concrete to laying the boards, this guide has got you covered.
After successfully trimming and fitting the wood to create a beautiful wood floor on concrete, you’re only a few steps away from achieving a flawless finish. In this section, we will walk you through the remaining details that will elevate the aesthetic appeal and functionality of your new floor. From securing the floorboards to adding baseboards and transitions, we’ve got you covered.
Trimming And Fitting The Wood
To ensure a seamless installation, it’s crucial to accurately trim and fit the wood floorboards. Here’s a step-by-step guide to help you achieve precision:
- After laying the floorboards, mark the areas that need trimming. Measure the gap between the wall and the last full board, keeping in mind the recommended expansion gap.
- Using a miter saw or circular saw, carefully cut the marked boards to the required length. Remember to wear safety goggles and follow the manufacturer’s instructions.
- Fit the trimmed boards back into place, ensuring a snug fit against the wall. Check for any gaps or unevenness, making any necessary adjustments to maintain a uniform appearance.
Securing The Floorboards
Once you have the boards perfectly trimmed and fitted, it’s time to secure them in place. This ensures stability, prevents shifting, and prolongs the lifespan of your wooden floor. Follow these simple steps for a solid installation:
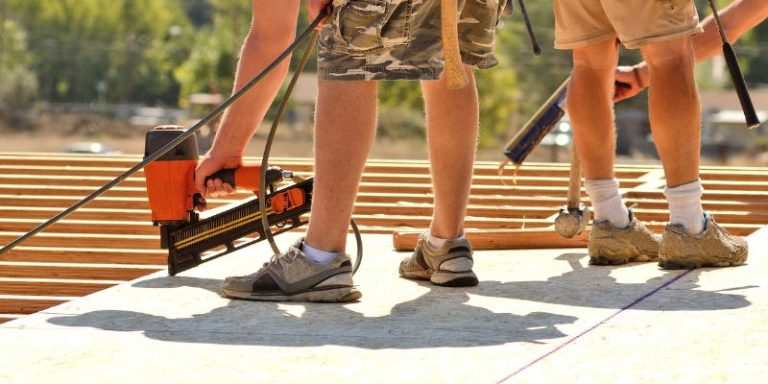
- Starting from one corner of the room, use a finish nailer or pneumatic stapler to secure each floorboard onto the concrete. Position the nails or staples at a slight angle to minimize visibility.
- Continue nailing or stapling along the length of each floorboard, placing fasteners roughly every 10 inches. Take care not to apply excessive force, as it may damage the wood or the concrete.
- Revisit each board after installation to ensure all nails or staples are properly seated and countersunk. This step will help achieve a smooth and even surface.
Adding Baseboards And Transitions
Completing your wood floor installation involves adding baseboards and transitions to provide a polished look while protecting the edges. Below are the steps to achieve a professional finish:
- Measure each wall to determine the required length of the baseboards. Cut the baseboards accordingly, mitering the corners for a precise fit.
- Using a construction adhesive, apply a thin, consistent line along the back of each baseboard piece. Position the baseboards flush against the wall, applying light pressure to secure them in place.
- Once the baseboards are installed, it’s time to attach the transitions between rooms or different floor materials. Select the appropriate transition type (e.g., T-molding, reducer, or threshold) based on your specific needs.
- Following the manufacturer’s instructions, carefully attach the transition piece, aligning it with the edges of the wood floor and the adjacent flooring material.
- Double-check that all baseboards and transitions are securely installed and provide a smooth transition between surfaces.
By taking the time to focus on these finishing touches, you can transform your wood floor installation into a stunning visual centerpiece while ensuring its durability and longevity. With each step carefully executed, your wood floor on concrete will be ready to impress for years to come.
Frequently Asked Questions For How To Install Wood Floor On Concrete
Can You Put Wood Flooring Directly On Concrete?
Yes, you can install wood flooring directly on concrete with proper preparation. It requires moisture testing, a moisture barrier, and a subfloor. The concrete should be clean, dry, and level. Wood flooring can be glued or floated with the use of underlayment for cushioning and soundproofing.
What Do You Put Between Concrete And Wood Floors?
A moisture barrier or underlayment is typically placed between concrete and wood floors to protect against dampness and potential damage. It helps to prevent moisture from seeping through the concrete and reaching the wood, preserving the integrity of the flooring materials.
How Do You Prepare A Concrete Floor For Hardwood Floors?
To prepare a concrete floor for hardwood floors, follow these steps:
1. Start by cleaning the floor thoroughly to remove any dirt or debris.
2. Fill any cracks or holes in the concrete using a patching compound.
3. Smooth out the surface using a sanding machine or a grinder.
4. Apply a concrete primer to ensure proper adhesion.
5. Finally, install a moisture barrier before laying the hardwood floor.
Do I Need A Vapor Barrier Between Concrete And Wood Flooring?
Yes, a vapor barrier is necessary between concrete and wood flooring. It prevents moisture from reaching the wood, reducing the risk of mold and warping. A vapor barrier acts as a protective layer, ensuring a longer lifespan for your wood flooring.
Conclusion
Installing wood flooring on concrete can be a challenging task, but with the right guidance and preparation, it is definitely achievable. By following the proper steps, such as ensuring the concrete is clean and level, using an appropriate adhesive, and allowing for the necessary acclimation period, you can transform your concrete floor into a beautiful wood floor.
Remember to choose the right type of wood for your specific needs and follow the manufacturer’s instructions. With patience and careful execution, you can enjoy the warmth and charm of wood flooring in your home.