10 Steps to Build a DIY Table Saw Using a Circular Saw
Building your own table saw can be a rewarding project. It saves money and fits your needs perfectly.
Are you a DIY enthusiast looking to expand your workshop? Making your own table saw from a circular saw is a practical and fulfilling project. You’ll need some basic tools and a bit of time, but the result is a custom tool that enhances your woodworking skills.
This guide will walk you through each step, ensuring you have everything you need to create a functional and efficient table saw. Ready to dive into this hands-on project? Let’s get started on transforming your circular saw into a versatile table saw.
Materials Needed
Building a DIY table saw using a circular saw can be a rewarding project. But to get started, you need the right materials. This section will guide you through the essential tools, equipment, and safety gear needed for the job. Let’s dive in.
Tools And Equipment
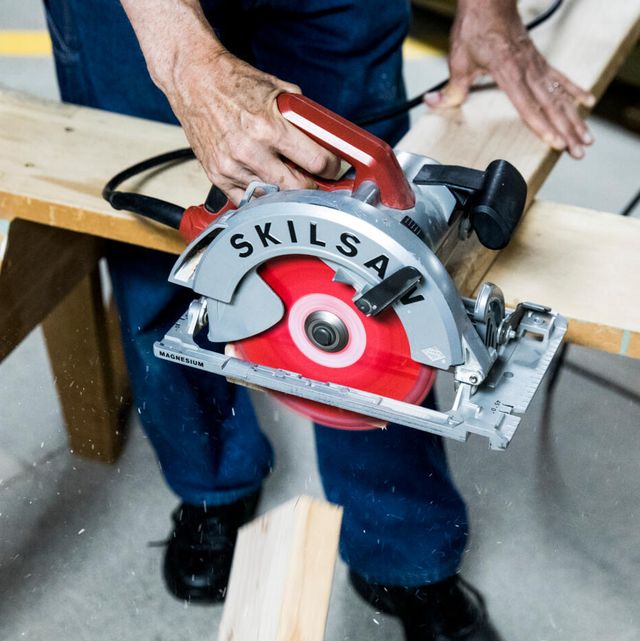
You will need a circular saw, of course. It is the heart of your DIY table saw. A sturdy workbench or table is also important. You will attach your saw to this.
Next, gather some clamps. They will hold things steady while you work. A measuring tape is crucial for accuracy. You also need a pencil for marking measurements.
A drill and drill bits will be necessary. You will use these to make holes for screws. Screws and a screwdriver will secure the saw and other parts. You will need a straight edge or a level to ensure everything is aligned.
Finally, a jigsaw will be handy for cutting out specific shapes. It is not mandatory but makes some tasks easier.
Safety Gear
Safety should always come first. Start with safety glasses. They protect your eyes from flying debris.
Wear ear protection. Circular saws can be very loud. Earplugs or earmuffs will help.
A dust mask is also important. It will protect you from inhaling sawdust.
Wear sturdy work gloves. They will protect your hands from cuts and splinters.
Finally, wear proper footwear. Closed-toe shoes are a must. Steel-toed boots are even better.
Make sure your workspace is well-lit. Poor lighting can lead to accidents.

Credit: jaimecostiglio.com
Design Planning
Design planning is the first and crucial step in building a DIY table saw using a circular saw. Proper planning ensures a smooth building process and a functional final product. Let’s dive into the details of sketching the layout and choosing dimensions for your table saw.
Sketching The Layout
Start by sketching the layout of your table saw. Use a pencil and paper. Draw the overall shape and structure. Include the tabletop, the frame, and any other parts. This helps you visualize the project. It also guides you through the build.
Think about where each part will go. Mark the positions of the circular saw, the fence, and the miter slots. These are essential components. A clear layout makes construction easier. It also ensures that all parts fit together well.
Choosing Dimensions
Choosing the right dimensions is key. Measure your workspace first. You need enough room to operate the table saw safely. Also, consider the size of the material you will cut. The tabletop should be large enough to support these materials.
Decide on the height of the table. It should be comfortable to use. A standard height is around 34 inches. But adjust this based on your preference. The width and length of the table depend on your needs and space. Make sure the dimensions align with your layout sketch.
Planning and choosing the right dimensions help avoid errors. They ensure your table saw works efficiently. Proper design planning sets the foundation for a successful DIY project.
Building The Base
Learn how to create a DIY table saw using a circular saw with these 10 easy steps. Build a strong base for stability and safety. Follow the guide to complete your woodworking project efficiently.
Building the base for your DIY table saw is crucial. It’s the foundation that will ensure stability and precision. A well-built base can make all the difference in your woodworking projects. ###
Selecting Wood
Choosing the right wood is your first step. Opt for sturdy and durable wood like plywood or MDF. These materials are known for their strength and stability. Consider the thickness of the wood. A thicker base will offer better support. If you have scrap wood lying around, check its condition. Avoid wood with cracks or warps. ###
Assembling The Base
Start by cutting the wood to your desired dimensions. Make sure your cuts are straight and accurate. Next, assemble the pieces using screws or wood glue. Ensure each joint is tight to prevent wobbling. For added stability, attach brackets or metal braces at the corners. This will reinforce your base and keep it secure. Think about how you will attach your circular saw to the base. Plan this step carefully to avoid mistakes later on. Finally, test the stability of your base.
Place it on a flat surface and apply pressure. It should not move or tilt. Building a strong base is not just about following instructions. It’s about ensuring your DIY table saw will work efficiently and safely. Have you ever built a base that didn’t turn out as expected? How did you fix it? Share your experiences in the comments below.
Mounting The Circular Saw
Mount the circular saw securely to the table. Align the blade carefully for accurate cuts. Ensure all bolts are tightly fastened.
Mounting the circular saw onto your DIY table saw is a pivotal step. It ensures your saw operates safely and efficiently. Let’s break it down into two parts: positioning the saw and securing the saw.
Positioning The Saw
Before you start, find a sturdy workbench or table. Place the circular saw on the underside of your table with the blade protruding through the pre-cut slot. Make sure the blade aligns perfectly with the slot. This alignment is crucial for straight cuts. Double-check the saw’s position before moving on. Consider the saw’s power cord and switch placement. You want easy access to the switch without it getting in the way.
Securing The Saw
Once positioned, it’s time to secure the saw. Use clamps or mounting brackets to hold the saw in place. Ensure it is firmly attached to avoid any movement during operation. Loose saws can cause inaccurate cuts and are dangerous. Test the saw’s stability by giving it a slight shake. If it moves, tighten the brackets or clamps more. Think about safety. Is everything bolted securely?
Is the blade shield in place? Your safety is paramount. By carefully positioning and securing your circular saw, you’re setting the stage for successful and safe woodworking projects. Have you ever mounted a saw before, or is this your first time? Share your thoughts and experiences in the comments!
Creating The Fence
Step eight involves creating the fence for your DIY table saw. Secure the circular saw, ensuring accurate cuts and stability. Proper alignment is key for precision.
Creating the Fence Building a DIY table saw using a circular saw is an exciting and rewarding project. One crucial component is the fence, which ensures that your cuts are straight and precise. The fence acts as a guide, keeping your material steady and aligned during cutting. Let’s dive into the necessary steps to create and install the fence effectively.
Materials For The Fence
To build a sturdy fence, you’ll need a few basic materials: –
Straight wood or metal piece: Ideally, a 2×4 or metal bar that’s perfectly straight. –
Clamps: To hold the fence securely in place. –
Screws and a drill: For attaching the fence to the table. –
Measuring tape and pencil: For accurate measurements and markings. –
Square or level: To ensure the fence is perfectly aligned. –
Sandpaper: For smoothing any rough edges. Gather these materials before starting. It’s easier to work when everything is within reach.
Installing The Fence
Position the fence parallel to the blade. Use your measuring tape to check the distance from the blade at both ends. This ensures the fence is perfectly straight. Next, clamp the fence securely to the table. Double-check its alignment with the square or level. This step is crucial for accurate cuts. Once aligned, drill pilot holes through the fence into the table. This prevents the wood from splitting.
Then, screw the fence into place. Make sure it’s firmly attached, but don’t overtighten and risk damaging the table. Regularly check the fence’s alignment. Over time, vibrations from the saw can cause it to shift. Have you ever struggled with a misaligned fence? It can ruin a perfect project.
Ensuring your fence is straight from the start saves you time and frustration. Creating an effective fence is more about precision than complexity. With these steps, you can achieve a professional-quality fence for your DIY table saw. What are your thoughts on this process? Do you have any tips for ensuring a perfectly straight fence? Share your ideas!
Credit: www.instructables.com
Adding Safety Features
Building a DIY table saw using a circular saw is a rewarding project. Yet, safety should never be overlooked. Adding safety features to your table saw can prevent accidents and injuries. Focus on two main areas: the blade guard and the emergency stop mechanism.
Blade Guard Installation
A blade guard is a crucial safety feature for your table saw. It covers the blade and protects your hands from accidental contact. Choose a transparent guard to maintain visibility. Attach the guard securely to the saw’s base. Ensure it moves freely with the blade. This way, it offers protection without hindering your work.
Emergency Stop Mechanism
An emergency stop mechanism is another vital safety feature. It allows you to quickly shut off the saw in case of an emergency. Install a large, easily accessible stop button. Place it near your working area. This ensures you can reach it quickly if needed. Test the button regularly to ensure it works. A reliable stop mechanism can be a lifesaver.
Wiring And Electrical Setup
Wiring and electrical setup is a crucial part of building your DIY table saw. Proper electrical connections ensure safety and smooth operation. Here, we will cover the essential steps for setting up the power source and installing the switch.
Power Source
First, choose a reliable power source for your table saw. Ensure your power outlet matches the voltage requirements of your circular saw. Most saws need a 120V outlet. Using an extension cord? Make sure it’s heavy-duty and rated for the power of the saw.
Secure the power cord to avoid accidental unplugging. Clip or tie the cord to the table frame. This prevents any tripping hazards and keeps your workspace safe.
Switch Installation
Next, install a power switch for your table saw. A switch adds convenience and safety. Choose a switch that can handle the saw’s power load. Mount the switch on the front or side of the table for easy access. Make sure the switch is within reach while operating the saw.
Connect the switch to the power cord of the saw. Follow the manufacturer’s instructions for wiring. Double-check all connections before plugging in the saw. This ensures everything is secure and ready for use.
Test the switch to make sure it works properly. Flip the switch to power the saw on and off. If everything works, you are ready to move on to the next step in building your DIY table saw.

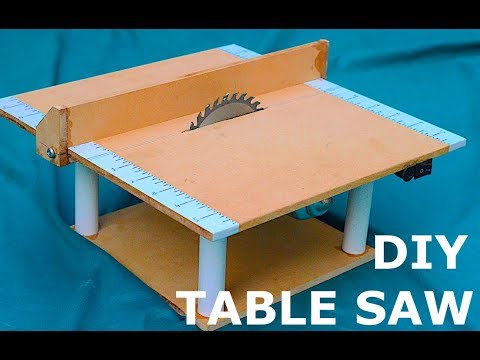
Credit: www.youtube.com
Testing The Table Saw
Testing the table saw ensures your DIY project runs smoothly and safely. Follow these steps to build a table saw using a circular saw.
Testing the Table Saw Once you have built your DIY table saw using a circular saw, it’s essential to test it thoroughly. This ensures it operates safely and efficiently. Testing isn’t just about flipping the switch; it involves a series of steps that guarantee precision and performance.
Initial Test Runs
Start with a basic check. Plug in the saw and turn it on. Observe the blade to ensure it runs smoothly without wobbling. Run a piece of scrap wood through the saw. Check for clean, straight cuts. Listen for unusual sounds. If the saw makes any strange noises, turn it off immediately and inspect for issues.
Adjustments And Calibration
After the initial tests, fine-tune your saw. Check the alignment of the blade with the miter slot. Use a square to ensure it’s perfectly aligned. Adjust the fence to make sure it’s parallel to the blade. A misaligned fence can lead to inaccurate cuts and potential kickbacks. Test the blade height adjustment mechanism. It should raise and lower smoothly. Finally, check the safety features. Ensure the blade guard and anti-kickback pawls are functioning correctly.
Your Thoughts? Have you ever built a DIY tool before? What challenges did you face during the testing phase? Your feedback can help others in their DIY journey. Share your experiences in the comments below!
Maintenance Tips
Maintaining your DIY table saw is crucial for its longevity and performance. Proper care can prevent accidents and ensure smooth operation. Here are some essential maintenance tips to keep your tool in top shape.
Regular Cleaning
Dust and debris can build up on your table saw. Regular cleaning is essential. Use a soft brush or cloth to remove sawdust from the surface. Pay extra attention to the motor housing and vents. Clogged vents can cause overheating. For hard-to-reach areas, use compressed air. This will help remove dust particles effectively.
Blade Sharpening
A dull blade can affect the quality of your cuts. It can also strain the motor. Sharpen the blade regularly to maintain its efficiency. You can use a blade sharpening tool or take it to a professional. Always check the blade for any signs of damage. Replace it if you notice cracks or missing teeth. A sharp blade ensures cleaner cuts and reduces the risk of accidents.
Safety Tips
Building a DIY table saw using a circular saw can be fun and rewarding. But safety should always come first. Proper safety measures protect you from injuries and ensure your project runs smoothly.
In this section, we’ll cover essential safety tips. These will help you use your tools correctly and handle emergencies if they arise.
Proper Usage
Always read the manual of your circular saw. Understand its features and limitations. Use protective gear like safety glasses and ear protection. Ensure your saw blade is sharp and clean. A dull blade can cause kickbacks and accidents.
Secure the wood firmly before cutting. Loose wood can shift and lead to inaccurate cuts or injuries. Keep your hands away from the cutting area. Use push sticks for small pieces. Maintain a clean workspace to avoid trips and falls.
Emergency Procedures
Know where your first aid kit is. Keep it nearby. Familiarize yourself with basic first aid steps. In case of an injury, act quickly but calmly.
Unplug your saw immediately if something goes wrong. This prevents further accidents. If you experience a severe injury, call for medical help right away. Always have a phone nearby for emergencies.
Safety measures are crucial. They ensure your DIY project is enjoyable and injury-free. Keep these tips in mind as you work on your table saw.
Frequently Asked Questions
How Can I Turn My Circular Saw Into A Table Saw?
Mount your circular saw upside down under a sturdy table. Ensure the blade protrudes through a slot. Secure it firmly. Use a fence for straight cuts.
How Do You Use A Circular Saw Step By Step?
Follow these steps to use a circular saw: wear safety gear, mark the cut line, adjust the blade depth, hold the saw firmly, and guide it along the line steadily.
Can A Circular Saw Do Everything A Table Saw Can?
No, a circular saw cannot do everything a table saw can. Table saws offer greater precision, stability, and repeatability for various cuts. Circular saws are more portable and versatile for rough cuts and quick jobs, but lack the accuracy and safety features of table saws.
How Do You Use A Table Saw Step By Step?
To use a table saw, follow these steps: 1. Wear safety gear. 2. Set the blade height. 3. Adjust the fence. 4. Turn on the saw. 5. Push the wood through the blade using a push stick.
Conclusion
Building a DIY table saw using a circular saw is a rewarding project. Follow these 10 steps carefully for a successful build. You can save money and create a tool that meets your needs. Plus, it’s a fun challenge that improves your woodworking skills.
Remember to prioritize safety at each step. With patience and precision, you’ll have a reliable table saw. Happy building!