Milwaukee Fuel 7-1/4 vs 6-1/2 Saw: Which One Should You Buy?
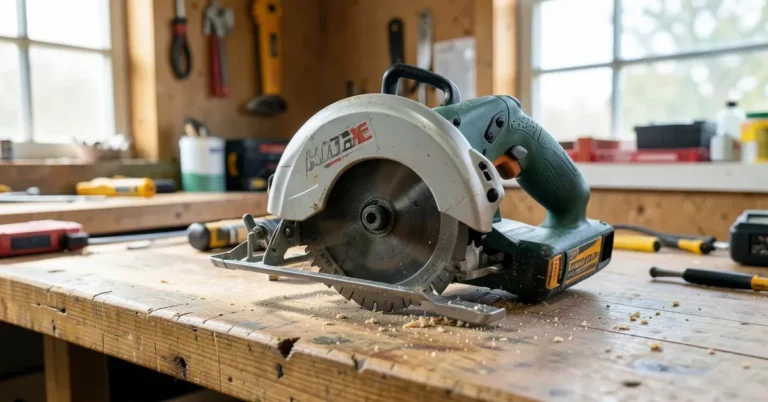
The 7-1/4-inch Milwaukee Fuel saw cuts up to roughly 1/2 inch deeper than the 6-1/2-inch model, letting it clear thick dimensional lumber and doubled-up framing in one pass. The 6-1/2-inch saw is about 1.5 lbs lighter and easier to control one-handed, which is why finish carpenters doing overhead or awkward-angle cuts tend to prefer it.
The catch most comparisons skip: the bigger blade also pulls noticeably more current per cut. On the same M18 battery, expect meaningfully fewer cuts per charge from the 7-1/4-inch saw than the 6-1/2-inch, worth knowing if you are cutting sheet goods all day and only own one or two batteries.
Milwaukee Fuel Circular Saw Size Matters
Best 7-1/4in Pick for Framing
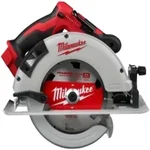 |
Milwaukee M18 FUEL 7-1/4″ Circular Saw (Bare Tool) – $224.10 This is the larger-blade Fuel saw from our comparison above, the one to get if you need max depth of cut.
|
Understanding Milwaukee Fuel Circular Saw Blade Sizes
Blade diameter is the single spec that determines almost everything else about a circular saw‘s size, weight, and capability. The 7-1/4 inch blade became North America’s de facto framing standard decades ago because it’s the smallest diameter that reliably clears a doubled 2×4 (3 inches) or a single 2×10 in one pass, which is exactly the cutting job a framing crew repeats hundreds of times a day. A 6-1/2 inch blade shaves roughly 3/4 inch off the spinning mass and lets manufacturers build a noticeably smaller saw body around it – less inertia to fight during plunge cuts and overhead work, and a lower center of gravity that’s easier to keep flat on the shoe during long rip cuts.
Where this actually matters in practice: doubled framing lumber, engineered beams, and anything cut at a bevel angle (which eats into usable depth) is where that extra quarter-to-half inch on the 7-1/4 inch blade earns its keep. Sheet goods, 1x trim stock, and single-pass 2x lumber at 90 degrees rarely come close to taxing a 6-1/2 inch blade’s depth ceiling.
Cut Depth Differences Explained
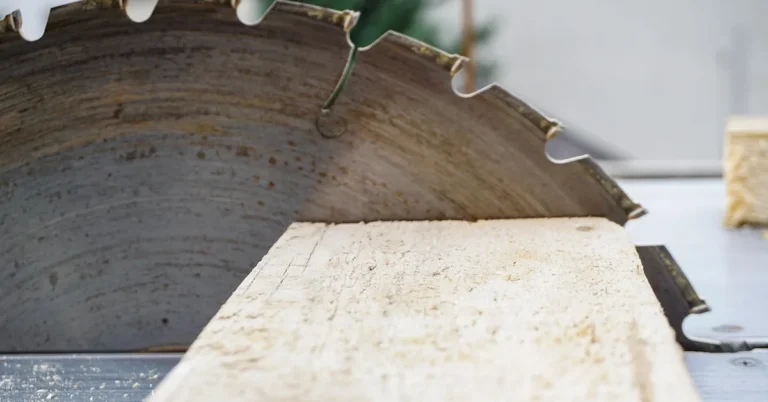
The blade diameter difference shows up directly in the spec sheet: a 7-1/4 inch saw at 90 degrees maxes out around 2-9/16 inches of depth, versus roughly 2-1/8 inches on a 6-1/2 inch model – a 7/16-inch gap that matters more than it sounds like. A dressed 2x lumber piece measures 1-1/2 inches thick, so both saws clear it easily at 90 degrees; the gap shows up once you add a bevel cut, since tilting the shoe to 45 degrees eats into usable depth on both saws, but pushes the 6-1/2 inch model uncomfortably close to its ceiling on anything thicker than a single 2x board.
In practice that 7/16-inch difference decides exactly one thing: whether you can clear a doubled beam or a 4x post notch in a single pass. If your work is mostly sheet goods, 1x trim, or single-thickness dimensional lumber at square cuts, the 6-1/2 inch saw’s shallower depth never becomes a limitation.
Weight and Maneuverability
Milwaukee’s 7-1/4 inch M18 FUEL saw runs roughly 8-8.5 lbs as a bare tool, while the 6-1/2 inch FUEL model comes in around 6.5-7 lbs – call it a pound and a half difference once you factor in a battery on either one. That gap sounds small until you’re holding the saw overhead cutting ceiling joists or working one-handed on a ladder, where an extra pound and a half translates directly into forearm fatigue over a full day.
The smaller saw’s lower weight and more compact shoe also make it noticeably easier to keep flat and square when you’re cutting plywood or trim one-handed while holding the workpiece steady with the other – a common scenario in cabinet and finish work that a bulkier 7-1/4 inch saw handles less gracefully.
Benefits of Smaller Blades
- Ease of Handling A smaller blade often means a lighter saw. This makes it easier to lift, carry, and control for extended periods.
- Increased Agility With a more compact design, smaller saws can be more agile. They are easier to position and cut accurately in tight spaces or on angled cuts.
- Faster Spin-Up Smaller, lighter blades can often reach their optimal cutting speed more quickly. This can feel more responsive during use.
- Reduced User Fatigue The overall lighter weight and better balance of a saw with a smaller blade contribute to less fatigue during long work sessions.
The practical payoff of the 6-1/2 inch saw’s lighter blade and body shows up in three places at once: less arm fatigue on overhead or one-handed cuts, a smaller footprint that fits into tighter framing bays and cabinet interiors, and a lighter blade mass that spins up to full RPM slightly faster, which translates to less hesitation and a cleaner entry cut when you’re following a tight pencil line. None of these are dramatic advantages on their own, but stacked together over a full day of finish carpentry or repeated cabinet cuts, they add up to noticeably less fatigue and more consistent accuracy late in the day.
Benefits of Larger Blades
- Greater Cut Depth The most obvious advantage is the ability to cut through thicker materials. This is essential for framing and heavy-duty applications.
- Stability and Power Larger blades often come on more substantial saws, which can offer more power and stability during demanding cuts.
- Versatility for Framing For general construction and framing jobs, the 7-1/4 inch blade is the industry standard and can handle most common lumber sizes with ease.
- Reduced Sawing Passes For very thick materials, a larger blade might achieve the cut in fewer passes than a smaller blade.
The 7-1/4 inch saw’s extra depth pays off in exactly the jobs a framing crew does all day: doubled top plates, 2×8 and 2×10 joists, and beam stock that a 6-1/2 inch blade would need two flipped passes to clear. Two passes on the same board don’t just cost time – they also risk a slightly misaligned second cut where the kerfs don’t perfectly meet, leaving a small step in the cut face that a single-pass cut never produces. On a job site cutting the same lumber dimensions dozens of times a day, that single-pass reliability is the entire reason the 7-1/4 inch saw remains the framing-crew default.
Milwaukee Fuel 7-1/4 vs 6-1/2 Circular Saw Performance Comparison
Performance on a jobsite comes down to three numbers that actually matter: how much torque the motor holds under load, how many cuts you get per battery charge, and how consistently the saw maintains RPM when it hits a knot or dense grain. Both saws share Milwaukee’s brushless FUEL motor platform, but the 7-1/4 inch saw’s larger blade mass and deeper typical cut demand more sustained current draw – the tradeoff for that extra cutting capacity is fewer cuts per charge on the same battery, which is worth planning around if you’re only carrying one or two packs to a job.
Motor Power and Torque
Brushless motors eliminate the friction and heat losses that come from physical brushes contacting a commutator, which is why Milwaukee’s FUEL line consistently outperforms brushed cordless saws on both torque and runtime for the same battery. The 7-1/4 inch saw’s motor is tuned to hold RPM steady under the higher load of spinning a larger blade through thick stock – the moment a motor’s RPM sags mid-cut is when you get burning, binding, or a bogged-down blade, and Milwaukee’s electronic speed control is built specifically to resist that sag.
The 6-1/2 inch saw’s motor is tuned toward the lighter loads its smaller blade actually encounters, which lets Milwaukee bias the tuning slightly toward RPM and battery efficiency rather than maximum torque headroom. In practice this means the 6-1/2 inch saw feels just as capable within its shallower depth range, since it’s rarely being asked to do the heavy-load work the 7-1/4 inch saw’s tuning is built around.
In amperage terms, a 7-1/4 inch cordless saw pulling peak load can draw 15-18 amps from the battery – on par with a corded saw plugged into a standard 15-amp household circuit. The 6-1/2 inch saw typically pulls 12-15 amps under the same conditions, a meaningful gap that shows up directly in cuts-per-charge rather than in how the cut itself feels, since sustained power delivery (not the peak number) is what actually determines whether a cut stays smooth start to finish.
Battery Life and Runtime
Battery capacity, in amp-hours (Ah), is the multiplier on top of the amperage-draw gap above – a 5.0 Ah or 6.0 Ah pack roughly doubles the runtime of a 2.0 Ah or 3.0 Ah pack on either saw, so for all-day cutting the battery you buy matters as much as the saw itself. For a full comparison of Milwaukee against six other 7-1/4 in cordless platforms — including real cuts-per-charge and total cost to start — see our battery-powered circular saw guide.
Because the 7-1/4 inch saw’s larger blade draws more current per cut, it will run through a given battery’s capacity faster than the 6-1/2 inch saw doing equivalent work – Milwaukee’s power-management electronics narrow that gap somewhat, but they don’t erase it, so if you’re only carrying one or two batteries to a job, that difference is worth planning around.
To put real numbers on it: a 7-1/4 inch cordless saw on a 5.0 Ah pack typically clears somewhere around 70-100 linear feet of 2×10 cuts before needing a swap, while a 6-1/2 inch saw on the same pack can often stretch to 80-120 linear feet on the same material – the lighter blade simply asks the battery for less per cut. Wood density, blade sharpness, and cutting technique all shift those numbers meaningfully, so treat them as a rough planning baseline rather than a guarantee, and size your battery to the size of the job rather than assuming one pack covers a full day either way.
Cutting Speed and Efficiency
Cutting speed is really RPM under load, not RPM at idle – any saw spins fast with no resistance, but what separates a good motor from a mediocre one is how little that number drops once the blade actually bites into wood. Milwaukee’s brushless FUEL motors use electronic feedback to hold RPM close to their rated speed even as load increases, which is the practical reason these saws don’t bog down or burn wood the way a cheaper brushed saw does when it hits a knot. See our 6-1/2 vs 7-1/4 circular saw comparison for how this plays out against other brands’ blade-size lineups.
The practical split is depth versus finesse: the 7-1/4 inch saw’s extra torque headroom is built for pushing through thick, dense material without RPM sag, while the 6-1/2 inch saw’s lighter blade spins up and settles into a cut faster, which shows up as slightly cleaner entry cuts on thinner material and trim.
Cutting a 2×10 Board
- Preparation Ensure the 2×10 board is securely clamped to a stable surface. Mark your cut line clearly.
- Blade Selection Use a sharp 24-tooth or 40-tooth carbide-tipped blade suitable for dimensional lumber.
- Saw Setup For a 7-1/4 inch saw, set the cut depth to just slightly more than the 3-1/2 inch actual thickness of the 2×10.
- Starting the Cut Place the saw on the board with the blade guard retracted. Ensure the shoe is flat on the wood.
- Executing the Cut Start the saw and let it reach full speed before engaging the wood. Push the saw forward smoothly and steadily along the cut line. Let the saw do the work without forcing it.
- Finishing Once the cut is complete, allow the blade to stop spinning before lifting the saw.
A 2×10 (actual dimensions: 9-1/4 inches wide, 1-1/2 inches thick) is a useful benchmark because it’s thick enough to show the real gap between the two saws. Set a 7-1/4 inch saw’s depth to just over 1-1/2 inches and it clears the board with plenty of headroom to spare below its 2-9/16 inch ceiling – the motor barely notices the load.
A 6-1/2 inch saw also clears a 2×10 at 90 degrees, but with roughly 5/8 inch of headroom left rather than nearly an inch, which starts to matter if the board is slightly warped, if the blade has dulled, or if you introduce a bevel angle. On standard, flat, square-cut dimensional lumber, both saws handle a 2×10 cleanly – the 7-1/4 inch just does it with more margin for error.
Cutting Plywood Sheets
- Material Support Lay the plywood sheet flat on sawhorses or a sturdy workbench. Ensure it is well-supported to prevent sagging.
- Marking Line Measure and mark your desired cut line clearly with a pencil or chalk line.
- Blade Depth Setting Set the cut depth of your saw to slightly more than the thickness of the plywood (e.g., 1/2 inch for 3/4 inch plywood).
- Blade Choice Use a blade designed for cutting sheet goods or a general-purpose blade with at least 40 teeth for a cleaner edge.
- Starting and Cutting Place the saw’s shoe firmly on the plywood. Start the saw and slowly push it along the marked line.
- Maintaining Control Keep the saw moving at a steady pace, allowing the blade to cut through the material without forcing it.
- Finishing the Cut Once the cut is complete, lift the saw carefully after the blade has stopped spinning.
Depth is a non-issue on 3/4 inch plywood for either saw – both clear it with over an inch of spare depth. What actually decides the outcome here is a high-tooth-count blade (40+ teeth) to control tear-out on the plywood’s face veneer, not blade diameter. Where the 6-1/2 inch saw wins is pure ergonomics: breaking down a full 4×8 sheet into smaller panels usually means long rip cuts and repeated corner turns, and its lighter body and smaller shoe track a cut line with noticeably less arm fatigue over the length of a full sheet than the bulkier 7-1/4 inch saw manages.
Feature-by-Feature: Brakes, Lights, and Dust Ports
Beyond blade size, Milwaukee packs a lot of technology into its FUEL circular saws. Features like LED lights, electric brakes, and dust collection ports enhance the user experience and safety. When comparing the 7-1/4 inch and 6-1/2 inch models, you’ll find many of these premium features are available on both, reflecting Milwaukee’s commitment to quality across its product lines.
However, there might be slight variations or specific optimizations based on the intended use of each saw size.
For example, both saws will likely come with an electric brake that stops the blade quickly after you release the trigger, a significant safety improvement. The LED lights are also standard, illuminating your cut line for better visibility. Dust collection is another feature to consider.
While a dust port is usually present, its effectiveness can vary based on the saw’s design and the amount of dust generated. Let’s look at some of these common features and how they might apply to both sizes.
Safety Features
Milwaukee’s electric brake works by reversing current briefly through the motor windings the instant you release the trigger, stopping a blade that would otherwise coast for several seconds in under two seconds flat – that coast-down window on brake-less saws is exactly when a lot of set-the-saw-down injuries happen, so the brake is doing real safety work, not a marketing checkbox. Both saw sizes share this brake along with a spring-loaded lower guard that retracts on the push stroke and snaps closed the instant the blade clears the material, plus a spindle lock that lets you swap blades with a single wrench instead of two.
Electric Brake Functionality
Before electric brakes became standard, a released trigger just meant the blade was coasting on its own momentum – on a 7-1/4 inch blade that’s real stored energy, and it’s exactly what caused a lot of workshop injuries when someone set a saw down too soon or brushed a still-spinning blade during a kickback recovery. The counter-current braking on both FUEL sizes cuts that coast-down to a near-instant stop, which lets you set the saw down between cuts without the old habit of waiting it out – a small change that adds up to real time saved across a full day of repetitive cutting.
Blade Guard Design
Milwaukee builds both saws’ lower guards from a metal-reinforced housing rather than pure plastic, which matters because a guard that flexes or binds under repeated contact with material edges is a guard that eventually stops retracting smoothly – a known failure point on cheaper saws after heavy use. The spring tension is tuned the same way across both sizes: firm enough to snap shut reliably the instant the blade clears the workpiece, but light enough that it doesn’t drag or catch during the push stroke.
LED Lighting and Visibility
Both saws mount an LED just ahead of the blade, angled to throw light directly onto the cut line rather than generally lighting up the work area – a small distinction that matters in a dim basement or crawlspace where ambient light barely reaches the workpiece at all. The light activates with the trigger rather than needing a separate switch, so there’s no extra step between picking up the saw and having your cut line lit, which matters most on the exact jobs where you’d otherwise be squinting to follow a faint pencil mark.
Dust Collection
Both saws route a dust port off the upper guard that accepts a standard shop-vac hose, though how much dust actually gets captured versus what escapes around the blade depends heavily on whether a vacuum is actually connected and running – an unconnected port does essentially nothing. For MDF and other fine-dust materials specifically, running a vacuum through the port isn’t optional if you’re cutting indoors; airborne fine particulate from MDF is a real respiratory concern that a passive dust chute alone won’t manage.
Ergonomics and Comfort
Handle shape, grip texture, and weight balance determine how a saw actually feels an hour into a cutting session, not just when you first pick it up. Both FUEL saws use a rubber-overmolded main grip with a contoured front handle for two-handed control during long or angled cuts, and both bias their weight distribution toward the motor housing rather than the blade guard, which keeps the shoe planted flat instead of the saw wanting to tip forward mid-cut. The 6-1/2 inch saw’s lower overall weight makes that balance easier to maintain one-handed; the 7-1/4 inch saw relies more on its weight distribution to feel manageable, and largely succeeds, but users switching from the smaller saw do notice the difference in the first few uses.
Which Saw Size Actually Fits Your Projects
Everything above boils down to one question: does your typical cut need more than 2-1/8 inches of depth on a regular basis? If yes – doubled framing, beams, bevel cuts on thick stock – the 7-1/4 inch saw’s extra capacity and single-pass reliability outweigh the pound and a half of extra weight. If most of your work is sheet goods, trim, and single-thickness dimensional lumber at square cuts, the 6-1/2 inch saw’s lighter body and lower fatigue win out, since you’ll never actually use the depth you’d be carrying around. A few concrete scenarios below show how that plays out in practice.
For the DIY Homeowner
If you’re a DIY homeowner who tackles various projects around the house, from building shelves and small decks to cutting lumber for repairs, the choice between the two sizes becomes clearer. For many general home projects, the 6-1/2 inch saw might be the more practical choice. Its lighter weight and increased maneuverability make it easier to handle for a wide range of tasks.
You can cut plywood, 1x lumber, and even most 2x lumber with it, which covers a lot of common DIY needs.
The 6-1/2 inch saw is generally more forgiving for beginners. Its lighter weight means less fatigue, allowing for more focus on accurate cuts. If you’re not frequently cutting through very thick beams or performing heavy-duty framing, the 6-1/2 inch saw will likely meet all your requirements.
It offers a great balance of power and user-friendliness, making it a versatile tool for any homeowner’s toolbox.
For the Professional Contractor
Professional contractors often face demanding job requirements where efficiency, power, and the ability to cut through thicker materials quickly are paramount. In this context, the 7-1/4 inch Milwaukee Fuel circular saw is frequently the preferred choice. Its larger blade provides the necessary depth of cut for framing lumber, structural beams, and other heavy-duty applications common in construction.
The saw’s robust motor is designed to maintain power and speed even under significant load.
While the 7-1/4 inch saw is heavier, its power and cutting capacity often outweigh this drawback for professionals. The ability to make deep, clean cuts in a single pass saves valuable time on the job. For framing, deck building, and general carpentry work, the 7-1/4 inch saw is the industry standard and a reliable workhorse that professionals rely on for its performance and durability.
Scenario 1 Cutting Kitchen Cabinets
Imagine you’re building custom kitchen cabinets. This involves cutting sheet goods like plywood and particle board, as well as ripping smaller pieces of hardwood or laminate for frames and accents. The precision and control needed for cabinet making are high.
A 6-1/2 inch saw would be an excellent choice here. Its lighter weight and greater maneuverability allow for precise cuts on large sheets of plywood, minimizing tear-out and ensuring accurate dimensions. The ability to make quick, controlled cuts on smaller pieces of hardwood is also advantageous.
The 7-1/4 inch saw could also do this, but it might feel a bit bulky for the finer work involved in cabinet construction.
Scenario 2 Building a Deck Frame
Now consider building a deck frame. This typically involves cutting large quantities of 2x lumber, such as 2x6s and 2x8s, for joists and beams. The primary requirement is the ability to cut through these thick pieces of wood quickly and efficiently.
In this scenario, the 7-1/4 inch Milwaukee Fuel circular saw is the clear winner. Its larger blade has the depth to easily cut through 2x lumber in a single pass. The saw’s power ensures it maintains speed, making repetitive cuts faster and less strenuous.
While a 6-1/2 inch saw could technically make the cuts, it would likely be slower and require more effort, potentially impacting the project timeline.
Frequently Asked Questions
Question: Which Milwaukee Fuel saw is better for beginners?
Answer: For most beginners, a 6-1/2 inch Milwaukee Fuel circular saw is often recommended. It’s lighter and easier to handle, which makes it less intimidating and helps build confidence. The reduced weight also contributes to better control, leading to more accurate cuts as you learn.
Question: Can a 6-1/2 inch saw cut through 2x4s?
Answer: Yes, a 6-1/2 inch Milwaukee Fuel saw can easily cut through 2×4 lumber. A standard 2×4 is actually 1-1/2 inches thick, and a 6-1/2 inch saw can cut up to about 2-1/8 inches deep, so it has plenty of capacity.
Question: Does Milwaukee make a corded 7-1/4 inch Fuel saw?
Answer: Milwaukee’s FUEL line is primarily their premium cordless battery-powered tools. While they offer corded saws, the FUEL designation specifically refers to their advanced brushless motor technology in battery-powered tools.
Question: How often should I change the blade on my Milwaukee Fuel saw?
Answer: The frequency of blade changes depends on how much you use the saw and the materials you cut. A dull blade makes cutting harder and can lead to rougher cuts. Generally, change the blade when you notice a decrease in cutting performance or increased splintering.
For frequent use, consider replacing it every few months or sooner if performance degrades.
Question: Is the Milwaukee Fuel 7-1/4 inch saw too heavy for home DIY?
Answer: The 7-1/4 inch Milwaukee Fuel saw is heavier than the 6-1/2 inch model, but its weight is well-balanced. For many DIY tasks like cutting lumber for projects or sheet goods, it’s manageable. If you anticipate mostly lighter tasks or have less upper body strength, the 6-1/2 inch might be a more comfortable choice.
Conclusion
Choosing between the Milwaukee Fuel 7-1/4 inch and 6-1/2 inch circular saw comes down to your specific projects. The 7-1/4 inch is ideal for heavy-duty tasks like framing, offering maximum cut depth and power. The 6-1/2 inch is lighter, more maneuverable, and excellent for general DIY, sheet goods, and finer woodworking where ease of handling is key.
Both deliver exceptional performance thanks to Milwaukee’s FUEL technology. Select the size that best matches your most common cutting needs for a satisfying and efficient experience.
Sponsored / affiliate links. As an Amazon Associate I earn from qualifying purchases. I may earn additional commission from eligible campaigns.