6 Inch Wood Stove Pipe Kit: Complete Guide
Setting up a wood stove can seem tricky, especially for folks new to it. You might be wondering about the right pipes and how they all fit together. It’s a common worry, but getting this right is super important for safety and how well your stove works.
This guide is made to make things simple. We’ll walk through everything you need to know about a 6 Inch Wood Stove Pipe Kit: Complete Guide, step by step, so you can get your stove ready with confidence. Let’s find out what makes it easy.
Understanding Your 6 Inch Wood Stove Pipe Kit
This section is all about getting to know the parts that make up a 6 inch wood stove pipe kit. It’s important to see what each piece does so you can put them together correctly. Think of it like building with blocks; you need to know each block’s shape and purpose.
This knowledge helps you avoid mistakes and makes sure your stove system is safe and works like it should.
What is a 6 Inch Wood Stove Pipe Kit
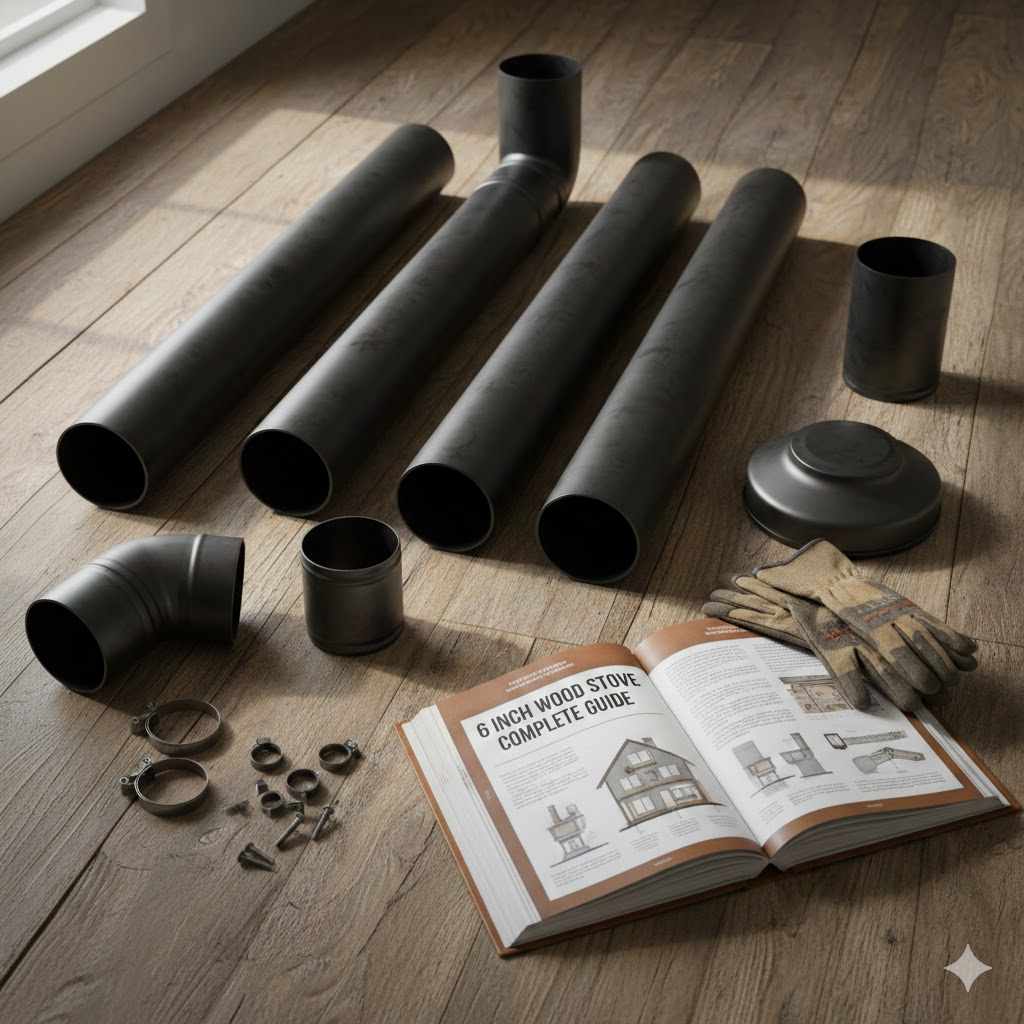
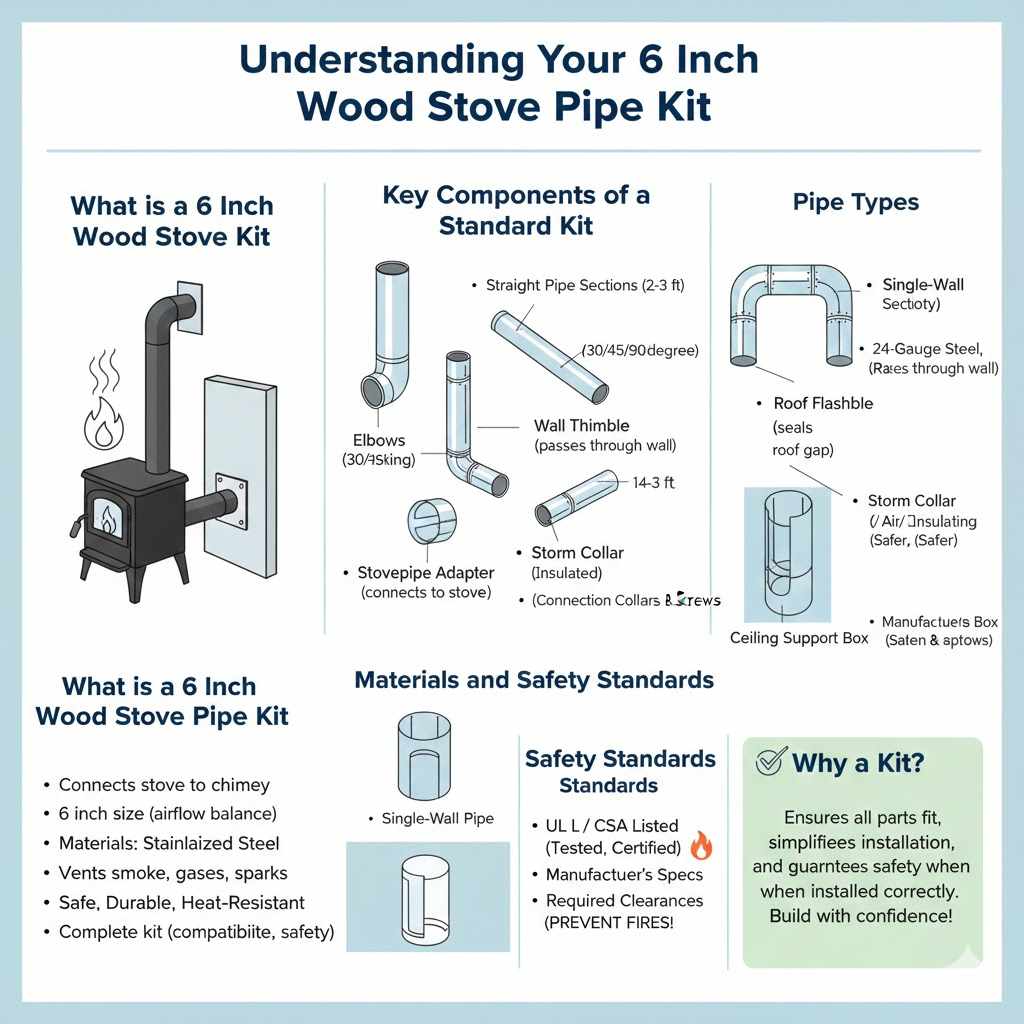
A 6 inch wood stove pipe kit is a collection of metal pipes and fittings specifically designed to connect your wood stove to your chimney. The 6 inch size is very common for many residential wood stoves because it offers a good balance for airflow and heat transfer. These kits usually include straight pipe sections, elbows for turns, a wall thimble if you’re passing through a wall, and a roof flashing if you’re going through the roof.
They are made from materials like stainless steel or galvanized steel, which can handle the high temperatures and corrosive creosote that wood fires produce.
The main job of this pipe is to safely vent smoke, gases, and sparks from your stove up and out of your home. It needs to be strong, durable, and able to withstand extreme heat. Using a complete kit makes sure all the pieces are compatible, which is a big help compared to buying individual parts that might not fit well together.
This compatibility is key for a secure and efficient installation.
Key Components of a Standard Kit
Inside a typical 6 inch wood stove pipe kit, you’ll find several essential pieces. There are usually straight sections of pipe, often in 2-foot or 3-foot lengths. These are the main lengths that carry the smoke upwards.
You’ll also find elbows, which are curved sections that allow you to change the direction of the pipe, usually at 30 or 45-degree angles, sometimes even 90 degrees for tight spots.
A vital part is the wall thimble, a metal sleeve designed to safely pass the stove pipe through a combustible wall. It has an air gap or insulation to keep the wall from catching fire. If your chimney is on the roof, you’ll get a roof flashing, which seals the gap between the pipe and the roof to prevent leaks.
There might also be a storm collar to help with weatherproofing at the roof. Some kits include a ceiling support box if you need to support the pipe from a ceiling.
Don’t forget the stovepipe adapter. This piece connects the stove pipe to the flue collar on your wood stove. It’s important that this adapter matches the size and shape of your stove’s outlet.
Finally, there are often connection collars and screws to join the pipe sections securely. These ensure there are no gaps where smoke or dangerous gases could escape.
Materials and Safety Standards
Wood stove pipes are built from specific materials to be safe. The most common are single-wall and double-wall pipes. Single-wall stove pipe is typically made from 24-gauge steel.
It’s less expensive but must be installed with specific clearances from combustible materials. Double-wall pipe, often called insulated pipe or all-fuel pipe, has two layers of metal with an air space or insulation between them. This design provides better insulation, allowing for closer clearances to walls and ceilings, which greatly increases safety.
All components, whether single-wall or double-wall, must meet strict safety standards. In North America, this often means being listed by organizations like UL (Underwriters Laboratories) or CSA (Canadian Standards Association). These listings mean the products have been tested and meet safety requirements for fire resistance and performance in wood heating applications.
Always look for the manufacturer’s specifications and the required clearances to combustible materials. These are not suggestions; they are safety rules to prevent house fires. Proper installation according to these standards is paramount.
Planning Your Wood Stove Pipe Installation
Before you start connecting pipes, good planning is essential. You need to think about where your stove will go, how the pipes will run, and what challenges you might face. This planning stage helps you get all the right parts and figure out the best way to connect your stove to the chimney safely and efficiently.
It’s about making sure everything fits perfectly and follows all the safety rules for your home.
Choosing the Right Location
The placement of your wood stove is key. It needs to be in a safe spot, away from curtains, furniture, or anything that can catch fire. Local building codes will tell you how far the stove and pipe must be from walls, ceilings, and other flammable materials.
This distance is called the clearance. A 6 inch wood stove pipe kit has specific clearance requirements that you must follow strictly. For example, single-wall pipe usually needs at least 18 inches of clearance, while double-wall pipe can often be installed much closer, sometimes just 6 inches.
Consider how the stove will look and function in the room. It should be accessible for loading wood and cleaning. Think about where the pipe will exit your house – either through a wall or the roof.
This exit point will heavily influence the layout of your pipe run. Also, make sure there’s enough space to work around the stove and pipe during installation. Planning the location properly from the start saves a lot of headaches later and ensures a safe and efficient setup.
Measuring and Layout
Accurate measurements are crucial for a successful installation. You need to measure the distance from the stove’s flue collar to where the pipe will enter your chimney or exit your house. Measure the height your pipe needs to go vertically.
Also, measure any horizontal runs. Keep horizontal runs as short as possible because smoke cools down and can cause creosote buildup more easily on flat sections.
Once you have your measurements, sketch out a plan for your pipe layout. Mark where you’ll need elbows to make turns. Decide if you need straight pipe sections and how long they should be.
If you’re passing through a wall or ceiling, mark the exact spot for the thimble or support box. A good layout plan helps you determine exactly how many pipe sections, elbows, and other fittings you’ll need from your 6 inch wood stove pipe kit. It’s better to have a few extra pieces than to be short during the installation.
Always double-check your measurements!
Installing a wood stove and its venting system is serious business, and it’s regulated by local building codes. These codes are in place to ensure your installation is safe and won’t cause a fire hazard. Before you buy anything or start working, find out what your local municipality requires.
You might need to get a permit for the work. An inspector will likely come to your home to check the installation.
Codes dictate things like minimum clearances to combustibles, the type of pipe you can use (single-wall vs. double-wall), how the pipe must be supported, and how it connects to the chimney. They also specify requirements for passing through walls and ceilings, like using approved thimbles.
Ignoring these codes can lead to unsafe living conditions, problems with your homeowner’s insurance, and fines. It’s always best to consult your local building department or a certified chimney professional to ensure your installation is compliant.
Installing Your 6 Inch Wood Stove Pipe
This is where the actual work begins. Installing the pipe correctly is vital for safety and performance. We’ll break down the steps so you can feel confident.
Remember, if you’re ever unsure, it’s wise to call a professional. Safety first is always the best rule when dealing with fire and ventilation.
Connecting to the Wood Stove
The first connection point is usually the flue collar on your wood stove. You’ll typically use a stovepipe adapter piece here. This adapter connects the round opening of your stove to the size of your stove pipe, which is 6 inches in this case.
Make sure the adapter fits snugly onto the stove’s collar. Sometimes, you might need a few screws to secure it, depending on the adapter design.
The stovepipe section then slides over or into the adapter. It’s crucial to have the pipe slope slightly upwards away from the stove. This upward slope helps with proper draft, allowing smoke to rise naturally.
Avoid having any dips or flat sections, as these can trap smoke and creosote. Ensure the connection between the adapter and the first pipe section is secure and sealed, as this is a common spot for leaks.
Assembling Pipe Sections and Elbows
When you connect straight pipe sections, the crimped (narrower) end of one pipe should slide into the uncrimped (wider) end of the next. This overlapping design helps create a seal. For elbows, you connect them in a similar way to straight sections.
If you need to make a turn, you’ll use an elbow. Remember to keep horizontal runs as short as possible, ideally less than 25% of the total vertical run length.
Secure each connection with at least three sheet metal screws spaced evenly around the circumference. These screws prevent the pipes from separating, especially if they experience vibration or heat expansion. For added security and sealing, especially on single-wall pipe, you can use a high-temperature stove cement or silicone sealant around the joints.
This helps prevent smoke from leaking out. Ensure all connections are tight and well-secured before proceeding.
Passing Through Walls and Ceilings
If your pipe needs to go through a wall, you must use a wall thimble. This is a critical safety device. The thimble provides a safe passageway for the hot pipe through combustible materials like wood framing.
It creates an air gap or has insulation to keep the heat away from the wall. Install the wall thimble according to the manufacturer’s instructions and local codes. This usually involves cutting an appropriate size hole in the wall and securing the thimble in place.
Similarly, if the pipe goes through a ceiling, you’ll need a ceiling support box or a specific type of insulated chimney pipe that can pass through ceilings. A ceiling support box provides structural support for the pipe and often includes a collar for connecting the stove pipe. It also helps maintain the required clearances from ceiling joists.
Ensure the box is properly secured and that all clearances are maintained. Never let the stove pipe touch any wood or other combustible material directly.
Securing and Supporting the Pipe
Proper support is essential to prevent sagging and ensure the long-term safety of your installation. Straight vertical sections of pipe are usually supported by a ceiling support box or a wall bracket. Horizontal sections need to be supported at regular intervals, typically every 5 to 10 feet, depending on the pipe type and local codes.
Use sturdy wall brackets designed for stove pipe. These brackets attach to the wall and hold the pipe securely.
If your pipe goes through the roof, it needs to be properly supported at the roof level. This is often done with a specialized roof support assembly. A storm collar should be installed just below the flashing to direct water away from the pipe.
The entire pipe system should feel solid and stable. Any movement or sagging indicates a support issue that needs to be addressed immediately. A well-supported system is a safe system.
Maintenance and Safety Checks
Once your 6 inch wood stove pipe kit is installed, the job isn’t over. Regular checks and cleaning are vital to keep your system safe and working well. Neglecting maintenance can lead to serious problems like chimney fires or carbon monoxide poisoning.
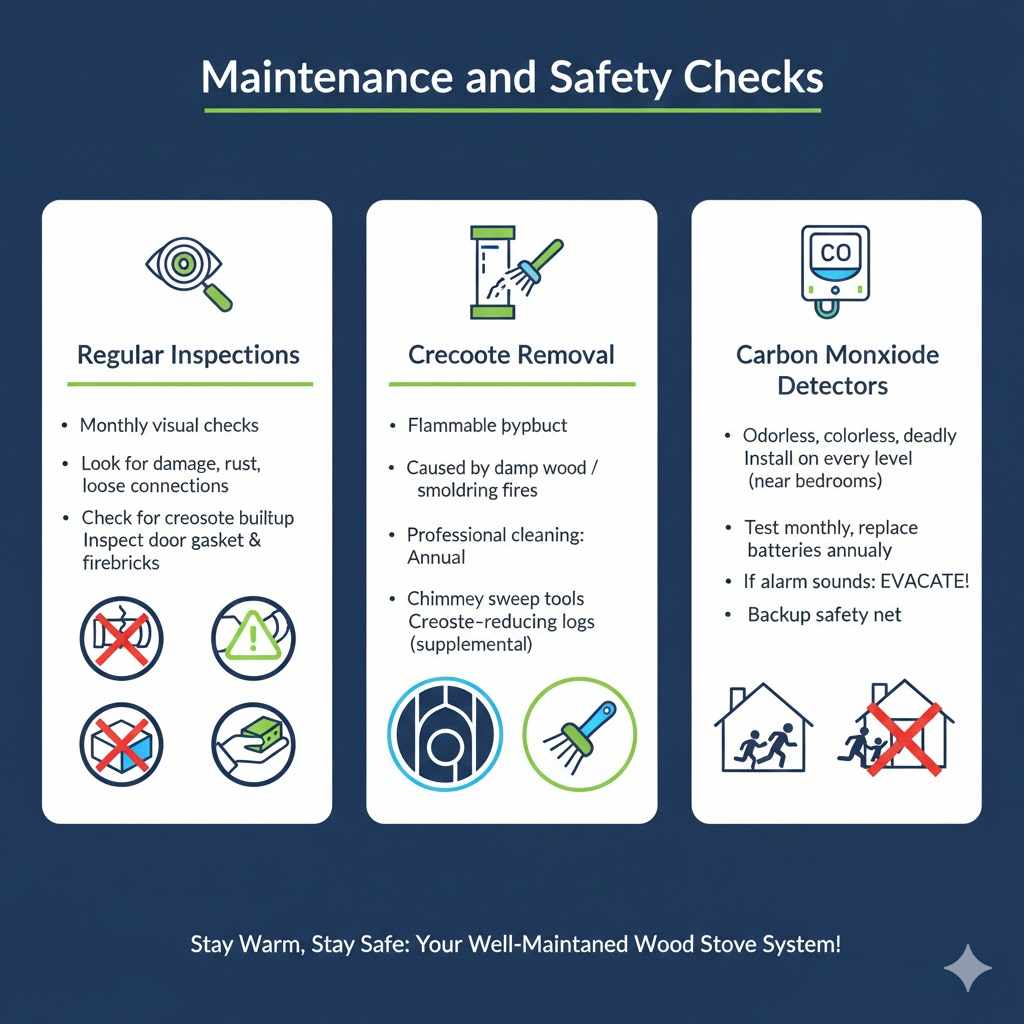
Regular Inspections
You should visually inspect your stove pipe regularly, at least once a month during the heating season. Look for any signs of damage, rust, corrosion, or loose connections. Check for creosote buildup, which looks like a flaky, tar-like substance on the inside of the pipe.
If you see any cracks, dents, or areas where the pipe might be weakening, address them right away. Pay close attention to connections, elbows, and areas where the pipe passes through walls or ceilings.
Also, check your wood stove’s door gasket and firebricks. Make sure they are in good condition. A good seal on the stove door is important for controlling the burn rate and preventing smoke from escaping.
Worn firebricks can affect how well your stove heats and can even damage the stove itself. These regular checks are simple but can catch small issues before they become big, dangerous problems.
Creosote Removal
Creosote is a highly flammable byproduct of burning wood. When it builds up inside your chimney and stove pipe, it can ignite and cause a chimney fire. The amount of creosote buildup depends on the type of wood you burn, how efficiently your stove burns, and how often you use it.
If you burn a lot of damp wood or smolder your fires, you’ll get more creosote.
You should have your chimney and stove pipes professionally cleaned and inspected at least once a year, or more often if you notice significant creosote buildup. Chimney sweeps have special brushes and tools to remove this buildup safely. They can also identify other potential problems, like blockages or structural damage to the chimney system.
Sometimes, creosote-reducing logs can help, but they are not a substitute for professional cleaning.
Carbon Monoxide Detectors
Carbon monoxide (CO) is an odorless, colorless gas that is a dangerous byproduct of incomplete combustion. Wood stoves, if not vented properly or if there’s a blockage, can release CO into your home. Having working carbon monoxide detectors is non-negotiable.
Install them on every level of your home, especially near sleeping areas. Test them monthly and replace the batteries at least once a year.
If your CO detector sounds, evacuate your home immediately and call your local fire department. Do not try to re-enter the home until emergency responders have declared it safe. A properly installed and maintained 6 inch wood stove pipe kit, connected to a well-functioning chimney, is your best defense against CO buildup.
However, detectors are your essential backup safety net.
Frequently Asked Questions
Question: How often should I clean my wood stove pipes?
Answer: It’s generally recommended to have your wood stove pipes and chimney professionally cleaned and inspected at least once a year. However, if you notice significant creosote buildup, burn a lot of damp wood, or use your stove very frequently, you may need more frequent cleanings, perhaps every few months.
Question: Can I use single-wall pipe for the entire run?
Answer: Single-wall pipe can be used for a portion of the run, typically the section directly connecting to the stove, but it requires much larger clearances from combustible materials. For sections passing through walls, ceilings, or running closer to combustibles, double-wall (insulated) pipe or a proper chimney system is usually required by code for safety.
Question: What happens if my stove pipe is too long?
Answer: If your stove pipe is excessively long, it can lead to poor draft. The smoke may cool too much, increasing creosote buildup. It can also make it harder for the stove to get enough air for efficient burning, reducing its heating capability.
Always follow manufacturer guidelines for maximum horizontal and vertical pipe lengths.
Question: Do I need a permit to install a wood stove pipe?
Answer: In most areas, yes, you will need a permit to install or replace a wood stove and its venting system. Building codes are strict for safety reasons. Contact your local building department to understand their requirements and to schedule any necessary inspections.
Question: How do I know if my pipe is installed correctly?
Answer: A correctly installed pipe will have a strong, consistent draft, meaning smoke is easily drawn up and out. There will be no visible smoke or gas leaks at any joints. All clearances to combustible materials will be maintained according to the manufacturer’s specifications and local building codes.
If you’re unsure, a professional inspection is the best way to confirm correct installation.
Summary
This guide provided a complete look at the 6 inch wood stove pipe kit. You learned about its parts, how to plan your installation with safety in mind, and the steps to put it all together. Proper installation and regular maintenance are key to safe and efficient wood heating.
Always follow codes and manufacturer instructions to protect your home.