How to Attach Metal to Wood: Screws, Adhesive & Brackets (Full Guide)
To attach metal to wood, use screws or bolts for structural strength, epoxy or construction adhesive for a clean bond, or metal brackets for heavy loads. The strongest approach combines mechanical fasteners with adhesive. This guide covers every method — screws, adhesive, rivets, brackets, and welding — with step-by-step instructions for each.
Find the right calculation in our woodworking calculators guide.
Quick Answer
How do you attach metal to wood? Use self-tapping screws or bolts with pilot holes for the strongest mechanical bond. For a clean, no-fastener look, apply a two-part epoxy like J-B Weld or Loctite. Combine both methods for structural applications. Metal brackets and angle irons work best for shelf supports and heavy loads.
Factors To Consider When Selecting Metal And Wood
Factors to consider when attaching metal to wood include selecting the right fasteners, ensuring compatibility between the materials, considering the load requirements, preparing the surfaces properly, and using appropriate tools and techniques for a secure and long-lasting connection.
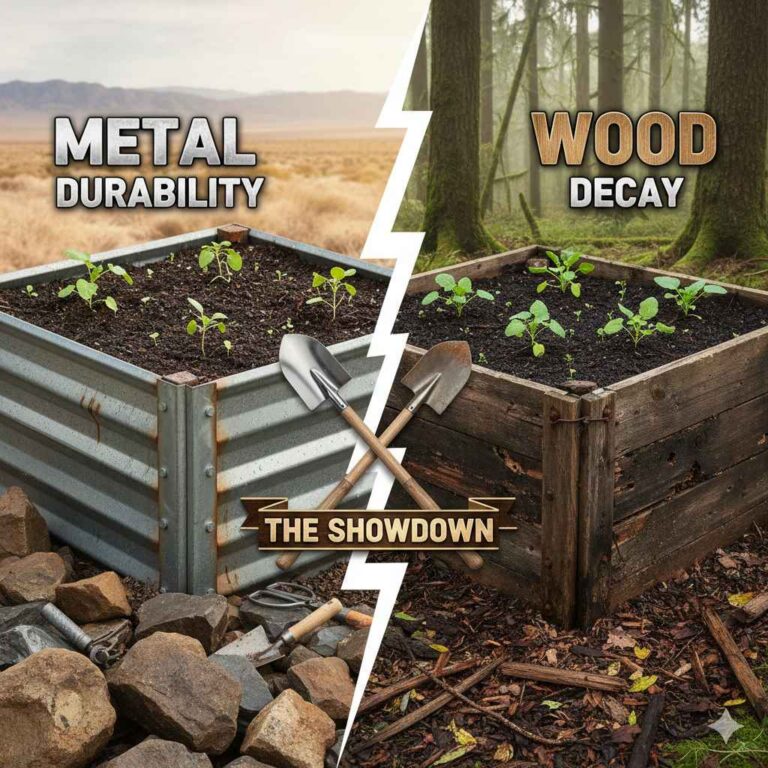
Metal and wood are commonly used materials in various construction and DIY projects. However, choosing the appropriate metal and wood materials is crucial to ensure the strength, durability, compatibility, appearance, and corrosion resistance of the finished product. When selecting metal and wood for attachment purposes, keep the following factors in mind:
Strength And Durability:
- Consider the load-bearing capacity required for your project. Choose metal and wood materials that can withstand the stress and weight they will be subjected to.
- Evaluate the hardness and toughness of the metals and woods you are considering. This will affect their ability to resist bending, breaking, or warping under pressure.
- Opt for metal and wood materials with a high resistance to wear and tear, especially if your project will be exposed to harsh conditions or frequent use.
Compatibility And Appearance:
- Ensure that the metal and wood materials you choose are compatible with each other in terms of joining methods and structural requirements. Different types of metals and woods may have varying characteristics that affect their compatibility.
- Consider the aesthetic aspect of your project and select metal and wood materials that complement each other visually. This will help create an appealing finished product.
Corrosion Resistance:
- Evaluate the environmental conditions your project will be exposed to. If moisture, humidity, or other corrosive elements are present, select metal and wood materials that have excellent corrosion resistance properties.
- If the project will be outdoors, especially in damp or marine environments, consider using stainless steel or galvanized metal materials for their superior resistance to corrosion.
- Choose appropriate wood materials that are naturally resistant to rot, decay, or insect infestation to ensure their longevity when in contact with metal.
Considering these factors when selecting metal and wood materials will help you make informed decisions and achieve an effective and durable attachment between the two. Remember to carefully evaluate the strength, compatibility, appearance, and corrosion resistance properties of both materials to ensure the success of your project.
Ensuring A Smooth And Clean Surface
Get a smooth and clean surface by effectively attaching metal to wood with these expert tips. Achieve a strong bond for your projects with step-by-step instructions on how to ensure a seamless integration between these two materials.
When it comes to attaching metal to wood, it is crucial to ensure a smooth and clean surface. This will not only promote better adhesion but also result in a more professional finish. In this section, we will explore three essential steps to achieve a smooth and clean surface: sanding the wood, removing any existing coatings or finishes, and properly cleaning the wood.
Sanding The Wood:
Sanding the wood is an essential step in preparing it for metal attachment. By sanding the surface, you create a rough texture that allows for better adhesion of the metal. Here’s how to sand the wood effectively:
- Start with coarse-grit sandpaper (around 60 or 80 grit) to remove any roughness or imperfections on the wood surface.
- Use long, even strokes while applying moderate pressure to ensure a consistent and smooth finish.
- Gradually switch to finer-grit sandpaper (120 or 150 grit) to create a smoother surface.
- Remember to sand along the wood grain to prevent any visible scratches.
Removing Any Existing Coatings Or Finishes:
Before attaching metal to wood, it is essential to remove any existing coatings or finishes that may hinder adhesion. Here’s how to remove them properly:
- Use a paint scraper or putty knife to gently scrape off any loose paint, varnish, or coatings from the wood surface.
- If there are stubborn coatings, you can use sandpaper or a chemical paint stripper to remove them effectively. Follow the manufacturer’s instructions when using chemical strippers to ensure safety.
- After removing the coatings, thoroughly clean the wood surface to remove any residue.
Properly Cleaning The Wood:
Properly cleaning the wood is crucial to remove dirt, oils, and other contaminants that can compromise the adhesion of the metal. Follow these steps to ensure a clean surface:
- Start by dusting off the wood surface using a soft cloth or a brush to remove any loose particles.
- Prepare a solution of mild dish soap and warm water.
- Using a clean cloth or sponge, gently scrub the wood surface with the soapy water solution.
- Rinse the wood surface with clean water to remove any soap residue.
- Allow the wood to dry completely before proceeding with the metal attachment.
When attaching metal to wood, it is essential to ensure a smooth and clean surface for better adhesion and a professional result. By following the steps of sanding the wood, removing any existing coatings or finishes, and properly cleaning the wood, you can create an optimal surface for attaching metal.
Remember to take your time and pay attention to detail, as a smooth and clean surface will significantly improve the durability and aesthetics of your project.
Removing Rust And Residues
Remove rust and residues easily with these effective tips for attaching metal to wood. Say goodbye to stubborn stains and ensure a secure bond between the two materials.
When it comes to attaching metal to wood, one crucial step is to ensure that the metal surface is free from rust and residues. This will not only improve the overall bond but also prolong the lifespan of the joint.
Below are three effective methods for removing rust and residues to prepare the metal surface:
Using Wire Brushes Or Sandpaper:
- Wire brushes or sandpaper can be used to manually scrub off rust and residues from the metal surface.
- Start by using a wire brush or sandpaper with a coarse grit to remove the majority of the rust and residues.
- Scrub in a back-and-forth motion, applying moderate pressure to ensure thorough cleaning.
- Once most of the rust and residues are removed, switch to a fine-grit sandpaper to smoothen the surface and remove any remaining traces.
- Remember to clean up any loose debris before moving on to the next step.
Applying Rust Removal Solutions:
- Rust removal solutions, such as commercial rust removers or homemade remedies, can effectively dissolve rust and residues.
- Apply the rust removal solution onto the metal surface using a brush or a cloth, following the product instructions or recipe guidelines.
- Allow the solution to sit on the surface for the recommended time to ensure maximum effectiveness.
- After the designated time, scrub the surface using a wire brush or sandpaper to help loosen and remove the dissolved rust and residues.
- Rinse the metal surface thoroughly with clean water to remove any remaining solution or residue.
Cleaning The Metal Surface Thoroughly:
- Before attaching metal to wood, it is essential to clean the metal surface thoroughly to ensure optimal adhesion.
- Start by removing any loose rust, debris, or other particles using a wire brush, sandpaper, or compressed air.
- Next, use a mild detergent or metal cleaner mixed with water to clean the surface thoroughly. Apply the cleaner using a clean cloth or sponge, and scrub gently.
- Rinse the surface with clean water to remove any remaining cleaner or residue.
- Finally, pat dry the metal surface with a clean towel or allow it to air-dry completely before proceeding with the attachment.
By following these steps, you can effectively remove rust and residues from the metal surface, creating a clean and suitable base for attaching metal to wood. Remember to wear protective gloves and eyewear when working with rust removal solutions, and ensure proper ventilation in the working area.
With a clean and well-prepared metal surface, you can achieve a strong and durable bond between metal and wood.
Selecting The Appropriate Adhesive
When looking to attach metal to wood, selecting the appropriate adhesive is crucial. With a variety of options available, it’s important to choose a strong adhesive that is specifically designed for this purpose to ensure a secure and durable bond between the two materials.
Different Types Of Adhesives For Metal To Wood Attachment
When it comes to attaching metal to wood, selecting the appropriate adhesive is crucial to ensure a strong and durable bond. There are various types of adhesives available in the market that are suitable for this purpose. Let’s explore some of the different types you can consider:
- Epoxy adhesive: Epoxy adhesives are known for their exceptional strength and durability. They provide a strong bond between metal and wood and are resistant to temperature changes and moisture.
- Polyurethane adhesive: Polyurethane adhesives offer excellent flexibility, making them suitable for applications that require some degree of movement. They provide a strong bond and are resistant to water, heat, and chemicals.
- Construction adhesive: Construction adhesives are designed to bond a variety of materials, including metal and wood. They offer good load-bearing capacity and are easy to apply, making them a popular choice for attaching metal to wood.
- Liquid nails: Liquid nails are a common choice for bonding metal to wood. They provide a strong, durable bond and can withstand heavy loads. They are easy to use and offer good resistance to temperature changes.
- Cyanoacrylate adhesive: Cyanoacrylate adhesives, also known as super glue, are fast-setting and provide a strong bond. They work well for smaller metal to wood attachments and offer good resistance to moisture and temperature changes.
Remember to consider the specific requirements of your project, such as load-bearing capacity and flexibility, when choosing the appropriate adhesive. Each type of adhesive has its own strengths and limitations, so it’s essential to select the one that best suits your needs.
Editor’s Pick — Best Adhesive for Metal to Wood
J-B Weld Original Cold-Weld Two-Part Epoxy
The industry standard for bonding metal to wood. Sets in 4–6 hours, fully cures in 15–24 hours. Bonds steel, aluminum, bronze, and most metals to wood, concrete, and fiberglass. Withstands up to 5,020 PSI — stronger than most wood itself. Works on clean, dry surfaces with no clamps required once set.
Check Price on Amazon →Choosing The Right Fasteners
Choosing the right fasteners is crucial when attaching metal to wood. With careful consideration, you can ensure a secure and long-lasting connection that will withstand various conditions. Explore different options, such as screws or bolts, to find the best fit for your project.
Nails, Screws, Or Bolts For Metal To Wood Attachment
When it comes to attaching metal to wood, choosing the right fasteners is crucial for ensuring a secure and long-lasting connection. The type of fastener you select depends on the application and load requirements. Here are the three primary options:
Nails:
- Nails are a popular choice for attaching metal to wood due to their affordability and ease of installation.
- They are available in various lengths and thicknesses to accommodate different materials and load capacities.
- Common types of nails used for metal to wood attachment include common nails, finish nails, and roofing nails.
- For a stronger connection, consider using ring-shank or screw-shank nails, which provide better grip and resistance to withdrawal forces.
Screws:
- Screws offer superior holding power and are ideal for heavy-duty applications or when a more robust connection is necessary.
- They come in different sizes, lengths, and thread patterns, allowing you to select the appropriate screw for your specific needs.
- Self-drilling screws, also known as Tek screws, are popular for attaching metal to wood as they eliminate the need for pre-drilling pilot holes.
- Coated screws, such as galvanized or stainless steel, are recommended to prevent corrosion when exposed to outdoor or moisture-prone environments.
Bolts:
- Bolts are the strongest and most durable option for metal to wood attachment, especially for high-load applications.
- These fasteners consist of a threaded shaft and a nut that provide a secure and adjustable connection.
- Carriage bolts, also known as coach bolts, are commonly used for attaching metal hardware or brackets to wood.
- To ensure a stable connection, make sure to use washers under the bolt head and the nut to distribute the load evenly.
Remember, when choosing the right fasteners for attaching metal to wood, always consider the application, load requirements, and the desired level of strength and durability.
Ensuring Proper Equipment And Safety Measures
To attach metal to wood, it is crucial to ensure proper equipment and safety measures. By following these steps, you can securely join these materials together for a wide range of projects.
Welding Machines And Tools:
To effectively attach metal to wood, you’ll need the right welding machines and tools. Here are some essential equipment and tools to consider:
- Welding machine: A reliable welding machine is crucial for the job. Look for one that supports both metal and wood to ensure proper bonding.
- Welding electrode: Select the appropriate welding electrode based on the type of metal and wood you’re working with. Consult experts or refer to the electrode manufacturer’s recommendations.
- Clamps: Use clamps to hold the metal and wood together securely during the welding process. This helps maintain proper alignment and ensures a strong bond.
- Appropriate drill bits: Depending on the project, you may need drill bits designed for metal and wood. Having the right drill bits will enable you to create precise holes for attaching the metal and wood together.
Protective Gear And Equipment:
Ensuring your safety is paramount when working with welding and attaching metal to wood. Here’s a list of protective gear and equipment you should always utilize:
- Welding helmet: Invest in a high-quality welding helmet to shield your eyes and face from sparks, heat, and harmful ultraviolet (UV) radiation emitted during the welding process.
- Welding gloves: Protect your hands from heat, sparks, and sharp edges using welding gloves. Ensure they are comfortable and provide sufficient dexterity for handling tools and materials.
- Safety glasses: Wear safety glasses with side shields to safeguard your eyes from flying debris, splinters, and other hazards that may occur during welding or drilling.
- Respiratory protection: When working in an environment with smoke, fumes, or harmful gases, wear a respirator or a dust mask to protect your lungs from inhalation hazards.
- Protective clothing: Put on flame-resistant clothing, such as a welding jacket or apron, to shield your body from sparks and potential fire risks. Avoid wearing loose or flammable clothing.
Remember to follow safety guidelines and take necessary precautions to prevent accidents or injuries. The right equipment, coupled with proper protective gear, ensures your safety while attaching metal to wood.
Understanding The Riveting Process
The riveting process is an effective way to attach metal to wood, providing a strong and secure connection. By understanding the steps involved, you can successfully complete this task and ensure your project’s durability.
When it comes to attaching metal to wood, one effective method is riveting. Riveting involves the use of specialized fasteners called rivets that securely connect two materials together. This process is widely used in various industries, including construction, automotive, and woodworking.
Understanding the riveting process is crucial in ensuring a strong and lasting attachment. In this section, we will explore the types of rivets and rivet guns, as well as the proper techniques for attaching metal to wood using rivets.
Types Of Rivets And Rivet Guns:
- Solid rivets: These are the most traditional type of rivets and consist of a solid, cylindrical shaft with a head at one end. They are typically used for heavy-duty applications and provide excellent strength and durability.
- Blind rivets: Also known as pop rivets, blind rivets have a hollow shaft and a mandrel, which is pulled into the rivet to secure the materials together. They are widely used for applications where access to the backside of the joint is limited.
- Tubular rivets: Tubular rivets have a hollow body and a head on one end. They are commonly used in electrical and electronic equipment, as well as in leatherwork.
- Rivet guns: These tools are specifically designed for installing rivets. They come in different sizes and styles, including manual, pneumatic, and hydraulic rivet guns. The type of rivet gun needed depends on the size and material of the rivets being used.
Proper Techniques For Attaching Metal To Wood With Rivets:
Preparation:
- Measure and mark the positions where the metal will be attached to the wood.
- Drill holes in the metal and wood according to the size of the rivets.
- Make sure the holes are aligned properly for a secure attachment.
Inserting the rivets:
- Place the rivet into the pre-drilled hole in the metal, with the head of the rivet on the side that will be visible.
- Insert the rivet gun into the hollow end of the rivet.
- Squeeze the handles of the rivet gun to pull the mandrel into the rivet, expanding it and securing the metal and wood together.
- Repeat the process for each rivet, ensuring they are evenly spaced for a balanced attachment.
Finishing the attachment:
- Once all the rivets are in place, trim off any excess mandrel protruding from the backside of the attachment.
- If desired, sand the wood and polish the metal to achieve a smooth and aesthetically pleasing finish.
Riveting provides a strong and reliable way to attach metal to wood. By choosing the appropriate type of rivet and using the proper techniques, you can ensure a secure attachment that will withstand the test of time. So whether you’re working on a DIY project or a professional woodworking task, understanding the riveting process is key to achieving a successful outcome.
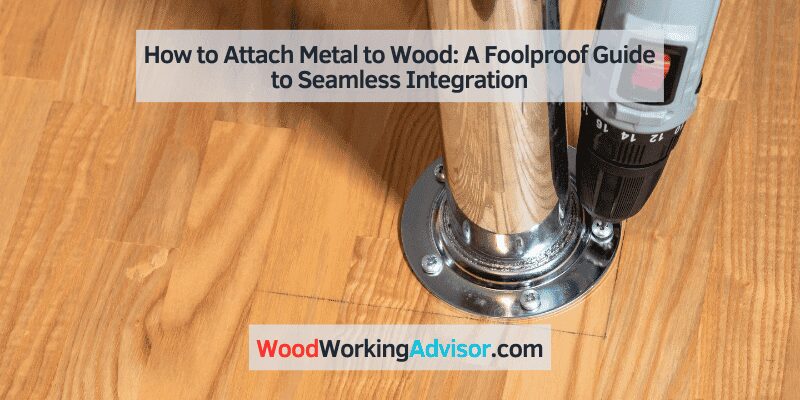
Mounting Metal To Wood With Brackets And Angle Irons
Mount metal to wood effortlessly using brackets and angle irons. These sturdy and reliable hardware options provide a secure attachment, ensuring your project is durable and long-lasting. Perfect for DIY enthusiasts or professionals seeking a seamless metal-to-wood connection.
Mounting metal to wood can be a tricky process, but with the right brackets and angle irons, it can be done successfully. Whether you’re working on a DIY project or a professional job, selecting the right bracket or angle iron is crucial for a secure attachment.
In this section, we will discuss how to choose the appropriate brackets or angle irons and how to effectively attach and secure the metal to wood.
Selecting The Right Bracket Or Angle Iron:
- Consider the weight and size of the metal: Before choosing a bracket or angle iron, determine the weight and size of the metal you will be attaching. This will help you select a bracket or angle iron that can adequately support the weight and size of the metal.
- Evaluate the application: Depending on the application, you may need different types of brackets or angle irons. For example, if you’re attaching a shelf to wood, a shelf bracket would be suitable. If you’re securing a metal frame to wood, an L-shaped angle iron may be the best option.
- Quality and durability: Ensure that the bracket or angle iron is made of high-quality materials that can withstand the intended use. Look for brackets and angle irons that are corrosion-resistant and sturdy.
Attaching And Securing The Metal Using Brackets And Angle Irons:
- Measure and mark: Start by measuring and marking the desired location for attaching the metal to the wood. This will ensure accuracy and prevent any mistakes during the installation process.
- Pre-drill pilot holes: To prevent splitting the wood or damaging the metal, it’s essential to pre-drill pilot holes. These holes will serve as a guide for the screws or bolts used to attach the brackets or angle irons.
- Position the brackets or angle irons: Place the brackets or angle irons in the desired position on the wood. Make sure they are aligned properly and evenly spaced.
- Attach the brackets or angle irons: Secure the brackets or angle irons to the wood using screws or bolts. Ensure that they are tightly fastened to provide a stable and secure attachment.
- Double-check stability: After attaching the brackets or angle irons, double-check the stability of the metal. Give it a gentle wiggle to ensure that it is securely attached and does not wobble or move.
By following these steps and using the appropriate brackets or angle irons, you can successfully attach metal to wood. Remember to choose high-quality and suitable brackets or angle irons for the desired application. With proper installation and secure attachment, your metal-to-wood connection will be strong and durable.
Strengthening Metal To Wood Attachment
Discover effective methods for attaching metal to wood and strengthening the connection. Follow these step-by-step guidelines to ensure a secure and durable metal to wood attachment.
When it comes to attaching metal to wood, it’s essential to ensure a strong and secure connection. Strengthening the metal to wood attachment can provide added durability and stability to your project. Here are some effective methods to achieve this:
Adding Additional Fasteners Or Brackets For Extra Support:
- Use screws or nails in addition to the primary fasteners to reinforce the connection.
- Choose fasteners made of corrosion-resistant materials like stainless steel or galvanized steel.
- Install brackets or corner braces at the joints for increased stability.
- Consider using epoxy or adhesive along with the fasteners to create a more secure bond.
- Distribute the fasteners evenly and strategically to provide balanced strength across the metal-wood connection.
Using Metal Plates Or Reinforcements:
- Utilize metal plates or straps to reinforce the attachment points.
- Position the plates on both sides of the joint to distribute the load evenly.
- Opt for thicker metal plates for heavier applications or when increased strength is required.
- Ensure that the metal plates or reinforcements are securely fastened to both the metal and wood surfaces.
- Consider sandwiching the wood between two metal plates for enhanced stability and load-bearing capacity.
By employing these methods, you can significantly strengthen the attachment between metal and wood. These techniques provide extra support, ensuring a long-lasting and sturdy connection that can withstand heavy loads and external forces.
Remember to choose the appropriate fasteners, materials, and techniques based on the specific requirements and load-bearing capacity of your project. Strengthening the metal to wood attachment not only enhances the overall durability but also ensures the safety and longevity of your structure or furniture piece.
Applying Coatings And Finishes
Applying coatings and finishes is a crucial step when attaching metal to wood. By carefully following the correct process, you can ensure a strong and durable bond between the two materials.
To ensure a durable and aesthetically pleasing metal-wood attachment, applying coatings and finishes is essential. These protective layers not only guard against corrosion and weathering but also enhance the appearance and longevity of the connection. Below, we will explore the importance of protecting against corrosion or weathering and how coatings and finishes can contribute to optimizing the metal-wood attachment.
Protecting Against Corrosion Or Weathering:
Coatings and finishes play a crucial role in shielding the metal-wood attachment from the harmful effects of corrosion or weathering. Here are some key considerations:
- Barrier protection: Coatings act as a physical barrier between the metal and wood, preventing direct contact with air, moisture, and other corrosive elements.
- Rust inhibitors: Applying specialized coatings with rust-inhibiting properties helps to impede the formation and progression of rust on the metal surface.
- Weatherproofing: Coating the metal component with weather-resistant finishes safeguards it against the damaging effects of exposure to rain, extreme temperatures, UV radiation, and other environmental factors.
- Sealing gaps: Properly applied coatings can fill any gaps or voids in the metal-wood joint, preventing moisture penetration and subsequent damage.
Enhancing The Appearance And Longevity Of The Metal-Wood Attachment:
Coatings and finishes not only protect against corrosion and weathering but also enhance the overall aesthetics and durability of the metal-wood connection. Here’s why:
- Appearance customization: Coatings and finishes provide an opportunity to customize the appearance of the metal-wood attachment by offering a range of color options, gloss levels, and textured finishes.
- Seamless integration: Well-applied coatings can help the metal component blend seamlessly with the wood, ensuring a visually cohesive and attractive overall finish.
- Durability reinforcement: Certain coatings and finishes can strengthen the metal-wood bond, increasing the attachment’s longevity and resistance to wear and tear.
- Easy maintenance: Coatings and finishes can simplify the maintenance process by making the metal-wood attachment resistant to stains, dirt, and debris, making it easier to clean and maintain.
Applying coatings and finishes to a metal-wood attachment is vital for protecting against corrosion or weathering while also enhancing its appearance and lifespan. By considering the various coating options available and selecting the appropriate finish, you can optimize the durability and aesthetic appeal of your metal-wood connection.
Identifying And Fixing Attachment Issues
Learn how to effectively attach metal to wood with these expert tips. Identify and fix attachment issues with simple techniques for a secure and long-lasting connection. Say goodbye to loose or unstable attachments with these easy-to-follow methods.
Metal-wood connections are commonly utilized in various DIY projects, construction, and woodworking endeavors. Understanding how to attach metal to wood is essential for ensuring a strong and secure bond. However, like any connection, attachment issues can arise, which may compromise the stability of the structure.
In this section, we will explore common attachment issues encountered when joining metal and wood, as well as effective methods to repair and maintain these connections.
Loose Or Failed Attachment Points:
- Inspect the metal-wood connection for any signs of looseness or failure.
- Identify areas where the attachment may have weakened, such as screws coming loose or nails pulling out.
- Check for gaps between the metal and wood components, indicating a loss of attachment.
To address loose or failed attachment points:
- Tighten any loose screws or bolts, ensuring a secure connection between the metal and wood.
- Replace any failed screws or bolts with new ones that are appropriate for the job.
- If nails have pulled out, remove the damaged ones and replace them with longer or thicker nails to enhance stability.
- Apply wood glue or epoxy adhesive to reinforce the attachment point and create a stronger bond between the metal and wood.
- Consider using additional fasteners, such as brackets or metal reinforcements, to strengthen the connection.
- Ensure that the attachment points are securely tightened or fastened, providing long-lasting stability.
Repairing and maintaining metal-wood connections:
- Regularly inspect the attachment points for any signs of wear or damage.
- Replace damaged screws, bolts, or nails promptly to uphold the integrity of the connection.
- Apply a protective finish, such as paint or sealant, to the exposed metal surfaces to prevent rust or corrosion.
- Lubricate moving parts or hinges to prevent friction and ensure smooth operation.
- Consider reinforcing the attachment points with metal plates or brackets, particularly in areas of frequent stress or movement.
- Follow manufacturer’s guidelines to maintain any specialized metal-wood connections, such as those found in furniture or outdoor structures.
By promptly addressing and rectifying loose or failed attachment points and implementing proper maintenance practices, you can enhance the durability and longevity of metal-wood connections. Regular inspections and proactive repairs contribute to the overall strength and stability of your projects, ensuring that your metal and wood components remain securely attached.
Summary And Key Takeaways
Learn how to effectively attach metal to wood with these key takeaways. Discover the best techniques and tools to ensure a secure and durable connection for your woodworking projects.
Important Considerations For Attaching Metal To Wood:
- Compatibility of materials: Ensure that the metal and wood are compatible and will not cause corrosion or other issues when combined.
- Weight-bearing capacity: Evaluate if the wood is capable of supporting the weight of the metal object to be attached.
- Surface preparation: Clean and prepare the wood surface to ensure proper adhesion and minimize the risk of failure.
- Fastener selection: Choose appropriate fasteners that are suitable for both the metal and wood materials.
- Pilot holes: Use pilot holes to prevent wood splitting when inserting screws or nails.
- Avoid over-tightening: Be cautious not to over-tighten screws or nails, as it can weaken the wood or damage the metal.
- Expansion and contraction: Consider the different rates of expansion and contraction between metal and wood, especially for outdoor structures.
- Protective coatings: Apply protective coatings such as sealants or paint to minimize moisture exposure and prevent corrosion.
Different Methods And Techniques For Seamless Integration:
- Adhesives: Use high-strength adhesives specifically designed for bonding metal and wood.
- Welding: Join metal and wood through welding techniques like arc welding or spot welding.
- Lag bolts: Utilize lag bolts to securely fasten metal to wood, especially for heavy-duty applications.
- Wood screws: Choose wood screws with self-drilling features for easier installation into the wood.
- Brackets and connectors: Utilize metal brackets or connectors designed for connecting metal and wood structures.
- Metal straps: Consider using metal straps to reinforce joints between metal and wood components.
- Threaded inserts: Install threaded inserts into the wood to provide stronger connections with metal objects.
- Wood dowels: Opt for wooden dowels as an alternative method to connect metal and wood by drilling corresponding holes.
Remember, the successful attachment of metal to wood requires careful consideration of factors such as compatibility, weight-bearing capacity, proper preparation, appropriate fasteners, and an understanding of different methods and techniques. By following these guidelines, you can ensure a seamless integration that is both secure and durable.
Frequently Asked Questions Of How To Attach Metal To Wood
What Is The Best Bond For Metal To Wood?
The best bond for metal to wood is achieved using epoxy or a specialized adhesive.
What Is The Strongest Adhesive For Wood To Metal?
The strongest adhesive for wood to metal is epoxy glue. It provides a durable and reliable bond.
How Do You Attach Thin Metal To Wood?
To attach thin metal to wood, follow these steps:
1. Drill pilot holes in both the metal and wood pieces.
2. Align the pieces and insert screws through the metal into the pre-drilled holes in the wood.
3. Tighten the screws until the metal is securely attached to the wood.
4. Use adhesive or epoxy for additional strength if necessary.
Will Liquid Nails Bond Wood To Metal?
Yes, Liquid Nails can bond wood to metal effectively due to its strong adhesive properties.
Can You Attach Metal To Wood Without Screws?
Yes — epoxy, construction adhesive (like Loctite PL Premium or Gorilla Glue), and rivets all let you attach metal to wood without screws. Two-part epoxy is the strongest adhesive-only method, with shear strength up to 3,000 PSI when fully cured. Rivets work well for thin sheet metal where screws would split the material.
What Screws Should I Use For Metal To Wood?
Use self-tapping hex head screws (also called sheet metal screws) for the most reliable metal-to-wood connection. Choose zinc-plated or stainless steel screws for corrosion resistance outdoors. Drill a pilot hole 70% of the screw diameter in hardwoods to prevent splitting, and 50% in softwoods. For structural connections, use lag bolts with washers.
Conclusion
To sum up, attaching metal to wood may seem like a daunting task, but with the right tools and techniques, it can be achieved with ease. It is important to choose the appropriate fasteners and take into consideration the type of metal and wood being used.
Pre-drilling holes and using pilot screws can help prevent splitting and ensure a secure connection. Additionally, using adhesive products or welding can provide even greater strength and stability. Remember to wear protective gear and work in a well-ventilated area when using power tools or welding.
Lastly, always double-check your work and make any necessary adjustments to ensure a sturdy and durable attachment. By following these steps and taking the necessary precautions, you’ll be able to securely attach metal to wood for various DIY projects or professional applications.
Happy woodworking!
->