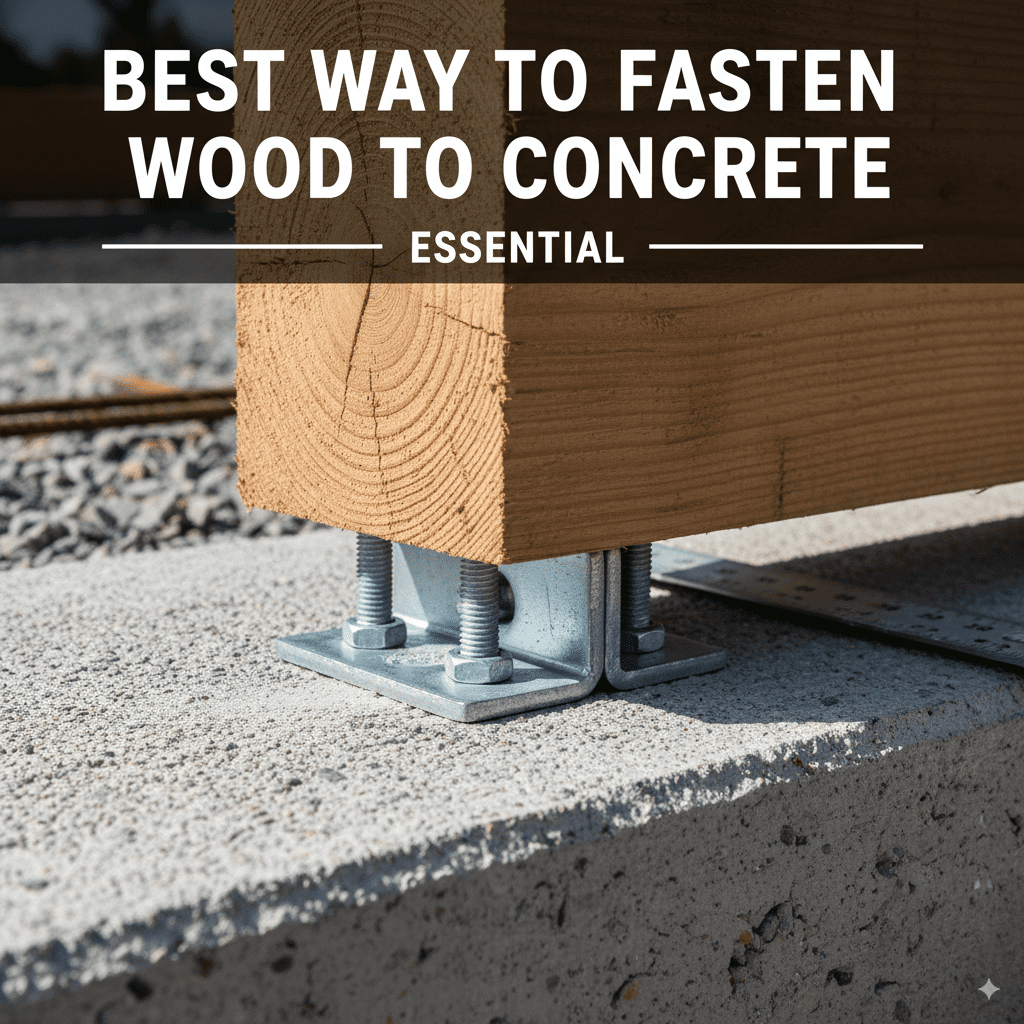
Best Way To Fasten Wood To Concrete: Essential
The best way to fasten wood to concrete involves selecting the right fastener for your project’s needs, whether it’s a heavy-duty anchor bolt for structural connections or a specialized screw for lighter applications. Proper preparation of the concrete surface and precise drilling are crucial for a secure and lasting bond.
Hey there, fellow woodworkers and DIY lovers! Md Meraj here, ready to tackle another common project challenge. Have you ever found yourself needing to attach a sturdy wooden frame to a concrete patio, a garage floor, or a basement wall? It’s a frequent need for everything from building a workbench to installing a deck ledger board. But let’s be honest, concrete can seem a bit intimidating when you’re used to the forgiving nature of wood. Getting it right means a strong, safe connection that will last for years. Mess it up, and you might end up with wobbly structures or anchors that pull out. Don’t worry! I’m here to guide you through it, making this process simple and straightforward. We’ll break down the best methods, the tools you’ll need, and some insider tips to ensure your wood-to-concrete projects are rock solid. Let’s dive in and get your projects built right!
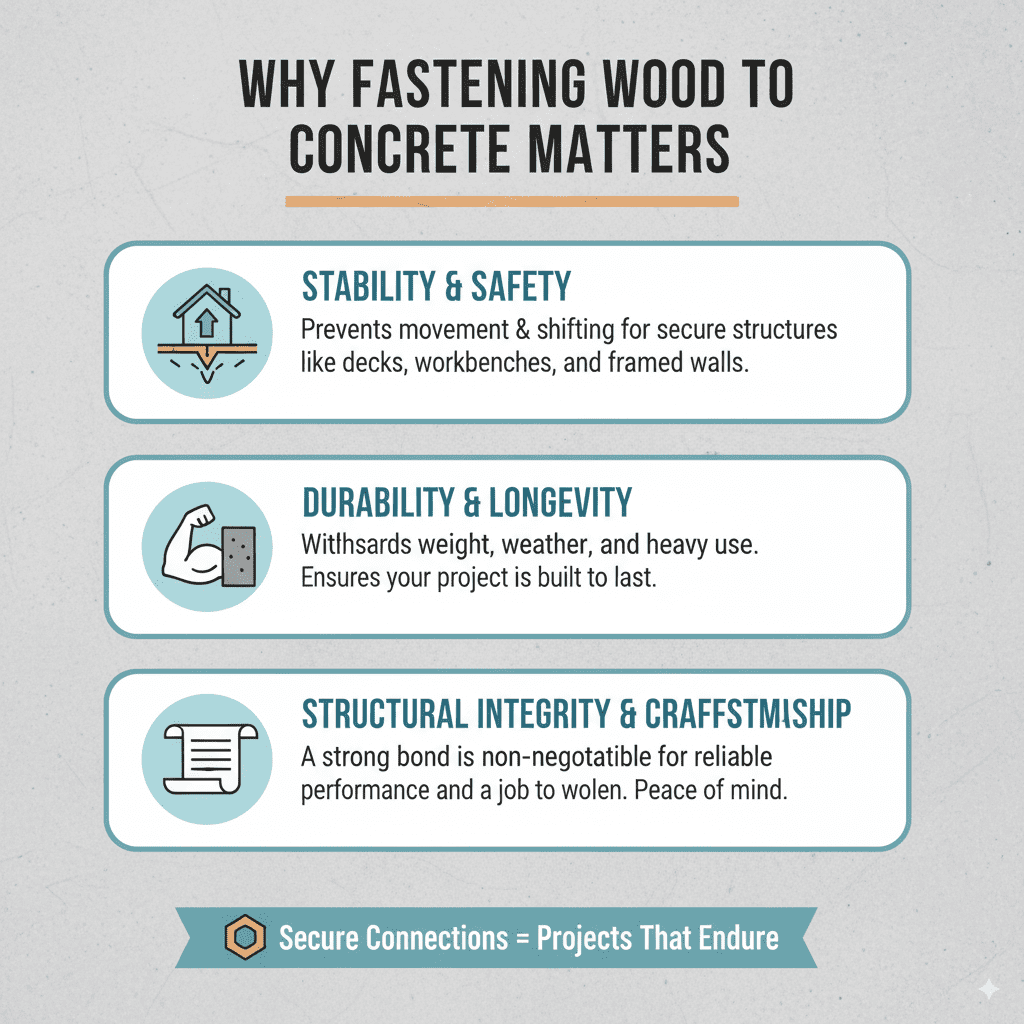
Why Fastening Wood to Concrete Matters
Attaching wood to concrete is a fundamental skill for countless home improvement and woodworking projects. Think about building a beautiful outdoor deck attached to your home’s foundation, creating a robust workbench in your garage, or framing out a basement room. In all these scenarios, a secure connection between wood and concrete is non-negotiable.
A strong bond ensures that your structure is safe, stable, and durable. It prevents movement, shifting, and ultimately, potential failure. For instance, a deck needs to withstand significant weight and the stresses of weather, while a workbench must remain stable under heavy use. The right fastening method provides peace of mind, knowing your creation is built to last and perform as intended. When done correctly, it’s a testament to good craftsmanship and a job well done, contributing to the overall integrity and safety of your home.
Understanding Your Concrete and Wood Needs
Before we grab any tools, it’s essential to understand what you’re working with. Not all concrete is the same, and the type of wood and the intended use of your project will significantly influence the best fastening method.
Types of Concrete
Concrete can vary in age and condition. Older concrete might be more brittle, while newer concrete is generally stronger. You also need to consider if the concrete is solid or if there’s a possibility of it being hollow (like in some precast slabs or block walls). For most DIY applications, you’ll be dealing with solid, poured concrete, but it’s always good to be aware.
Wood Type and Project Load
Are you attaching a lightweight garden shed or a heavy-duty beam? The weight and purpose of your wooden structure are key. A simple trellis might only need light-duty anchors, while a structural element like a deck railing post needs much more robust fastening. Consider the moisture levels too; if the wood will be exposed to the elements, you’ll need fasteners that resist corrosion.
Load Considerations
Light Duty: Shelving, small furniture, decorative elements.
Medium Duty: Workbenches, some framing, non-structural garden structures.
Heavy Duty: Deck ledger boards, structural posts, pergolas, anything supporting significant weight.
By thinking about these factors first, you can avoid choosing a fastener that’s too weak or unnecessarily overkill.
Essential Tools for the Job
Having the right tools makes any project smoother and safer. Here’s what you’ll likely need to fasten wood securely to concrete:
Drill: A powerful hammer drill is highly recommended for drilling into concrete. A standard drill can struggle and may overheat. Look for one with a hammer function.
Masonry Drill Bits: These are specially designed with a carbide tip to cut through concrete effectively. Ensure you have the correct size for your chosen fasteners.
Measuring Tape: Precision is important for marking and drilling.
Pencil or Marker: To mark your drilling locations.
Level: To ensure your wood is installed straight and plumb.
Safety Glasses: Crucial for protecting your eyes from concrete dust and debris.
Work Gloves: To protect your hands.
Dust Mask or Respirator: Concrete dust can be harmful if inhaled.
Vacuum Cleaner: For cleaning up dust after drilling.
Hammer: For setting certain types of anchors.
Wrench or Socket Set: For tightening anchor bolts.
Caulking Gun and Exterior-Grade Sealant: To help waterproof connections.
Having these tools ready means you’re prepared for a clean and efficient installation.
The Best Ways to Fasten Wood to Concrete
There isn’t a single “best” way, but rather the best method for your specific situation. Let’s explore the most popular and effective options for beginners.
Method 1: Using Concrete Screws (Tapcons)
Concrete screws, often known by the brand name Tapcon, are one of the most user-friendly options for many DIYers. They are essentially specialized screws that tap their own threads directly into pre-drilled holes in concrete, brick, or block.
When to Use:
Ideal for lighter-duty applications like attaching furring strips, electrical boxes, conduit clamps, or simple wooden frames where high structural loads aren’t a concern. They are quick and relatively easy to install.
How to Install:
- Mark & Drill: Position your wood. Mark the hole locations through the wood. Remove the wood. Using a masonry drill bit of the exact size recommended by the screw manufacturer (this is critical!), drill a pilot hole into the concrete. The depth of the hole also needs to match the screw’s specifications.
- Clean the Hole: Use a vacuum or compressed air to thoroughly remove all dust from the drilled hole. This ensures a good grip.
- Drive the Screw: Place the wood back in position, aligning the holes. Insert the concrete screw through the wood and into the pilot hole. Use a drill or a nut driver (depending on the screw head type) to drive the screw until it’s snug. Don’t overtighten, as this can strip the threads in the concrete.
Pros:
- Easy to install.
- Removable and reusable if needed.
- No special tools like powder-actuated tools are required.
- Available in various lengths and head types (hex, Phillips).
Cons:
- Not suitable for very heavy loads or structural applications.
- Can sometimes strip out in the concrete if overtightened or if the pilot hole is too large.
Method 2: Using Wedge Anchors
Wedge anchors are a very common and robust choice for medium to heavy-duty applications. They offer a strong mechanical connection to the concrete.
When to Use:
Great for attaching ledger boards for decks (check local building codes for requirements), structural beams, outdoor furniture frames, or anything that needs a reliable, secure hold.
How to Install:
- Mark & Drill: Lay out your wood and mark the mounting points. Remove the wood. Drill a hole into the concrete that is the exact diameter recommended for your wedge anchor. The depth of the hole is also critical and usually needs to be a bit deeper than the anchor itself.
- Clean the Hole: Thoroughly clean out all dust and debris from the hole using a vacuum or blower.
- Insert the Anchor: Place the wedge anchor into the hole. The nut and washer should be on the threaded end of the anchor, but don’t tighten them yet.
- Position the Wood: Place your wood piece over the anchor bolts.
- Tighten the Nut: Thread the nut onto the anchor’s threaded stud. Using a wrench, tighten the nut. As you tighten, the expander wedge at the bottom of the anchor gets pulled up inside the concrete sleeve, expanding it and creating a secure grip. Tighten until the anchor is firm and the wood cannot be moved.
Pros:
- Very strong and reliable for significant loads.
- Relatively straightforward installation process.
- Consistent holding power in solid concrete.
Cons:
- Requires precise drilling of a specific hole diameter and depth.
- Not easily removable once installed.
- Can be an overkill for very light projects.
Method 3: Using Sleeve Anchors
Sleeve anchors are another excellent option for securing wood to concrete, offering good holding power for a wide range of applications. They work by expanding a sleeve within the concrete as a bolt is tightened.
When to Use:
Suitable for medium to heavy-duty applications, similar to wedge anchors. They are often used for mounting machinery, railings, shelving units, and structural elements.
How to Install:
- Mark & Drill: Mark your connection points on the wood and then transfer these to the concrete. Drill a hole that matches the diameter of the sleeve and is deep enough for the entire anchor.
- Clean the Hole: Remove all concrete dust and debris from the hole with a vacuum or blower.
- Insert the Anchor: Insert the sleeve anchor – which typically consists of a bolt, a washer, a nut, and an expanding sleeve – into the drilled hole. The sleeve will likely be larger than the bolt itself.
- Position the Wood: Slide your wooden component onto the anchor bolt.
- Tighten the Bolt: Place the washer and nut onto the bolt and tighten it with a wrench. As you tighten, the bolt pulls through the sleeve, causing the sleeve to expand and grip the concrete walls securely. Continue tightening until the wood is firmly secured.
Pros:
- Provides strong holding power in concrete and block.
- Versatile and available in various sizes and materials (e.g., galvanized steel for outdoor use).
- Can be used in slightly less structurally sound concrete than some other anchors.
Cons:
- Requires accurate drilling for proper expansion.
- Less forgiving of error than other methods.
- Generally not meant for frequent removal.
Method 4: Using Expansion Anchors (J-Bolts or L-Bolts)
Expansion anchors, like J-bolts or L-bolts, are embedded into wet concrete as it’s poured or drilled into hardened concrete. They provide a very strong, permanent connection.
When to Use:
Best for permanent, heavy-duty structural connections where the anchor can be set before concrete is poured, or when creating a very strong anchor point post-pour. Think of foundation anchor bolts for framing or securing heavy machinery.
How to Install (Post-Pour):
- Mark & Drill: Mark the precise location for the anchor. Drill a hole deep enough to accommodate the anchor, plus a little extra depth for the expansion mechanism. The diameter of the hole must match the anchor’s specifications.
- Clean the Hole: Thoroughly clean out all dust and debris.
- Install the Anchor: Insert the expansion anchor into the hole. Ensure the bolt end is positioned where your wood will attach.
- Set the Anchor: Tighten the nut on the bolt. This action pulls the anchor’s internal mechanism, expanding it and gripping the concrete. Continue tightening until the anchor is firmly set.
- Attach Wood: Place your wood over the anchor bolt and secure it with a nut and washer.
Note: Anchoring into wet concrete offers the strongest bond. For this method, J-bolts or L-bolts are placed into the wet concrete, with the hook or L-shape embedded in the concrete and the threaded rod protruding.
Pros:
- Extremely strong and durable, ideal for critical structural connections.
- Permanent and reliable.
- Provides a very secure anchor point.
Cons:
- Requires careful drilling to the correct depth and diameter.
- Difficult to remove once set.
- Often best installed before concrete is poured.
Factors to Consider for Longevity and Strength
Beyond choosing the right fastener, several factors contribute to a long-lasting and strong connection between wood and concrete.
1. Material Choice of Fasteners
Galvanized Steel: Excellent for outdoor applications or areas prone to moisture, as the zinc coating provides corrosion resistance.
Stainless Steel: Offers the best corrosion resistance, ideal for harsh marine environments or highly corrosive conditions, though it’s more expensive.
Zinc-Plated Steel: Suitable for indoor, dry applications. The plating offers basic protection but can rust over time if exposed to moisture.
2. Hole Preparation is Key
Cleanliness: This cannot be stressed enough. Any dust or debris in the drilled hole will prevent the anchor from expanding or screwing properly, significantly reducing its holding power. Vacuuming or blowing out the hole is essential.
Accuracy: Drilling the exact diameter and depth specified by the fastener manufacturer is crucial. Too small, and you won’t get the anchor in; too large, and it won’t hold securely.
3. Sealing and Waterproofing
For exterior applications or areas that might experience moisture, consider these steps:
Sealant Around Anchors: After installing anchors or screws, you can apply a bead of exterior-grade, paintable caulk or sealant around the base where the wood meets the concrete. This helps prevent water from wicking into the connection points.
Pressure-Treated Lumber: Whenever wood will be in direct contact with concrete, especially outdoors, use pressure-treated lumber rated for ground contact. This wood is treated to resist rot and insect damage.
Barriers: In some cases, you might want to place a moisture barrier (like a sill gasket or a plastic sheeting) between the wood and the concrete to further prevent moisture transfer. However, ensure this doesn’t trap moisture in a way that causes other issues.
4. Avoiding Common Mistakes
Overtightening: For concrete screws, overtightening can strip the threads in the concrete. For mechanical anchors, overtightening can distort the anchor or damage the concrete.
Undersized Holes: Using a drill bit that is too small for the fastener can make installation difficult and compromise the anchor’s expansion.
Incorrect Anchor Type: Using a light-duty anchor for a heavy-duty job is a recipe for failure. Always match the fastener to the load requirement.
* Drilling into Unsound Concrete: If your concrete is severely cracked, spalled, or appears weak, your anchors may not hold reliably.
Comparing Fastening Methods: A Quick Guide
Here’s a table to help you quickly compare some of the most common methods:
| Fastener Type | Best For | Holding Power | Ease of Installation | Removability | Cost |
|---|---|---|---|---|---|
| Concrete Screws (Tapcons) | Light duty (furring strips, conduit) | Low to Medium | Very Easy | Yes | $ |
| Wedge Anchors | Medium to Heavy duty (deck ledgers, structural) | High | Moderate | Difficult | $$ |
| Sleeve Anchors | Medium to Heavy duty (railings, machinery) | High | Moderate | Difficult | $$ |
| Expansion Anchors (J/L Bolts) | Heavy duty, permanent (foundation, structural) | Very High | Moderate to Difficult (easier in wet concrete) | Very Difficult | $$$ |
This table provides a general overview. Always check the manufacturer’s specifications for exact load ratings and installation requirements.
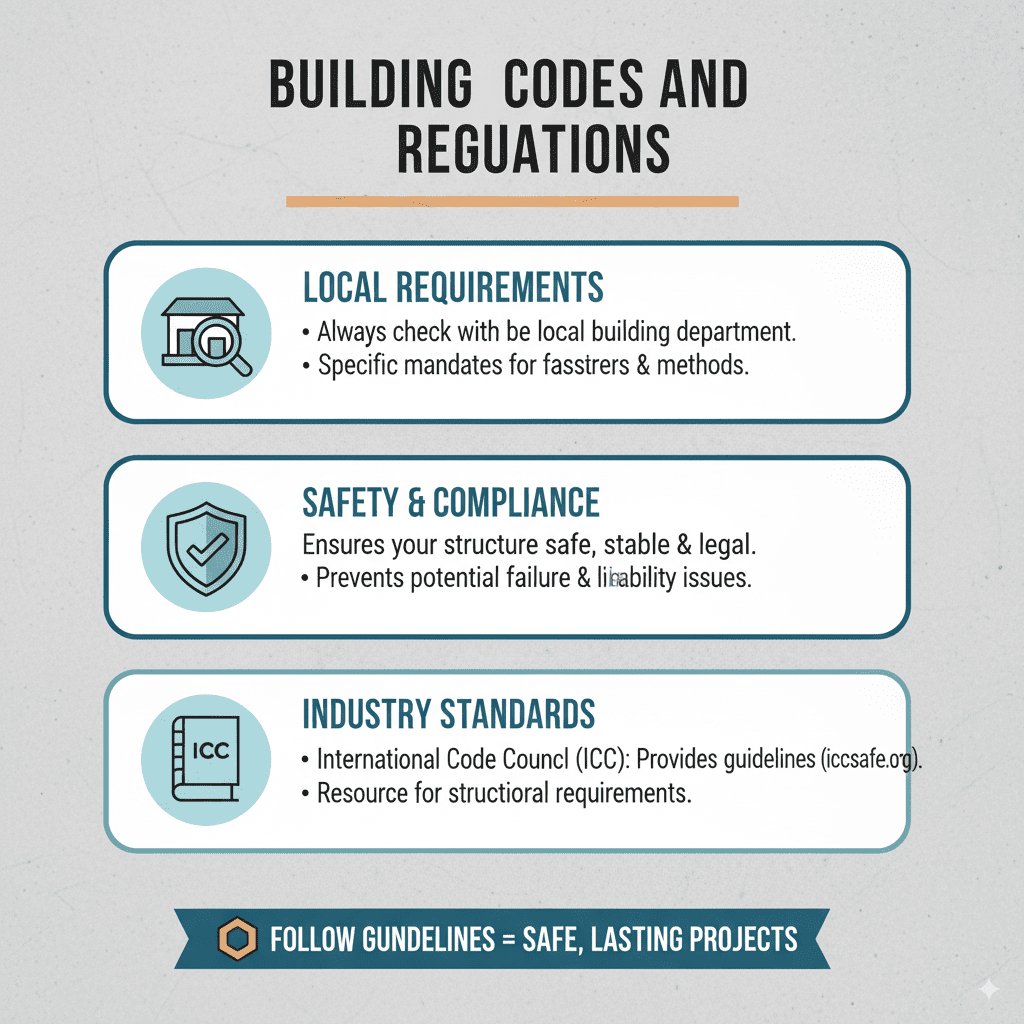
Building Codes and Regulations
It’s always a good idea to check with your local building department regarding specific requirements for attaching wood to concrete, especially for structural projects like decks or additions. Building codes often dictate the type of fasteners, spacing, and installation methods that must be used to ensure safety and compliance. For example, the International Code Council (ICC) provides standards and guidelines for building materials and methods, which can be a valuable resource for understanding structural requirements. You can often find general information on their website (iccsafe.org) or by visiting your local building permit office. Following these guidelines is crucial for the safety and longevity of your project.
Frequently Asked Questions (FAQ)
Q1: What is the absolute easiest way to attach wood to concrete?
For beginners looking for the easiest method, concrete screws (like Tapcons) are generally the simplest. They require straightforward drilling and driving, with no complex setting procedures.
Q2: Can I use regular wood screws to attach wood to concrete?
No, you absolutely cannot. Regular wood screws are designed for wood and do not have the strength or threading to grip into concrete. They will not hold securely and are a safety hazard.
Q3: Do I need a special drill for concrete?
While you can attempt to drill concrete with a standard drill using masonry bits, it’s highly recommended to use a hammer drill. The hammer action significantly speeds up the drilling process and reduces strain on the drill and yourself.
Q4: How deep should I drill the hole for a concrete anchor?
The required depth varies significantly by the type of anchor and its size. Always refer to the manufacturer’s specifications for the specific anchor you are using. Typically, the hole needs to be deeper than the anchor itself to allow for proper expansion or embedding.