How to Make Your Own Wooden Handscrew Clamps
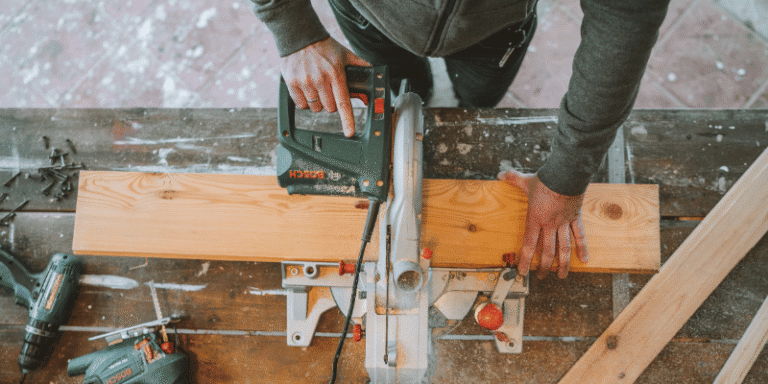
When it comes to woodworking, one of the essential tools you can have is a set of clamps. Clamps help hold pieces of wood together while you work on them; they come in different sizes and shapes. While you can buy clamps at any hardware store, sometimes it’s more satisfying (and cheaper) to make your own.
Here’s a quick guide on how to make your wooden handscrew clamps.
- Cut four pieces of wood to the desired length for your clamp
- Make sure they are all the same size
- Drill a hole through the center of each piece of wood, making sure the holes line up perfectly with each other
- Thread a screw through each hole, and then tighten them until the pieces of wood are held together snugly
- Your handscrew clamp is now complete! Use it to clamp things together in your workshop whenever you need to
How Do You Make a Woodworking Clamp?
If you’re interested in taking up woodworking as a hobby, one of the first things you’ll need to invest in is a good set of clamps. Clamps are essential for holding pieces of wood together while you work on them, and there are many different types and sizes to choose from. In this article, we’ll show you how to make your wooden clamp so that you can confidently start working on your next project.
First, gather all the materials you’ll need: a piece of wood at least 12″ long, two screws, two washers, and two wing nuts. You’ll also need a drill and either a saw or a router. If you’re using a saw, wear gloves and eye protection.
Next, mark where you want to place your holes on the piece of wood. It’s essential to ensure that the holes are evenly spaced so that the clamp will grip securely. Once your spots are marked out, use your drill to create them.
If you’re using a router, follow the manufacturer’s instructions for making shallow cuts into the wood. Now it’s time to assemble your clamp! Place one screw through each hole and add a washer followed by a wing nut.
Tighten each nut until it’s snug against the washer – don’t over-tighten, or you may strip the threads. And that’s it – your very own DIY wooden clamp!
How Do You Make a Simple Clamp at Home?
Assuming you don’t have any clamps at home and need to make one urgently, here is a quick and easy way to do it. You will need the following:
– A long strip of wood (at least 12 inches)
– A shorter strip of wood (at least 6 inches) – 2 nails – Hammer
– Saw (optional)
- Take the long strip of wood and nail one end of it to the shorter strip of timber, ensuring that the nails are facing inwards, so they don’t stick out.
2. Now, take the other end of the long strip of wood and bend it upwards to make a 90-degree angle with the first piece of wood.
Nail this end, too, so that it is secure. You should now have a basic clamp shape.
3. If you want, you can see off any excess length from either piece of wood – this is optional, depending on how big or small you want your clamp to be.
And that’s it – your very own homemade clamp!
How Do You Screw Clamps?
There are a few different ways to screw clamps, depending on the type of clamp and its use. The most common type of clamp is the C-clamp, which has a screw that goes through one side of the clamp and into the other. To use this clamp, tighten the screw until the desired pressure is achieved.
Another common type is the bar clamp, which has a screw that goes through one side of the bar and into the other. These clamps are often used for woodworking projects. To use a bar clamp, loosen the screw, so it is not completely tightened.
Then, place the bar across whatever it is you are trying to clamp together and tighten the screw until secure. There are also pipe clamps, similar to bar clamps, but with pipes instead of bars. These clamps are often used in plumbing applications.
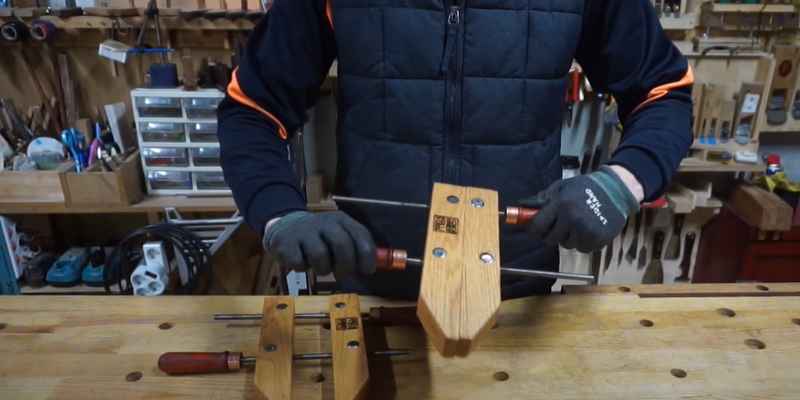
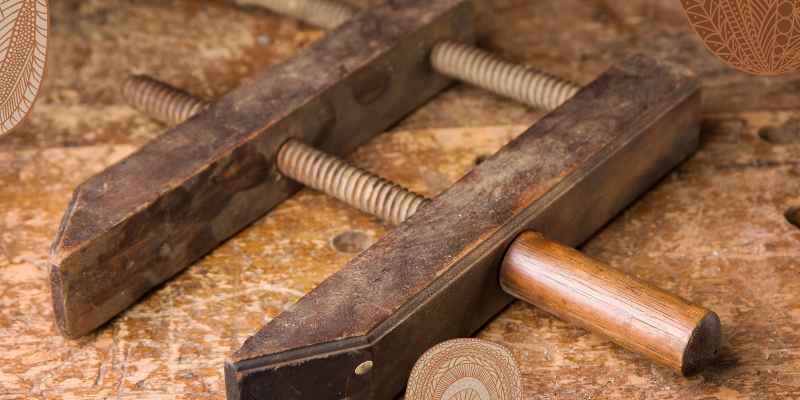
What is the Handle of the handscrew Clamp Used For?
The handle of the handscrew clamp is used to rotate the screw and tighten or loosen the clamp. The handle can also be used to apply pressure to the workpiece being clamped.
Hand Screw Clamp Hardware Kit
When it comes to clamping, one size does not necessarily fit all. This is where a hand screw clamp hardware kit comes into play. A hand screw clamp hardware kit contains all the necessary components to build a custom clamp specifically tailored to your needs.
The most critical component in a hand screw clamp hardware kit is the screw. The type of screw you choose will determine your clamp’s strength and holding power. There are three basic types of screws: round head, oval head, and pan head.
Each has advantages and disadvantages, so choosing the right one for your application is essential. Round-head screws are the strongest and have the most significant holding power. However, they can be difficult to insert into tight spaces.
Oval head screws are slightly weaker than round heads, but they’re easier to insert into tight spaces. Pan head screws are the lowest and most accessible to insert into tight spaces. Once you’ve selected the right screw for your application, it’s time to choose the suitable washer.
Washers help distribute force evenly and prevent stripping of threads. They come in various sizes, so selecting one that fits snugly around the outside diameter of your screw while still allowing it to rotate freely is essential. After you’ve chosen your screw and washer, it’s time to select a nut.
Nuts come in two primary varieties: hex nuts and wing nuts.
How to Use Wood Screw Clamps
Wood screw clamps are a quick and easy way to clamp projects together while you work on them. Here’s how to use them:
- Drill pilot holes in your project pieces.
This will help prevent the wood from splitting when you screw the clamps in place.
2. Place the clamp against one of the project pieces, lining up the holes in the clamp with the pilot holes in the wood.
3. Insert a screw into the holes and tighten until the clamp is snug against the wood.
Repeat for all of the clamps you are using.
4. Once all the clamps are in place, you can start working on your project! When you’re finished, unscrew the clamps and remove them.
Making Screw Clamps
Screw clamps are an essential part of any woodworker’s toolkit. They’re versatile, robust, and easy to use. Here’s a quick guide on how to make your screw clamps.
You’ll need the following:
– A length of threaded rod (at least 18″ long)
– Two nuts that fit the thread size of your rod
– Two washers that fit the thread size of your rod
– A drill with a bit slightly smaller diameter than your rod. First, take one of the nuts and thread it onto the rod until it’s snug against the end.
Then, add one of the washers and continue threading the nut until it’s finger-tight. Next, take the second washer and place it over the end of the rod. Finally, add the second nut and tighten it down, so it presses firmly against the washer – this will create a stop for drilling later.
Now you’re ready to start making your clamp! Take your drill and carefully drill through nuts and Washers (being careful not to damage either). Once you’ve made a hole through, unscrew both nuts from the rod(they should still be connected at this point).
Now put one of the nuts back on the rod and screw it down until it stops against the first washer – this will be the bottom of the clamp. Add the second nut to Theotheren of the rod and thread it tightly into place – this will be the top of the clamp. To finish up, cut off any excess threaded rod (leaving about 1/2″ sticking out from each nut), and you’re done!
You can now use your new clamp to hold pieces of wood together while you work on them – perfect for when you need an extra set of hands!
DIY Wood Screw Clamps
We often need clamps when working with wood, whether we’re doing carpentry or woodworking projects. There are many types and sizes of clamps available on the market, but sometimes it’s just more convenient (and economical) to make our own. In this blog post, we’ll show you how to make your wood screw clamps.
You’ll need a few supplies for this project: scrap wood, screws, washers, and wing nuts. You can use whatever size and type of screw you like, but we recommend using at least 3/4″ screws. Washers will help distribute the clamping force evenly, and wing nuts will allow you to quickly loosen and tighten the clamp without searching for a screwdriver.
First, cut your scrap wood into lengths that will be appropriate for the project you’re working on. For example, if you’re working on a small box, you’ll want shorter pieces than making a large table. Once your details are cut to size, drill pilot holes in each one.
These holes should be slightly smaller in diameter than your screws. Next, thread a screw through each washer and each piece of wood. Be sure to leave enough thread on each end so you can easily attach the wing nuts later.
When all your pieces are threaded onto the screws, start tightening them until their snug against each other – but don’t overtighten! If everything is aligned correctly, you should have a sturdy DIY clamp ready for your next project!
Conclusion
Clamps are essential to any woodworker’s toolkit, but they can be expensive. This blog post shows you how to make your handscrew clamps for a fraction of the cost. You’ll need basic woodworking skills and access to a drill, but the clamps are easy to make.
With just a few hours of work, you’ll have a set of custom clamps that will last for years.