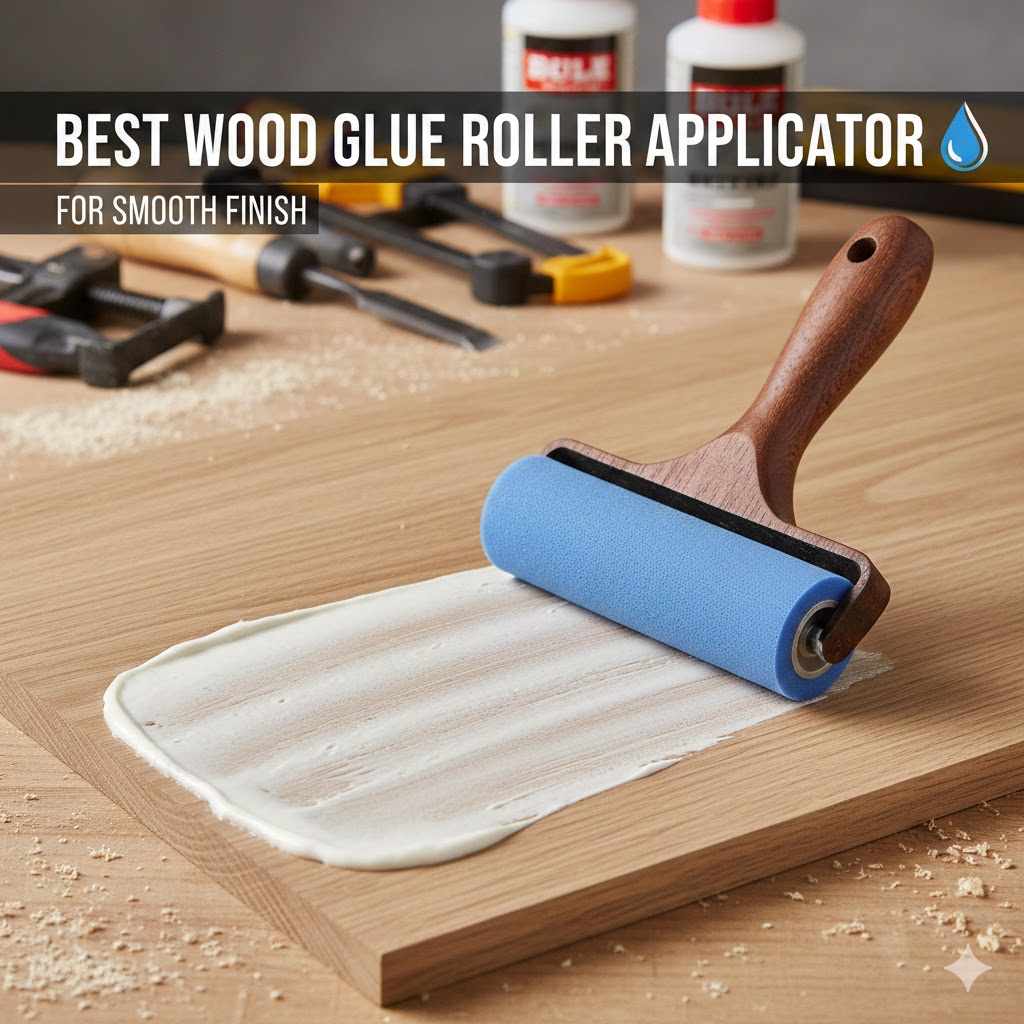
Best Wood Glue Roller Applicator For Smooth Finish
Finding the Best Wood Glue Roller Applicator for Smooth Finish can feel a bit tricky when you’re just starting out with woodworking projects. You want that clean, even glue spread without a mess, and sometimes it’s hard to know where to begin. Don’t worry, we’ve got you covered.
We’ll walk through everything simply, step by step, so you can get a beautiful, smooth finish on your next creation. Let’s see how this can make your projects much easier.
Choosing The Best Wood Glue Roller Applicator
Selecting The Best Wood Glue Roller Applicator For Smooth Finish
This section helps you pick the perfect tool for applying wood glue evenly. Getting the glue spread just right is super important for strong joints and a tidy look. We will explore different types of rollers, what makes a good one, and how they help you achieve that flawless finish every single time you build something.
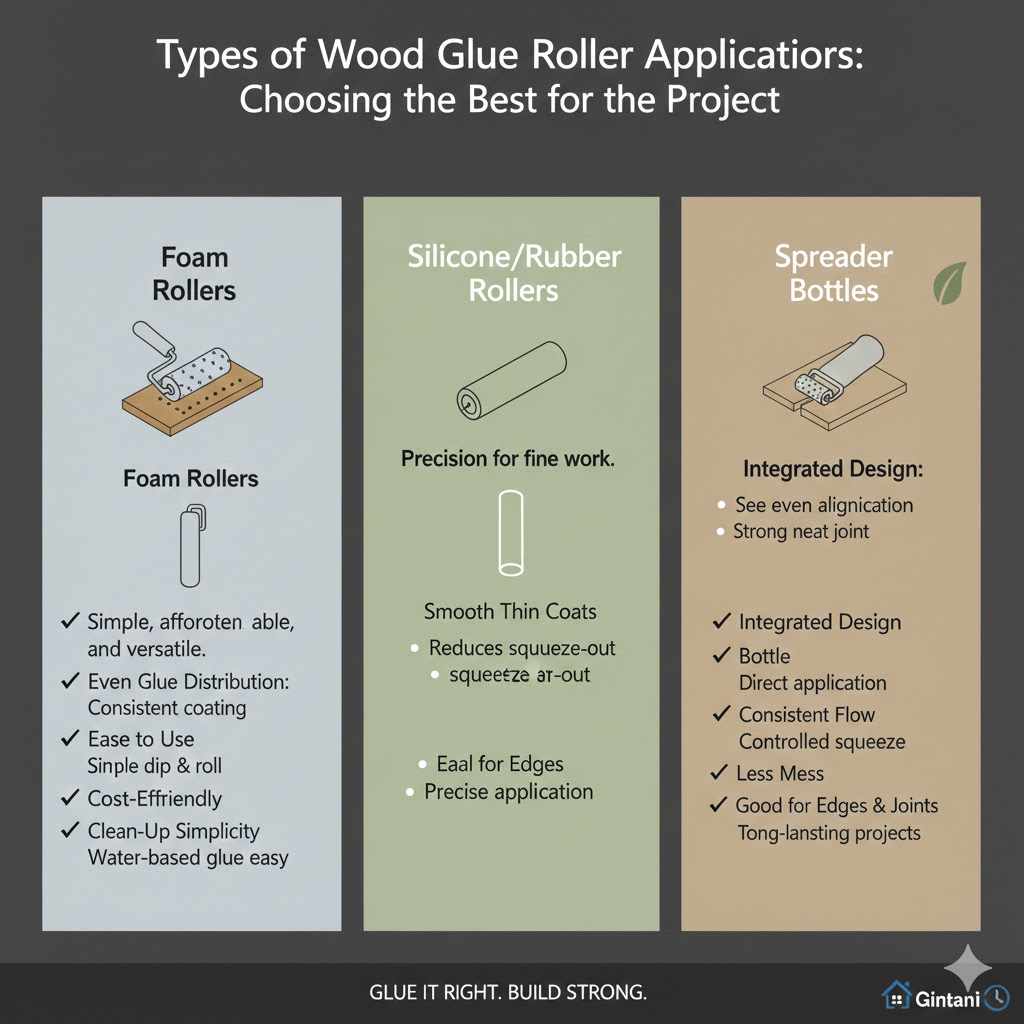
Types of Wood Glue Roller Applicators
There are a few main kinds of roller applicators out there, each with its own way of getting the job done. Understanding these differences will help you make the best choice for your specific woodworking needs and the kinds of projects you usually work on.
Foam Rollers
Foam rollers are very popular because they are affordable and easy to find. They have a simple foam pad attached to a handle. The foam is usually dense enough to hold a good amount of glue.
When you roll it over the wood, the foam’s porous nature helps it pick up and release glue in a fairly even way. They are great for flat surfaces and large areas.
- Even Glue Distribution: The foam material conforms to the wood surface, allowing for a consistent coating. This is key for preventing thick spots or bare patches, which can weaken the joint.
- Ease of Use: They are very straightforward to use. Just dip the roller into your glue or spread some on a tray and roll it across your wood.
- Cost-Effective: Foam rollers are typically the least expensive option available. This makes them a good starting point for beginners or for projects where you might not need extreme precision.
- Clean-Up Simplicity: Most foam rollers can be cleaned easily with water, especially if you clean them right after use before the glue dries.
Rubber Rollers
Rubber rollers often have a slightly textured surface, sometimes with small nubs or a smooth finish. They are designed to be durable and offer a very controlled glue application. The rubber material can be stiffer than foam, which can be beneficial for spreading thicker glues or working on less forgiving surfaces.
They tend to be a bit more expensive than foam rollers but offer better longevity and precision.
- Durability and Longevity: Rubber is a tough material that can withstand repeated use and cleaning without degrading quickly.
- Precise Spreading: The firmer nature of rubber allows for more precise control over the glue layer. This is especially useful for detailed work or smaller pieces.
- Less Absorption: Rubber doesn’t absorb glue like foam does, meaning less glue is wasted into the applicator itself.
- Versatile for Different Glues: They work well with various wood glues, from thin CA glues to thicker PVA glues.
Specialty Applicators
Beyond basic foam and rubber, you’ll find specialized roller applicators. These might have specific roller shapes, like curved edges for edges of wood, or they might feature built-in glue reservoirs. Some have finer textures for very delicate work.
These are often more advanced tools for serious woodworkers or specific tasks.
- Ergonomic Designs: Many specialty rollers are designed with comfort and control in mind, featuring shaped handles that fit well in your hand.
- Integrated Reservoirs: Some models have a built-in chamber that holds glue, allowing you to apply it continuously without dipping into a separate container. This speeds up the process.
- Variable Pressure Control: Certain high-end specialty rollers might offer ways to adjust the pressure you apply, giving you even finer control over the glue thickness.
- Task-Specific Shapes: You can find rollers shaped to perfectly apply glue to dados, rabbets, or the edges of mouldings, ensuring complete coverage in these tricky areas.
Key Features for the Best Wood Glue Roller Applicator
When you’re searching for the ideal tool, pay close attention to a few key features. These aspects will directly impact how easy it is to use, how well it spreads glue, and how long it lasts. Making sure your applicator has these qualities will make a big difference in your projects.
Handle Comfort and Grip
The handle is what you’ll be holding for most of your gluing. A comfortable handle means you can work longer without your hand getting tired. A good grip prevents the applicator from slipping, especially if your hands get a little sticky with glue.
Look for handles that are shaped to fit your hand naturally and made of materials that provide good traction.
- Ergonomic Shape: Handles designed to fit the curve of your hand reduce strain and allow for better maneuverability.
- Non-Slip Material: Rubber or textured grips offer a secure hold, even when glue might get on your hands.
- Weight Distribution: A well-balanced applicator feels lighter and easier to control during use.
- Handle Length: A longer handle can sometimes provide more leverage and reach, which can be helpful for larger projects.
Roller Material Quality
The material the roller is made from is critical for glue application. High-quality foam rollers resist tearing and maintain their shape. High-quality rubber rollers are flexible yet durable, ensuring they don’t leave streaks or gaps.
The density and texture of the roller material will affect how much glue it holds and how smoothly it spreads. A good roller material is the heart of the applicator.
- Density and Firmness: The right density ensures the roller holds enough glue without soaking it up too much, and it can spread the glue evenly.
- Surface Texture: Whether it’s smooth, subtly textured, or has small nubs, the surface impacts how the glue is laid down.
- Material Durability: Look for materials that won’t crumble, tear, or degrade after a few uses, especially with water-based wood glues.
- Chemical Resistance: The roller material should be able to handle the specific type of wood glue you use without breaking down.
Ease of Cleaning
Cleaning your glue applicator promptly is essential for its lifespan and for hygienic work. The best applicators are easy to clean with just soap and water. If glue dries on a roller that’s hard to clean, it can become less effective or even unusable.
Think about how quickly and thoroughly you can rinse it out after each use.
- Quick Rinseability: The ability to wash off glue residue quickly under running water saves time and effort.
- Non-Porous Surfaces: Materials that don’t easily absorb glue make cleaning much simpler.
- Durable Material for Scrubbing: If some glue hardens, you might need to gently scrub. The roller material should withstand this without damage.
- Disassembly Options: Some applicators have detachable roller heads, making them even easier to clean thoroughly.
Glue Capacity and Flow
How much glue the roller can hold and how smoothly it releases that glue are vital. An applicator that holds a good amount of glue means you can cover a larger area before needing to reapply. A consistent flow prevents you from having to press too hard, which can lead to an uneven spread.
- Holding Enough Glue: A roller that can hold a generous amount of glue reduces the frequency of dipping, speeding up your workflow.
- Consistent Release: The applicator should release glue steadily as you roll, providing a uniform layer.
- No Dripping or Leaking: A well-designed applicator won’t drip glue when you’re not actively rolling, keeping your workspace cleaner.
- Adjustable Flow (for some types): Some specialized applicators might offer ways to control the rate at which glue is dispensed.
Benefits of Using a Wood Glue Roller Applicator
Using a dedicated roller applicator for your wood glue offers several advantages over traditional methods like using a brush or a spreader. These benefits contribute to stronger joints, a cleaner workspace, and a more professional appearance for your finished projects. It’s a small tool that can make a big impact on your woodworking success.
Even Glue Distribution for Stronger Joints
One of the most significant benefits of using a roller applicator is its ability to spread glue very evenly. Wood glue needs to cover the entire surface of both pieces being joined to create a strong bond. When glue is applied unevenly, with thick spots and thin areas, the joint can be weaker.
A roller ensures a consistent film of glue, maximizing the surface area that is bonded and leading to more durable and reliable joints.
- Maximum Surface Adhesion: Even spread means glue contacts the entire mating surface of both wood pieces. This maximizes the area for the glue to bond to.
- Reduced Glue Wastage: By applying a consistent, thin layer, you use only the necessary amount of glue, reducing waste and cost.
- Preventing Glue Squeeze-Out Issues: While some squeeze-out is normal and a sign of good coverage, an even spread helps control it. Uneven application can lead to excessive squeeze-out in some areas and none in others.
- Consistent Strength Across the Joint: Every part of the joint benefits from the same glue thickness, ensuring uniform strength throughout.
Cleaner Work Area
Applying glue with a brush or even a spreader can sometimes be a messy affair, with drips and smudges. Roller applicators, especially those with good designs, help contain the glue. They minimize accidental drips and make it easier to keep excess glue off your hands and your workbench.
This leads to a much tidier and safer working environment.
- Reduced Drips and Smears: The controlled rolling motion helps prevent the accidental drops and smears that often happen with other methods.
- Less Glue on Hands: With a good grip and controlled application, you’re less likely to get glue on your fingers, which can then transfer to other surfaces.
- Easier Cleanup of Tools: As mentioned, many rollers are easier to clean than brushes, meaning less time spent cleaning up your tools after the job.
- Neater Project Appearance: A cleaner workspace often leads to a cleaner project, with fewer accidental glue marks on visible surfaces.
Time Savings
Spreading glue evenly and efficiently can save you a lot of time, especially on larger projects or when you have many pieces to glue. A roller applicator can cover a surface much faster than a small brush. The consistent application also means you don’t have to go back and add more glue to thin spots or scrape away excessive globs.
This streamlined process helps keep your project moving forward.
- Faster Coverage of Large Areas: Rollers can spread glue across wide surfaces much more quickly than manual spreading.
- Reduced Reapplication Needs: The evenness of the spread means you’re less likely to find areas that need more glue, saving you the extra steps.
- Streamlined Workflow: A consistent and efficient gluing process keeps your project momentum going without interruptions.
- Less Time Spent Cleaning Up Messes: By reducing the mess, you spend less time cleaning up both the workspace and the tools afterwards.
Versatility for Different Projects
Whether you’re working on a large cabinet, a small decorative box, or intricate furniture, the right roller applicator can adapt. Some rollers are better for flat surfaces, while others can handle edges and curves. Having a good applicator in your toolkit means you’re prepared for various gluing tasks.
The best wood glue roller applicator for smooth finish can be used across many different types of woodworking.
- Adaptable to Various Surfaces: Different roller types can handle flat panels, edges, and even some curved components effectively.
- Suitable for Different Glue Types: Most rollers work well with common wood glues like PVA, epoxy, and even some cyanoacrylates.
- Scalability for Project Size: Whether it’s a small craft or a large furniture piece, you can find or adapt a roller for the job.
- Precision for Fine Work: Specialized rollers can offer the detail needed for delicate joinery or small components.
How to Use a Wood Glue Roller Applicator Effectively
Using a roller applicator correctly ensures you get the best results. It’s not complicated, but a few tips can make a big difference. Follow these simple steps to achieve that perfect, smooth glue application for your woodworking projects.
Preparing Your Workspace and Materials
Before you start applying glue, make sure your workspace is ready. Clear any clutter and protect surfaces that you don’t want to get glue on. Have your wood pieces prepared and your roller applicator clean and ready to go.
It’s also a good idea to have damp cloths nearby for quick cleanups.
- Clear and Clean Area: Ensure your work surface is free of dust and debris that could get into the glue.
- Protect Surfaces: Lay down newspaper, brown paper, or a drop cloth to catch any stray glue drips.
- Wood Preparation: Make sure the surfaces of the wood pieces to be joined are clean, dry, and fit together well.
- Have Tools Ready: Have your applicator, glue, and damp cloths within easy reach to maintain a smooth workflow.
Applying the Glue with the Roller
When you’re ready, apply a moderate amount of glue to the roller. Roll it evenly across the surface of one of the pieces of wood you are joining. Aim for a consistent, thin layer.
Don’t put on too much glue, as this can cause excessive squeeze-out and create a mess. Just enough to see a consistent sheen is usually perfect.
- Moderate Glue Amount: Don’t overload the roller. A light coat is usually sufficient and prevents excessive squeeze-out.
- Even Strokes: Roll the applicator back and forth, overlapping your strokes slightly, to ensure full coverage without gaps.
- Focus on Full Coverage: Make sure to get glue on the entire surface that will be in contact with the other piece.
- Work Quickly but Deliberately: Once glue is applied, you have a limited time before it starts to set, so work efficiently.
Joining the Pieces and Clamping
Once both pieces have glue applied, carefully bring them together. Apply firm, even pressure to align them perfectly. Then, use clamps to hold the pieces securely in place while the glue dries.
The clamping pressure will spread the glue evenly and ensure a strong bond as it cures.
- Align Precisely: Fit the pieces together carefully to ensure they are perfectly aligned before applying clamping pressure.
- Apply Clamps Correctly: Use enough clamps to apply even pressure across the entire joint. Don’t overtighten, which can starve the joint of glue.
- Wipe Away Squeeze-Out: Use a damp cloth to wipe away any excess glue that squeezes out from the joint. This makes for a cleaner finish.
- Allow Adequate Drying Time: Refer to the glue manufacturer’s instructions for the recommended drying and clamping time.
Maintaining Your Glue Roller Applicator
Taking care of your roller applicator after each use will ensure it works well for many projects to come. Proper cleaning and storage are key to its longevity and performance. A well-maintained tool is a reliable tool.
Cleaning After Use
As soon as you finish your gluing, it’s time to clean the applicator. For water-based wood glues, rinse the roller thoroughly under warm running water. You can use a small brush or your fingers to gently remove any residual glue.
If the glue has started to dry, you might need a bit of soap or a specialized glue cleaner. Ensure all glue is removed before drying.
- Immediate Cleaning is Key: Clean the roller as soon as possible after use before the glue has a chance to harden.
- Warm Water Rinse: Most water-based wood glues rinse off easily with warm water.
- Gentle Removal of Residue: Use your fingers or a soft brush to dislodge any stubborn glue bits.
- Drying Thoroughly: After rinsing, shake off excess water and allow the roller to air dry completely.
Proper Storage
Once clean and dry, store your glue roller applicator properly. Keep it in a place where it won’t be damaged. Some applicators come with a cover or a case, which is ideal.
If not, you can store it in a clean plastic bag or a toolbox, ensuring it’s protected from dust and damage. Storing it tip-up can also help preserve the roller material.
- Protect from Dust: Store in a clean container or bag to prevent dust and debris from accumulating on the roller.
- Prevent Deformation: Store it in a way that doesn’t put pressure on the roller, which could cause it to lose its shape.
- Keep Away from Extreme Temperatures: Avoid storing in hot garages or freezing sheds, as extreme temperatures can damage some materials.
- Consider a Dedicated Case: If your applicator didn’t come with one, a small, dedicated case or bag can be a good investment for protection.
When to Replace Your Applicator
Even the best wood glue roller applicator won’t last forever. You’ll know it’s time to replace it when the roller material starts to degrade. This could mean it’s tearing, chunks are missing, it’s no longer spreading glue evenly, or it’s impossible to get it clean.
Using a worn-out applicator can negatively impact your project results.
- Visible Wear and Tear: If the roller material is visibly damaged, cracked, or peeling, it’s time for a new one.
- Uneven Glue Application: If you notice the roller is leaving streaks, gaps, or is just not spreading glue smoothly anymore, it’s likely worn out.
- Difficulty in Cleaning: If glue residue is permanently embedded and affects performance, replacement is often the best option.
- Damage to the Handle or Shaft: If the handle is broken or the roller is no longer securely attached, it’s unsafe to use.
Common Problems and Solutions with Glue Rollers
Even with the best tools, sometimes things don’t go perfectly. When using a wood glue roller applicator, you might encounter a few common issues. Understanding these problems and their solutions can help you get back on track quickly and achieve that smooth finish you’re aiming for.
Glue Not Spreading Evenly
This is a common frustration. If your roller isn’t spreading glue evenly, it could be because there isn’t enough glue on the roller, or the roller material itself is worn out or not suitable for the glue type. Make sure you’re using enough glue and rolling with consistent pressure.
If the roller is old or damaged, consider replacing it.
- Insufficient Glue on Roller: Try applying a bit more glue to the roller before spreading.
- Worn-Out Roller Material: If the foam is torn or the rubber is cracked, it won’t spread evenly. Replace the roller.
- Inconsistent Pressure: Ensure you’re applying even pressure as you roll. Avoid pressing too hard in some spots and too lightly in others.
- Incorrect Roller Type for Glue: Some porous rollers might not work well with very thin glues. Ensure your roller is compatible with your glue.
Excessive Glue Squeeze-Out
Too much glue squeezed out can be as much of a problem as too little. This often happens when you apply more glue than necessary or when clamping pressure is too high. Use a lighter coat of glue and adjust your clamping pressure so it’s firm but not excessive.
Wiping away excess glue immediately with a damp cloth is also important.
- Over-Application of Glue: Be mindful of how much glue you’re putting on the roller. A thin, even layer is usually best.
- Too Much Clamping Pressure: While good, excessive clamping can force out too much glue.
- Not Wiping Squeeze-Out Promptly: Dried glue squeeze-out can be difficult to remove. Wipe it away while wet.
- Using the Wrong Glue Viscosity: Very thin glues might seem to squeeze out more easily.
Applicator Dripping Glue
A dripping glue roller can make a mess. This usually happens if the roller is overloaded with glue, or if the applicator design isn’t great. Make sure to not dip too much glue onto the roller.
If the applicator itself seems to have design flaws that cause dripping, it might be time to look for a different model.
- Overloaded Roller: Avoid loading the roller with excessive amounts of glue.
- Poor Applicator Design: Some applicators are prone to dripping due to their construction or how the glue reservoir is designed.
- Holding the Roller Incorrectly: Try not to let excess glue pool on the applicator when it’s not in use.
- Glue Too Thin: Very fluid glues can sometimes drip more readily from any applicator.
Difficulty Cleaning the Roller
If your roller is proving very hard to clean, it might be due to the type of glue used or how long you waited to clean it. Some glues are harder to remove once dried. Always clean rollers immediately after use.
For stubborn residue, using a dedicated glue cleaner or a bit of denatured alcohol might help, but always check the manufacturer’s recommendations for your specific roller.
- Waiting Too Long to Clean: The longer glue sits, the harder it is to remove.
- Using Difficult-to-Clean Glues: Some specialty glues might require specific cleaning agents.
- Porous Roller Material: Very porous foam can trap glue, making it hard to fully clean.
- Not Rinsing Thoroughly: Ensure all soap or cleaner residue is rinsed away.
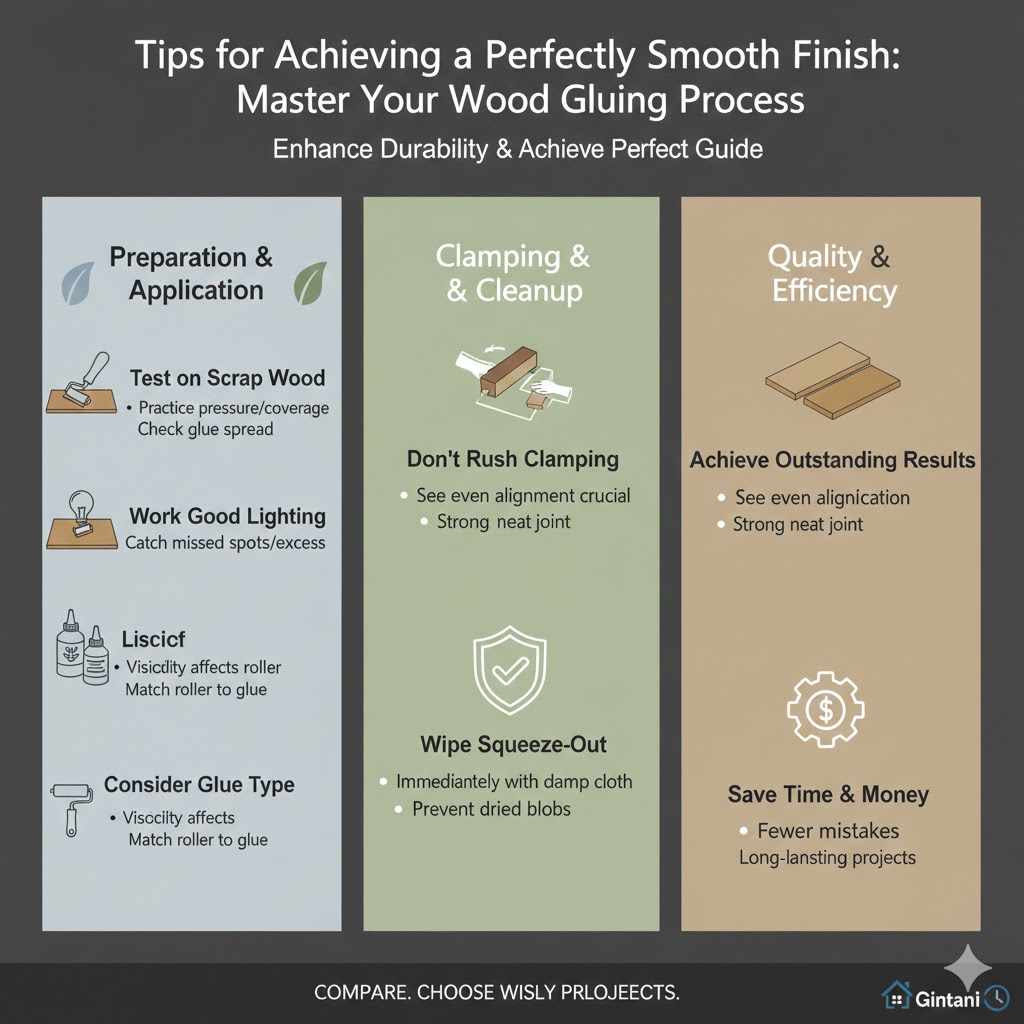
Tips for Achieving a Perfectly Smooth Finish
Achieving that smooth, professional finish with wood glue involves more than just applying it. It’s about the entire process, from choosing the right applicator to the final cleanup. Here are some extra tips to help you get outstanding results every time you use your glue roller.
- Test on Scrap Wood First: Before working on your project, practice applying glue with your roller on a scrap piece of the same wood. This helps you get a feel for the pressure and coverage needed. It also lets you check how your chosen glue spreads.
- Work in Good Lighting: Proper lighting is essential to see where you’ve applied glue and if the spread is even. It helps you catch any missed spots or areas with too much glue.
- Don’t Rush the Clamping Process: While speed is good during application, take your time when bringing pieces together and clamping. Accurate alignment is crucial for a strong and neat joint.
- Wipe Squeeze-Out Immediately and Cleanly: As soon as you see glue squeeze out, gently wipe it away with a slightly damp cloth. This prevents dried glue blobs on your finished surface.
- Consider the Glue Type and Viscosity: Different wood glues have different properties. Thicker glues might require a stiffer roller, while thinner glues need a more controlled application. The best wood glue roller applicator for smooth finish will work well with your preferred glue.
Frequently Asked Questions
Question: What is the best type of roller for wood glue
Answer: For most woodworkers, a good quality foam roller or a rubber roller offers excellent results. Foam rollers are generally more affordable and great for large surfaces, while rubber rollers provide more precision and durability.
Question: How much glue should I put on a roller applicator
Answer: Apply a moderate amount of glue. You want enough to create a consistent, thin sheen across the wood surface. Avoid overloading, which leads to excess squeeze-out.
Question: Can I use the same roller for different types of wood glue
Answer: Generally, yes, but it’s best to check the manufacturer’s recommendations. Water-based PVA glues are common and clean up easily. Some rollers might be less suitable for fast-setting cyanoacrylates or thick epoxies.
Question: How do I prevent glue from drying on the roller
Answer: Clean the roller immediately after use with warm water and mild soap. If glue starts to dry, gently remove it before it hardens completely. Storing it in a sealed bag can also help prevent drying if you can’t clean it right away.
Question: What if my roller applicator leaves streaks
Answer: Streaks can happen if the roller isn’t loaded with enough glue, if the roller material is worn, or if you’re applying uneven pressure. Try a slightly more even distribution of glue, ensure consistent pressure, and check if the roller needs replacing.
Conclusion
Choosing the right wood glue roller applicator makes a significant difference in project quality. You now know how different rollers work and what features to look for to ensure an even, smooth glue application. By following these tips, you can achieve stronger joints and a cleaner, more professional look for all your woodworking endeavors.