Can Pressure Treated Lumber Be Painted?
Many people wonder, “Can Pressure Treated Lumber Be Painted?” when they see this wood in their yards or on decks. It can seem tricky because this wood is treated to last longer outdoors. Beginners often feel unsure about the right steps to take. This guide will make it simple. We will show you exactly how to prepare and paint your pressure-treated lumber so it looks great and lasts. Get ready to transform your outdoor spaces with confidence.
Painting Pressure Treated Lumber An Overview
This section explains why painting pressure treated lumber is a common question. It also touches on why some people find it difficult. We will cover the basic steps to get you started. Knowing these basics helps prevent common mistakes. This guide aims to give you clear, actionable advice. You will learn what makes this wood different and how to work with it.
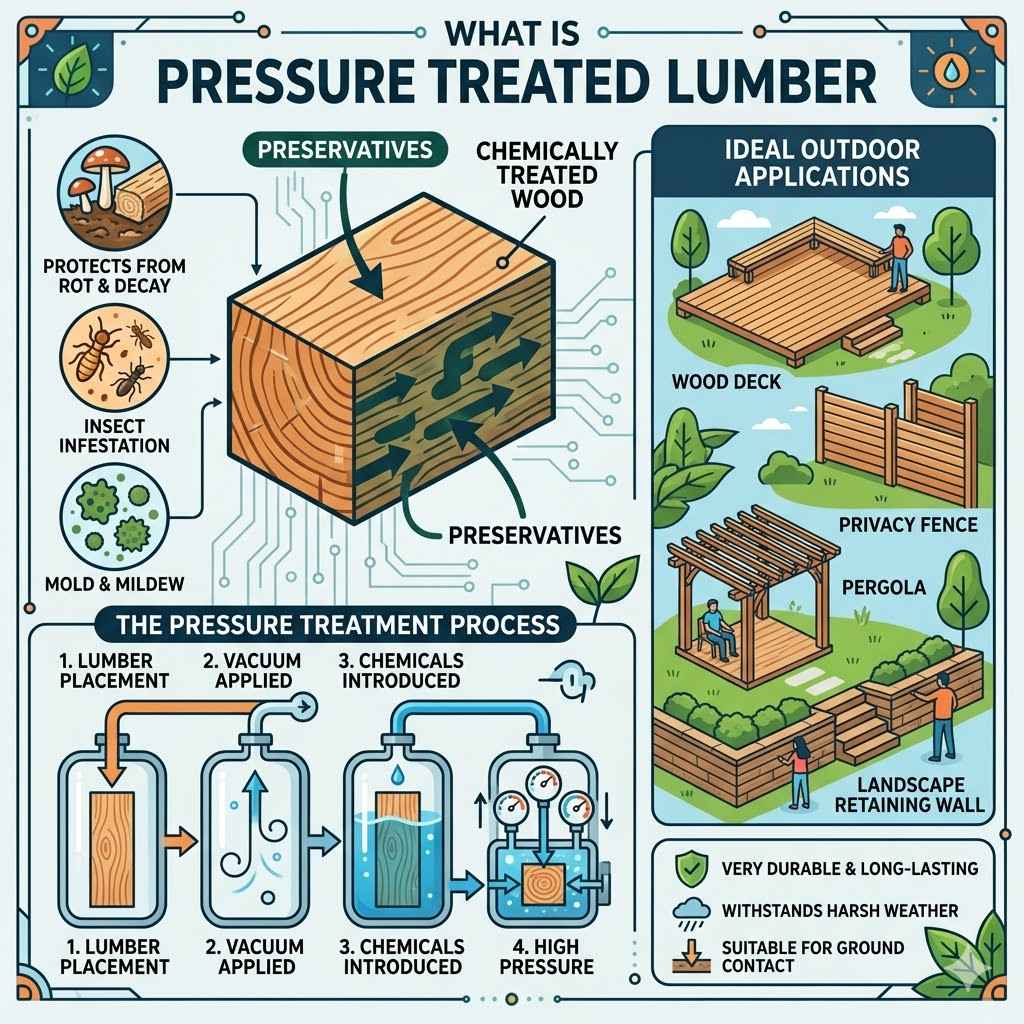
What Is Pressure Treated Lumber
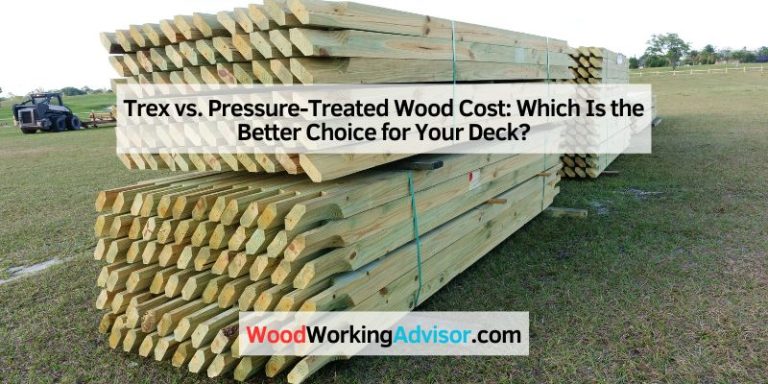
Pressure treated lumber is wood that has been chemically treated under pressure. This process forces preservatives deep into the wood fibers. These chemicals protect the wood from rot, decay, and insect infestation. This makes it ideal for outdoor projects like decks, fences, and pergolas.
The treatment process typically involves placing the lumber in a sealed chamber. A vacuum is pulled to remove air from the wood cells. Then, a special solution of chemicals is introduced. High pressure is applied to force the chemicals into the wood. This ensures thorough protection throughout the material.
This type of wood is very durable and long-lasting. It can withstand harsh weather conditions and direct contact with the ground. Because of its protective treatment, it’s a popular choice for many outdoor construction projects where moisture and pests are a concern.
Why Is Painting This Wood Different
The special treatment that makes pressure-treated lumber so durable also makes it a bit challenging to paint. The chemicals can affect how paint adheres to the surface. Sometimes, the wood can remain wet for a long time after installation. This moisture needs to dry out completely before painting.
If you paint too soon or without proper preparation, the paint may not stick well. It can peel or chip over time. This is a common reason why people get frustrated. They may have tried painting it before and had poor results.
The good news is that with the right knowledge and steps, you can achieve a beautiful and lasting paint finish. It just requires a little patience and understanding of the wood’s properties. We will walk you through each step carefully.
Preparation Steps for Painting Pressure Treated Lumber
Proper preparation is the most important part of painting pressure-treated lumber. Skipping these steps can lead to paint failure. It is worth the extra effort to ensure your paint job looks good for years.
The wood needs to be clean and dry. Often, new pressure-treated lumber is still quite wet from the treatment process. It needs time to dry out before you can apply any finish. You also need to make sure there is no dirt, mildew, or old paint on the surface.
We will cover cleaning methods and how to tell if your wood is dry enough. We will also discuss sanding and priming. These are key steps that prepare the surface for paint. Following them will make a big difference in the final look and durability.
Cleaning the Lumber
Before you can paint, the lumber must be clean. Over time, outdoor wood can accumulate dirt, grime, and mildew. These contaminants will prevent the paint from adhering properly.
You can clean the lumber using a mild detergent solution and a stiff brush. Scrub the wood gently to remove any surface dirt. For stubborn mildew or algae stains, a specialized wood cleaner or a solution of one part bleach to three parts water can be used. Always rinse the wood thoroughly with clean water after cleaning.
Let the wood dry completely after cleaning. This is a crucial step. It may take several days or even weeks, depending on the weather conditions. Using a moisture meter can help you determine if the wood is dry enough. It should read below 15% moisture content.
A case study from a homeowner in Ohio showed that neglecting cleaning led to peeling paint within a year. They had to scrape off all the paint and start over. This experience highlights the importance of thorough cleaning.
Drying Time For New Lumber
This is a very important point. New pressure-treated lumber is saturated with chemicals and water. Painting it too soon is a recipe for disaster. The wood needs to acclimate to its environment and dry out.
The drying time can vary greatly. It depends on the wood’s thickness, the type of treatment used, and the climate. In humid or rainy areas, it could take months. In dry, sunny climates, it might only take a few weeks.
A good rule of thumb is to wait at least one to two months after installation. Some experts recommend even longer, up to six months, for optimal drying. You can test the moisture content with a wood moisture meter. Aim for a reading of 15% or less.
If you don’t have a moisture meter, you can do a simple test. Tape a small piece of plastic wrap to the wood surface. Leave it for 24 hours. If you see condensation on the underside of the plastic wrap, the wood is still too wet.
Sanding for Better Adhesion
Once the lumber is clean and dry, sanding is the next important step. Sanding creates a slightly rougher surface. This texture gives the primer and paint something to grip onto, improving adhesion.
Use medium-grit sandpaper, around 80 to 120 grit. Sand in the direction of the wood grain. This will help remove any rough spots or mill glaze. Mill glaze is a smooth surface created by the milling process that can prevent paint from sticking well.
After sanding, wipe down the wood with a tack cloth or a damp cloth to remove all dust. Any dust left behind will create an uneven finish and can affect paint adhesion. This preparation step ensures a smooth base for your paint.
A survey of professional painters revealed that over 70% consider sanding essential for a long-lasting finish on treated lumber. They often use orbital sanders for larger areas to speed up the process.
Choosing the Right Paint and Primer
Selecting the correct paint and primer is crucial for a successful paint job on pressure-treated lumber. Not all paints are created equal, and using the wrong type can lead to premature failure.
A good primer is key. It acts as a bridge between the wood and the topcoat of paint. It helps seal the wood, block stains, and improve the adhesion of the paint. For pressure-treated lumber, an oil-based or a high-quality acrylic-latex primer is usually recommended.
For the topcoat, you’ll want a durable exterior paint. Acrylic latex paints designed for outdoor use are a popular choice. They are flexible and can expand and contract with the wood as temperatures change.
Consider the finish you want. A semi-gloss or satin finish can offer good durability and is easier to clean than a flat finish. Matte finishes are also available but may require more frequent cleaning.
Primer Selection
For pressure-treated lumber, using a stain-blocking primer is highly recommended. These primers are designed to prevent any potential bleed-through from the wood’s treatment chemicals. They also help seal the wood surface effectively.
Oil-based primers are excellent at blocking stains and offer great adhesion. However, they can be harder to clean up and may have strong fumes. Water-based (acrylic) stain-blocking primers are a good alternative. Many modern water-based primers offer excellent stain-blocking capabilities and are easier to work with.
Look for primers specifically labeled as suitable for exterior use and for use on challenging surfaces. Read the product label carefully to ensure it is compatible with pressure-treated wood.
A common mistake is using a primer not designed for exterior use or one that doesn’t block stains. This can lead to discolored paint or poor adhesion later on. Always choose a primer that addresses the unique needs of pressure-treated lumber.
Paint Types for Exterior Use
When it comes to painting your prepared lumber, you need a paint that can withstand the elements. Exterior-grade paints are formulated to resist UV rays, moisture, temperature changes, and general wear and tear.
100% acrylic latex paints are a top choice for many reasons.
Flexibility: They are very flexible. This allows them to expand and contract with the wood as temperatures fluctuate. This flexibility helps prevent cracking and peeling over time.
Durability: They offer excellent durability against weather. They are resistant to fading and can maintain their color well in direct sunlight.
Ease of Use: Acrylic paints are easy to apply with brushes, rollers, or sprayers. Cleanup is also simple, usually just requiring soap and water.
Oil-based paints can also be used, especially for trim or areas that need extra hardness. However, they are less flexible than acrylics and can become brittle over time. They also have stronger odors and require mineral spirits for cleanup.
For most DIY projects on decks, fences, or siding, a high-quality 100% acrylic latex exterior paint is the best option. It offers a good balance of performance, ease of use, and longevity.
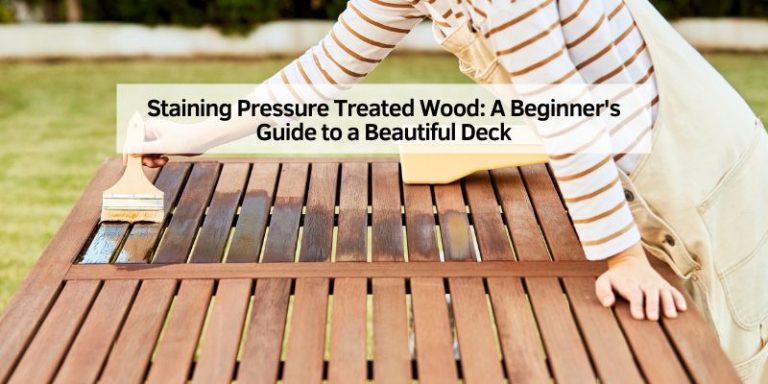
Application Techniques for Best Results
Once you have chosen your primer and paint, it’s time to apply them. The technique you use can significantly impact the final outcome and how long the paint job lasts.
Start with the primer. Apply it evenly and ensure full coverage. Let the primer dry completely according to the manufacturer’s instructions. This is important before applying the first coat of paint.
When painting, work in manageable sections. This prevents the paint from drying out before you can smooth it. Pay attention to the wood grain and apply paint in long, even strokes.
Two thin coats of paint are usually better than one thick coat. Thin coats dry more evenly and are less likely to chip or peel. Allow each coat to dry thoroughly before applying the next.
Applying the Primer
Apply the primer in thin, even coats. Avoid applying it too heavily, as this can lead to drips and an uneven finish. Use a good quality brush or roller for best results.
If using a roller, a medium nap roller cover is usually suitable for wood surfaces. For brush application, choose a synthetic bristle brush for water-based primers and a natural bristle brush for oil-based primers.
Ensure you get the primer into all the nooks and crannies of the wood. This is especially important for textured wood or areas with knots. Even coverage is key for a uniform paint finish.
After applying the primer, check for any missed spots or areas where the primer is too thick. Make any necessary adjustments before it dries. The primer coat should look uniform and provide a good base.
Applying the Paint
Once the primer is completely dry, you can begin applying the paint. Again, thin, even coats are best. Work in sections, ensuring you maintain a wet edge to avoid lap marks.
If you are painting a deck, applying paint perpendicular to the boards can sometimes provide better adhesion and a more even appearance, but always follow the paint manufacturer’s recommendations. For vertical surfaces like fences or siding, painting with the grain is standard.
Use a brush for edges and detailed areas, and a roller for larger flat surfaces. A sprayer can also be used for larger projects, but it requires practice and proper masking to avoid overspray.
Allow adequate drying time between coats. This is crucial for the paint to cure properly. Check the paint can for specific drying times. Usually, it is recommended to wait at least 4-6 hours between coats.
Maintaining Your Painted Surface
The best paint jobs require a little ongoing care. Regular cleaning will help your painted pressure-treated lumber look its best and last longer.
Periodically inspect the painted surface for any signs of damage, such as chipping or peeling. Address any minor issues promptly by touching them up. This prevents small problems from becoming larger ones.
Clean the surface gently with a mild soap and water solution. Avoid harsh chemicals or abrasive scrubbers that can damage the paint. Rinsing thoroughly with clean water is important.
In areas with heavy foot traffic or direct exposure to the elements, you might consider reapplying a fresh coat of paint every 3-5 years to maintain its appearance and protective qualities.
Common Issues and How to Solve Them
Even with careful preparation and application, you might encounter a few common issues when painting pressure-treated lumber. Knowing how to address them can save your paint job.
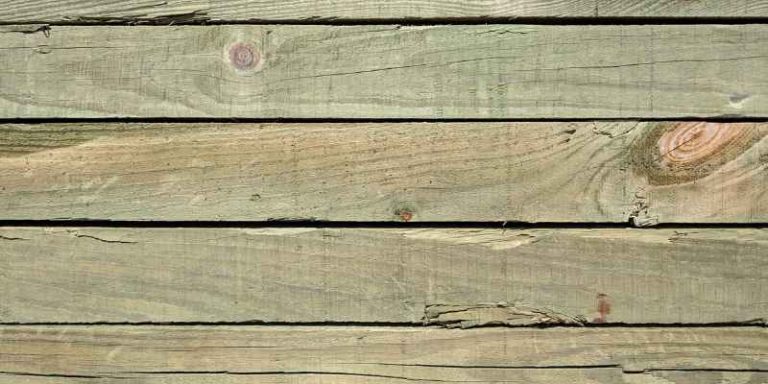
One of the most frequent problems is peeling or flaking paint. This often happens if the wood was not dry enough when painted, or if the primer did not adhere well.
Another issue is mildew growth on the painted surface. While pressure-treated wood resists decay, painted surfaces can still be susceptible to mildew, especially in damp, shady areas.
We will look at the causes of these problems and offer practical solutions to fix them and prevent them from happening again.
Peeling and Flaking Paint
Peeling paint is a disheartening sight. The most common cause is moisture trapped within the wood. As the moisture tries to escape, it pushes the paint off the surface.
If you notice peeling or flaking paint, the best solution is to remove the affected paint.
Scrape off all loose or bubbling paint with a paint scraper.
If the peeling is extensive, you may need to sand the entire area to create a smooth transition between the old and new paint.
Clean the surface thoroughly and ensure it is completely dry.
Apply a high-quality stain-blocking primer.
Repaint the area, ensuring you use thin, even coats.
To prevent this, always wait for the wood to be adequately dry. Use a moisture meter to confirm. Also, choose a good primer and top-quality exterior paint.
Mildew and Algae Growth
Mildew and algae can grow on painted surfaces, especially in humid or shaded environments. This is more of a cosmetic issue but can eventually degrade the paint.
To clean mildew and algae, use a solution of one part bleach to three parts water.
Apply the solution to the affected areas using a brush or spray bottle.
Let it sit for about 10-15 minutes.
Scrub gently with a stiff brush if needed.
Rinse the area thoroughly with clean water.
Allow the surface to dry completely.
For future prevention, consider using paints with mildewcide additives. Ensure good air circulation around the painted structures. Trim any overhanging branches that might keep the area shaded and damp.
A homeowner in Florida reported recurring mildew on their deck. They switched to a premium exterior paint with mildew resistance and implemented better deck cleaning routines, which significantly reduced the problem.
Discoloration or Stains
Sometimes, even after painting, you might notice stains or discoloration appearing on the surface. This can happen if the wood’s treatment chemicals bleed through the paint.
If you encounter this, it means your primer was not sufficient to block the stains.
You may need to reapply a stain-blocking primer. Ensure it is a high-quality product specifically designed for this purpose.
Allow the primer to dry fully.
Then, apply your topcoat of exterior paint.
Using a specific stain-blocking primer is a critical step to avoid this issue. Some wood treatments contain tannins that can also cause discoloration, and a good primer will seal these in.
Can Pressure Treated Lumber Be Painted A Final Look
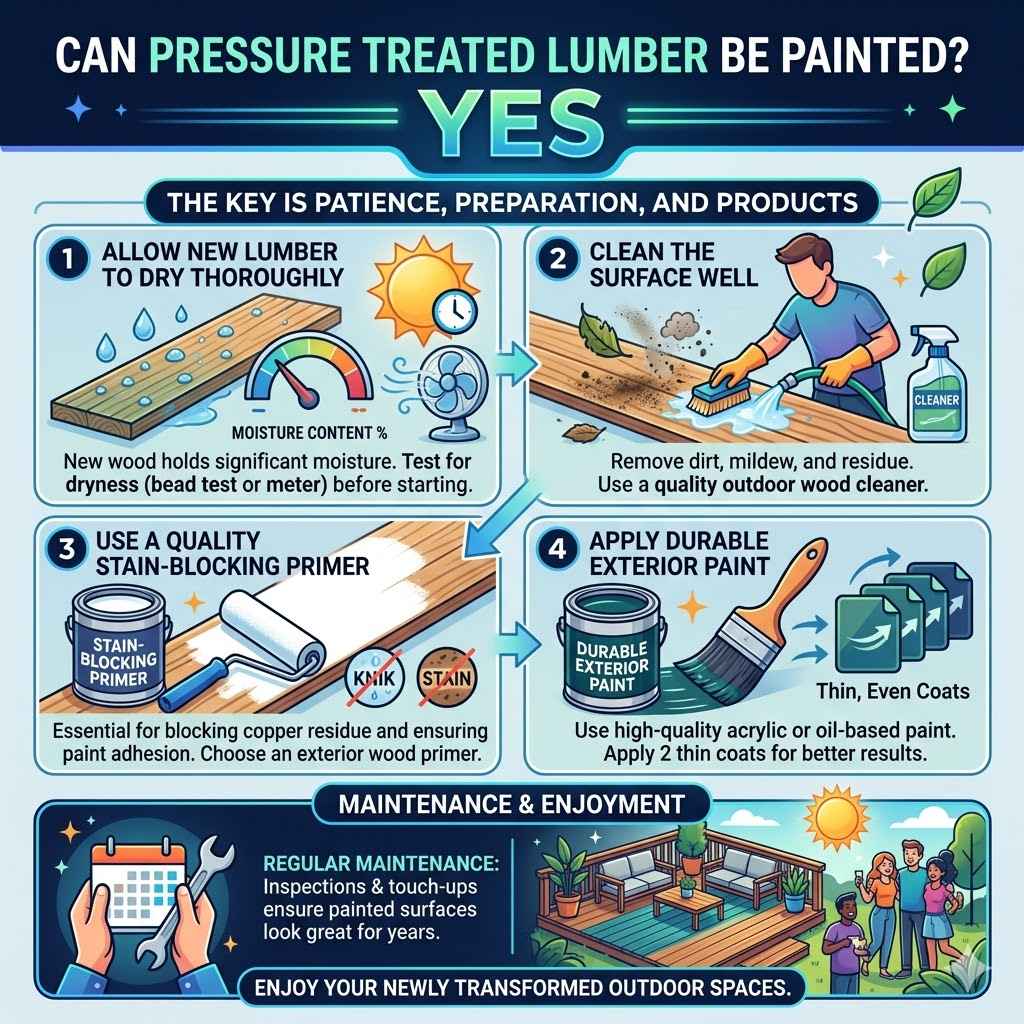
The question of “Can Pressure Treated Lumber Be Painted?” has a clear answer: yes, it can be. With the right preparation and products, you can achieve a beautiful and durable finish.
The key is patience. Allow new lumber to dry thoroughly. Clean the surface well. Use a quality stain-blocking primer. Apply durable exterior paint in thin, even coats. Regular maintenance will ensure your painted surfaces look great for years. Enjoy your newly transformed outdoor spaces.
Frequently Asked Questions
Question: How long should I wait before painting new pressure treated lumber
Answer: It is recommended to wait at least one to two months after installation for new pressure treated lumber to dry. For best results, waiting up to six months is ideal, especially in humid climates. Using a wood moisture meter to confirm a reading of 15% or less is the most reliable method.
Question: Can I use any exterior paint on pressure treated lumber
Answer: While it’s an exterior paint, not all types are ideal. High-quality 100% acrylic latex exterior paints are the best choice. They offer flexibility and durability.
Always use a stain-blocking primer first, regardless of the topcoat you choose.
Question: What if my painted pressure treated wood starts to peel
Answer: Peeling usually means moisture is trapped in the wood. You’ll need to scrape off the loose paint, ensure the wood is completely dry, apply a stain-blocking primer, and then repaint. Preventing this starts with proper drying before painting.
Question: Do I need to sand pressure treated lumber before painting
Answer: Yes, sanding is a very important step. It creates a slightly rougher surface for the primer and paint to adhere to better. Use medium-grit sandpaper and wipe away all dust afterward.
Question: Can I paint pressure treated lumber that has been previously stained
Answer: Yes, but proper preparation is key. You’ll need to clean the stained wood thoroughly, ensuring all dirt and mildew are removed. If the stain is flaking or peeling, it must be removed entirely.
A good stain-blocking primer is essential to cover any remaining stain and prevent bleed-through before applying your paint.
Conclusion
Yes, you absolutely can paint pressure treated lumber. The success lies in preparation and product choice. Ensure the wood is dry, clean, and sanded. Use a quality stain-blocking primer. Apply exterior-grade paint in thin, even coats. Regular maintenance keeps your painted surfaces looking their best. Enjoy your beautiful, freshly painted outdoor projects.