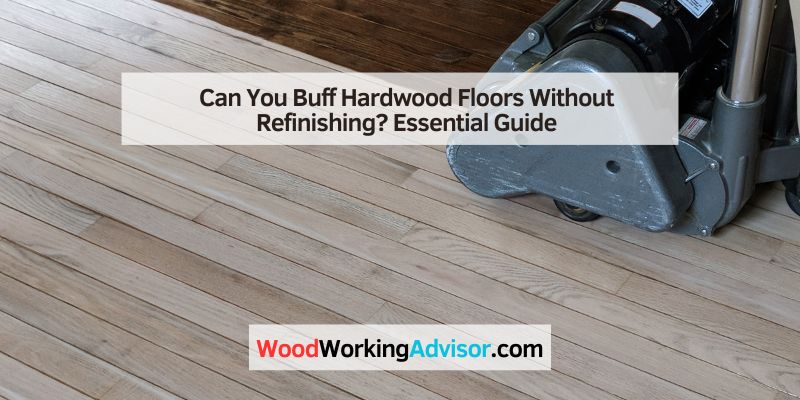
Can You Buff Hardwood Floors Without Refinishing? Essential Guide
Yes, you can buff hardwood floors without a full refinishing! Buffing is a way to add a fresh sheen and protect your existing finish. It’s ideal for floors that are generally in good shape, with minor dullness or light scuffs, rather than deep scratches or worn-away finishes. This process revitalizes your floors without the dust, time, and cost of a complete sanding and refinishing job.
Ever look at your beautiful hardwood floors and feel like they’ve lost their sparkle? Maybe they’re looking a little dull or have a few scuff marks that just won’t budge. It’s easy to think the only solution is a full, messy refinish. But what if there was a simpler way to bring back that lovely shine? You don’t always need to go through the hassle of sanding everything down. There’s a middle ground that can make a big difference! This guide will show you how to buff your hardwood floors, breathing new life into them with a much easier process.
Buffing vs. Refinishing: What’s the Difference?
It’s great to know the terms, so let’s quickly clear up what buffing and refinishing actually mean for your hardwood floors. Understanding this will help you decide which path is right for your home.
Think of it this way: refinishing is like a complete overhaul. Buffing is more like a polish or a refresh.
Hardwood Floor Refinishing
Refinishing involves sanding down the existing finish and the top layer of the wood itself. This is done to remove deep scratches, worn-out areas, stains, and discoloration. After sanding to bare wood, a new stain (if desired) and multiple coats of a new protective finish (like polyurethane) are applied. It’s a thorough restoration that can make old, damaged floors look brand new.
Hardwood Floor Buffing
Buffing, often called screen-and-recoat or recoating, is a much less invasive process. It doesn’t sand down to bare wood. Instead, a buffer machine with a special abrasive screen or pad is used to lightly abrade the very top layer of the existing finish. This scuffs up the old finish just enough to help a new coat of finish bond properly. After buffing, one or two new coats of finish are applied over the existing one.
The key takeaway is that buffing works with your existing finish, while refinishing removes it entirely.
Can You Buff Hardwood Floors Without Refinishing? The Short Answer
Yes, absolutely! Buffing is a fantastic option if the wear and tear on your hardwood floors are mostly on the surface. If your floors have lost their shine, have light scuff marks, or just look a bit tired, buffing can restore that beautiful glow without the mess and expense of a full refinish. It’s a maintenance step that can significantly extend the life and beauty of your floors.
When Buffing is the Right Choice
So, how do you know if buffing is the magic bullet your floors need? It really comes down to assessing the condition of your current finish. If your floors are generally in good shape, buffing is a great solution. Here are some signs that indicate buffing is a good path:
- Dullness: The most common reason! The top protective layer of your floor has lost its luster, making the wood look flat and lifeless.
- Light Scuff Marks: Small, superficial marks from furniture or everyday foot traffic that haven’t penetrated the finish itself.
- Minor Surface Wear: Areas that look slightly worn but don’t have deep gouges or exposed wood.
- Previous Finish is Intact: As long as there’s a good layer of original finish still present, buffing will work.
- You Want a Quick Refresh: If you need to improve the look of your floors before a party or just want to boost their appearance without a major project.
When You ACTUALLY Need to Refinish
Buffing is excellent for maintenance, but it can’t fix everything. If your floors are showing signs of deeper damage, it’s time to consider a full refinish. These issues are beyond what buffing can address:
- Deep Scratches and Gouges: Cuts that go through the finish and into the wood itself.
- Visible Bare Wood: Areas where the finish has been completely worn away, exposing the wood.
- Stains and Discoloration: Dark spots, pet stains, or areas where the wood has changed color due to sun or moisture.
- Warping or Cupping: If the floorboards are physically distorted by moisture.
- Previous Finishes Failed: If the existing finish is peeling, blistering, or flaking off, buffing won’t help.
If you’re unsure, it’s always best to consult with a professional flooring specialist. They can give you an expert opinion on the best course of action.
The Tools You’ll Need for Buffing
Gathering the right tools is the first step to success. You don’t need a lot of fancy equipment, and most of these can be rented or purchased at your local home improvement store.
Here’s a checklist to get you started:
- Orbital Buffer Machine: This is the most important tool. Look for a standard 175 RPM buffer. You can rent these from most tool rental centers.
- Buffing Screen or Pad: These are specific abrasive pads that attach to the buffer. For recoating, a 100-grit or 120-grit buffing screen or a maroon Scotch-Brite pad is typically used.
- Quality Vacuum Cleaner: With a soft brush attachment, crucial for removing all dust.
- Stiff-Bristled Push Broom: For initial debris removal.
- Microfiber Dust Mops: Several of them, for thorough dust removal after vacuuming.
- Wood Floor Cleaner: A pH-neutral cleaner specifically designed for finished wood floors.
- Clean Microfiber Cloths or Applicator Pads: For applying the new finish.
- Polyurethane Finish: Choose a high-quality water-based or oil-based polyurethane that matches your existing finish (e.g., satin, semi-gloss). Water-based finishes dry faster and have less odor.
- Painter’s Tape: To protect baseboards and walls.
- Safety Glasses: Protect your eyes from dust.
- N95 Dust Mask: For breathing protection.
- Gloves: To keep your hands clean and protect from the finish.
Step-by-Step Guide: How to Buff Hardwood Floors
Ready to get started? Follow these steps carefully for a beautifully refreshed floor. Remember, patience and thoroughness are key!
Step 1: Prepare the Room
First, clear out everything from the room. Move furniture, rugs, and anything else that’s on the floor. This gives you complete access and prevents any damage to your belongings.
Then, protect the edges:
- Use painter’s tape around the baseboards and any other areas you don’t want the buffer or finish to touch. This simple step saves a lot of cleanup later.
Step 2: Thoroughly Clean the Floors
This is a critical step. Any dirt or grit left on the floor will be ground into the finish by the buffer, causing more damage. You want to start with a perfectly clean surface.
- Initial Sweep/Vacuum: Use a stiff-bristled push broom or a good vacuum with a floor brush attachment to get up all loose dirt, dust, and debris. Get into corners and along edges.
- Deep Clean: Use a pH-neutral wood floor cleaner. Dampen a microfiber mop with the cleaner (don’t saturate it) and clean the entire floor. Work in manageable sections and change your mop pads frequently as they get dirty.
- Rinse (if necessary): Check your cleaner’s instructions. Some require a rinse with a separate, damp mop, while others do not. If rinsing, ensure the mop is just barely damp.
- Dry Completely: Allow the floors to dry completely. This could take a few hours. You can speed this up by using fans and ensuring good air circulation.
- Final Dusting: Once dry, do a final pass with clean, dry microfiber dust mops. Go over the entire floor. Then, use your vacuum with the soft brush attachment again, paying extra attention to edges and corners. The goal is zero dust. The U.S. Environmental Protection Agency (EPA) recommends thorough cleaning to improve indoor air quality, which also benefits your floor prep!
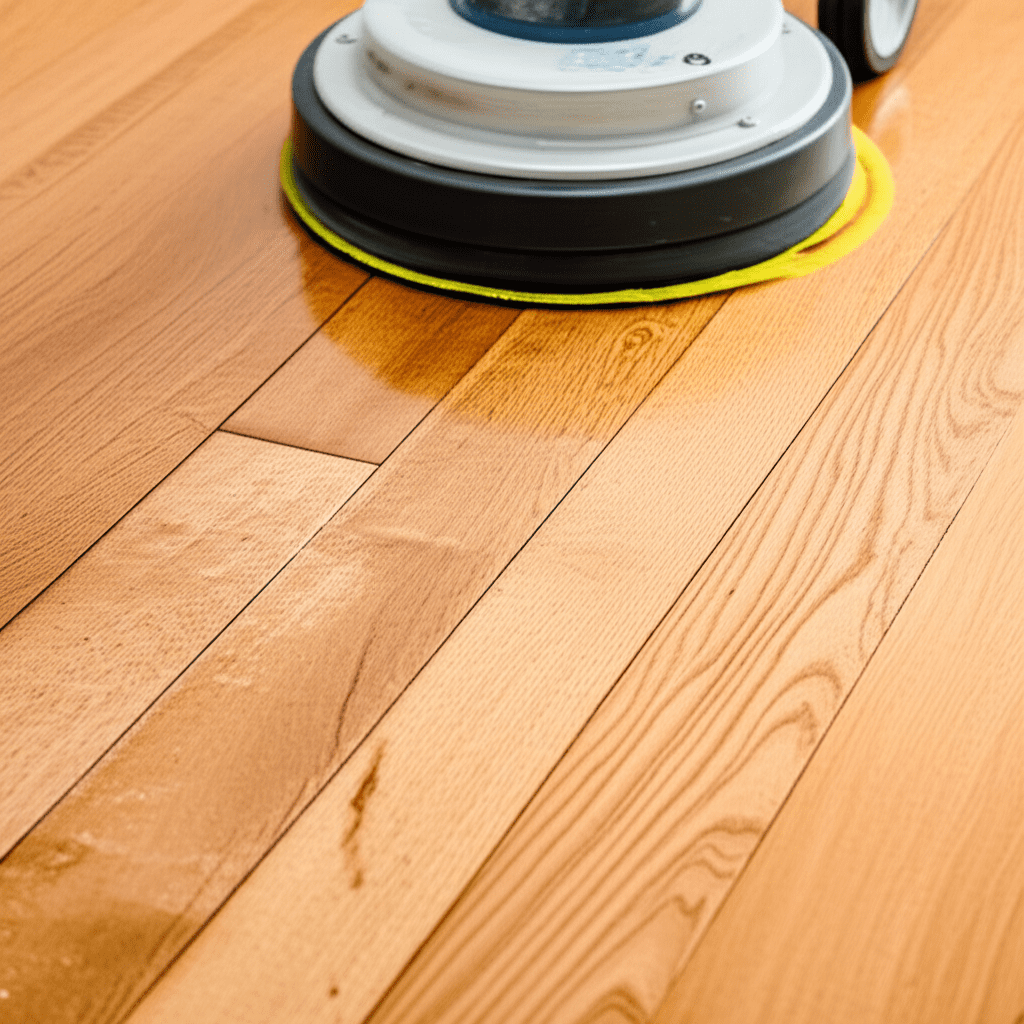
Step 3: The Buffing Process
Now comes the actual buffing. This step lightly scuffs the old finish to prepare it for the new coat.
- Attach the buffing screen or maroon pad to your orbital buffer machine.
- Start in one corner of the room and move the buffer in a slow, steady, overlapping pattern. Work your way across the floor. Imagine you are vacuuming or mopping, just with this machine.
- Ensure you cover the entire floor. The screen will slightly dull the existing sheen, which is exactly what you want.
- Pay attention to edges and corners; you might need to do these by hand with a sanding block and fine-grit sandpaper (around 120-150 grit) if the buffer can’t reach. However, for most recoating scenarios, a good buffer can get quite close.
- Once the entire floor has been buffed, vacuum it meticulously. Ensure all dust is removed. Then, use your clean microfiber dust mops for a final, thorough dusting.
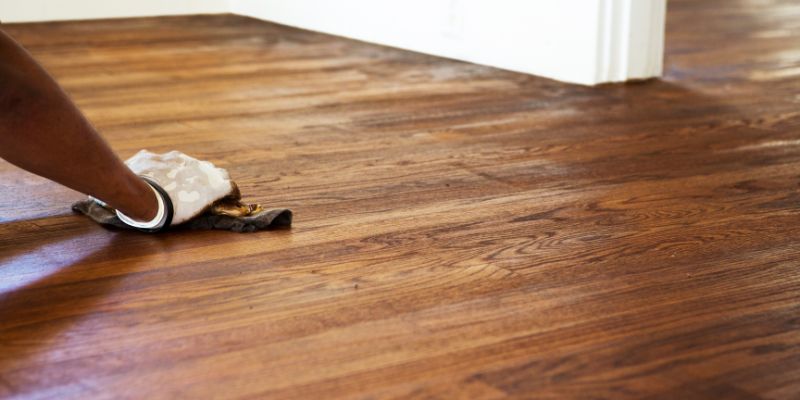
Step 4: Apply the New Finish
With the floor prepped and buffed, it’s time to apply the protective top coat.
- Read the instructions on your chosen polyurethane finish carefully. Pay attention to temperature, humidity, and drying times.
- Stir the finish gently. Do not shake it, as this creates bubbles.
- Start applying the finish in a corner, working away from the exit. Use a quality applicator pad or a good-quality brush.
- Apply a thin, even coat. Avoid puddling or leaving heavy brush marks. Work with the grain of the wood.
- Typically, you’ll apply the finish in long, even strokes. Some recommend applying in a serpentine (S) pattern and then spreading it out evenly.
- Cover the entire floor, ensuring consistent coverage.
- Allow the first coat to dry completely according to the manufacturer’s instructions. This can range from 4 to 12 hours for water-based finishes and 24 hours for oil-based.
Step 5: Second Coat (Optional but Recommended)
A second coat adds another layer of protection and can enhance the sheen.
- Once the first coat is thoroughly dry, lightly buff the floor again. This time, use a very fine-grit buffing pad (like a white or gray one) or a clean, dry microfiber cloth. This helps the second coat adhere better and smooths out any minor imperfections.
- Vacuum and dust the floor again meticulously, just as you did after the initial buffing.
- Apply the second coat of finish, following the same technique as the first.
- Again, allow the final coat to dry completely. Check the manufacturer’s recoat and light traffic guidelines.
Step 6: Curing and Moving Back In
Drying is not the same as curing. While the floor will be dry to the touch relatively quickly, it takes time for the finish to harden completely and reach its maximum durability.
- Light Traffic: Most water-based finishes allow for light foot traffic after 24 hours.
- Heavy Traffic & Furniture: Avoid heavy traffic, rugs, and moving furniture back for at least 3-7 days, but ideally longer. Refer to your finish’s specific curing instructions.
- Protect: Place felt pads under all furniture legs to prevent scratches.
For more information on floor finishes and their application, resources like the North Carolina Building Codes offer guidance on materials and safety, which can indirectly inform your choice of finishes based on building standards.
Table: Buffing vs. Refinishing Comparison
To make it even clearer, here’s a chart comparing the two methods:
| Feature | Buffing (Screen and Recoat) | Refinishing (Sanding) |
|---|---|---|
| Process | Lightly scuffs existing finish for recoating. | Sands down to bare wood, then stains and finishes. |
| Effectiveness | Restores shine, removes light scratches/scuffs, renews surface. | Removes deep scratches, stains, discoloration; can change color. |
| Time Commitment | 1-2 days (including drying time). | 4-7 days or more (including drying and curing time). |
| Cost | Lower (primarily cost of finish and supplies/rental). | Significantly higher (DIY or professional labor costs). |
| Disruption | Minimal; room must be clear. | High; room uninhabitable, strong odors. |
| Dust | Minimal dust from buffing screen. | Significant dust from sanding, requires containment. |
| Skill Level | Beginner to Intermediate. | Intermediate to Advanced (or professional). |
| Best For | Floors with intact finish, surface dullness/scuffs. | Floors with deep damage, worn-through finish, or color change desired. |
Tips for a Flawless Buffed Finish
Achieving a great result is all about the details. Here are some extra tips from my workshop to yours:
- Test in an Inconspicuous Area: Before starting, test your cleaner and finish in a closet or under a large piece of furniture.
- Ventilation is Key: Even water-based finishes have fumes. Ensure good ventilation by opening windows and using fans.
- Work in Good Light: Proper lighting helps you see missed spots or areas where the finish is uneven.
- Don’t Over-Work the Buffer: Just a single pass with the buffing screen is usually enough. Too much aggressive buffing can thin the existing finish too much.
- Maintain Consistent Strokes: Whether buffing or applying finish, keep your movements consistent and overlapping for an even result.
- Clean Your Tools Immediately: Clean brushes, rollers, and pads right after use. Dried polyurethane is very hard to remove.
- Proper Storage of Leftover Finish: Seal the can tightly. Store in a cool, dry place away from extreme temperatures.
Maintaining Your Buffed Floors
Once you’ve put in the effort to buff and recoat, keeping your floors looking great is much easier!
- Regular Cleaning: Sweep or vacuum your floors regularly (daily if possible) to remove grit that can scratch the finish.
- Use a pH-Neutral Cleaner: Avoid harsh chemicals, ammonia, or abrasive cleaners, as they can damage the finish.
- Wipe Spills Immediately: Don’t let liquids sit on the floor.
- Use Furniture Pads: Always use felt pads on the legs of furniture. Regularly check and clean these pads as they can collect grit.
- Use Entry Mats: Place mats both inside and outside exterior doors to trap dirt and moisture before it reaches your hardwood.
- Consider Area Rugs: Use rugs in high-traffic areas or places prone to spills (like dining areas) to protect the finish. Ensure rugs have a backing that won’t trap moisture or damage the finish.
- Avoid High Heels and Cleats: These can easily dent or scratch even a well-maintained floor.
Frequently Asked Questions (FAQ)
Q1: How often can I buff my hardwood floors?
You can typically buff and recoat your hardwood floors every 3-5 years, or as needed based on wear and tear. It’s a maintenance process, so watch your floors for signs of dullness or light damage.
Q2: Can I use a floor buffer that I bought for cleaning car paint?
No, it’s strongly recommended to use a dedicated orbital floor buffer. These machines are designed for the weight and pressure needed for floor maintenance and have the correct RPMs. Using the wrong type of buffer could damage your floors.
Q3: What grit of buffing screen should I use?
For a standard screen-and-recoat, a 100-grit or 120-grit buffing screen is usually appropriate. This is aggressive enough to lightly abrade the old finish but not so aggressive that it will cause deep scratches or remove too much material.
Q4: Can I buff out deep scratches on my hardwood floors?
Unfortunately, buffing is a surface-level process. It can remove very light scuffs and dullness, but it cannot remove deep scratches or gouges that have penetrated the finish and into the wood itself. For deep scratches, a full refinish is necessary.
Q5: My floor has a matte finish. What type of topcoat should I use?
Always try to match the sheen of your existing finish. If your floors have a matte finish, use a water-based or oil-based polyurethane in a matte or flat sheen. Using a higher sheen (like glossy) over a matte finish will likely result in an uneven appearance.
Q6: How long does the new finish take to cure?
Drying and curing are different. Most water-based finishes are dry to the touch in a few hours and can handle light foot traffic in 24 hours. However, full curing, meaning the finish has reached its maximum hardness, can take anywhere from 7 to 30 days, depending on the product and environmental conditions. During this period, be extra gentle with your floors.
Q7: Is it safe to use a floor buffer if I’m new to DIY projects?
Yes, with some guidance and caution. Read the buffer’s manual thoroughly. Orbital buffers are generally easier and safer for beginners than rotary buffers because they are less likely to “dig in” or cause damage if you lose control. Take your time, keep the machine moving, and don’t force it.
Conclusion
As you can see, restoring the beauty and shine to your hardwood floors doesn’t always require a full, labor-intensive refinishing project. Buffing, or screen-and-recoating, offers a fantastic, accessible solution for floors that have simply lost their luster due to everyday wear. By understanding the difference between buffing and refinishing, gathering the right tools, and following a careful, step-by-step process, you can achieve remarkable results.
You’ve learned how to properly clean your floors, use a buffer to prep the surface, and apply a new protective finish to bring back that inviting glow. Remember, consistency in your movements and thoroughness in cleaning are your best friends throughout this process. With a little effort and the right approach, your hardwood floors can look revitalized, protected, and beautiful for years to come. So go ahead, give your floors the refresh they deserve, and enjoy the satisfaction of a job well done!