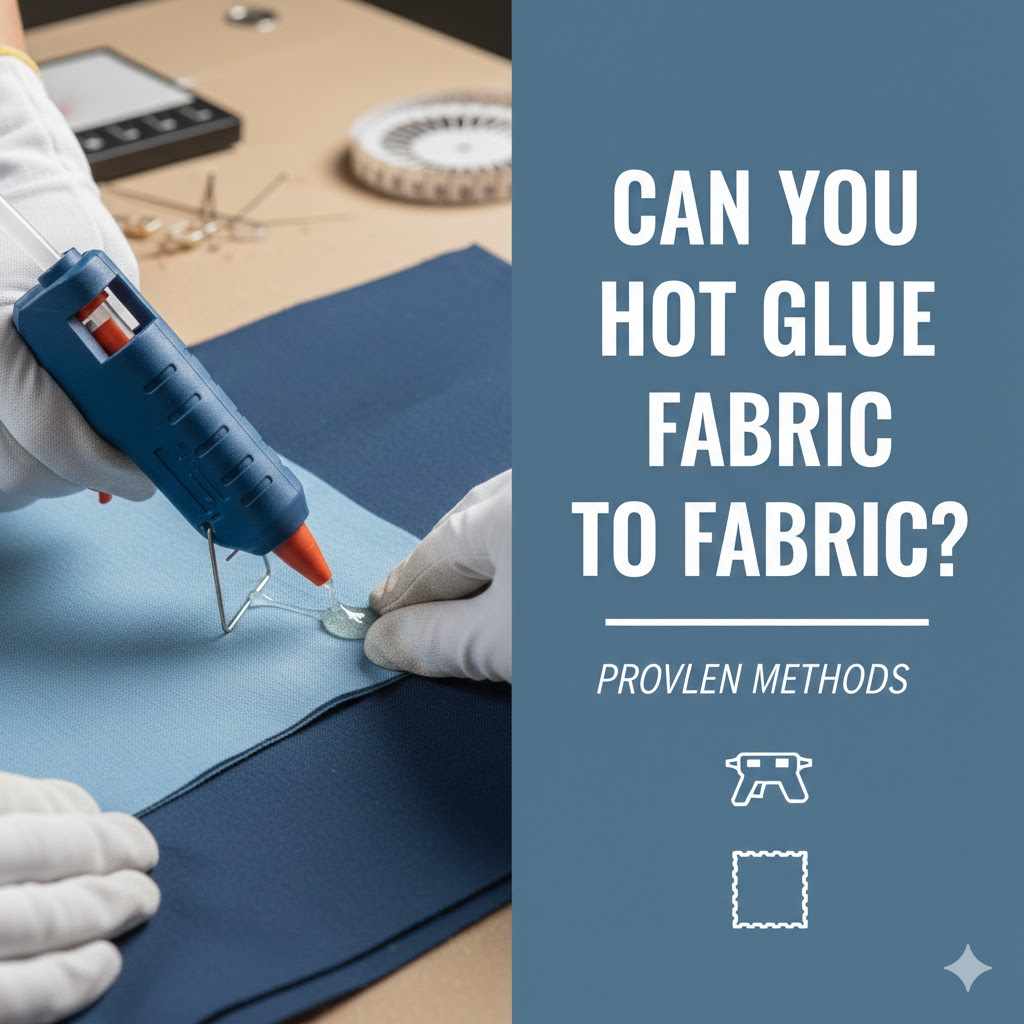
Can You Hot Glue Fabric To Fabric? Proven Methods
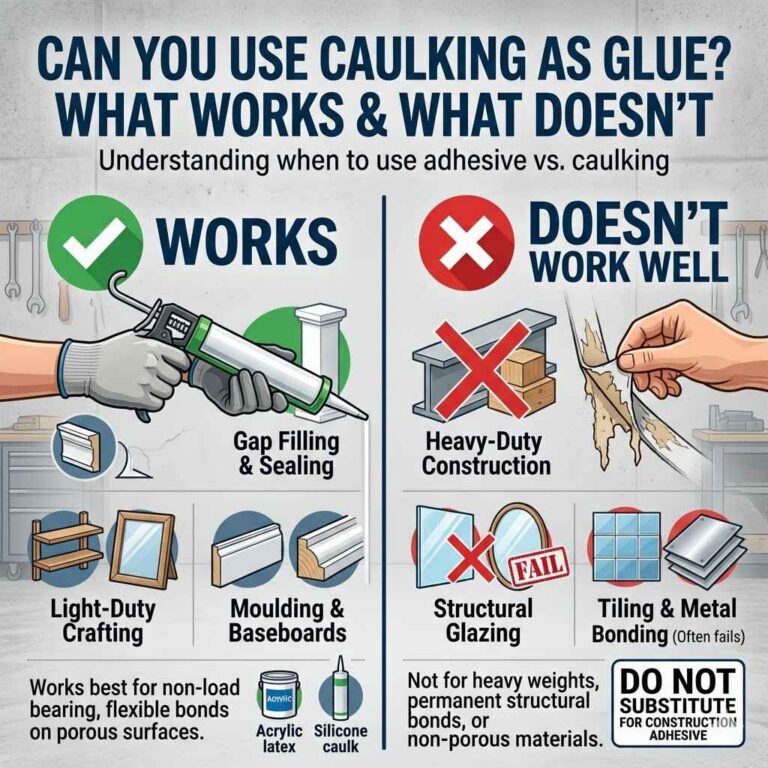
Yes, you absolutely can hot glue fabric to fabric, and it’s a fast, surprisingly strong solution for quick repairs, crafts, and non-washable decorations. However, success depends entirely on choosing the right glue stick and applying proper technique. We’ll cover the best methods here to ensure your bond holds strong.
Have you ever tried to quickly mend a tear in a costume or attach appliqué to a sturdy craft project, only to find your regular glue failed the fabric test? You are not alone! Fabric is tricky because it breathes and flexes. Using the wrong adhesive leads to frustrating peels and frustrating, weak connections. But don’t worry! With a few simple pointers and the right hot glue stick, you can master this simple but powerful technique. We’ll break down exactly which glue to pick and the best way to press that fabric down for a bond that actually lasts.
Why Hot Glue is Tempting (and When It Works Best) for Fabric
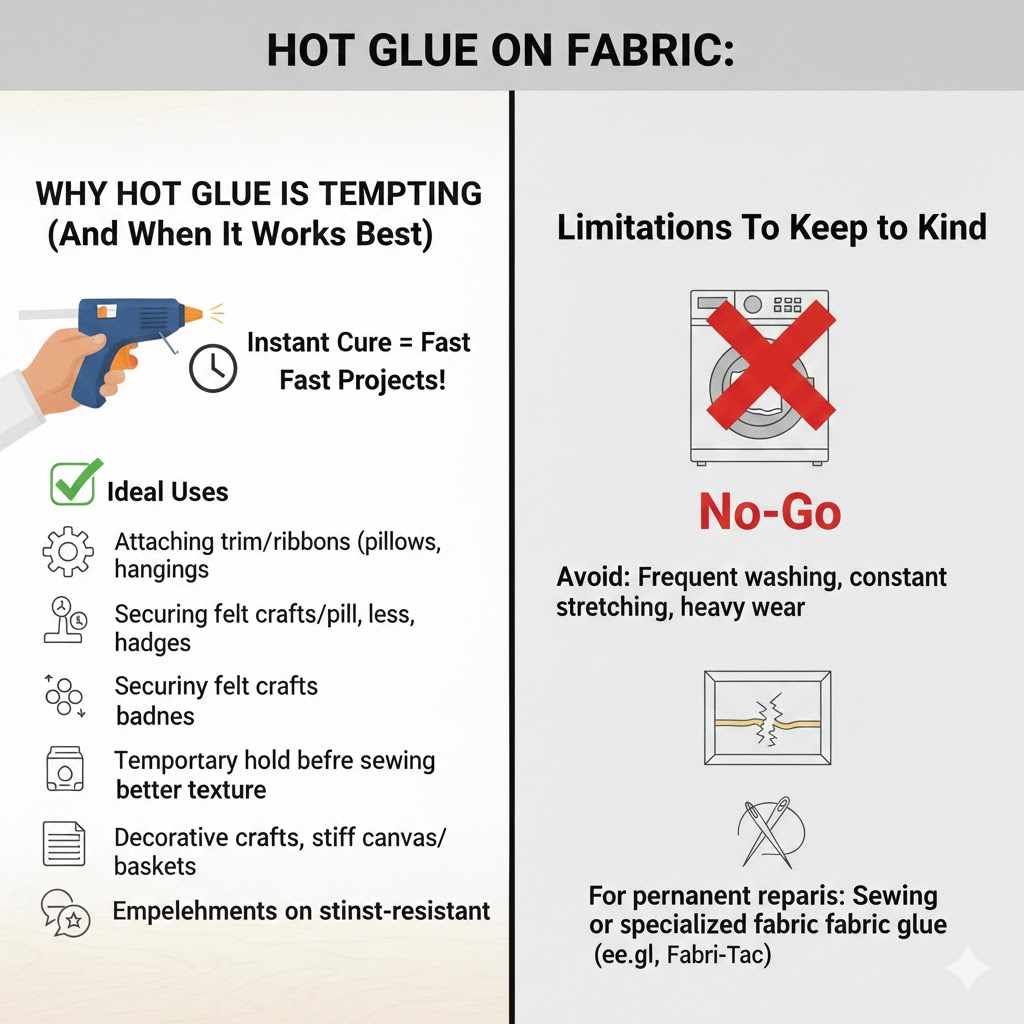
As a DIY mentor, I love tools that make a project fast and easy. Hot glue definitely fits that description. It cures almost instantly, meaning you spend less time clamping and more time admiring your work.
When thinking about hot glue and fabric, remember this: it’s best for applications where the item won’t face heavy wear or constant washing.
Ideal Uses for Hot Glue on Fabric
You can rely on your glue gun for these fabric tasks:
- Attaching trim or ribbons to non-wearable decor (like pillows or wall hangings).
- Securing felt or synthetic crafts like masks or badges.
- Temporary holding or stabilizing edges before sewing (a handy hack!).
- Crafts that are purely decorative and won’t go through the laundry.
- Adhering embellishments to items like stiff canvas bags or sturdy baskets.
Limitations to Keep in Mind
Hot glue isn’t magic; it has limits. Fabric that needs frequent washing, constant stretching, or handling might eventually pop the bond. For permanent clothing repairs, traditional sewing or specialized fabric glues (like Fabri-Tac) are usually a better long-term bet.
The Most Important Choice: Selecting the Right Hot Glue Stick
This is where most beginners go wrong. Not all glue sticks are created equal, especially when dealing with textiles. You need a formula designed for flexibility and a lower melting temperature.
High-Temp vs. Low-Temp Glue Sticks
Most standard, inexpensive glue guns use high-temperature settings, which can scorch delicate fibers or melt certain synthetics right through the fabric, creating a stiff, plastic-like mess.
For fabric work, you want the cool approach:
| Glue Type | Best For | Fabric Risk |
|---|---|---|
| Low-Temp Sticks | Delicate, synthetic, or lightweight fabrics (like tulle or chiffon). | Very low risk of melting or scorching. |
| Standard/High-Temp Sticks | Thick fabrics like denim, canvas, wool, or heavy felt crafts. | Risk of stiffness and potential scorching on thinner materials. |
If you are using a dual-temperature glue gun, always switch to the low-temp setting for fabric, unless you are working with very heavy-duty materials that need extra grip.
Specialty Glue Sticks for Fabric
If you plan on doing a lot of fabric crafting, look for specialized “fabric” or “low-temp craft” glue sticks. These often have better adhesion to fibers and cure slightly softer, allowing the finished piece to flex a little better without cracking the adhesive bond.
Essential Tools for Gluing Fabric Successfully
Preparation is key in any DIY project, whether we’re joining wood or textile. Before you plug in that glue gun, gather these simple tools. Remember, safety first!
Tools Checklist:
- Hot Glue Gun (Preferably Dual-Temperature).
- Appropriate Glue Sticks (Low-Temp recommended).
- Silicone Glue Pad or Parchment Paper (Crucial for protecting your work surface).
- Heat-Resistant Glove or Thimble (Optional, but recommended for pressing).
- Sharp Fabric Scissors.
- Small Wooden Craft Stick or Spatula (For spreading glue thinly).
A silicone mat is a lifesaver! Hot glue slides right off cured silicone, saving your workbench from those messy little glue blobs. You can check out safety tips for working with common shop tools, including heating elements, via resources like the Centers for Disease Control and Prevention on home safety, which reminds us to handle heat carefully.
Proven Step-by-Step Method: How to Hot Glue Fabric to Fabric
Ready to join those pieces? Follow these steps precisely. We aim for a thin, even layer of glue for maximum hold without excess bulk.
Step 1: Prepare Your Materials
Measure and cut your fabric pieces. If you are layering fabric (like an appliqué), decide exactly where the top layer will sit. Mark the placement lightly with chalk or a disappearing fabric marker.
Step 2: Protect Your Surface
Lay down your silicone mat or parchment paper where you will be working. Hot glue can seep through lightweight fabrics, so this protection is mandatory.
Step 3: Heat Up the Gun
Load your preferred glue stick and plug in your gun. Allow it several minutes to fully heat up. If you have a dual-temp gun, ensure it’s set to the “low” setting.
Step 4: Apply a Thin Bead of Glue
Apply the glue to the base layer of fabric—the piece that will sit stationary on your work surface.
Use short, quick swipes of the glue gun.
Do NOT glob the glue on. Thick glue takes longer to cure and results in a stiff bond. You want a consistent, thin layer—like frosting a thin cookie.
Glue only the area you plan to cover immediately. Hot glue sets very quickly!
Step 5: Press and Hold Firmly
Carefully align the top piece of fabric onto the glued base layer.
Once aligned, press down firmly, starting from the center and working outwards to push any air bubbles out.
If you are using a heavy fabric, press down for 15–20 seconds. For lightweight fabric, 5–10 seconds is usually enough.
Use your silicone-covered finger or a craft stick to apply pressure. Never use bare fingers on freshly applied hot glue unless you are using a low-temp setting and move very fast.
Step 6: Cure and Test
Allow the glued section to cool completely, usually just a minute or two. Gently test the bond. If the fabric lifts easily, you may need to peel it up and apply a slightly thicker (but still even) layer of glue to that section and press again.
Dealing with Different Fabric Types: Expert Tips
The texture and composition of the fabric drastically affect how well the glue sticks. Treating silk differently than burlap is essential for good craftsmanship.
Working with Thick and Sturdy Fabrics (Denim, Canvas, Felt)
These materials absorb heat less quickly and provide a great surface for mechanical grip.
Glue Choice: Standard or high-temp glue can work here, as the bulkier material resists melting.
Technique: You can apply the glue a little more generously since the fabric can handle the extra thickness without looking bulky. Ensure the fabric lies completely flat before pressing down.
Working with Lightweight Fabrics (Cotton, Linen, Tulle)
These fabrics pose the biggest challenge because the heat can easily penetrate them.
Glue Choice: Low-temperature glue is a must.
Technique: Work in very small sections—about one square inch at a time. Apply the glue, press immediately, and move to the next section. If the glue is too hot, the fibers may fuse or even burn.
Working with Slippery Fabrics (Silk, Satin, Synthetic Blends)
Smooth, tightly woven synthetics resist most adhesives because there is very little “tooth” (texture) for the glue to grab onto.
Glue Choice: Specialized clear, flexible craft glue is often superior, but if you must use hot glue, choose low-temp glue designed for maximum adhesion.
Technique: Pre-roughen the gluing area very lightly with fine-grit sandpaper if possible (test this on scrap first!). Apply the thinnest possible layer of glue. Pressure must be maintained for longer—up to a full minute—to force the glue into the tiny weave spaces.
The Secret to Flexibility: Hot Glue vs. Seams
One of the main reasons hot glue fails on fabric used for clothing is lack of flexibility. When you move, the fabric stretches. Traditional stitching allows the fabric to stretch while the thread moves with it. Hot glue creates a rigid bridge that cracks under strain.
To combat this when working on items that will move (like fabric jewelry or soft accessories):
1. Use a “Wiggly” Glue Pattern: Instead of running a continuous bead, apply glue in short, dashed lines. This creates several small, flexible points of contact rather than one giant, rigid patch.
2. Use Low-Temp Glue Exclusively: Low-temp formulas generally dry slightly softer and less brittle than their high-temp cousins.
3. Consider Edge Support: If possible, wrap the edge slightly around a stiff backing (like cardstock temporarily tucked inside) while the glue cures to ensure the edge dries flat and tight.
For a more in-depth look at material science behind bonding materials, the NASA Technical Reports Server has detailed documents on adhesive strength under various mechanical stresses, which explains why flexible bonding is crucial for textiles that move.
Troubleshooting Common Hot Glue Fabric Failures
Even with the best intentions, things can go wrong. Here’s how to diagnose and fix the most common issues when you hot glue fabric.
Problem 1: The Fabric Peels Up Immediately
This usually means the fabric cooled too fast, or you didn’t press hard enough to establish initial contact.
Fix: Carefully peel back the area that lifted. Scrape off any old glue residue if it looks stringy or old. Reapply a fresh, slightly thicker (but still even) bead of glue and press again for a full 30 seconds, perhaps using gentle steam from an iron held a safe distance away to temporarily warm the fabric fibers slightly before pressing.
Problem 2: The Glue Bleeds Through to the Front
This creates a shiny, hardened “window” on the outside of your nice fabric.
Fix: You used too much glue or the glue temperature was too high for that material. If the spot is small, sometimes you can carefully use an iron on a very low setting (with a press cloth covering the front) to try and melt the visible glue back into the fibers, drawing it away slightly, but this is risky. Future prevention is better: use less glue and switch to low-temp sticks.
Problem 3: The Bond is Too Stiff and Cracks
The material feels hard where the glue is, making the craft look unprofessional or tearing the connection point.
* Fix: This is often related to using high-temp glue on thin cotton or synthetics. For fixing, you generally need to cut the glue line with a fine utility blade or small seam ripper and re-adhere it using the “wiggly line” technique mentioned above with low-temp glue.
Hot Glue vs. Traditional Fabric Adhesives: A Comparison
While hot glue is excellent for speed and hobby crafts, it’s important to know what other options exist if you need serious durability, especially if the item needs to withstand laundering.
| Adhesive Type | Cure Time | Washable? | Flexibility |
|---|---|---|---|
| Hot Glue (Low-Temp) | Instant (Seconds) | No (Usually) | Fair (Can stiffen) |
| Specialty Fabric Glue (e.g., Fabri-Tac) | Several Hours | Yes (After full cure) | Excellent |
| Liquid Sewing Alternatives (Fusible Webbing) | Cured with Iron Heat | Yes | Very Good |
For projects requiring longevity, like attaching heavy patches to jeans or mending hems that will see a washing machine, investing in a textile-specific liquid glue will give you that craftsman-level durability we all aim for.
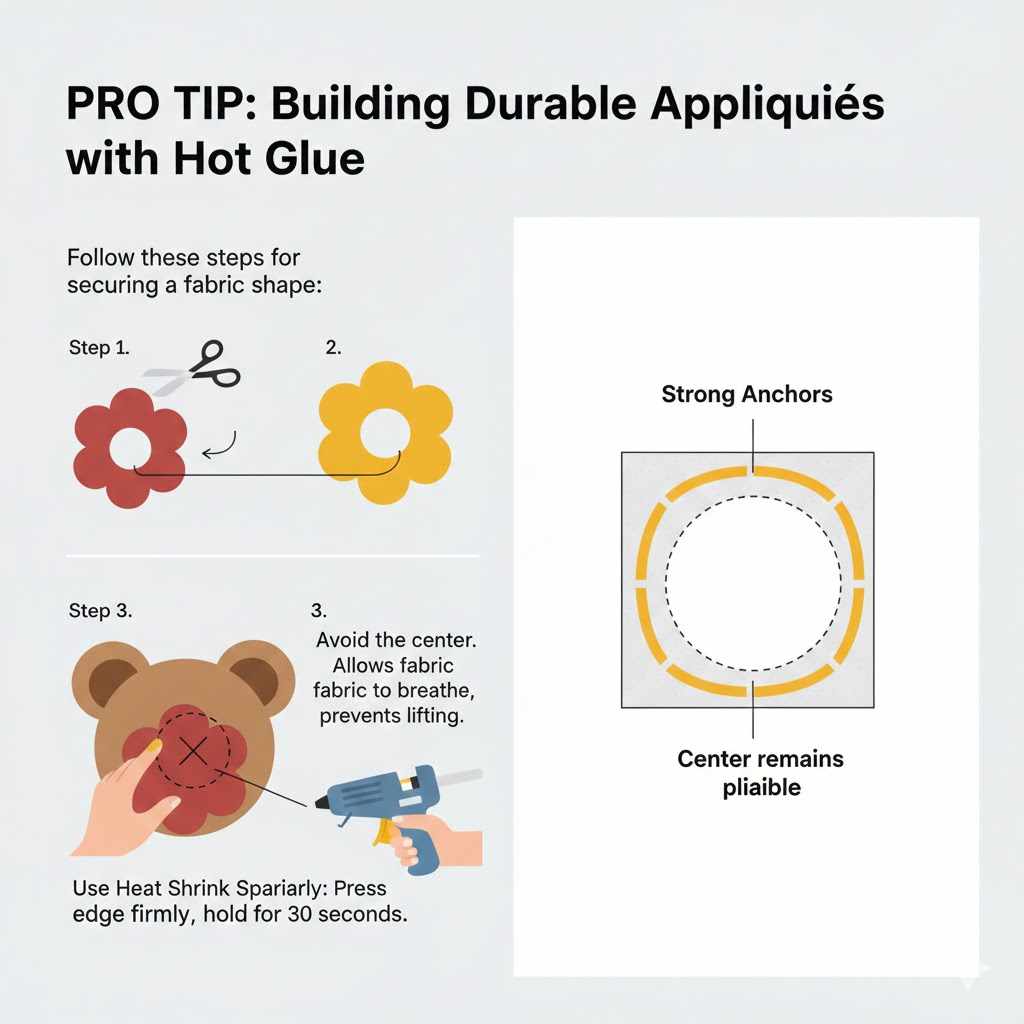
Pro Tip: Building Durable Appliqués with Hot Glue
Appliqué (layering pieces of fabric decoratively onto a base fabric) is a common craft. When using hot glue for this, think of it less as a permanent fixture and more as a series of strong anchors.
Follow these steps for securing a fabric flower or shape:
1. Cut the Backing Fabric: Cut the appliqué piece slightly larger than you need.
2. Glue Only the Edges: Run a very thin bead of low-temp glue around the outermost edge of the piece you are gluing down.
3. Avoid the Center: Leave the very center free of glue. This space allows the top fabric piece to breathe and prevents large areas from lifting awkwardly when pressed or slightly pulled.
4. Use Heat Shrink Sparingly: If you want the edges to lay completely flat against a curved surface (like a teddy bear’s ear), press the edge down firmly, then wait 30 seconds before moving to the next edge segment. Never let the heat source touch the fabric directly.
This method ensures the most critical part of the bond—the edge where stress occurs—is strong, while the center remains somewhat pliable.
Frequently Asked Questions (FAQs) About Hot Gluing Fabric
Here are the quick answers to the most common head-scratchers when mixing glue guns and textiles.
Q1: Can I iron fabric that has hot glue underneath it?
It is highly risky. Hot glue has a relatively low melting point. If you place a hot iron directly on the glue (even through the fabric), it will melt, spread, and permanently ruin the surrounding fibers. Only iron the area if you have thoroughly secured the bond using a specialized, washable adhesive beneath, and even then, use a very low heat setting with a thick pressing cloth.
Q2: Will hot glue hold silk permanently?
No. Silk is extremely smooth and delicate. Hot glue adheres poorly to it and often damages the fibers with heat. For silk, use a specific silk adhesive or embroidery backing stabilizer if you want a permanent, professional result.
Q3: How long does hot glue take to dry/cure on fabric?
Hot glue sets to the touch almost instantly—usually within 10 to 30 seconds depending on the glue and humidity. However, for a truly stable bond that won’t immediately lift when manipulated, you should leave it undisturbed for at least 5 to 10 minutes to ensure the cooling process is complete across the entire glue line.
Q4: Is hot glue washable when used on fabric?
In nearly all standard formulations, hot glue is not washable. Detergents and the heat of the water cycle will soften or dissolve the bond, causing the fabric to separate. Stick to hot glue for items that will only be spot-cleaned or displayed.
Q5: What temperature setting should I use on my dual-temp gun?
Always start with the Low setting (usually around 250°F / 120°C) when working with any fabric, especially synthetic materials like polyester or nylon. Use the High setting (closer to 380°F / 190°C) only for very heavy materials like thick canvas, rugged upholstery, or felt boards.
Q6: Can I use hot glue to temporarily hem clothing?
Yes, it’s a popular temporary fix! It holds well enough for a day or two. Just be aware that a few hours of wear, body heat, or sitting might cause the bond to weaken. It’s perfect for costumes that need a quick adjustment right before the event, but plan to sew it properly later.
Conclusion: Achieving Great Fabric Bonds with Your Glue Gun
You see? “Can you hot glue fabric to fabric?” is a resounding yes, provided you treat the process with a little mindfulness. The keys to success are matching your glue stick temperature to your fabric weight and applying a thin, deliberate layer of adhesive. By leaning on low-temperature sticks for delicate items and making sure you press firmly for a full set, you build confidence in your DIY skills.
Remember, your glue gun is a fantastic tool for fast craft fixes, decorations, and mock-ups. Embrace the speed, respect the heat, and enjoy creating sturdy, satisfying bonds in your next fabric project. Happy crafting!