How to Glue Veneer to Wood: PVA, Contact Cement or Hide Glue?
For most flat panels, cold-press PVA glue under even pressure is the best way to glue veneer to wood. Contact cement skips the clamps but can let veneer creep at the edges, and hide glue is the one you can undo later with heat and moisture. Picking wrong shows up as bubbles, bleed-through or lifted corners. This guide compares all three, explains open time and pressure, and shows how to fix veneer that has already lifted.
How to Glue Veneer to Wood: Which Adhesive Should You Use?
Best Veneer Glue Pick | |
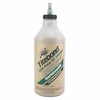 |
Titebond Cold Press for Veneer Glue, 32 oz, $11.79 A modified PVA made for veneer. The bottle label calls it nonflammable and formulated to minimize bleed-through, which are the two traits that matter most for the PVA route described below.
|
As an Amazon Associate we earn from qualifying purchases.
The right glue depends on the job, not on which one is “strongest.” Three questions settle it: can you apply even pressure across the whole panel, will you ever need to take the veneer off again, and how big is the surface? Use the table to match your job to an adhesive, then read the section for that glue.
| Your situation | Best adhesive | Why | Watch out for |
|---|---|---|---|
| Flat panel, tabletop or cabinet door, clamps or vacuum bag available | Cold-press PVA veneer glue | Rigid bond, long open time, water cleanup | Needs pressure until it sets; too much glue bleeds through thin veneer |
| Large sheet, countertop or door where clamping is impractical | Contact cement | Bonds on contact, no clamps | No repositioning; slow edge creep is possible; solvent types are flammable |
| Antique repair, marquetry or work you may need to reverse | Hide glue (hot or liquid) | Softens again with heat and moisture | Short working window; not for damp environments |
| Veneer that has lifted from an older piece | Match the glue already there, or inject PVA | See the repair table below | Do not force a fix that fights the old adhesive |
For laminating whole plywood sheets rather than thin veneer, a different glue comparison applies, covered in our guide to the best glue to laminate plywood. If you want the full veneering workflow from cutting to finishing, see how to veneer wood. If you are comparing specific products, see our roundup of the best adhesives for veneer on plywood. This page stays focused on the adhesive decision and the bonding step.
Cold-Press PVA: The Default for Flat Panels
Cold-press veneer glue is a PVA emulsion built for this one job. Titebond’s data sheet for its version lists an open assembly time of 15 minutes at 70 degrees F and 50 percent humidity, a minimum spread of about 6 mils (roughly 250 square feet per gallon), and an application temperature above 50 degrees F. It is rated for veneer on solid wood, particleboard, MDF, plywood and other porous materials, and the maker does not recommend it for exterior use or where moisture is likely.
Titebond Cold Press for Veneer: 15 minute open time, about 250 sq ft per gallon, application above 50 degrees F. Source: Titebond product data sheet
One practical point follows from those numbers: a 6 mil film is thin, so the instinct to slather glue on “to be safe” works against you.
The Open-Time Trap: Dry Veneer Drinks the Glue
The 15 minutes on the label is measured on the glue alone. Dry wood pulls water out of PVA, which shortens the time you really have. Wood scientist Gene Wengert made the point in a WoodWeb Q&A on veneer glue-ups:
“The adhesive open assembly time does not include the absorption of the wood.”
His suggested workaround in that thread was to wipe the veneer with a slightly damp cloth before gluing so it absorbs less from the adhesive. Treat that with care on thin or figured veneer, because added moisture can make it curl, so try it on an offcut first. The more reliable habits are to cut and dry-fit everything before the bottle opens, spread glue on the substrate only, and work one panel at a time. One production-door builder in the same thread reported spreading with a 4 inch roller and leaving panels in vacuum bags for 30 to 45 minutes.
How Much Pressure Does Veneer Need?
Numbers online conflict, so here are the ones that can be checked. Titebond’s sheet lists 100 to 250 psi “depending on substrates,” a figure for industrial cold presses. A home vacuum bag cannot reach that, because it can only use atmospheric pressure: about 14.7 psi at sea level, which works out to roughly 2,100 pounds per square foot (14.7 x 144). Clamps and cauls are the other home option, and their pressure depends entirely on how many clamps you use and how stiff the caul is.
| Pressure method | Typical home use | Strength | Weak point |
|---|---|---|---|
| Vacuum bag or press | Panels and curved work | Even over the whole face, up to about 14.7 psi | Equipment cost; leaks stop the bag from working |
| Clamps and flat cauls | Small and medium panels | Depends on clamp count and caul stiffness | Center of wide panels gets the least pressure |
| Veneer hammer (hide glue) | Marquetry, small repairs | Pressed by hand as the glue cools | Needs practice and hot glue |
| J-roller (contact cement) | Large sheets | Firm local pressure, center outward | Not enough for PVA; a WoodWeb contributor prefers a veneer hammer or scraper on movement-prone species such as maple |
Gluing Veneer With PVA, Step by Step
- Dry-fit and mark: lay the veneer on the substrate, check grain direction and seams, and cut it 1/8 to 1/4 inch oversize on every side so a small shift never leaves a bare edge.
- Prep the substrate: it should be flat, clean, dust-free and sanded smooth but not glossy. Fill dents and sand them flush, because veneer copies every flaw beneath it.
- Spread a thin film: roll or spread the glue on the substrate only, aiming for the even 6 mil coat the data sheet describes. Skip puddles and beads.
- Lay the veneer within the open time: position it without sliding it around in wet glue, then cover it with wax paper or plastic so excess glue never bonds to your caul.
- Apply pressure center-out: place the caul, then clamp or bag. Work from the middle toward the edges.
- Leave it alone: keep the panel under pressure for the time the glue maker specifies, then let it cure before trimming and sanding.
- Trim last: cut the overhang flush with a sharp knife or flush-trim bit, then sand lightly with the grain.
Bonding veneer to both faces matters as much as the glue. A one-sided panel can bow toward the unveneered face as the two sides take up moisture at different rates, so add a balancing veneer of similar thickness to the back, glued in the same session with the grain running the same direction.
Contact Cement: Fast, Clamp-Free, and Final
Contact cement is applied to both surfaces, allowed to dry to the touch, and then pressed together, where it grabs immediately. That makes it practical for large sheets, countertops and doors where clamping is impractical. The price is that you cannot slide the veneer into position once the two coated surfaces touch, so many woodworkers lay a sheet of paper or dowels between them and pull them out as they go.
Because the cured film stays somewhat flexible, many furniture makers reserve contact cement for work where small movement is acceptable, and use PVA for pieces meant to stay perfectly flat for decades. Many classic contact cements are also solvent-based and flammable, while water-based and nonflammable versions exist, so read the can before you start. Our guide to using Weldwood contact cement covers the types, coverage and application in depth, so this page does not repeat it.
Hide Glue: The Reversible Option
Hide glue is a protein adhesive. In traditional veneering, hot hide glue goes on the substrate, the veneer is laid on, and a veneer hammer is pushed from the center toward the edges to squeeze out excess glue. According to the Wikipedia entry on the veneer hammer, the metal head also helps cool the glue so it grabs and holds the veneer, and a failed area can be reheated with a household iron and pressed again with the hammer.
That reversibility is why restorers still choose it. A bubble or lifted corner on an old piece can often be fixed without stripping the whole panel, which is impossible with a cured PVA or contact cement bond. The tradeoff is a short working window and sensitivity to humidity, so it is a poor choice for kitchens, bathrooms or anything outdoors.
Bleed-Through and Figured Veneer
Bleed-through is glue seeping through the pores of thin veneer and blotching the surface, and it shows up when you finish the piece, not during glue-up. Open-grain and very thin veneers are most at risk. Reduce it by spreading a thin, even film on the substrate instead of the veneer, avoiding excess glue near edges, and choosing a glue designed for veneer. The Titebond bottle itself is labeled as formulated to minimize bleed-through.
Figured veneer such as curly maple needs extra care because it is brittle and wants to curl as it takes up moisture. Flatten it first, cut it oversize, and test your glue and pressure method on an offcut. A thin first coat of glue on porous substrate edges, such as MDF edges, before the main glue-up is a common way to limit soak-in; test it first on scrap.
How to Fix Veneer That Has Lifted
Partially dislodged veneer is one of the most common reasons people land on this topic. The right repair depends on the glue underneath, so work out what you are dealing with before you reach for an iron.
| Glue underneath | Repair that works | Details |
|---|---|---|
| Hide glue (older furniture) | Heat plus moisture, then press | Reactivate with a damp cloth and a medium-hot iron, then clamp flat. Woodworkers advise keeping the iron low because very hot glue can be ruined. |
| Contact cement | Iron with a cloth barrier | Per WoodWeb contributors, the iron reactivates the bond; hold the bubble flat until the adhesive sets, and inject a little more adhesive if the iron alone fails. |
| PVA or unknown | Slit, inject, clamp | Cut a fine slit along the grain, inject PVA with a syringe, cover with wax paper and a flat block, and clamp until dry. |
| Water damage under the veneer | Dry fully first | Moisture damage needs its own repair; see our guide to repairing water-damaged wood veneer. |
For lifting edges specifically, see how to glue wooden veneer edges without lifting, and for missing pieces, how to glue a veneer patch into damaged furniture. Cut with the grain when you slit a bubble. A slit along the grain is far less visible than a pin hole, and one WoodWeb contributor advises cutting through any phenolic backer too so trapped air can escape (WoodWeb discussion on bubbled veneer).
Keeping Veneer Stable After Glue-Up
Edge lift months later usually points to contact cement creep or too little edge pressure, and gaps at an edge usually mean the veneer was cut to exact size instead of oversize. Beyond that, veneered pieces like stable conditions: keep them out of direct sun and away from heat vents, since humidity swings drive most long-term movement. If you are covering a veneered cabinet with paint rather than glue, our guide to painting wood veneer cabinets covers that process.
Safety Notes
- Ventilation: contact cement and some adhesives give off strong fumes, so work with airflow and follow the label.
- Fire: solvent-based contact cement is flammable. Keep flames, pilot lights and sparks away, and note that a nonflammable PVA such as Titebond Cold Press carries that label on the bottle.
- Heat: when reactivating glue with an iron, keep a cloth or paper barrier between iron and veneer and keep the iron moving. Hot hide glue can burn skin.
- Cutting: veneer knives and flush-trim bits are sharp; keep fingers behind the cut and wear eye protection when trimming.
Frequently Asked Questions
What is the best glue for wood veneer?
Cold-press PVA veneer glue is the best choice for most flat veneer work, because it gives a rigid bond with a long open time when the panel is held under even pressure. Contact cement suits large surfaces where clamping is impractical, and hide glue suits reversible work like marquetry or antique repair.
Can you use regular wood glue for veneer?
You can, but a glue made for veneer is safer. General PVA wood glue can bleed through thin veneer, and the general-purpose Titebond III was described on WoodWeb as having a 10 minute open time against 15 for its veneer glue. A cold-press veneer glue is formulated to minimize bleed-through and gives you more working time.
Is contact cement good for veneer?
It works well for large sheets, countertops and doors because it bonds on contact with no clamping. The tradeoffs are that you cannot reposition the veneer once the surfaces touch, solvent versions are flammable, and the flexible bond can allow slow edge creep on pieces meant to stay flat for years.
How long should veneer stay clamped?
Follow the glue maker. One production builder on WoodWeb reported leaving panels in vacuum bags for 30 to 45 minutes, but that depends on glue, temperature and humidity. Check the data sheet for your glue, and let the glue cure fully before trimming and finishing.
Do you have to veneer both sides of a panel?
In most cases yes. Veneering one face lets that side take up and release moisture differently from the bare face, which can bow the panel. A balancing veneer of similar thickness on the back keeps both sides moving together.
How do you fix veneer that is coming loose?
Identify the old glue first. Hide glue can often be reactivated with heat and moisture, and contact cement with an iron over a cloth barrier. For PVA or unknown glue, slit along the grain, inject PVA with a syringe, cover with wax paper and a flat block, and clamp until dry.
Bottom Line
Choose cold-press PVA when you can press the whole panel evenly, contact cement when size makes clamping impractical, and hide glue when you may need to take the work apart again. Cut veneer oversize, spread glue thin on the substrate, work inside the real open time, and balance both faces. Do those four things and most veneer failures never happen.
Sponsored / affiliate links. As an Amazon Associate I earn from qualifying purchases. I may earn additional commission from eligible campaigns.