Can You Use Latex Paint on Metal Pro Guide
Many folks wonder if latex paint is a good choice for metal surfaces. It might seem a bit tricky at first, especially if you’re new to painting. But don’t worry!
This guide is here to help. We’ll walk through exactly what you need to know to get a great finish. Get ready for simple steps that will make painting metal easy.
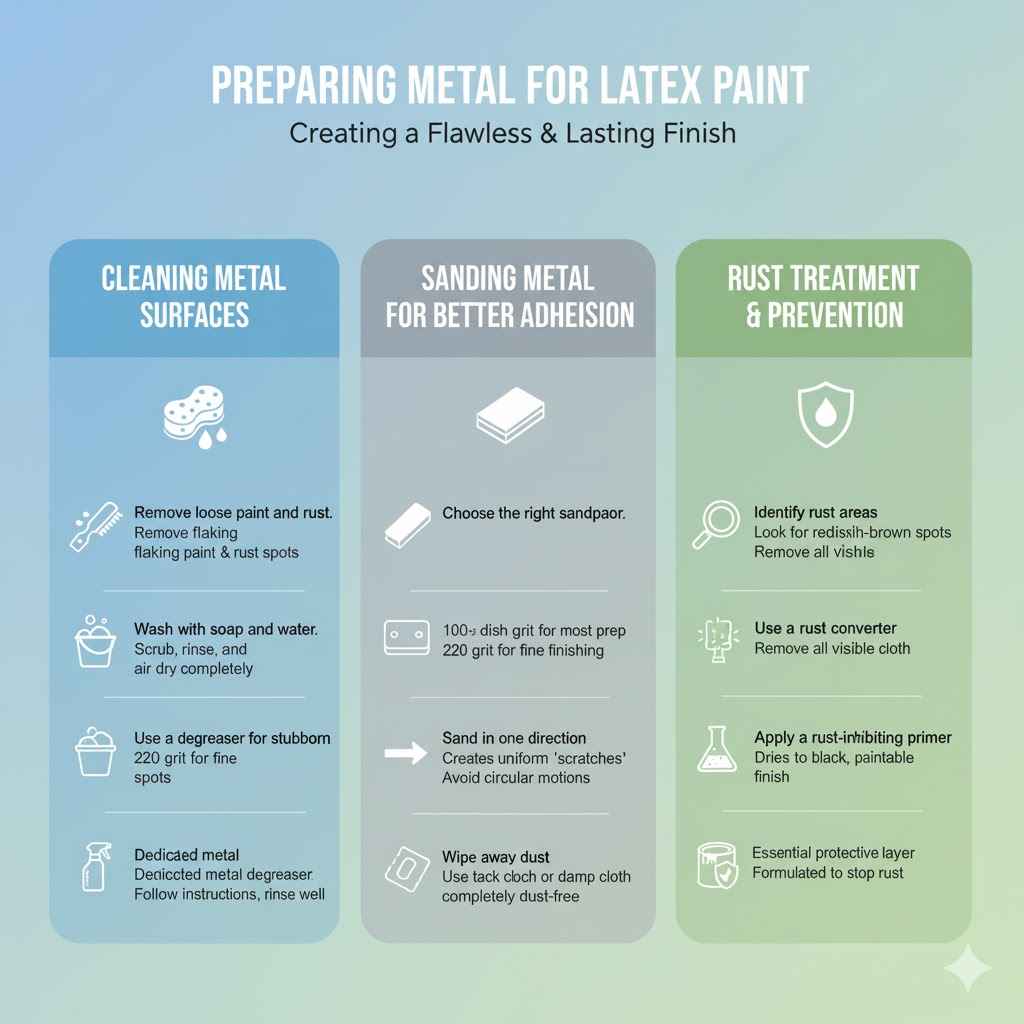
Preparing Metal for Latex Paint
Getting metal ready is the most important step for any paint job, especially with latex. If you skip this, your paint might not stick well or could peel off later. It’s all about creating a clean, smooth surface for the paint to grip.
This section covers how to clean and prep metal so your latex paint job looks fantastic and lasts a long time.
Cleaning Metal Surfaces
Before you even think about painting, you must clean the metal. Dirt, grease, and old paint can stop new paint from sticking. A clean surface is key for a lasting finish.
- Remove loose paint and rust. Use a wire brush or sandpaper to scrape away any flaking paint or rust spots. This ensures you are painting over a solid surface, not loose material.
- Get into all the nooks and crannies to remove as much as possible. You want a smooth base.
- Wash with soap and water. Mix mild dish soap with warm water. Use a clean cloth or sponge to scrub the entire metal surface.
- This will remove grease, grime, and any leftover dust. Rinse the surface thoroughly with clean water to get rid of all soap residue. Let it air dry completely.
- Use a degreaser for stubborn spots. For oily or greasy areas, a dedicated metal degreaser works wonders. Follow the product instructions carefully.
Make sure to rinse well afterward. Proper cleaning prevents paint adhesion problems later on.
Sanding Metal for Better Adhesion
Sanding creates a slightly rough surface. This roughness helps the primer and paint grab onto the metal better. It’s like giving the paint tiny little grips to hold onto.
- Choose the right sandpaper. For most metal prep, sandpaper with a grit of 100 to 150 is a good starting point. If the metal is very smooth or has some imperfections, you might go a bit coarser.
- For very fine finishing before painting, you might use a finer grit like 220.
- Sand in one direction. When you sand, try to go in a consistent direction. This creates uniform “scratches” that the paint can adhere to.
- Avoid sanding in circles, which can create swirl marks that might show through the paint.
- Wipe away dust. After sanding, use a tack cloth or a damp cloth to wipe away all the sanding dust. This is very important.
Any dust left behind will make your paint job look bumpy and rough. Ensure the surface is completely dust-free before moving to the next step.
Rust Treatment and Prevention
Rust is metal’s enemy. If you don’t deal with it, it will spread and ruin your paint job. Treating rust now saves a lot of trouble later.
- Identify rust areas. Look for any reddish-brown spots or powdery residue. These are signs of rust.
- It’s crucial to remove all visible rust. If you paint over rust, it will continue to grow under the paint, causing it to bubble and peel.
- Use a rust converter. A rust converter chemically changes rust into a stable, paintable surface. Apply it according to the manufacturer’s directions.
- It usually dries to a black, primer-like finish. This is a great way to treat rust that’s hard to remove completely.
- Apply a rust-inhibiting primer. After treating or removing rust, always use a primer that is specifically designed to stop rust. This adds an extra layer of protection.
Priming is essential for metal surfaces that might be exposed to moisture.
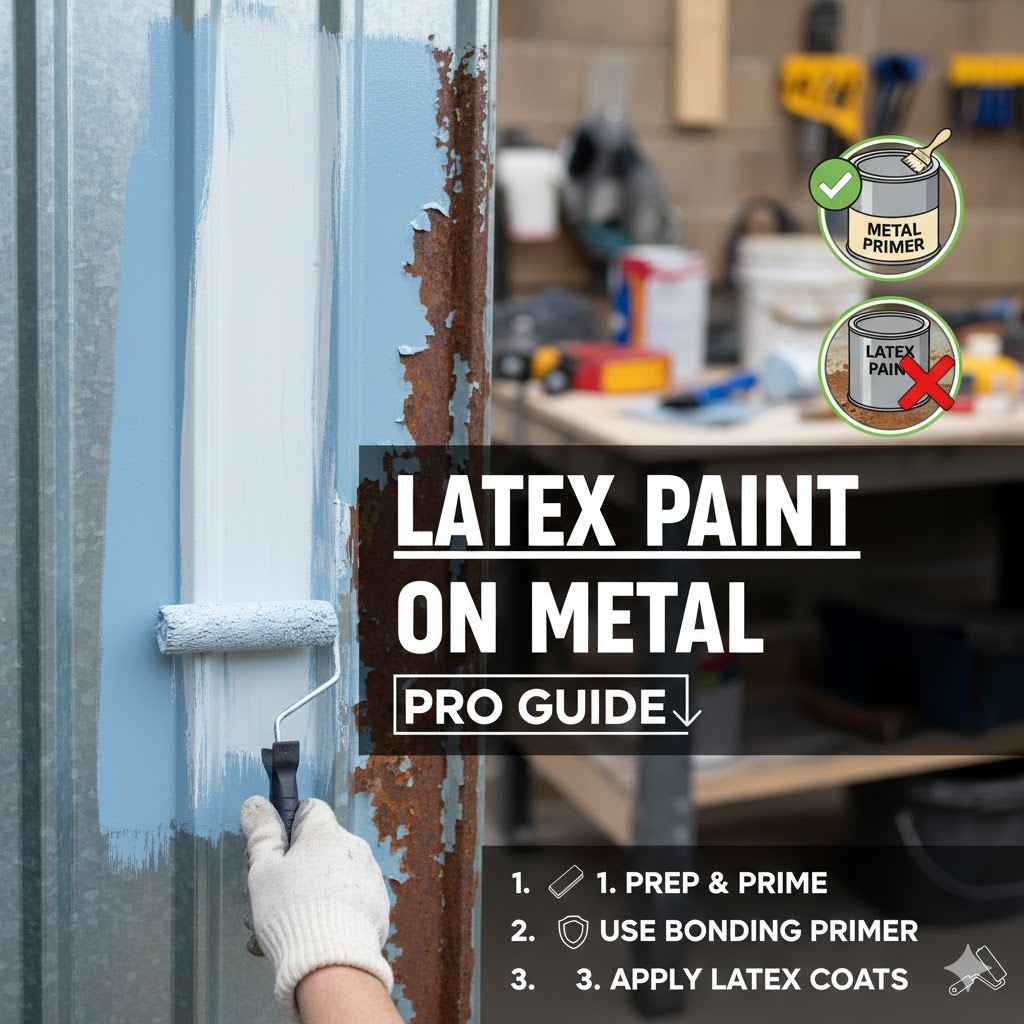
Can You Use Latex Paint on Metal? The Answer
So, can you use latex paint on metal? The short answer is yes, but with some important steps. Latex paint, also known as water-based paint, is becoming more popular for many surfaces.
It’s easier to clean up and often has less odor than oil-based paints. For metal, success depends heavily on proper preparation and using the right products alongside the latex paint.
Latex Paint Properties
Latex paint is made with acrylic polymers. These polymers form a flexible, durable film when the paint dries. This flexibility is actually a benefit for metal, as metal can expand and contract with temperature changes.
The paint can move with the metal without cracking as easily as some older paint types might.
- Flexibility and expansion. Unlike rigid paints, latex formulas can stretch and shrink. This is important because metal, especially outdoors, goes through temperature changes.
- It expands when hot and shrinks when cold. Latex paint can better handle this movement without becoming brittle and cracking.
- Water cleanup. One of the biggest advantages of latex paint is that brushes, rollers, and spills can be cleaned up with just soap and water. This makes the painting process and cleanup much simpler and more pleasant.
- It’s a great feature for DIYers.
- Low VOCs. Many latex paints have lower volatile organic compounds (VOCs) compared to oil-based paints. This means they release fewer fumes into the air.
This makes them a healthier choice for indoor projects and more environmentally friendly.
The Role of Primer
Primer is your best friend when painting metal with latex paint. It’s the bridge between the metal surface and your topcoat of latex paint. Without the right primer, latex paint alone might not stick well to smooth metal.
- Adhesion promotion. A good metal primer is formulated to bond strongly to metal surfaces. It creates a surface that the latex paint can easily adhere to.
- Think of it as a sticky base coat that the top paint loves to grab onto.
- Corrosion resistance. Many metal primers also contain rust inhibitors. This is crucial for protecting the metal from moisture that can cause rust.
- Even if you think your metal is clean, a rust-inhibiting primer adds an extra layer of defense.
- Surface uniformity. Primer can help to cover minor imperfections and create a more uniform color. This means your final coat of latex paint will look smoother and more even.
It also helps with color consistency, especially if you are painting over a dark or stained surface.
Types of Metal Suitable for Latex Paint
Many common metals can be painted with latex paint, provided you follow the preparation steps. This includes things like steel, iron, aluminum, and galvanized metal. Each might have slight differences in how they react, but the core principles of cleaning, priming, and painting remain the same.
- Ferrous metals like steel and iron. These metals are prone to rust. So, thorough rust removal and a rust-inhibiting primer are absolutely essential.
- Once primed, they accept latex paint well. Examples include garden furniture, railings, and structural beams.
- Aluminum and its alloys. Aluminum is naturally corrosion-resistant because it forms a protective oxide layer. However, it’s a very smooth surface, so sanding and a good primer are still needed for latex paint to stick.
- Think of aluminum window frames or outdoor signage.
- Galvanized metal. This is steel coated with zinc. The zinc coating can sometimes react with paint.
A special primer for galvanized surfaces is often recommended to ensure the latex paint adheres properly and to prevent any chemical reactions.
Painting Metal With Latex Paint Step-By-Step
Now that you know it’s possible, let’s get down to the practical steps. Following this guide will help you achieve a professional-looking finish on your metal items using latex paint. This process is straightforward and designed for anyone to follow.
Applying Primer to Metal
The primer coat is the foundation of your paint job. It’s where you ensure the latex paint has something to stick to and where you build in protection.
- Choose the right primer. Select a high-quality metal primer. Look for terms like “rust-inhibiting,” “direct-to-metal (DTM),” or “multi-surface.” For galvanized metal, use a primer specifically labeled for it.
- Check the primer’s label to confirm it’s suitable for use under latex paint.
- Apply the primer. Use a good quality brush or roller for smooth application. Apply a thin, even coat.
- Avoid thick, gloppy layers, which can lead to drips and an uneven finish. Ensure you cover all areas, including edges and corners.
- Allow primer to dry completely. Follow the manufacturer’s instructions for drying times. This is crucial.
- Trying to paint over wet primer can ruin the adhesion and the finish. Most primers need at least a few hours to dry, and some may need up to 24 hours.
- Lightly sand the primer. Once the primer is fully dry, you can optionally sand it lightly with very fine-grit sandpaper (220 or higher). This creates an ultra-smooth surface for the topcoat.
Wipe away all dust with a tack cloth afterward. This extra step leads to a much smoother final look.
Applying Latex Paint Topcoats
This is where your metal object gets its color! Apply the latex paint in thin, even coats for the best results. Patience here pays off in a beautiful finish.
- Select your latex paint. Choose a high-quality interior or exterior latex paint depending on where the metal object will be. For outdoor use, ensure the paint is rated for exterior durability and weather resistance.
- Semi-gloss or satin finishes often hide imperfections better on metal than flat finishes.
- Apply the first coat. Use a good quality brush or a high-density foam roller. Apply a thin, even layer.
- Work in one direction to avoid brush marks. If you are using a roller, avoid pressing too hard, which can cause drips.
- Allow the first coat to dry. Check the paint can for recommended drying times between coats. This is usually several hours.
- Rushing this step can cause the paint to peel or not adhere properly.
- Apply subsequent coats. Most projects will require two to three thin coats of latex paint for full coverage and durability. Apply each coat thinly and evenly, allowing sufficient drying time between each layer.
- Two thin coats are always better than one thick, uneven coat.
- Allow paint to cure. Drying time is when the paint is dry to the touch. Curing time is when the paint reaches its maximum hardness and durability.
This can take several days to a few weeks, depending on the paint and conditions. During this time, be gentle with the painted surface to avoid damage.
Drying and Curing Times Explained
Understanding the difference between drying and curing is vital for a long-lasting paint job on metal. It’s easy to think that once the paint looks dry, it’s ready for anything, but that’s not quite the case.
- Drying time. This is the period when the paint’s solvent (water for latex paint) evaporates. The paint becomes dry to the touch.
- You can usually apply a second coat after this time. It typically takes a few hours for latex paint to dry. Factors like humidity and temperature can affect this.
- Curing time. This is a longer process where the paint film fully hardens and reaches its ultimate durability. Chemical reactions continue to happen within the paint as it cures.
- During curing, the paint is still vulnerable to scratches, dents, and chemicals. It’s best to avoid heavy use or exposure to harsh cleaning agents until the paint has fully cured.
- Factors affecting time. Temperature, humidity, and airflow all play a role. Warmer, drier conditions with good airflow speed up both drying and curing.
Cooler or more humid environments slow it down significantly. Always refer to the paint manufacturer’s guidelines, as these are usually based on ideal conditions.
Troubleshooting Common Issues
Sometimes, despite best efforts, minor issues can pop up. Knowing how to fix them can save your project.
- Paint not sticking. This usually means the surface wasn’t prepped properly. There might have been grease, dust, or rust that wasn’t removed.
- Or, the wrong type of primer was used. For a quick fix, you might need to scrape off the peeling paint, re-prep the area, and re-prime and repaint.
- Runs and drips. These happen when too much paint is applied at once or if the paint is too thin. For minor drips, you can often gently sand them down once dry and reapply a thin coat.
- For major runs, you might need to scrape them off and start that area again.
- Uneven finish. This can be due to poor application technique, not stirring the paint enough, or using a poor-quality brush or roller. Ensure you stir your paint thoroughly before and during use.
Use high-quality tools for a smoother application.
Benefits of Using Latex Paint on Metal
Using latex paint on metal offers several advantages that make it a popular choice for many projects. It’s not just about convenience; there are real performance benefits too.
Environmental and Health Benefits
Latex paints are often a healthier choice for both you and the environment. This makes them a preferred option, especially for indoor projects or in areas with limited ventilation.
- Lower VOC emissions. Volatile Organic Compounds (VOCs) are chemicals that can be released into the air as paint dries. These can cause fumes and affect air quality.
- Latex paints, especially low-VOC or zero-VOC varieties, release far fewer of these harmful compounds.
- Easier cleanup. As mentioned, latex paint cleans up with water. This means no harsh chemical solvents are needed.
- This is safer for your skin and reduces the amount of hazardous waste you produce from cleaning brushes and rollers.
- Reduced odor. The fumes from oil-based paints can be strong and lingering. Latex paints typically have a much milder odor, making the painting process more pleasant and less disruptive, especially if you are painting indoors.
Durability and Flexibility for Metal
When applied correctly, latex paint can provide a durable and long-lasting finish on metal surfaces. Its inherent flexibility is a major plus for metal applications.
Withstands temperature changes. Metal expands and contracts with heat and cold. Latex paint’s flexibility allows it to move with the metal.
This prevents the paint film from cracking or becoming brittle over time, which is common with less flexible paints.
Resists chipping and peeling. When applied over a properly primed surface, latex paint creates a strong bond. The flexibility helps it resist chipping and peeling that can occur when rigid paint films are stressed by movement or impact.
Good weather resistance. Many exterior-grade latex paints are formulated to withstand UV rays, moisture, and general weathering. This makes them suitable for outdoor metal items like patio furniture, fences, and metal sheds.
Cost-Effectiveness and Availability
Latex paint is widely available and can be a budget-friendly option. The ease of use and cleanup also contribute to its overall cost-effectiveness for DIY projects.
- Wide range of colors. Latex paints come in an enormous spectrum of colors, from basic neutrals to vibrant hues. You can find them in most hardware and paint stores, and many can be custom-mixed to your exact shade.
- Affordable pricing. Generally, latex paints are competitively priced, and often more affordable than high-quality oil-based paints. This makes them an accessible option for large projects or for those on a tighter budget.
- Easy to find. You can find latex paints at virtually any store that sells paint supplies. This makes them convenient to purchase for your next project.
The availability also means a wide selection of brands and finishes to choose from.
When Not to Use Latex Paint on Metal
While latex paint is versatile, there are some situations where it might not be the best choice for metal. Knowing these exceptions helps you pick the right product for your specific needs.
High-Heat Applications
If the metal object will be exposed to very high temperatures, like an engine part or a grill surface, latex paint is not suitable. Standard latex paints will likely burn, discolor, or peel off.
- Engine components. Parts of a car engine get extremely hot. Regular latex paint would degrade quickly.
- You need specialized high-heat engine enamel for these applications.
- Barbecue grills. Grills reach temperatures that can cause latex paint to blister and burn. Heat-resistant grill paint is designed to withstand these intense conditions and maintain its integrity.
- Exhaust pipes. Car or motorcycle exhaust systems also get very hot. Only high-temperature paints formulated for extreme heat should be used here to ensure safety and durability.
Immersion in Water
For metal that will be constantly submerged in water, like boat hulls or pipes in a pool, latex paint may not offer sufficient protection. Specialized marine or epoxy coatings are usually better suited for these environments.
- Boat hulls. A boat hull is constantly exposed to water, which can lead to blistering and delamination of standard paints. Marine-grade coatings are designed to resist water penetration and prolonged submersion.
- Underwater fixtures. Any metal fixture that will be permanently underwater, such as in a fountain or pond, needs a coating that can withstand constant moisture without breaking down. Epoxy coatings are often recommended.
- Pipes in high-moisture areas. While not fully submerged, pipes in areas like crawl spaces or very damp basements might benefit from more robust, moisture-resistant coatings than standard latex paint offers.
Heavily Abused Surfaces
For metal surfaces that will experience significant abrasion, impacts, or heavy use, other paint types might offer better durability. For example, a workshop tool or industrial equipment.
- Industrial machinery. Machines in factories often face constant wear and tear, impacts, and exposure to chemicals. Heavy-duty industrial coatings or epoxy paints provide superior protection in these demanding conditions.
- High-traffic metal floors. Metal flooring in areas with heavy foot traffic or vehicles might require more resilient coatings like epoxy floor paints or specialized industrial floor coatings to withstand the constant abrasion.
- Tools and equipment. Tools that are constantly handled, dropped, or scraped might wear down latex paint quickly. For these, consider tougher finishes like spray-on truck bed liners or industrial-grade spray paints designed for impact resistance.

Frequently Asked Questions
Question: Can I paint over old, chipping paint on metal with latex paint?
Answer: It’s best not to paint directly over old, chipping paint. You need to scrape off all the loose and peeling paint first. Then, sand the surface smooth.
After that, clean the area thoroughly, prime it with a metal primer, and then apply your latex paint. This ensures the new paint has a solid surface to stick to.
Question: Do I need a special type of latex paint for metal?
Answer: While you can use regular interior or exterior latex paint, it’s highly recommended to use a high-quality primer specifically designed for metal. This primer is crucial for adhesion and rust prevention. Some paint lines offer “direct-to-metal” (DTM) latex paints, which combine primer and paint but still require good surface prep.
Question: How many coats of latex paint do I need on metal?
Answer: For most metal projects, two to three thin coats of latex paint are usually sufficient. This provides good coverage, durability, and a smooth finish. Always apply thin coats rather than one thick one, and allow proper drying time between each coat for the best results.
Question: Will latex paint peel off smooth metal like aluminum?
Answer: Latex paint can peel off very smooth surfaces like aluminum if not properly prepared. Smooth metals require thorough cleaning, light sanding to create some “tooth,” and then a high-quality metal primer designed for adhesion. The primer is what helps the latex paint grip the smooth surface.
Question: Can latex paint be used on rusty metal without treating the rust?
Answer: No, you should never paint over rust with latex paint without treating it first. Rust will continue to spread underneath the paint, causing it to bubble, flake, and fail. Always remove as much rust as possible and use a rust converter or a rust-inhibiting primer before applying any paint, including latex.
Conclusion
Yes, you can absolutely use latex paint on metal with excellent results. The key is thorough preparation, including cleaning and priming. Always use a quality metal primer designed for adhesion and rust protection before applying your chosen latex paint.
With the right steps, you’ll achieve a beautiful, durable finish that lasts.