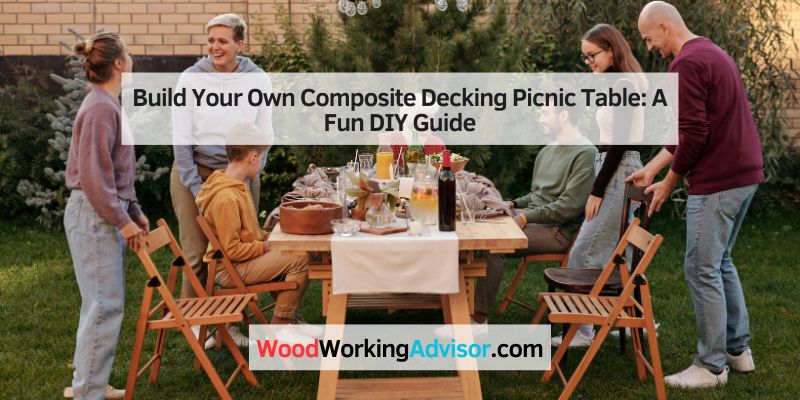
Build Your Own Composite Decking Picnic Table: A Fun DIY Guide
I built my first composite decking picnic table last summer for my backyard. My kids wanted a sturdy table for picnics, and I wanted something easy to clean and weather-proof. This project was fun, simple, and saved money compared to buying a fancy outdoor table. In this article, I’ll share how you can build your own table. You’ll learn what composite decking is, get a step-by-step guide, and find tips to make it easy. Whether you’re new to DIY or a pro, this guide is for you. Let’s get started!
What Is a Composite Decking Picnic Table?
A composite decking picnic table is an outdoor table made from composite decking boards. These boards mix wood fibers and plastic to create a strong, weather-resistant material.
Why Use Composite Decking?
Composite decking is perfect for outdoor furniture. It doesn’t rot, splinter, or need much care. Unlike wood, it handles rain, sun, and snow well. I love that my table stays smooth and looks great all year.
How It Compares to Wood
Wood tables are cheaper but need constant upkeep. They can crack or warp in bad weather. Composite decking lasts longer and saves time. However, it costs more upfront and can get hot in direct sun.
Why Build Your Own Composite Decking Picnic Table?
Building your own table is rewarding. You save money and make exactly what you want. My table fits our small deck perfectly, and I picked a color to match our house. Plus, it’s a fun project to do with family or friends.
Benefits of a DIY Picnic Table
- Customizable: Choose the size, shape, and color you like.
- Durable: Composite decking lasts 25+ years with little maintenance.
- Eco-Friendly: Many brands, like Trex, use recycled materials.
Drawbacks to Consider
- Cost: Composite boards are pricier than wood.
- Weight: The table is heavy, so plan to build it near its final spot.
- Heat: Dark colors can get hot in the sun, so choose wisely.
Step-by-Step Guide to Building a Composite Decking Picnic Table
Here’s how I built my 8-foot-long picnic table. It seats eight people and uses composite decking for the tabletop and benches. Follow these steps for your own.
Tools You’ll Need
You don’t need fancy tools. Here’s what I used:
- Drill: For screws and pre-drilling holes.
- Saw: A circular saw cuts composite boards cleanly.
- Measuring Tape: To get sizes right.
- Screws: Use stainless steel screws for composite decking.
- Safety Gear: Wear gloves and safety glasses.
Materials for Your Table
I used affordable materials from my local hardware store. Here’s a list:
| Material | Quantity | Cost (Approx.) |
|---|---|---|
| Composite Decking Boards (5.5” x 8’) | 6 | $150–$200 |
| Pressure-Treated 2x4s | 8 | $40–$60 |
| Stainless Steel Screws | 100 | $20–$30 |
| Wood Glue | 1 bottle | $5 |
Caption: Table comparing materials for a composite decking picnic table.
Step-by-Step Instructions
- Plan Your Design: I sketched a simple 8’x3’ table with two benches. A diagram of the frame and board layout helps.
- Build the Frame: Use 2x4s to make a rectangular table frame. Add diagonal braces for strength.
- Cut Composite Boards: Measure and cut six 8-foot boards for the tabletop and benches.
- Attach Boards: Screw boards to the frame using stainless steel screws. Pre-drill holes to avoid cracking.
- Build Benches: Make two bench frames with 2x4s. Attach composite boards on top.
- Secure Everything: Check all screws are tight. Add glue for extra hold.
- Place Your Table: Move it to your backyard or deck. Get help—it’s heavy!
Suggested Visual Ideas
- Diagram 1: A sketch showing the table frame with labeled parts (legs, braces).
- Diagram 2: A top-down view of board placement for the tabletop.
- Photo Idea: A finished table with a picnic setup to show size.
Tips for Success from My Experience
I made mistakes building my first table. Here are tips to help you:
- Choose Light Colors: Dark composite boards get hot in the sun. I picked a light gray to keep it cool.
- Check Joist Spacing: Composite decking sags if supports are too far apart. Use 12-inch spacing, not 16 inches.
- Use Hidden Fasteners: Screws on top can look messy. Try hidden clips for a cleaner look.
Common Mistakes to Avoid
- Skipping Pre-Drilling: Composite boards can split without pre-drilled holes.
- Using Wrong Screws: Regular screws rust. Always use stainless steel.
- Ignoring Weight: Plan where to place the table before building—it’s hard to move.
Comparing Composite Decking Brands
Not all composite decking is the same. I compared three popular brands for my project.
| Brand | Pros | Cons | Cost per Board |
|---|---|---|---|
| Trex | Durable, eco-friendly, many colors | Expensive, can get hot | $25–$35 |
| Fiberon | Affordable, recycled materials | Less rigid, may sag | $20–$30 |
| TimberTech | Long warranty, premium look | Very pricey | $30–$45 |
Caption: Table comparing top composite decking brands for picnic tables.
Cost-Saving Ideas
Building a composite decking picnic table can be budget-friendly. Here’s how I saved money:
- Use Leftover Boards: I used scraps from a deck project to cut costs.
- Shop Sales: Check Home Depot or Lowe’s for deals on composite boards.
- Build Smaller: A 6-foot table uses fewer boards than an 8-foot one.
Safety Tips for Your Project
Safety matters when building. Follow these tips:
- Wear gloves to avoid splinters from cutting boards.
- Use safety glasses when sawing composite decking.
- Work in a shaded area to avoid overheating boards during assembly.
Other Options for Outdoor Tables
If composite decking isn’t right for you, try these:
- Cedar Wood: Looks great, resists weather, but needs sealing yearly.
- Pressure-Treated Wood: Cheap but may splinter or warp over time.
- PVC Decking: Lightweight and durable but more expensive than composite.
| Material | Durability | Maintenance | Cost |
|---|---|---|---|
| Composite Decking | High | Low | $$$ |
| Cedar Wood | Medium | High | $$ |
| Pressure-Treated Wood | Low | High | $ |
Caption: Table comparing outdoor table materials.
Conclusion
Building a composite decking picnic table is a fun, rewarding project. It’s strong, looks great, and lasts for years with little work. My table has been the star of our backyard barbecues, and my kids love it for crafts. You can build one too, even if you’re new to DIY. Pick your materials, follow the steps, and enjoy your new table. Share your project with friends or on social media—I’d love to see it! Grab your tools and start building today!
Frequently Asked Questions
What Is Composite Decking Made Of?
Composite decking mixes wood fibers and plastic. It’s strong, weather-resistant, and eco-friendly. Brands like Trex use recycled materials, making it a green choice for picnic tables. It doesn’t splinter or rot, perfect for outdoor use.
How Much Does a Composite Decking Picnic Table Cost?
Costs range from $200–$400, depending on size and brand. I spent $250 using Trex boards and 2x4s. Check for sales at Home Depot to save money. Leftover boards from other projects can lower costs too.
Can I Paint or Stain Composite Decking?
Painting or staining isn’t recommended for composite decking. It comes in many colors, so pick one you like. Painting can peel, and stains don’t stick well. Choose a light color to avoid heat buildup.
How Do I Clean a Composite Decking Picnic Table?
Cleaning is easy. Use soap, water, and a soft brush to remove dirt. Avoid harsh chemicals or pressure washers over 2,500 psi—they can damage the surface. I rinse mine monthly, and it looks new.
Does Composite Decking Get Too Hot?
Dark composite boards can get hot in direct sun, reaching 140°F. I chose light gray to keep it cooler. Place your table in a shaded area or use an umbrella to reduce heat.
How Long Does a Composite Decking Picnic Table Last?
Composite decking tables last 25–30 years with proper care. They resist fading, warping, and rot. My table’s been outside a year and still looks great. Check warranties from brands like TimberTech for details.
Can Beginners Build a Composite Decking Picnic Table?
Yes, beginners can do it! My guide uses simple steps and basic tools. Start with a small table, follow the instructions, and ask for help moving it. You’ll be proud of your new table