The Ultimate Guide to Corner Wood Stove Hearth Pads: Safety, Style, and Savings
Hey there! If you’re thinking about adding a wood stove to your home, or maybe you already have one tucked into a cozy corner, you’ve probably heard about corner wood stove hearth pads. Let me tell you, they’re more than just a practical necessity—they’re a game-changer for both safety and style. I’ve spent years exploring home improvement projects, and installing a wood stove with a proper hearth pad was one of my favorite upgrades.
It transformed my living space into a warm, inviting haven while keeping safety first. In this guide, I’m going to walk you through everything you need to know about corner wood stove hearth pads—why they’re essential, how to choose the right one, and even how to build your own. Whether you’re a DIY enthusiast or just want to make an informed purchase, I’ve got you covered. Let’s dive in!
Why You Need a Corner Wood Stove Hearth Pad
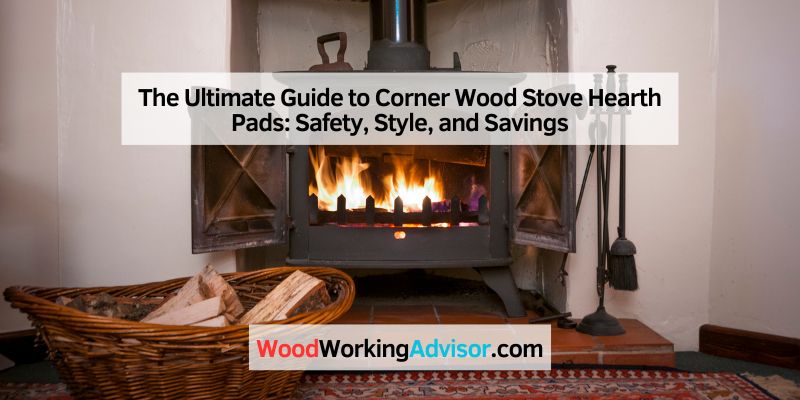
Picture this: a chilly winter evening, your wood stove crackling away, casting a warm glow across the room. Sounds perfect, right? But without a hearth pad, that cozy scene could turn risky fast. Wood stoves get incredibly hot—sometimes up to 900°F—and embers can pop out when you open the door to add logs. A corner wood stove hearth pad is your first line of defense against floor damage or, worse, a fire hazard.
These pads are designed to sit beneath your stove, protecting your flooring from heat, sparks, and ash. If you’ve got wood, carpet, or even laminate floors, a hearth pad is non-negotiable. When I installed my wood stove, I learned the hard way that skipping this step isn’t an option—my pine floors would’ve been toast without one. Plus, hearth pads add a polished look, especially in a corner setup where space is tight. They’re not just about safety; they’re about making your stove the star of the room.
Understanding Hearth Pad Requirements
Before you pick out a hearth pad, you need to know the rules. Fire codes in the USA, like those from the National Fire Protection Association (NFPA), set clear guidelines to keep your home safe. For a corner wood stove, the hearth pad typically needs to extend at least 8 inches beyond the stove’s sides and back and 18 inches in front. Why the extra space in front? That’s where the door opens, and hot embers are most likely to land.
There are two types of hearth pads: Type 1 (ember protection) and Type 2 (thermal protection). Type 1 is simpler—just a non-combustible surface like tile or metal to catch sparks. Type 2 adds insulation to protect against heat transfer, which is crucial if your stove sits on a combustible floor. My stove required a Type 2 pad because of my wood floors, and I used a material called Micore 300 with an R-value of 1.03 to meet the code. Check your stove’s manual for specific requirements, as every model is different. Trust me, getting this right avoids headaches with inspectors or insurance companies later.
Choosing the Right Materials for Your Hearth Pad
When I started shopping for a hearth pad, I was amazed by the variety of materials out there. You can go as simple or as fancy as you want, depending on your budget and style. Here’s a quick rundown of the most popular options:
- Tile: Ceramic or porcelain tiles are affordable and come in endless colors and patterns. I went with slate tiles for a rustic vibe that matched my cabin-style living room.
- Stone: Granite, marble, or flagstone give a high-end look but can be pricey. They’re super durable and naturally fire-resistant.
- Brick: Classic and budget-friendly, bricks let you create patterns like herringbone for a custom touch.
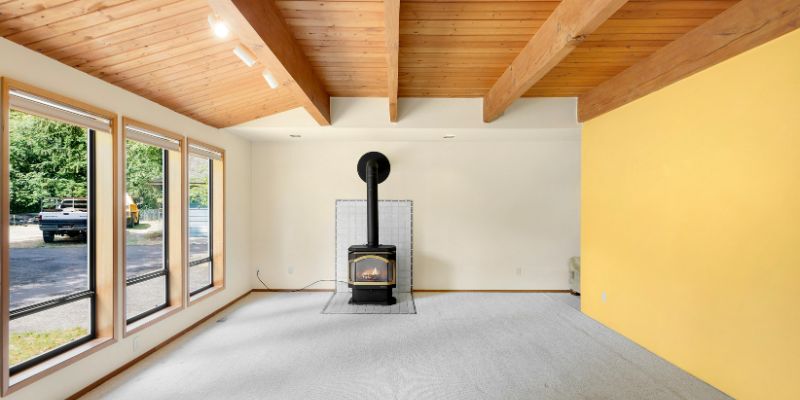
- Metal: Steel or aluminum sheets are sleek and modern, often used for Type 1 ember protection. They’re great for minimalist homes.
- Concrete: A poured concrete slab is sturdy and can be stained for a unique finish. It’s a solid choice for a modern or industrial aesthetic.
Here’s a table to help you compare these materials based on cost, durability, and style:
| Material | Cost (per sq. ft.) | Durability | Style Options | Best For |
|---|---|---|---|---|
| Tile | $5–$15 | High | Wide variety | Budget-friendly customization |
| Stone | $20–$50 | Very High | Elegant, natural | Luxury homes |
| Brick | $5–$10 | High | Rustic, patterned | DIY projects |
| Metal | $10–$20 | High | Modern, sleek | Minimalist designs |
| Concrete | $10–$25 | Very High | Customizable stains | Modern or industrial spaces |
Each material has its charm, but make sure it’s non-combustible and meets your stove’s R-value requirements. I spent hours browsing tile samples at my local hardware store, and it was worth it to find something that felt like “me.”
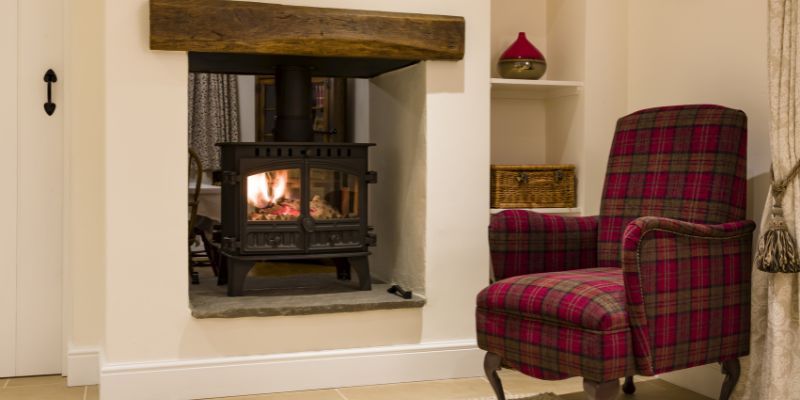
Designing a Corner Hearth Pad for Style and Function
Corner wood stoves are a fantastic way to save space, but they need a hearth pad that fits the unique triangular or semi-circular shape of the corner. When I designed mine, I wanted it to blend seamlessly with my room’s decor while meeting safety standards. Here are some design tips I learned:
- Shape Matters: Corner hearth pads are often triangular or have angled cuts to hug the walls. Measure your stove and the corner space carefully to ensure the pad extends the required distance (8 inches on sides/back, 18 inches in front).
- Low Profile vs. Raised: A flat hearth pad sits flush with the floor, perfect for small spaces or if you want a sleek look. A raised pad (3–8 inches) adds storage space or a defined edge for safety, especially with kids around.
- Patterns Add Personality: I chose a herringbone pattern with slate tiles because it gave my hearth a custom, farmhouse feel. Brick or tile patterns like basketweave or subway can add character without breaking the bank.
- Edge It Out: Adding trim, like wood or metal edging, gives your hearth a polished look. I used a thin oak trim to match my floors, secured with adhesive and a few small screws.
Pro tip: If your stove has feet, you might only need ember protection, which simplifies the design. Always double-check with your local fire code, as some areas require thicker pads (2–4 inches) for extra safety.
Building Your Own Corner Hearth Pad: A Step-by-Step Guide
One of the most rewarding parts of my wood stove project was building my own hearth pad. It saved me hundreds compared to buying a pre-made one, and I got exactly the look I wanted. Here’s how I did it, broken down into simple steps:
- Measure and Plan: Measure your stove’s base and add the required clearances (8 inches sides/back, 18 inches front). My stove was 23 inches wide and 17.5 inches deep, so my pad needed to be at least 39 inches wide and 35.5 inches deep.
- Gather Materials: I used 3/4-inch plywood for the base, 1/2-inch cement backer board for fire resistance, slate tiles, mortar, and plastic spacers. You’ll also need a utility knife, circular saw, trowel, and safety gear like goggles.
- Cut the Base: Cut the plywood and backer board to your measured dimensions. I used a circular saw for the plywood and a utility knife to score and snap the backer board.
- Assemble the Base: Nail the backer board to the plywood with eight-penny nails. This creates a sturdy, fire-resistant foundation.
- Lay the Tiles: Spread a thin layer of mortar on the backer board with a trowel. Place your tiles in your chosen pattern (I went with herringbone). Use spacers to keep gaps even.
- Grout and Finish: Pour liquid cement or grout between the tiles, wipe off excess, and let it dry overnight. I sealed my slate tiles to protect against soot stains.
- Secure the Pad: Place the pad in the corner. If it’s a floating design, the stove’s weight will hold it in place. I added a few small screws for extra stability.
My total cost was about $150, compared to $600 for a custom pre-made pad. It took a weekend, but the result was a gorgeous, code-compliant hearth that’s still the centerpiece of my living room.
Buying a Pre-Made Corner Hearth Pad
If DIY isn’t your thing, there are plenty of pre-made corner hearth pads out there. I considered this option before deciding to build my own, and I was impressed by the variety. You can find them at hardware stores, online retailers like Northline Express, or specialty fireplace shops. Here’s what to look for:
- Size and Shape: Ensure the pad meets your stove’s clearance requirements. Corner pads often come in modular sizes (46–60 inches wide) to fit most setups.
- Material Quality: Look for UL1618-certified pads, which meet strict fire safety standards. Tile and stone pads are popular for their durability and style.
- Budget Options: Basic black steel pads start around $100–$200, while custom slate or granite pads can run $500 or more.
- Decor Match: Choose a color and texture that complements your room. I saw beautiful ceramic tile pads with wood-grain finishes that looked amazing in modern homes.
When I browsed, I found brands like HY-C and Hearth Classics offer reliable options with warranties. Just make sure to check the R-value if your stove requires thermal protection.
Maintaining Your Hearth Pad
Once your hearth pad is in place, it’s easy to keep it looking great. I sweep mine weekly to remove ash and soot, and I use a damp cloth for stubborn spots. For tile or stone pads, a mild cleaner works wonders—just avoid harsh chemicals that could damage the finish. If you have a brick pad, seal it every couple of years to prevent staining. I learned to keep a small brush nearby for quick cleanups during the heating season. Regular maintenance not only keeps your hearth looking sharp but also ensures it stays fire-safe.
Cost-Saving Tips for Hearth Pads
Hearth pads can be a big investment, but there are ways to save without sacrificing safety or style. Here’s what worked for me:
- Shop Clearance: I found discounted slate tiles at my local hardware store—scuffs didn’t matter since the stove covered them.
- DIY When Possible: Building your own pad, like I did, cuts costs significantly. Use affordable materials like ceramic tiles or bricks.
- Repurpose Materials: If you have leftover tiles or bricks from another project, put them to use. I used extra plywood from a shelving project for my base.
- Compare Online: Sites like Friendly Fires offer budget-friendly steel pads that meet basic ember protection needs.
By being strategic, you can get a beautiful, safe hearth pad without breaking the bank.
Safety First: Why Compliance Matters
I can’t stress this enough—safety is the top priority with a wood stove. A non-compliant hearth pad could void your fire insurance or fail a code inspection. When I installed my stove, I had a WETT (Wood Energy Technology Transfer) inspection for insurance purposes. The inspector checked that my pad met the size, material, and R-value requirements. It was a relief knowing my DIY pad passed with flying colors. Always consult your stove’s manual and local fire codes, and consider hiring a professional if you’re unsure. A little extra effort upfront keeps your home and family safe.
Adding Storage and Functionality
One thing I love about my corner hearth pad is the extra functionality it brings. A raised pad can double as a storage spot for firewood or tools, keeping your space tidy. I built a small ledge into mine to hold a poker and ash shovel, which saves me from rummaging around when I’m tending the fire. Some pre-made pads come with built-in racks or shelves, which is great if you want a turnkey solution. Just make sure any storage additions don’t block airflow or create a fire hazard.
Making Your Hearth Pad a Design Statement
Your hearth pad doesn’t have to be just functional—it can be a showstopper. When I built mine, I chose slate tiles in a herringbone pattern to add texture and charm to my living room. You can go bold with colorful ceramic tiles, sleek with polished granite, or rustic with exposed brick. I’ve seen friends use reclaimed barn wood as a frame (non-combustible, of course) for a vintage look. Think about your room’s vibe—modern, farmhouse, or cozy cabin—and let your hearth pad reflect that. It’s like the frame for your wood stove’s masterpiece.
Conclusion
There’s something magical about a wood stove in the corner of a room—it’s warm, inviting, and full of character. But none of that magic happens without a proper corner wood stove hearth pad. Whether you build your own like I did or buy a pre-made one, this small investment makes a huge difference in safety, style, and peace of mind. I still smile every time I light my stove, knowing my hearth pad is protecting my floors and adding a touch of rustic charm to my home. Take your time choosing materials, double-check those fire codes, and don’t be afraid to get creative. Your perfect hearth pad is out there, ready to make your wood stove shine. Now, go grab a cup of cocoa and start planning your cozy corner!
Frequently Asked Questions
What is a corner wood stove hearth pad?
A corner wood stove hearth pad is a fire-resistant surface placed under a wood stove in a corner to protect your floor from heat, embers, and ash. It’s typically made of materials like tile, stone, or brick and meets specific safety codes.
Do I need a hearth pad for my wood stove?
Yes, if your floor is combustible (like wood or carpet), a hearth pad is required to prevent fire hazards. Even non-combustible floors like concrete benefit from a pad to catch embers and add style.
How big should my corner hearth pad be?
Your hearth pad should extend at least 8 inches beyond the stove’s sides and back and 18 inches in front, per NFPA guidelines. Check your stove’s manual for exact measurements.
Can I build my own hearth pad?
Absolutely! I built mine with plywood, cement backer board, and slate tiles for about $150. Just follow safety codes and use non-combustible materials.
What materials are best for a hearth pad?
Tile, stone, brick, metal, or concrete are great choices. Pick based on your budget and style—tile is affordable, while stone looks luxurious.
How much does a pre-made hearth pad cost?
Basic steel pads start at $100–$200, while custom tile or stone pads can cost $500 or more. Shop around for deals to save.
How do I maintain my hearth pad?
Sweep away ash and soot weekly, use a damp cloth for stains, and seal tile or brick pads every few years to prevent damage.
Can a hearth pad add storage?
Yes! A raised pad can include space for firewood or tools, as long as it doesn’t block airflow or create a fire risk.