What Is a Wood Burning Cat? Pyrography Cat Art Explained
A wood burning cat is a pyrography piece — a cat design burned into a wood surface with a heated pen tip, not a tool, a brand, or anything involving a real animal. Woodworkers and pyrography artists use the phrase to describe a finished (or in-progress) cat portrait created entirely with controlled heat and pressure, no paint or ink involved. Below is what the term actually means, the gear it takes, and a real step-by-step for burning one yourself, including the layering technique that separates a flat outline from a piece that actually looks like fur.
What “Wood Burning Cat” Actually Means
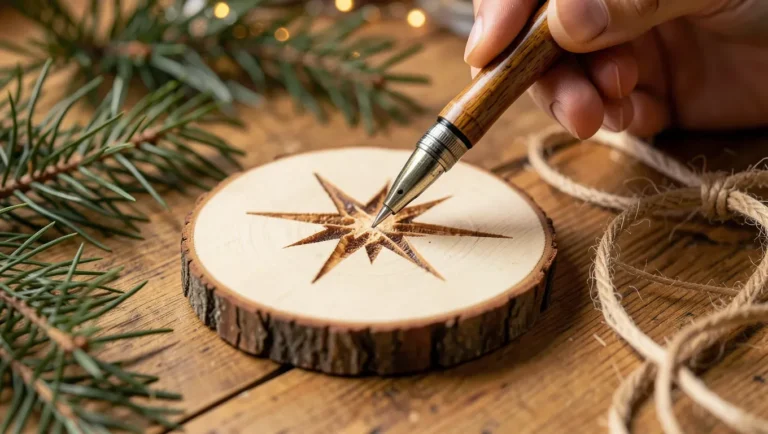
Pyrography (Greek for “writing with fire”) is the craft of decorating wood by scorching it with a heated tip instead of cutting, carving, or painting it. A “wood burning cat” is simply a cat rendered in that medium — the same way a “watercolor cat” means a cat painted in watercolor. It’s a common enough search term that some sites have mixed it up with unrelated results (old wood-stove safety FAQs, even a Wikipedia entry for a medieval punishment that has nothing to do with this craft). None of that is what people searching this phrase are actually after, so this page sticks to one real topic: pyrography cat art.
The finished pieces show up as wall plaques, cutting boards, coasters, pet memorial portraits, and gift signs — anywhere a warm, single-tone burned image works better than paint.
Best Cat Pattern Book For Tracing
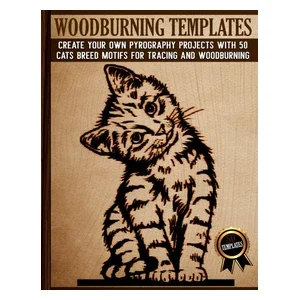 |
Woodburning Templates: Cats Breed Motifs for Tracing and Woodburning – $12.99 50 single-sided cat breed templates you can trace straight onto your wood blank, skipping the hardest part of a portrait: getting the proportions right before you ever pick up the pen.
|
Tools You Need to Burn a Cat Design
You don’t need much to start: a temperature-adjustable wood burning pen (a fixed single-heat pen makes shading fur almost impossible), a handful of interchangeable tips, a sanded piece of light-colored wood, carbon transfer paper, and 220-grit sandpaper for cleanup. A digital-temperature pen in the $30–$60 range covers everything below — see our fixed-heat vs. digital temperature breakdown if you’re choosing your first unit, and the wood burning pen temperature chart for exact heat settings by tip type.
For a cat specifically, two tips do almost all the work: a writing/pointed tip for the outline, whiskers, and eye detail, and a shading tip (a flat or ball-shaped head) for building up fur tone in layers.
Where to Find or Trace a Cat Pattern
Most pyrography artists don’t freehand a cat from memory. They start from a reference photo or a printed pattern, transfer the outline onto the wood with graphite or carbon paper, and burn over those lines. Dedicated cat pyrography pattern books (line-art templates by breed or face shape, sized for tracing) are the fastest way to get a proportioned cat without drawing skill of your own — that’s the product below. If you’d rather work from your own pet photo, convert it to a high-contrast black-and-white outline first (any basic photo editor’s “posterize” or “threshold” tool works), print it at the size of your wood blank, and transfer with carbon paper the same way.
Step-by-Step: How to Wood-Burn a Cat
- Sand and transfer. Sand the wood to at least 220 grit — rough wood makes the tip skip and scorches unevenly. Transfer your outline with carbon paper, pressing lightly so the guide lines don’t dent the surface.
- Burn the outline first, at a moderate heat. Use the pointed tip at a medium setting (roughly the middle of your pen’s range — check the temperature chart for your specific tip) and trace every line slowly and steadily. Outline strokes should be thin and even; this is the skeleton the shading builds on.
- Work light to dark. Start shading with the lowest heat and lightest, fastest strokes that still leave a visible mark. You can always go back over an area to darken it — you can’t lighten a burn that’s already too dark.
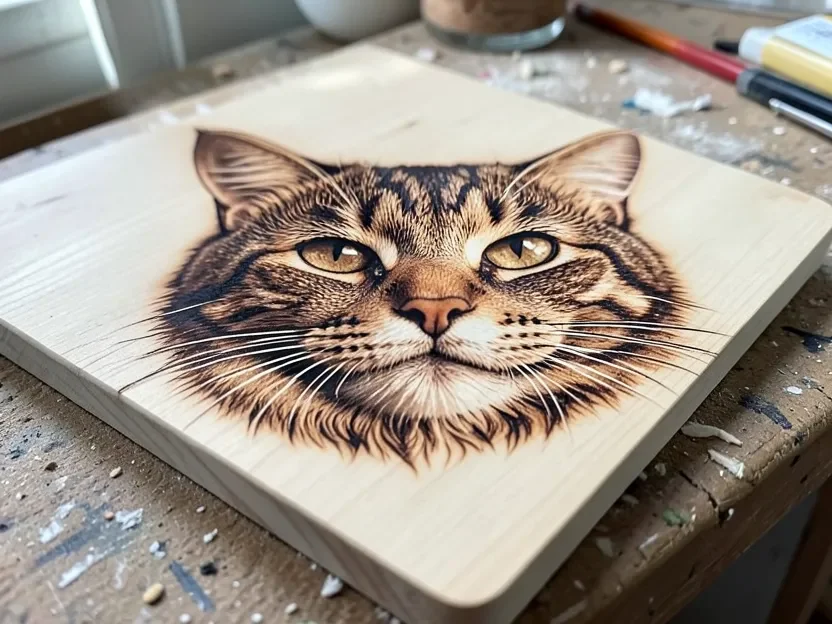
- Layer the fur in the direction it grows. This is the step most beginner tutorials skip, and it’s the single biggest difference between a “burned outline with gray shading” and a cat that reads as fur. Use short, flicking strokes that follow the actual direction hair grows on a cat’s face — radiating outward from the nose across the cheeks, downward on the chin, and in short tufts inside the ears. Build 2–3 light passes in the same direction before darkening any one area, rather than pressing hard once.
- Darken gradually around the eyes and nose. These areas read as the “anchor” of a realistic cat face. Slightly higher heat and slower, more deliberate strokes here create the crisp dark edges that make lighter fur shading around them look correct by contrast.
- Add whiskers last, with the pointed tip on a light touch. A single confident stroke per whisker looks far more convincing than several overlapping attempts.
Common Mistakes When Wood Burning a Cat
- Burning the outline too dark before shading. A heavy black outline flattens the whole piece — keep the outline thin and let the shading create depth.
- One heat setting for the entire piece. Fur has no depth without a range of tones; if every stroke is the same temperature and speed, the cat looks like a stencil instead of fur.
- Ignoring fur direction. Shading strokes going in random directions (instead of following how fur actually lies on a cat’s face) is the fastest way to make a burn look like scribbles instead of hair.
- Picking knotty or resinous wood. Knots burn unevenly and resin pockets can flare or smoke. Basswood, birch plywood, and poplar are the most forgiving and predictable surfaces for detail work.
- Skipping a scrap-wood test strip. Every pen, tip, and piece of wood burns slightly differently. Two minutes of testing heat and stroke speed on an offcut saves a ruined final piece.
Finishing and Displaying Your Piece
Once the burn is done, lightly hand-sand any raised char with fine (320+ grit) sandpaper — don’t use a power sander, it can blur fine fur lines. Seal with a food-safe mineral oil for a cutting board or coaster, or a wipe-on polyurethane or matte spray sealer for a wall piece; both protect the burn from fading and handling oils without darkening the wood. Frame it, mount it on a plaque stand, or drill a discreet hanging hole in the back — cat pyrography pieces are popular gifts for cat owners specifically because they can be personalized from a photo of an actual pet.
Frequently Asked Questions
Does “wood burning cat” mean burning a real cat?
No. It’s exclusively a pyrography art term for a cat image burned into wood with a heated pen. No animals are involved in any part of the craft.
What wood is best for a wood burning cat design?
Basswood is the standard choice for detailed pyrography — it’s pale, tight-grained, and has almost no knots to interrupt fine shading. Birch plywood and poplar are solid, cheaper alternatives for practice pieces.
How long does a wood burning cat piece take to finish?
A simple line-art cat outline can take under an hour. A fully shaded, photorealistic cat portrait with layered fur detail typically takes a beginner 4–8 hours across multiple sessions, since building up realistic shading means many light passes rather than a few heavy ones.
Can a beginner wood-burn a realistic cat?
Yes, starting from a traced pattern rather than freehand. A printed template handles the proportions (the hardest part for a beginner), which leaves you free to focus on heat control and fur-layering technique — the two skills that actually take practice.
Sponsored / affiliate links. As an Amazon Associate I earn from qualifying purchases. I may earn additional commission from eligible campaigns.