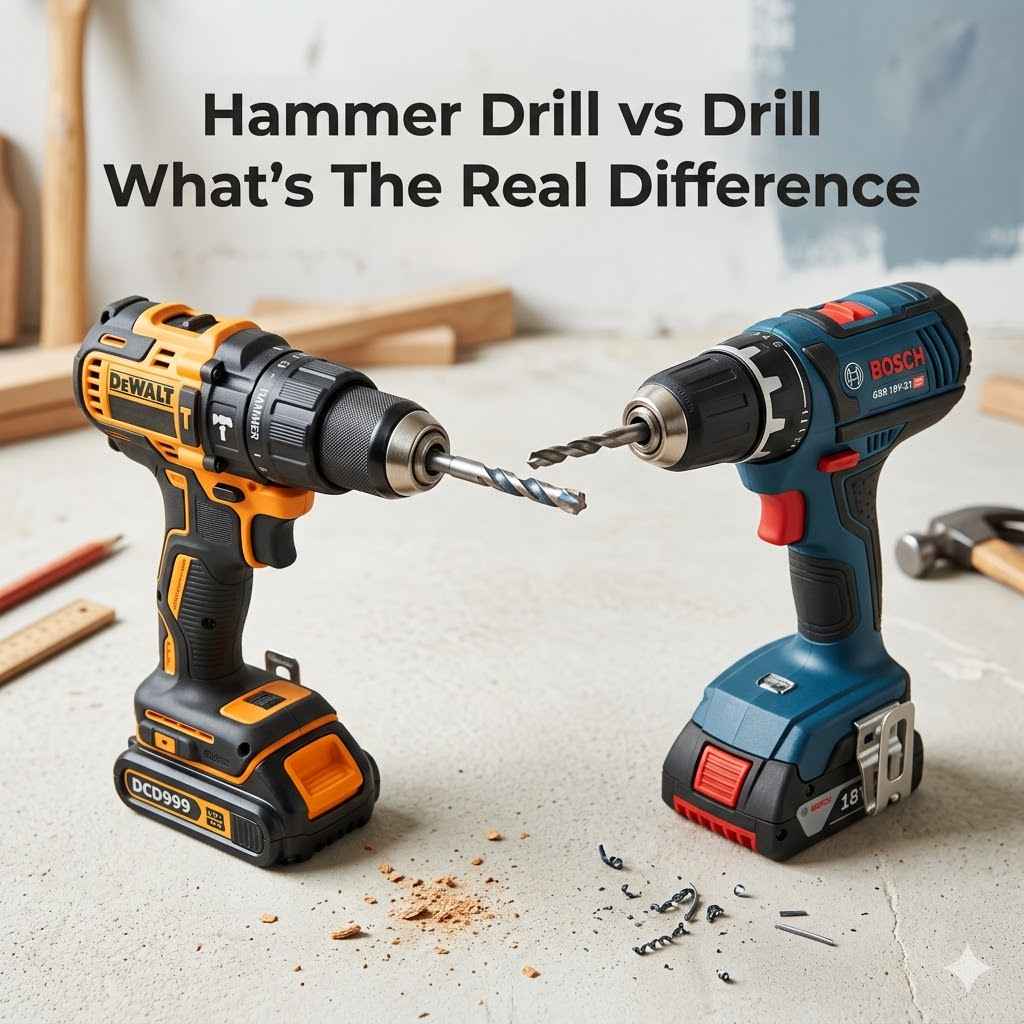
Hammer Drill vs Drill: What’s The Real Difference
Picking the right tool can feel tricky sometimes, especially when names sound so similar. Many people wonder about the Hammer Drill vs Drill: What’s the Real Difference? because it’s not always clear what each one does best. You might see them side-by-side and wonder if they just look alike or if there’s a real reason to choose one over the other.
Don’t worry, it’s a common question! We’ll break it down super simply, step-by-step, so you know exactly which drill to grab for your next project. Get ready to find out what makes them different.
Hammer Drill vs Drill What’s The Real Difference
This section explains the core differences between a hammer drill and a regular drill. We will explore their unique features, how they operate, and what makes them distinct from one another. Understanding these fundamental distinctions is key to selecting the right tool for various DIY and professional tasks.
You’ll learn about the added mechanism in a hammer drill and why it matters for certain materials.
The Basic Drill
A standard drill, often called a “cordless drill” or “power drill,” is your everyday go-to for most tasks. Its main job is to spin a bit to create holes or drive screws. Think of it as the workhorse for putting up shelves, assembling furniture, or drilling small holes in wood.
It has a motor that turns the chuck, where you insert drill bits.
These drills typically have a trigger that controls speed and a forward/reverse switch. Some also have a clutch setting, which lets you control how tight a screw is driven. This prevents you from stripping a screw head or overtightening into soft materials.
This feature is very useful for projects where precision is needed.
The chuck is where the drill bit is held. It can be keyless, meaning you twist it to tighten and loosen, or it might require a small key. Most modern drills are keyless for convenience.
The drill’s power comes from a battery (cordless) or a power cord (corded).
How A Standard Drill Works
A standard drill uses a motor to spin a shaft. This shaft is connected to the chuck. When you pull the trigger, electricity flows to the motor, making it rotate.
The rotation is transferred to the chuck, which grips the drill bit. This spinning action is what allows the bit to cut into materials like wood or plastic.
The forward and reverse switch changes the direction of the motor’s spin. Forward is typically for drilling and screwing in, while reverse is for unscrewing or removing a stuck bit. The speed of the spin is controlled by how hard you squeeze the trigger.
Some drills have a speed selector switch, usually marked 1 and 2, to provide a lower speed for more torque (power) or a higher speed for faster drilling.
The clutch is a very important feature on many standard drills. It’s a series of plates that can slip when a certain amount of resistance is met. This prevents the motor from damaging the screw head or the material.
You adjust the clutch setting with a numbered ring around the chuck. A lower number means it will slip sooner, a higher number means it will drive the screw deeper before slipping.
Introducing The Hammer Drill
A hammer drill looks very similar to a standard drill, but it has a special trick up its sleeve. It can do everything a regular drill can, plus it adds a powerful hammering action. This hammering is a rapid, short-stroke pounding motion that happens while the drill bit is also spinning.
This combination is what makes it great for tougher jobs.
This extra hammering action is perfect for drilling into hard materials like concrete, brick, or stone. The pounding helps to break up the material, making it much easier for the spinning bit to remove it. If you’ve ever tried to drill into a brick wall with a regular drill, you know how slow and difficult that can be.
A hammer drill makes that task much quicker and less frustrating.
Hammer drills usually have a mode selector switch. One mode is for drilling only (like a regular drill), and the other mode activates the hammering action. Some models also have a rotation-only mode for chiseling tasks, though this is less common.
The power comes from either a battery or a power cord, just like standard drills.
How A Hammer Drill Works
The key difference in a hammer drill lies in its internal mechanism. When the hammer function is engaged, two toothed discs rotate against each other. One disc is attached to the motor shaft, and the other is attached to the chuck.
As the motor spins, these discs try to move past each other.
When the drill bit encounters resistance, like in hard material, these discs are forced to move apart and then snap back together rapidly. This action creates a percussive or hammering effect. It’s not a heavy sledgehammer blow but rather a fast, sharp pounding.
This rapid hammering combined with the spinning bit is what pulverizes hard surfaces.
The intensity of the hammering can vary between models. Some higher-end hammer drills offer adjustable hammering power. The switch to select between drill-only mode and hammer mode is crucial.
It allows you to use the tool for standard drilling on wood or metal without the hammering action, which is unnecessary and can damage softer materials.
Hammer Drill vs Drill What’s The Real Difference Explained
The main distinction between a hammer drill and a regular drill is the added hammering mechanism in the hammer drill. This mechanism allows it to deliver a percussive blow in addition to rotation. A regular drill only rotates.
This difference in function dictates the types of materials each drill is best suited for.
For soft materials like wood, plastic, or drywall, a regular drill is usually sufficient. Its rotating action is all that’s needed to create holes or drive screws. Using a hammer drill in these materials in hammer mode is generally not recommended as the pounding can cause damage or weaken the material.
The extra power is simply not needed.
However, when you need to drill into dense materials like concrete, brick, or masonry, the hammer drill’s percussive action becomes invaluable. It makes drilling into these hard surfaces possible and much faster than with a regular drill alone. The hammering action helps to chip away at the material, allowing the spinning bit to remove debris and create the hole.
Choosing The Right Drill For Your Project
Deciding between a hammer drill and a regular drill depends entirely on the tasks you plan to do. For general home repairs, furniture assembly, or light-duty drilling in wood and metal, a standard drill is perfectly fine. It’s lighter, often less expensive, and easier to handle for everyday jobs.
If your projects often involve drilling into walls for hanging pictures, mounting shelves on brick, or any work with masonry, then a hammer drill is a wise investment. It will save you a lot of time and effort. Think about the materials you work with most often.
If concrete or brick is in your regular DIY toolkit, a hammer drill is essential.
It’s also worth noting that many modern hammer drills have a mode selector, so you can switch off the hammer function and use it just like a regular drill. This makes them versatile tools that can handle a wide range of jobs. So, a hammer drill can be a good option if you want one tool that can do almost everything, especially if you anticipate needing to drill into harder materials occasionally.
When To Use A Standard Drill
A standard drill is the best choice for tasks that do not involve hard surfaces like concrete or stone. This includes most woodworking projects, such as building shelves, decks, or furniture. It is also ideal for metal fabrication where you might be drilling through sheet metal or thicker steel.
Driving screws is another primary function where a standard drill excels. With its clutch settings, you can precisely control the torque, preventing damage to the screw or the material. This is critical for tasks like assembling flat-pack furniture or installing trim.
For these jobs, the smooth rotation of a standard drill is more than enough.
If you are drilling into drywall for hanging very light objects, a standard drill will work fine. However, for anything heavier, or if the wall is made of plaster and lath, you might need to locate a stud or consider using anchors, which is a separate topic. For simple hole-making in wood and metal, the standard drill is your most efficient and appropriate tool.
When To Use A Hammer Drill
A hammer drill is indispensable when you need to drill into masonry materials. This includes concrete, brick, block, and stone. These materials are extremely hard and would be very difficult, if not impossible, to drill through effectively with a standard drill.
The hammer drill’s percussive action breaks down these tough substances.
Examples include drilling holes for wall anchors to hang heavy items like cabinets or televisions on a brick wall. It’s also necessary for installing fixtures in basements or patios made of concrete. Even if you only do this type of work occasionally, renting a hammer drill can be an option, but owning one provides convenience and readiness.
When working with specialized masonry bits, the hammer drill’s action helps these bits clear debris from the hole as you drill. This prevents the bit from getting stuck and makes the drilling process smoother and faster. The combination of rotation and percussion is the key to tackling these challenging materials.
Key Features To Consider
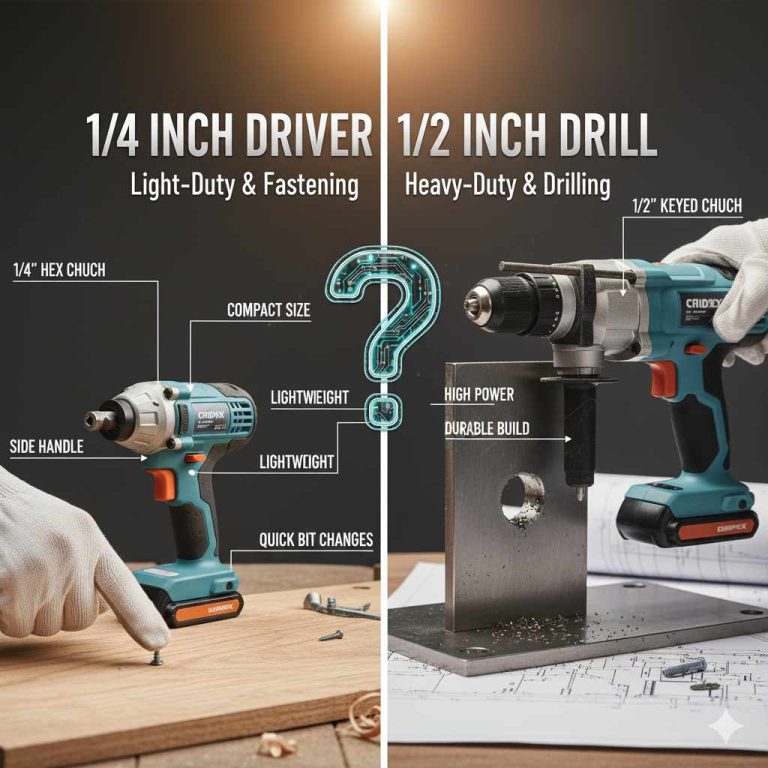
When looking at drills, both standard and hammer types, pay attention to power source, chuck size, battery voltage (for cordless), and ergonomics. For standard drills, the torque and speed settings are important. A higher voltage battery typically means more power and longer run time.
For hammer drills, the mode selector is crucial. Ensure it has a clear “drill only” mode. Also, consider the number of hammer settings or the intensity of the hammering action if it’s adjustable.
The weight and balance of the drill are important for comfort, especially during prolonged use.
Brushless motors are becoming more common and offer better efficiency, longer tool life, and more power compared to brushed motors. Look for features like LED lights to illuminate the work area, belt clips for convenience, and variable speed triggers for better control. These details can make a significant difference in your user experience.
Chuck Size And Type
The chuck is the part of the drill that holds the drill bit. Most drills today use a keyless chuck, which you tighten and loosen by hand. These are convenient and fast.
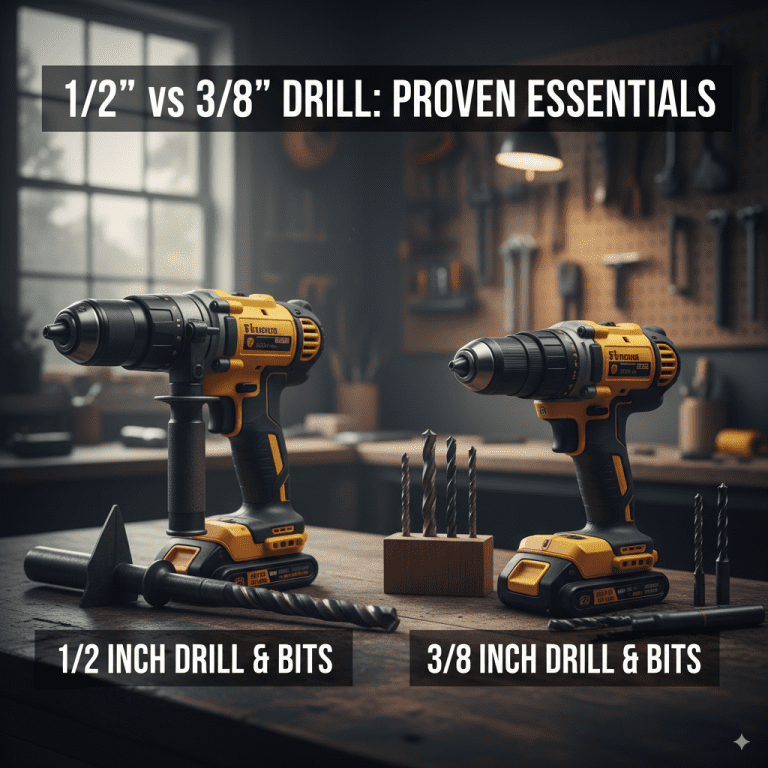
The size of the chuck is usually measured in millimeters and commonly comes in 3/8 inch (about 10mm) or 1/2 inch (about 13mm).
A 1/2 inch chuck is generally preferred for hammer drills and more powerful standard drills because it can accommodate larger drill bits and handle more torque without slipping. For lighter-duty standard drills, a 3/8 inch chuck is often sufficient. Using the correct chuck size ensures the bit is held securely.
The chuck mechanism itself can be a point of durability. High-quality chucks will maintain their grip even under heavy load. For hammer drills, a robust chuck is even more important due to the added forces from the hammering action.
Always ensure the bit is properly seated and tightened in the chuck before operating the drill.
Battery Power And Voltage
For cordless drills, the battery is a critical component. Voltage (e.g., 12V, 18V, 20V MAX) indicates the power of the drill. Higher voltage generally means more power and torque, making it suitable for tougher jobs.
18V or 20V MAX are common for most DIY and professional cordless drills, offering a good balance of power and portability.
Battery capacity is measured in Amp-hours (Ah). A higher Ah rating means the battery will last longer on a single charge. If you have a lot of work to do, consider getting a drill with a higher Ah battery or purchasing an extra battery so you can swap them out and continue working without interruption.
Lithium-ion batteries are the standard for cordless power tools today. They are lighter, hold a charge longer, and don’t suffer from the “memory effect” that older NiCad batteries did. When choosing a drill, consider the battery system you might already be invested in from a particular brand, as batteries are often interchangeable between tools of the same voltage.
Hammer Drill vs Drill What’s The Real Difference In Use Cases
The choice between a hammer drill and a regular drill truly hinges on the task at hand. For building a birdhouse, assembling furniture, or creating holes in wood for a DIY shelf, a standard drill is the most practical choice. It offers sufficient power and control for these softer materials.
On the flip side, if you’re installing a new mailbox post in a concrete sidewalk, hanging heavy artwork on a brick wall, or drilling into stone for a landscaping project, a hammer drill is essential. Its percussive action will make these jobs manageable and efficient. Without it, these tasks can be incredibly frustrating and time-consuming.
Many DIY enthusiasts find that a hammer drill offers the most versatility. Because it can function as a regular drill when the hammer mode is switched off, it can handle a wide range of tasks. This makes it a valuable addition to any toolbox, even if you don’t frequently work with masonry.
Everyday Home Projects
For most common household chores, a standard drill is more than adequate. This includes tasks like assembling flat-pack furniture, hanging curtains, or installing new hardware on cabinets. The smooth rotation and adjustable clutch of a standard drill are perfect for these jobs.
If you’re building a simple wooden frame for a picture or repairing a wooden fence, a standard drill will perform beautifully. You can easily switch between drilling pilot holes and driving screws with its variable speed trigger and forward/reverse function. The lightweight design of many standard drills also makes them comfortable for frequent use.
Even for drilling into drywall, a standard drill is sufficient. However, for anything heavier than a small picture hook, you’ll likely need to find a wall stud or use appropriate anchors. The key is to match the tool’s capabilities to the demands of the material you are working with.
Construction And Renovation Tasks
When construction or major renovations are on the agenda, the hammer drill often becomes the preferred tool. Drilling through concrete foundations for plumbing or electrical work, creating anchor points in brick walls for structural elements, or installing heavy-duty fixtures all require the power of a hammer drill.
For example, installing a new door frame in a brick opening necessitates drilling multiple, deep holes for anchor bolts. A standard drill would struggle immensely, taking hours and potentially overheating. A hammer drill, with the right masonry bits, can accomplish this task much more quickly and efficiently.
Even for lighter renovation tasks, like removing old plaster and lath, a hammer drill in a chiseling mode (if available) can be helpful. However, for general drilling into wood or metal during renovation, you would switch the hammer drill to its standard drilling mode. This versatility makes it a staple on construction sites.
Hammer Drill vs Drill What’s The Real Difference Comparison Table
Understanding the specific features and applications of each drill type is crucial. A comparison table can highlight these differences at a glance, making it easier to see which tool fits your needs. The core difference lies in their operational mechanism.
A standard drill relies solely on rotation to perform its tasks, making it ideal for softer materials like wood and metal. A hammer drill, on the other hand, combines rotation with a percussive hammering action, making it suitable for much harder materials such as concrete and brick. This added capability significantly broadens its applications.
Consider the materials you frequently work with and the types of holes you need to create. If your projects are primarily within the realm of woodworking or general assembly, a standard drill will serve you well. If you anticipate any work with masonry, a hammer drill offers superior performance and efficiency.
| Feature | Standard Drill | Hammer Drill |
|---|---|---|
| Primary Action | Rotation | Rotation and Percussion (Hammering) |
| Best For | Wood, metal, plastic, drywall, screw driving | Concrete, brick, masonry, stone, also wood, metal, plastic, drywall, screw driving |
| Mechanism | Motor spins a shaft connected to the chuck | Motor spins discs that create a rapid pounding motion along with rotation |
| Noise Level (Hammer Mode) | N/A | Higher |
| Vibration (Hammer Mode) | N/A | Higher |
| Versatility | Good for lighter tasks | Excellent, can perform standard drill functions plus masonry work |
| Cost | Generally less expensive | Typically more expensive |
Drill Bit Considerations
The type of drill bit you use is just as important as the drill itself. For standard drills, wood bits, metal bits, and driver bits are common. These bits are designed to cut or fasten effectively through rotation.
For hammer drills, when working with masonry, you must use specialized masonry bits. These bits have a carbide tip designed to withstand the impact and abrasion of drilling into hard materials. Using a regular wood or metal bit in hammer mode will likely destroy the bit and do little to the material.
The size of the drill bit will also affect the tool’s performance. Larger bits require more power and torque from the drill. For very large holes in hard materials, a heavy-duty hammer drill is necessary.
Always ensure your drill has sufficient power for the size of the bit and the material you are drilling.
Masonry Bits
Masonry drill bits are constructed differently to handle tough materials. They typically feature a reinforced carbide tip that is brazed or welded onto a steel shank. This carbide tip is extremely hard and durable, allowing it to chip away at concrete, brick, and stone.
The flute design of masonry bits is also optimized for clearing dust and debris from the hole. As the bit hammers and spins, the flutes carry the pulverized material away from the cutting edge. This prevents the bit from getting clogged and ensures efficient drilling.
When using a hammer drill with a masonry bit, it’s important to apply steady, even pressure. Let the tool do the work. Avoid excessive force, as this can lead to bit breakage or damage to the drill.
Regular inspection of masonry bits for wear and tear is also recommended.
Pros And Cons Summary
Choosing between the two types involves weighing their benefits and drawbacks against your specific needs. A standard drill is simpler, often more affordable, and perfectly suited for a wide array of common tasks. Its main limitation is its inability to efficiently handle hard materials.
A hammer drill offers greater versatility by tackling masonry work. This capability comes at a higher cost, and in standard drilling mode, it might be slightly heavier or bulkier than a comparable standard drill. However, its ability to perform dual functions makes it a popular choice for those needing a multi-purpose tool.
Ultimately, the “better” tool depends on your project list. For the average homeowner, a powerful standard drill might suffice. For someone doing more involved renovations or frequent DIY projects, especially those involving walls and structures, a hammer drill is often the more practical long-term investment.
Frequently Asked Questions
Question: Can I use a hammer drill for regular drilling jobs
Answer: Yes, most hammer drills have a mode selector that allows you to turn off the hammering action and use it just like a regular drill. This makes them very versatile.
Question: Is a hammer drill too powerful for wood
Answer: When used in the standard drill mode (hammering off), a hammer drill is not too powerful for wood. In fact, it functions identically to a standard drill. However, if you accidentally leave it in hammer mode while drilling wood, you could damage the material.
Question: What is the difference in cost between a hammer drill and a standard drill
Answer: Hammer drills are generally more expensive than standard drills because of the added complexity of the hammering mechanism. However, the price difference can vary widely depending on the brand, features, and power.
Question: Do I need a hammer drill if I only plan to hang pictures
Answer: If you are only hanging pictures on drywall, a standard drill is usually sufficient. However, if you plan to hang heavier items or need to mount things directly into brick or concrete walls, then a hammer drill would be much more effective.
Question: Are there any downsides to using a hammer drill for everyday tasks
Answer: A hammer drill can be slightly heavier and more expensive than a standard drill. If you don’t need the hammering function, it might be more tool than you require, and a standard drill would be a simpler choice.
Wrap Up
The core Hammer Drill vs Drill: What’s The Real Difference is simple. A standard drill rotates for holes in wood and metal. A hammer drill adds pounding to spin, perfect for concrete and brick.
For most home tasks, a standard drill works fine. If you face tough walls, a hammer drill is a real help. Many hammer drills can do both jobs, offering great value.