How to Fix Wall Anchor Holes That are Too Big

How to Fix Wall Anchor Holes That Are Too Big (Drywall & Plaster)

A wall anchor hole bigger than 3/8 inch needs more than spackle — upsize to a toggle bolt or rebuild the hole with epoxy putty before redriving a fastener. Skip that step and the weight rating on the package means little, since general fastener-industry guidance treats only about a quarter of the printed number as a safe everyday load once drywall or plaster around a hole is already compromised. This guide covers drywall and plaster repair methods, how to size an anchor by weight capacity, and the toothpick-and-glue fix for holes under 1/4 inch.

Quick Answer

Under 1/4 inch: dip a wood toothpick in wood glue, insert it, let it set, then redrive the screw. Up to 1/2 inch: fill with epoxy putty or vinyl spackle and let it cure fully. Over 1/2 inch, or in plaster: patch the hole first, then install a toggle bolt or self-drilling metal anchor rated for the load.

Assessing The Damage

Best Drywall Anchor Kit Pick

ALBO EZ Self-Drilling Drywall Toggle Anchors, 100 lb rated

ALBO EZ Self-Drilling Drywall Toggle Anchors (10-Pack)

Rated up to 100 lbs and self-drilling, so it installs directly into the same hole you’re already repairing.

  • Best for: Upgrading a stripped or oversized hole to a heavier-duty metal anchor without drilling a pilot hole
  • Why we picked it: 100-lb rating and self-drilling design means it works in the exact hole you just cleaned out
  • Main drawback: Some buyers report failures when it lands on a stud pocket or obstruction instead of open cavity — check for solid backing first
View Our Pick on Amazon

Compare more drywall anchor kits

KURUI 164-piece drywall anchor assortment kit

Option 1

KURUI 164-Pc Anchor Assortment Kit

  • Best for: Keeping every common anchor size on hand for future repairs
  • Why we picked it: Butterfly toggles plus self-drilling anchors in three sizes cover this fix and lighter jobs
  • Main drawback: Storage box is flimsy if dropped
Check on Amazon
Sysarua heavy-duty zinc toggle anchors, 100 lb rated

Option 2

Sysarua Heavy-Duty Zinc Toggle Anchors

  • Best for: Plaster, tile, or brick in addition to drywall
  • Why we picked it: Same 100-lb rating as our hero pick, and the maker notes plaster compatibility
  • Main drawback: Fewer verified reviews than our other picks
Check on Amazon
ALBO 120-piece plastic butterfly and self-drilling anchor kit

Option 3

ALBO 120-Pc Plastic Anchor Kit

  • Best for: Lighter jobs like shelves, mirrors, and frames near the repaired hole
  • Why we picked it: Three anchor styles in one box for about 12¢ apiece
  • Main drawback: Plastic anchors top out around 75 lbs rated — not a fit for heavy shelving or a wall-mounted TV
Check on Amazon

As an Amazon Associate we earn from qualifying purchases.

Fixing wall anchor holes that are too big requires some basic tools. Fill the hole with a suitable filler. Sand it smooth, then repaint for a seamless finish.

Quick Fix Steps (Overview)

  1. Clean the hole: Remove crumbling drywall or plaster and brush out dust so filler has a clean surface to bond to.
  2. Choose the fix by hole size: Toothpick and wood glue under 1/4 inch, epoxy putty or spackle up to 1/2 inch, a patch plus a new anchor for anything larger.
  3. Let the filler cure fully: Fast-set compounds are usually ready in a few hours; standard spackle or joint compound can take up to 24 hours.
  4. Install a properly sized anchor: Match the anchor’s rated capacity to what you’re hanging, then treat roughly a quarter of that rating as the safe everyday load.
  5. Sand, prime, and paint to blend the repair into the surrounding wall.

Before fixing wall anchor holes that are too big, assess the damage. This step ensures you choose the best repair method. First, identify the size and shape of the hole with a tape measure. Then, determine the type of wall material. Each type of wall may need a different repair approach.

Identifying Oversized Holes

Start by identifying oversized holes. Use a tape measure to check the hole’s diameter. If the hole is larger than the anchor, it needs repair. Also, look for any cracks or chips around the hole. These signs mean the wall may need extra attention. Take note of all damaged areas.

Evaluating Wall Material

Next, evaluate the wall material. Different materials need different fixes. Drywall is common and easy to repair. Plaster walls require more care and skill. Brick and concrete need special tools and materials. Knowing the wall type helps you choose the right repair method. Check the wall’s texture and composition to identify the material.

By assessing the damage properly, you can fix the wall anchor holes effectively. This preparation saves time and ensures a solid repair.

Assessing an oversized wall anchor hole before choosing a repair method
Measuring hole diameter first determines whether a toothpick fix, filler, or a full anchor upgrade is needed.

Gathering Necessary Tools

Fixing wall anchor holes that are too big can be a straightforward task. First, you need to gather the right tools. Having everything ready will save time and make the job easier.

Essential Repair Materials

You will need basic repair materials. Get wall putty or spackle. These will fill in the holes. You also need a putty knife. This helps spread the putty evenly. Sandpaper is important too. Use it to smooth the patched area.

Don’t forget the primer. This prepares the wall for painting. Lastly, have some paint that matches your wall. This will cover the repair and make it blend in.

Optional Tools For Better Results

Some optional tools can make the repair look even better. A caulk gun can help with precision. Use it to apply putty neatly. A level can ensure the repair is flat and even.

A small brush is useful for touch-up paint. It helps with detailed work. A vacuum can keep your work area clean. Clean spaces lead to better results.

Preparing The Wall

Fixing wall anchor holes that are too big can be a daunting task, but with the right preparation, it becomes much easier. Before jumping into the repair process, it’s crucial to prepare the wall properly. This preparation ensures a smooth and long-lasting fix. Let’s dive into the steps you need to take to get your wall ready.

Cleaning The Area

First things first, you need to clean the area around the hole. Dust and debris can prevent the filler from sticking properly. Here’s how you can clean the area:

  • Remove Dust: Use a brush or a vacuum to remove any loose dust and debris around the hole.
  • Wipe with a Damp Cloth: Lightly dampen a cloth and wipe the area to ensure it’s free of any lingering dust. Be sure not to soak the wall.
  • Let it Dry: Allow the area to dry completely before moving on to the next step.

Smoothing Rough Edges

Next, you’ll want to smooth out any rough edges around the hole. This helps the filler adhere better and creates a more polished finish.

  1. Sand the Edges: Use a piece of fine-grit sandpaper to gently sand the edges of the hole. This will remove any jagged pieces and create a smoother surface.
  2. Check for Smoothness: Run your hand over the area to ensure it’s smooth. If you feel any rough spots, sand them down.
  3. Remove Sanding Dust: Once you’ve finished sanding, use a brush or vacuum to clean up the dust.

Infographic comparing wall anchor hole repair methods by size
Matching the repair method to the hole size prevents a patch that fails under the anchor’s rated load.

Using Wall Patching Techniques

When you find wall anchor holes that are too big, don’t panic. Using wall patching techniques can restore your wall to its original state. These techniques are simple and effective, even for beginners. Let’s explore two methods: applying spackle or putty, and using drywall repair kits.

Applying Spackle Or Putty

Spackle or putty can fill oversized wall anchor holes. Start by cleaning the hole with a brush. This removes any loose debris. Next, use a putty knife to apply spackle or putty. Press it firmly into the hole. Fill it completely.

Allow the spackle or putty to dry. This usually takes a few hours. Once dry, sand it smooth with fine-grit sandpaper. This ensures a flat surface. Finally, paint over the patched area to match your wall.

Using Drywall Repair Kits

Drywall repair kits are another great option. These kits include everything you need. Start by following the instructions on the kit. Usually, it involves attaching a patch over the hole. Secure the patch with adhesive.

Next, apply joint compound over the patch. Spread it evenly using a putty knife. Let the compound dry for the recommended time. Sand it smooth once it’s dry. Finally, paint over the repaired area. Your wall will look as good as new.

Fixing Oversized Anchor Holes in Plaster Walls (Not Just Drywall)

Plaster walls behave differently than drywall once an anchor hole enlarges. Plaster is a hard, brittle coat keyed into wood or metal lath, not a single panel of gypsum board, so an oversized hole tends to crumble at the edges instead of tearing cleanly the way drywall paper does.

  • Vacuum first: Remove loose plaster dust and any crumbled bits from behind the hole before filling anything — trapped debris keeps filler from bonding.
  • Use a setting-type compound: A powder joint compound you mix yourself hardens by chemical reaction instead of drying, so it resists the hairline cracking that premixed vinyl spackle tends to develop on rigid plaster.
  • Back exposed lath with mesh tape: If the wood or metal lath behind the hole is visible or broken, bridge it with fiberglass mesh tape before applying compound so the patch has something to grip.
  • Pre-drill before a self-drilling anchor: Driving a self-drilling metal anchor straight into plaster the way you would on drywall can crack the surrounding coat — drill a pilot hole first.

Homes built before the 1950s are more likely to have plaster over lath rather than drywall. A quick way to tell which one you’re repairing: tap the wall near the hole. Plaster sounds solid and hard; drywall sounds hollow and gives slightly.

“Plaster cracks around an anchor hole faster than drywall because the coat is bonded to lath, not paper — a stiffer setting-type compound keeps the patch from telegraphing a hairline crack the way standard vinyl spackle does on lath-and-plaster.”
— Our team, from repair work on older plaster-and-lath homes

Reinforcing With New Anchors

One effective solution is reinforcing the area with new anchors. This method ensures a strong and secure hold, preventing further damage to your walls. Let’s dive into the details and get your walls looking as good as new!

Choosing The Right Type Of Anchor

First things first, you need to choose the right type of anchor for the job. Not all anchors are created equal, and picking the wrong one can lead to even bigger problems. Here are some common types of anchors you might consider:

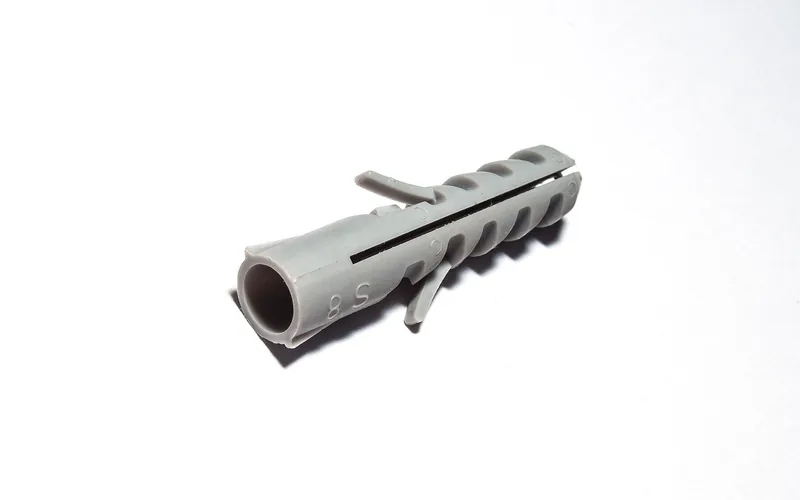
  • Plastic Anchors: Rated for roughly 10 to 25 lbs in standard 1/2-inch drywall. Easy to install, but the weakest option of the three.
  • Self-Drilling Metal Anchors: Rated up to about 25 to 75 lbs depending on size and drywall thickness. No pre-drilling needed on drywall, but plaster needs a pilot hole first (see the plaster section above).
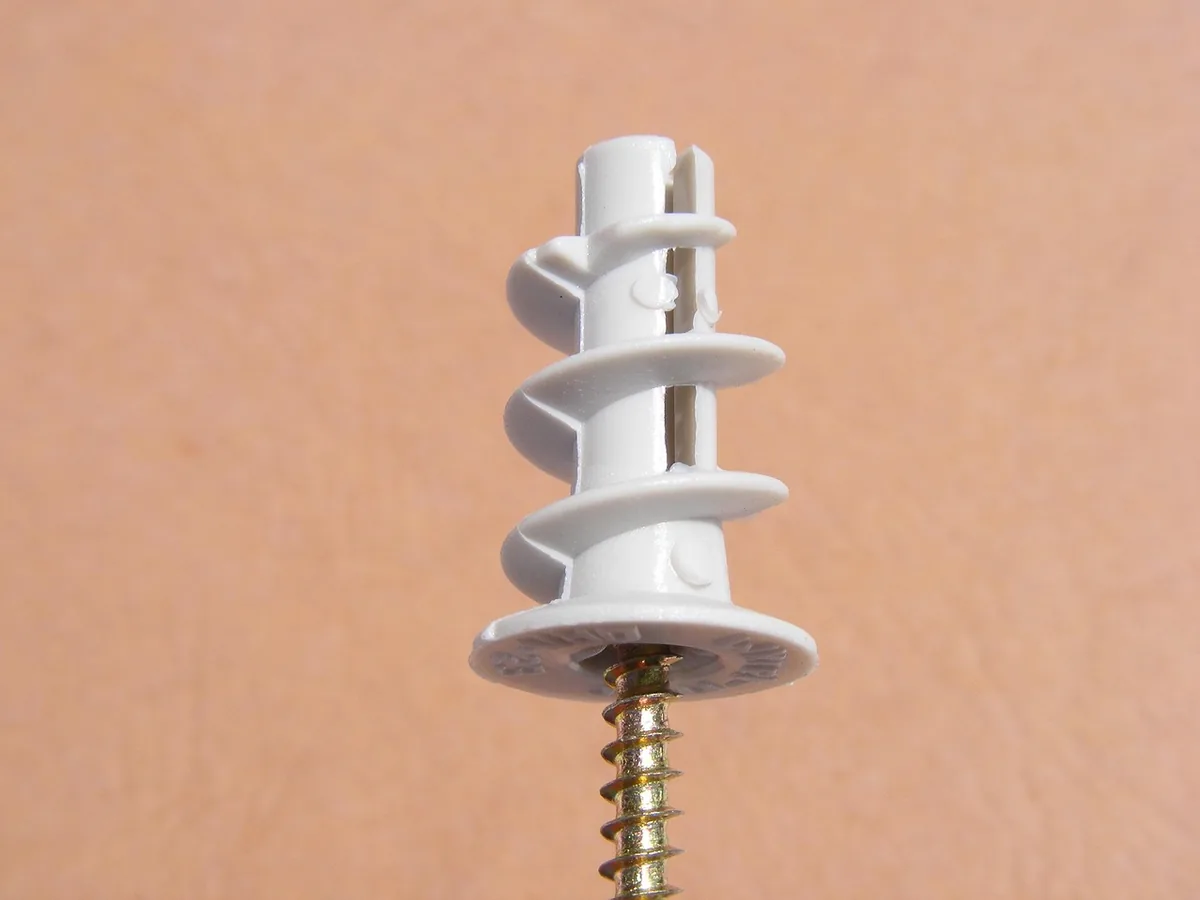
  • Toggle Bolts: The strongest hollow-wall anchor, commonly rated 30 to 100+ lbs since the wings expand fully behind the wall. Best choice once the original hole is already too big to hold a smaller anchor.

📊 Rated capacity is a manufacturer lab maximum, not a safe working load. General fastener-industry guidance (compiled from Angi and BuildToolHQ testing data, 2026) treats roughly a quarter of the printed number as what to actually trust day to day — so a “100 lb” toggle bolt is a reasonable pick for a 20–25 lb mirror, not a full 100 lb load.

Anchor Comparison by Hole Size

Hole Size Best Fix Rated Capacity
Under 1/4″ Toothpick + wood glue Restores original anchor’s rating
1/4″ – 3/8″ Plastic expansion anchor 10–25 lbs
3/8″ – 1/2″ Self-drilling metal anchor 25–75 lbs
Over 1/2″ (patch first) Toggle bolt 30–100+ lbs

When choosing an anchor, consider the weight of the item you’re hanging and the type of wall material. This will ensure you get the best hold possible.

Proper Installation Techniques

Once you’ve selected the right anchor, it’s time to install it correctly. Proper installation is key to ensuring your wall anchor holds up. Follow these steps for a secure fit:

  1. Prepare the Hole: Clean out the oversized hole, removing any loose debris. If the hole is too large, you might need to fill it with a wall patch or putty first. If you need to drill a fresh pilot hole nearby, check for hidden wiring first.
  2. Install the Anchor: Insert the new anchor into the prepared hole. For plastic anchors, tap them in gently with a hammer. For metal anchors, screw them in place until they are flush with the wall.
  3. Secure the Item: Once the anchor is installed, attach your item using the appropriate screws. Make sure to tighten them firmly but not too tight to avoid damaging the anchor.

Painting And Finishing

After fixing wall anchor holes that are too big, you need to paint and finish the area. This step ensures the repair blends seamlessly with the rest of your wall. Proper painting and finishing can make the repaired area nearly invisible. Follow these steps to achieve a professional look.

Priming The Repaired Area

Begin by applying a primer to the repaired area. Use a small brush to cover the patch completely. This helps the paint adhere better and provides a uniform surface. Let the primer dry for the recommended time on the label.

Applying Final Coat Of Paint

Once the primer is dry, apply the final coat of paint. Use a paintbrush or roller that matches the rest of your wall’s finish. Apply the paint in thin, even layers. Allow the first coat to dry completely before adding a second coat if needed.

Check the repaired area after the paint dries. Ensure the color matches the surrounding wall. Touch up if necessary to achieve a perfect blend.

Preventing Future Damage

Fixing wall anchor holes that are too big is crucial. But preventing future damage is equally important. Using proper methods can save you time and money. Here are some tips to prevent future issues.

Using Proper Anchor Sizes

Choosing the right anchor size matters. Measure the hole before picking an anchor. A tight fit ensures stability. Avoid using anchors that are too small. They can slip out and cause damage.

Follow the manufacturer’s instructions. Different walls need different anchors. Drywall, plaster, and concrete all have specific needs. Use the right anchor for each wall type. This prevents future damage and keeps your items secure.

Regular Wall Inspections

Inspect your walls regularly. Look for signs of wear and tear. Small cracks can grow over time. Catching them early can prevent bigger issues. Check areas where you have used anchors. Make sure they are still secure.

Touch up any damage immediately. A small repair now can save a lot of trouble later. Regular maintenance keeps your walls strong and durable.

Toggle bolt anchor ready to install in a repaired drywall hole
Toggle bolts expand behind the wall and hold more weight than a plastic anchor of the same size.

Expert Tips And Tricks

Fixing wall anchor holes that are too big can be simple with a few expert tips. Use wall repair compound or toothpicks with glue to fill the hole. Once dry, drill a new hole for a secure anchor.

A few extra details separate an invisible repair from one that telegraphs through the paint.

Common Mistakes To Avoid

Many people make the mistake of using the wrong materials. This can lead to further damage. Avoid using spackle or joint compound alone. These materials may not provide enough support. Another common mistake is not preparing the hole properly. Make sure to clean the hole before starting the repair. Dirt and debris can prevent the new material from adhering properly.

Pro Tips For A Seamless Repair

First, choose the right repair material. Epoxy putty or a patch kit works well. Apply the putty or patch to the hole. Make sure to press it firmly into the wall. This ensures it bonds well. Use a putty knife to smooth out the surface. This helps create an even finish.

Once the material is dry, sand the area lightly. This removes any rough spots. It also helps the repair blend in with the wall. Finally, paint over the repair. Use a matching paint color for a seamless look. Remember to use primer if needed. This helps the paint adhere better.

Get these two things right — material choice and hole prep — and the repair should be invisible once painted.

Frequently Asked Questions

How do you fix a hole in a wall that’s too big for the anchor?

Clean out loose material, then match the fix to the hole size: a glue-soaked toothpick for holes under 1/4 inch, epoxy putty or spackle for holes up to 1/2 inch, or a drywall patch plus a toggle bolt for anything larger. Let any filler cure fully before loading it with a screw.

Can you use wood glue in a drywall anchor hole?

Yes, for small holes. Dip one or two flat toothpicks in standard wood glue, insert them into the stripped hole, let the glue set, then trim the excess flush and redrive the original screw. This works for holes smaller than about 1/4 inch; larger holes need filler or a new anchor instead.

What’s the strongest wall anchor for a hole that’s already too big?

Toggle bolts hold the most weight of any hollow-wall anchor, commonly 30 to 100+ lbs depending on size, because the wings expand fully behind the wall. They also suit an already-oversized hole better than plastic anchors, which rely on a tight friction fit that a wider hole no longer provides.

How do you fix an anchor hole in a plaster wall?

Vacuum out loose plaster and dust, then fill with a setting-type joint compound instead of premixed spackle, since it resists cracking on rigid plaster. For anchors, drill a pilot hole before installing a self-drilling anchor — plaster cracks more easily than drywall if you skip that step.

How long does the filler need to dry before reinstalling the anchor?

Fast-setting compounds are typically ready in a few hours; standard spackle or joint compound needs up to 24 hours to fully cure. Wait for full cure, not just a dry-to-touch surface, before drilling or driving a screw back into the patch.

Conclusion

Match the fix to the hole, not the other way around: a toothpick and wood glue for anything under 1/4 inch, epoxy putty or spackle up to 1/2 inch, and a patch plus a properly rated anchor beyond that. Plaster needs a setting-type compound and a pre-drilled pilot hole instead of the drywall shortcuts. Sand, prime, and paint once the filler has fully cured, and size the replacement anchor to roughly a quarter of its rated capacity rather than the number printed on the package.

RELATED TO THIS GUIDE

Before you go, take a closer look

Explore this related product on Amazon. Check the details and fit before you buy.

Sponsored / affiliate links. As an Amazon Associate I earn from qualifying purchases. I may earn additional commission from eligible campaigns.

Similar Posts