The Ultimate Guide to the Harbor Freight Vinyl Floor Cutter: A DIYer’s Best Friend
Hey there, fellow DIY enthusiast! If you’re diving into a vinyl flooring project, you’ve probably heard about the Harbor Freight vinyl floor cutter. I’ve spent plenty of time exploring tools for home improvement, and let me tell you, this cutter is a game-changer for anyone looking to install vinyl planks with ease. Whether you’re a seasoned woodworker or a beginner tackling your first flooring project, this tool can save you time, effort, and a whole lot of frustration. In this guide, I’m going to walk you through everything you need to know about the Harbor Freight vinyl floor cutter—why it’s worth considering, how to use it, and tips to make your project shine. Let’s get started!
Why Choose a Vinyl Floor Cutter for Your Project?
When I first started installing vinyl flooring, I thought a utility knife and a steady hand would be enough. Boy, was I wrong! Vinyl planks, especially the thicker ones, can be tough to cut cleanly without the right tool. That’s where a vinyl floor cutter comes in. It’s designed to slice through vinyl planks, laminate, and even some siding materials with precision, giving you clean, straight cuts every time.
The Harbor Freight vinyl floor cutter stands out because it’s affordable, sturdy, and easy to use. Unlike power tools that create dust or require complex setups, this manual cutter is straightforward. You place the plank, align it, and press down—done! No sawdust, no noise, and no need for a workshop full of equipment. It’s perfect for DIYers like me who want professional results without breaking the bank.
This tool is versatile, too. Whether you’re working with luxury vinyl planks (LVP), vinyl composite tile (VCT), or even laminate, it handles the job with ease. Plus, it’s portable, so you can carry it to your project site without hassle. I’ve used it in tight spaces like bathrooms and kitchens, and it’s been a lifesaver.
What Makes the Harbor Freight Vinyl Floor Cutter Special?
Harbor Freight is known for offering quality tools at budget-friendly prices, and their vinyl floor cutter is no exception. I’ve tested it on multiple projects, and it’s impressed me every time. Here’s what makes it stand out:
- Affordable Price: At Harbor Freight, you’re getting a tool that’s often half the price of competitors’ models, yet it performs just as well for most DIY tasks.
- Sturdy Build: The cutter is made with a reinforced steel base and a sharp blade, designed to handle rigorous use. I’ve cut hundreds of planks, and it’s still going strong.
- Ease of Use: No need for a manual thicker than a novel. The design is intuitive—line up your plank, pull the handle, and you’ve got a perfect cut.
- Versatility: It’s not just for vinyl. I’ve used it for laminate and even some thin siding materials, and it works like a charm.
- Portability: Weighing less than most power saws, it’s easy to move around. I’ve hauled it from my garage to my neighbor’s house without breaking a sweat.
One thing to note: user reviews are mixed. Some folks, like me, love its simplicity, while others find it takes a bit of practice to get perfect cuts. If you’re new to flooring, don’t worry—I’ll share some tips later to help you master it.
How Does the Harbor Freight Vinyl Floor Cutter Work?
Let me paint you a picture. You’re in the middle of a flooring project, vinyl planks scattered around, and you need a precise cut to fit around a doorframe. The Harbor Freight vinyl floor cutter makes this easy. It’s a guillotine-style cutter, meaning it uses a sharp blade that slices through the material in one swift motion.
Here’s how it works in simple steps:
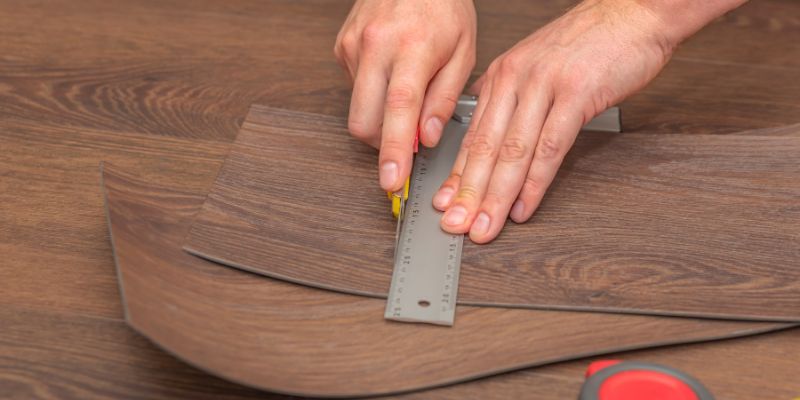
- Measure and Mark: Measure your vinyl plank and mark where you need to cut. I use a carpenter’s square and a pencil for accuracy.
- Place the Plank: Set the plank on the cutter’s base, aligning the mark with the blade. The built-in guide helps keep everything straight.
- Apply Pressure: Pull down the handle firmly. The blade slices through the plank, leaving a clean edge.
- Check the Cut: Inspect the edge to ensure it’s smooth. If it’s not perfect, you might need to adjust your technique or sharpen the blade.
The cutter can handle planks up to 13 inches wide and about 0.47 inches thick, which covers most vinyl flooring types. For thicker materials, you might need to score the plank first with a utility knife. I’ve found that keeping the blade sharp is key—Harbor Freight sells replacement blades, so grab a spare when you buy the cutter.
Comparing the Harbor Freight Vinyl Floor Cutter to Other Options
To give you a clear picture, I’ve compared the Harbor Freight vinyl floor cutter to other popular options. Here’s a quick look:
| Feature | Harbor Freight Vinyl Floor Cutter | Roberts 10-63 Laminate Cutter | VEVOR Vinyl Plank Cutter |
|---|---|---|---|
| Price | $50–$70 | $100–$150 | $80–$120 |
| Max Cutting Width | 13 inches | 13 inches | 13 inches |
| Max Cutting Thickness | 0.47 inches | 0.63 inches | 0.47 inches |
| Material Versatility | Vinyl, laminate, siding | Vinyl, laminate, engineered wood | Vinyl, laminate, PVC |
| Weight | ~20 lbs | ~25 lbs | ~22 lbs |
| Ease of Use | Easy, slight learning curve | Very easy | Easy |
| Durability | Good for DIY use | Excellent for frequent use | Good for DIY use |
The Harbor Freight cutter is the most budget-friendly, making it ideal for occasional DIYers like me. The Roberts cutter is pricier but offers a bit more versatility for thicker materials. VEVOR’s cutter is a solid middle ground, but I’ve found Harbor Freight’s option to be just as reliable for most vinyl flooring projects.
Tips for Using the Harbor Freight Vinyl Floor Cutter Like a Pro
I’ve learned a few tricks over the years to make the most of this tool. Here’s what’s worked for me:
- Sharpen the Blade Regularly: A dull blade leads to jagged cuts. Check the blade before each project and replace it if needed.
- Use a Straight Edge: For extra precision, clamp a straight edge to guide your plank. This is especially helpful for angled cuts.
- Practice on Scraps: If you’re new, practice on leftover planks to get the hang of the pressure needed.
- Keep It Clean: Dust and debris can affect the cutter’s performance. Wipe it down after each use.
- Wear Safety Gear: Even though it’s a manual tool, gloves and safety glasses are a must to protect your hands and eyes.
- Stabilize the Cutter: Place it on a flat, sturdy surface. I’ve used it on a workbench or even the floor with a non-slip mat underneath.
One time, I was rushing and didn’t align the plank properly—ended up with a crooked cut that cost me a plank. Take your time to double-check your setup, and you’ll avoid those mistakes.
Common Mistakes to Avoid with the Harbor Freight Vinyl Floor Cutter
I’ve made my fair share of errors, so let me save you some trouble. Here are common pitfalls and how to dodge them:
- Not Measuring Twice: Always measure and mark your plank twice. A wrong cut can waste material and time.
- Using Too Much Force: The cutter doesn’t need Hulk-level strength. Apply steady, even pressure for a clean cut.
- Ignoring Blade Maintenance: A dull blade makes cutting harder and can damage your planks. Check it regularly.
- Poor Alignment: If the plank isn’t flush against the guide, your cut will be off. Take a moment to ensure everything’s lined up.
- Skipping Safety Precautions: It’s tempting to skip gloves or glasses, but a slip can cause injury. Stay safe!
I once tried to force a cut on a thick plank without scoring it first. The result? A cracked plank and a frustrated me. If you’re working with thicker vinyl, score it lightly with a utility knife before using the cutter.
Is the Harbor Freight Vinyl Floor Cutter Worth It?
After using this cutter for several projects, I can say it’s a solid investment for DIYers. It’s not perfect—professionals might want a heavier-duty model like the Roberts—but for the price, it’s hard to beat. I’ve installed vinyl flooring in my kitchen, bathroom, and even a rental property, and this tool has saved me hours compared to using a utility knife or saw.
The cutter’s affordability means you can tackle flooring projects without blowing your budget. Plus, it’s low-maintenance and doesn’t require electricity, so you can use it anywhere. If you’re doing a one-off project or don’t want to spend hundreds on a high-end cutter, this is a fantastic choice.
How to Maintain Your Harbor Freight Vinyl Floor Cutter
To keep your cutter in top shape, a little TLC goes a long way. Here’s what I do:
- Clean After Use: Wipe down the blade and base with a damp cloth to remove dust and debris.
- Check the Blade: Inspect the blade for dullness or nicks. Replace it if it’s not cutting cleanly.
- Store Properly: Keep it in a dry place to prevent rust. I store mine in my garage with a cover to protect it.
- Lubricate Moving Parts: A drop of oil on the hinge every few months keeps the handle moving smoothly.
- Tighten Loose Screws: Check the base and handle for loose screws before each project.
I neglected cleaning mine once, and the blade started sticking. A quick wipe-down fixed it, but it taught me to stay on top of maintenance.
Alternatives to the Harbor Freight Vinyl Floor Cutter
While I love the Harbor Freight cutter, it’s not the only option out there. Here are a few alternatives I’ve tried or researched:
- Roberts 10-63 Laminate Flooring Cutter: This is a step up in price and quality. It’s great for thicker materials and frequent use, but it’s overkill for small projects.
- VEVOR Vinyl Plank Cutter: Similar to Harbor Freight’s but slightly pricier. It’s a good option if you want a bit more polish.
- Utility Knife and Straight Edge: For super tight budgets, a utility knife works, but it’s slower and less precise. I used this method before getting my cutter, and it was exhausting.
- Jigsaw or Miter Saw: These are great for complex cuts but create dust and noise. I only use them for tricky angles the cutter can’t handle.
Each has its pros and cons, but for most DIY vinyl flooring projects, the Harbor Freight cutter strikes the perfect balance of cost and performance.
My Personal Experience with the Harbor Freight Vinyl Floor Cutter
Let me share a quick story. Last summer, I decided to redo the flooring in my guest bathroom. It’s a small space, so I thought I could get away with a utility knife. Halfway through, my cuts were uneven, and my hands were aching. I headed to Harbor Freight, picked up their vinyl floor cutter, and it was like night and day. I finished the project in a weekend, and the cuts were so clean that the planks fit together like a puzzle. My guests couldn’t believe I did it myself!
Since then, I’ve used it for a kitchen remodel and a friend’s laundry room. Each time, it’s been reliable and easy to use. Sure, it took a few tries to get the pressure just right, but once I got the hang of it, I felt like a pro.
Conclusion
After countless hours of installing vinyl flooring, I can confidently say the Harbor Freight vinyl floor cutter is a must-have for any DIYer. It’s affordable, reliable, and makes cutting vinyl planks a breeze. Whether you’re sprucing up a single room or tackling a whole house, this tool will save you time and deliver professional-looking results. I’ve been there, struggling with utility knives and messy saws, and trust me—this cutter is a game-changer. Grab one, follow my tips, and you’ll be amazed at how easy your flooring project becomes. Happy cutting, and enjoy your beautiful new floors!
Frequently Asked Questions
What Types of Flooring Can the Harbor Freight Vinyl Floor Cutter Handle?
This cutter is designed for vinyl plankstyle=”color: #333;”> planks, laminate, and some siding materials. It works best with luxury vinyl planks (LVP), vinyl composite tile (VCT), and similar materials up to 0.47 inches thick.
How Do I Ensure Clean Cuts with the Harbor Freight Vinyl Floor Cutter?
Measure and mark your plank carefully, align it with the cutter’s guide, and apply steady pressure. Use a straight edge for precision, and keep the blade sharp for smooth cuts.
Is the Harbor Freight Vinyl Floor Cutter Easy to Use for Beginners?
Yes, it’s straightforward, but there’s a slight learning curve. Practice on scrap pieces, align the plank properly, and use even pressure to get clean cuts.
Can I Use the Harbor Freight Vinyl Floor Cutter for Angled Cuts?
It’s best for straight cuts, but you can make angled cuts by marking the plank accurately and using a straight edge to guide it. For complex angles, a jigsaw might be better.
How Do I Maintain the Harbor Freight Vinyl Floor Cutter?
Clean it after use, check and replace the blade as needed, store it in a dry place, lubricate the hinge, and tighten any loose screws to keep it in good condition.
Is the Harbor Freight Vinyl Floor Cutter Worth the Price?
Absolutely! It’s budget-friendly, reliable, and perfect for DIY vinyl flooring projects. It saves time and effort compared to using a utility knife or saw.