How Do You Kill a Maple Tree? Proven Final Steps
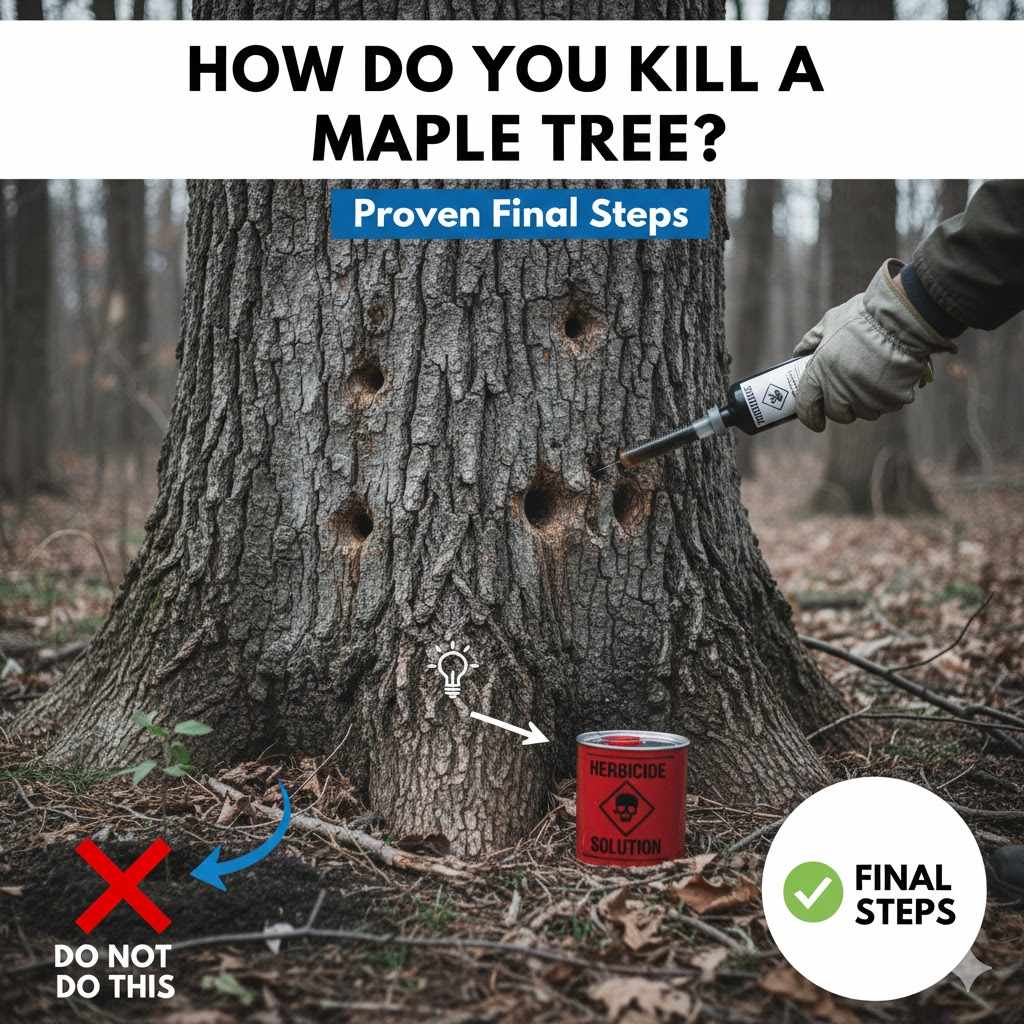
To kill a maple tree, the most effective methods are girdling (removing a ring of bark) or the cut-stump treatment. For cut-stump, you cut the tree down and immediately apply a systemic herbicide containing glyphosate or triclopyr to the outer ring of the fresh stump. This prevents new growth and ensures the root system dies completely.
Hello there, fellow DIYer! Md Meraj here, your friendly guide in the workshop and yard. Sometimes, a beautiful maple tree just grows in the wrong spot. Maybe its roots are threatening your foundation, or it’s blocking too much sunlight. Whatever the reason, removing a persistent tree like a maple can feel like a tough battle. But don’t you worry. It’s a job you can handle with the right know-how and a focus on safety. I’m here to walk you through the process, step-by-step, just like we’re working on it together. Let’s get this done right.
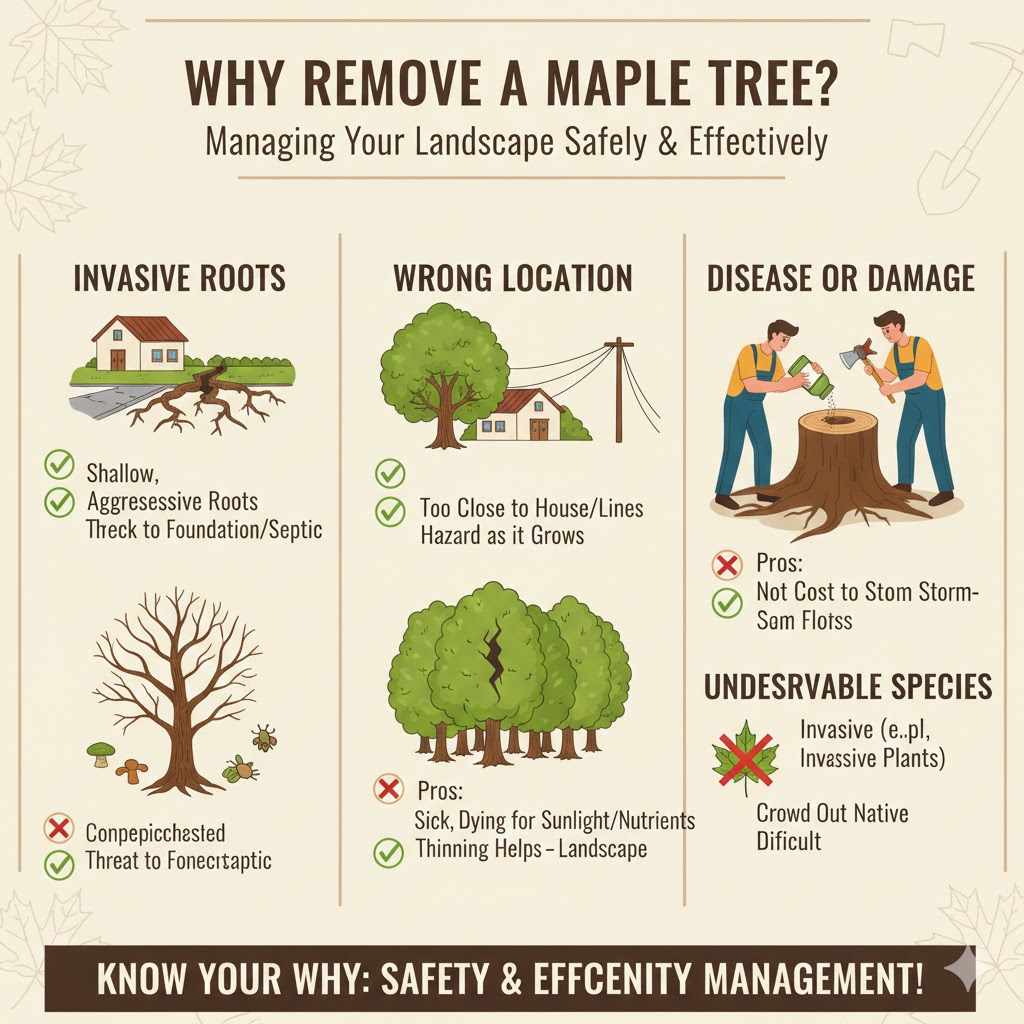
First, Why Remove a Maple Tree?
Maples are stunning trees, but they can sometimes become a problem. Understanding why you need to remove one helps you choose the best method. Let’s look at a few common reasons:
- Invasive Roots: Maple roots are known for being shallow and aggressive. They can crack sidewalks, disrupt driveways, and even pose a threat to your home’s foundation or septic system.
- Wrong Location: A tree planted too close to your house, power lines, or other structures can become a hazard as it grows.
- Disease or Damage: A sick, dying, or storm-damaged tree can be unpredictable and dangerous. Fungi, pests, or rot can weaken it from the inside out.
- Overcrowding: Sometimes, too many trees compete for sunlight and nutrients, and thinning them out helps the remaining landscape thrive.
- Undesirable Species: Certain maples, like the Norway Maple, can be invasive and crowd out native plants.
Knowing your “why” is the first step. It’s not about disliking the tree, but about managing your property safely and effectively.
Safety is Your Most Important Tool
Before we touch a single tool, let’s talk about safety. This is non-negotiable. Taking a few minutes to prepare can prevent serious accidents. Think of it as measuring twice before you cut—it’s just as important here.
Personal Protective Equipment (PPE) Checklist
Always wear the right gear. It’s your first line of defense against accidents.
- Safety Glasses or Goggles: To protect your eyes from wood chips, dust, and chemical splashes.
- Heavy-Duty Gloves: Protects your hands from cuts, splinters, and chemicals.
- Long-Sleeved Shirt and Pants: Guards your skin against scratches and potential contact with herbicides.
- Sturdy, Closed-Toe Boots: Provides good grip and protects your feet from falling objects or sharp tools.
Assess the Area Before You Begin
Take a walk around the tree and look for potential hazards:
- Check for Utilities: Look up for power lines and overhead cables. If the tree or its branches are anywhere near them, stop right there. This is a job for a professional arborist. Also, call 811 before you dig to have underground utility lines marked. It’s a free and essential service.
- Clear the Zone: Make sure the area around the tree is clear of toys, garden furniture, pets, and people. You need a safe space to work without any trip hazards.
- Assess the Tree’s Condition: Look for large dead branches, signs of rot, or a heavy lean. A compromised tree can behave unpredictably when you start working on it. If you have any doubts about its stability, it’s safer to call in an expert.
Remember, your safety is worth more than any project. If a job feels too big or too dangerous, there is no shame in calling a certified professional.
Choosing Your Method: A Look at the Options
There are a few proven ways to kill a maple tree. The best one for you depends on the tree’s size, your comfort level with tools and chemicals, and how quickly you want it gone. Let’s break down the most reliable methods.
Method 1: Girdling (Ring-Barking) – The Chemical-Free Approach
Girdling is a non-chemical method that starves the tree by cutting off its nutrient supply. You essentially remove a complete ring of bark and the living tissue underneath, which stops the flow of sugars from the leaves down to the roots.
Pros: No chemicals, low cost, simple concept.
Cons: Slow process (can take months or even a year), the tree will die standing, which can create a hazard later.
Tools You’ll Need:
- A handsaw, chainsaw, or hatchet
- A chisel or utility knife
- Your full set of PPE
Step-by-Step Girdling Instructions:
- Mark Your Lines: Decide on the width of your ring. For a maple, a ring 2 to 4 inches wide is effective. Use your knife or hatchet to score two parallel lines around the entire circumference of the trunk.
- Cut Through the Bark: Using your saw or hatchet, cut along the marked lines. You need to cut deep enough to get through the bark and the cambium layer just beneath it (it’s the moist, often greenish layer). A depth of about 1.5 inches is a good target for a mature tree.
- Remove the Bark: Use a chisel or the back of your hatchet to carefully peel away all the bark and cambium between your two cuts. Make sure the ring is complete and clean—even a small strip left behind can keep the tree alive.
- Wait and Watch: The tree will begin to die from the top down. The leaves may wilt during the first growing season, and it will fail to produce new leaves the following year. Keep an eye on it, as a standing dead tree will eventually need to be removed for safety.
Method 2: Cut-Stump Treatment – The Most Effective Approach
This is my go-to method for guaranteed results. You cut the tree down and then immediately treat the stump with a herbicide. This sends the chemical directly into the root system, killing it for good and preventing suckers from sprouting up later.
Pros: Extremely effective, works quickly, prevents regrowth.
Cons: Requires felling the tree first, involves using chemicals.
Tools and Materials:
- Chainsaw or handsaw
- Systemic herbicide (products containing glyphosate or triclopyr work best)
- A small paintbrush, sponge applicator, or spray bottle
- Your full set of PPE
Step-by-Step Cut-Stump Instructions:
- Prepare Your Herbicide: Before you make the first cut, have your herbicide ready to go. Read the product label carefully and mix it according to the manufacturer’s directions for cut-stump application. Many products are ready-to-use. Pour a small amount into a disposable container for easy application.
- Fell the Tree: Carefully cut the tree down, leaving the stump as low to the ground as is practical and safe. For large trees, this step is best left to professionals. For smaller trees you can handle, ensure you use proper cutting techniques and have a clear felling path.
- Apply Herbicide IMMEDIATELY: This is the most critical step. The tree’s transport system starts to seal off within minutes of being cut. You must apply the herbicide to the fresh-cut surface while it’s still wet. Use your paintbrush or applicator to apply a thin layer of herbicide to the outer edge of the stump—the cambium layer. This is the living part of the tree that will carry the chemical down to the roots. You don’t need to cover the entire stump, just that active outer ring.
- Clean Up Safely: Dispose of your herbicide container and applicator as directed on the product label. Wash your hands and tools thoroughly.
According to research from university extensions like the Penn State Extension, applying herbicide to a freshly cut stump is one of the most efficient and targeted ways to control unwanted trees.
Method 3: Hack-and-Squirt (Frill Girdle)
This method is a hybrid of girdling and chemical application. You make a series of downward-angled cuts around the trunk and then apply herbicide directly into those cuts. It’s great for when you can’t or don’t want to fell the tree right away.
Pros: Effective, uses less herbicide, doesn’t require felling the tree immediately.
Cons: Slower than cut-stump, leaves a standing dead tree.
Tools and Materials:
- Hatchet or axe
- Systemic herbicide in a small squirt bottle
- Your full set of PPE
Step-by-Step Hack-and-Squirt Instructions:
- Make the Cuts: Using your hatchet, make a series of downward-angled cuts around the entire trunk at waist height. The cuts should be deep enough to penetrate the cambium layer and create a small pocket or “cup.” Space them about 2-3 inches apart.
- Apply the Herbicide: Immediately after making the cuts, squirt the recommended amount of herbicide directly into each cut. The goal is to fill the pocket without it overflowing.
- Wait and Observe: Just like with girdling, the tree will die slowly while standing. The herbicide will be transported throughout the root system, ensuring a complete kill. Monitor the tree’s condition and plan for its eventual removal.
Comparison of Tree Killing Methods
Choosing the right method can feel overwhelming. Here’s a simple table to help you compare the options at a glance.
| Method | Effectiveness | Speed | Effort Level | Best For |
|---|---|---|---|---|
| Girdling | High (if done correctly) | Very Slow (6 months – 2 years) | Medium | Situations where you want to avoid chemicals and aren’t in a hurry. |
| Cut-Stump | Very High (near 100%) | Fast (kills roots in weeks) | High (requires felling) | Quick, permanent removal and preventing any regrowth. The most reliable option. |
| Hack-and-Squirt | High | Moderate (several months) | Low-Medium | Killing a standing tree with minimal effort and targeted chemical use. |
What Happens Next? The Process of a Dying Tree
Patience is key. Once you’ve done the work, the tree needs time to shut down. Here’s what you can expect:
- Initial Signs: For chemical methods, you might see leaves begin to wilt or yellow within a few weeks, especially if done during the growing season. For girdling, you might not see any change until the next spring when the tree fails to produce new leaves.
- Confirmation of Death: The tree is officially dead when the wood is dry and brittle, and there is no green under the bark when you scratch it with a knife. You will see no signs of new growth, leaves, or buds for an entire growing season.
- Becoming a Hazard: Remember, a dead tree becomes weaker over time. The wood will become brittle, and branches can break and fall unexpectedly, especially during storms or high winds. It’s crucial to plan for removal once you are certain the tree is dead.
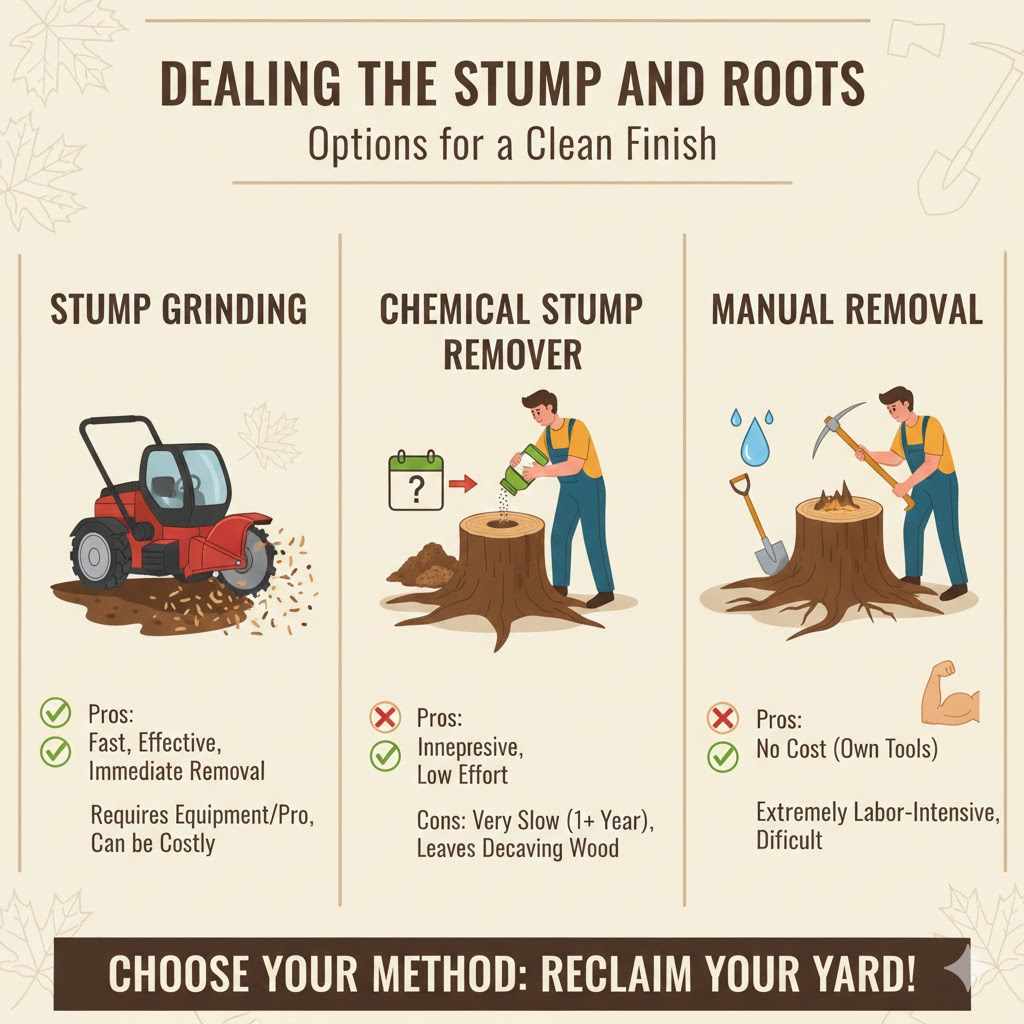
Dealing with the Stump and Roots
Once the tree is gone, you’re left with the stump. You have a few options for getting rid of it.
Stump Removal Options
| Option | Description | Pros | Cons |
|---|---|---|---|
| Stump Grinding | A machine with a rotating cutting wheel grinds the stump down below ground level. | Fast, effective, removes the stump immediately. | Requires renting heavy machinery or hiring a professional; can be costly. |
| Chemical Stump Remover | Potassium nitrate granules are applied to holes drilled in the stump to accelerate natural decay. | Inexpensive, low physical effort. | Very slow process (can take a year or more), leaves a decaying stump in your yard. |
| Manual Removal | Using a shovel, axe, and saw to dig out the stump and cut the major roots. | No cost if you own the tools. | Extremely labor-intensive, especially for large maple stumps. Not recommended for beginners. |
Frequently Asked Questions (FAQ)
What is the best time of year to kill a maple tree?
The best time is late summer or early fall. During this period, trees are actively sending sugars and nutrients down to their roots to store for winter. Applying herbicide then ensures it gets transported efficiently throughout the root system for a more effective kill.
Can I kill a maple tree without chemicals?
Yes, absolutely. Girdling is a completely chemical-free method. It requires patience, as it can take a long time for the tree to die, but it is very effective if you make sure to remove the bark ring completely.
How long does it take for a girdled maple tree to die?
It varies based on the tree’s size and health, but generally, it takes from six months to two years. The tree will gradually decline. You will likely notice a significant lack of leaves in the first spring following the girdling.
Will vinegar or salt kill a large maple tree?
While large amounts of salt or vinegar can damage soil and harm plants, they are generally not effective for killing a large, established maple tree. These methods can harm surrounding plants and contaminate the soil. It’s better to stick to proven methods like girdling or a targeted herbicide application.
What should I do if sprouts appear after cutting the tree?
Sprouts (or suckers) mean the root system is still alive. This is common if herbicide wasn’t applied or wasn’t applied correctly. The best solution is to cut the sprouts off and immediately paint the fresh cuts with a concentrated herbicide like triclopyr to kill the remaining roots.
Is it safe to burn the wood from a chemically treated tree?
No. According to the U.S. Environmental Protection Agency (EPA), you should not burn wood that has been treated with herbicides or other pesticides. Burning can release toxic chemicals into the air, which is hazardous to your health and the environment.
Do I need a permit to remove a tree on my property?
It depends on where you live. Some cities, towns, or homeowner associations have regulations about tree removal, especially for large or “heritage” trees. It’s always a good idea to check with your local municipal office or HOA before you start any work to avoid potential fines.
Your Final Step: A Job Done Right
And there you have it. You’re now equipped with the knowledge to tackle that problem maple tree safely and effectively. Remember, the key to any successful DIY project is taking your time, putting safety first, and using the right method for the job. Whether you choose to go the slow-and-steady route with girdling or the quick-and-certain path of a cut-stump treatment, you can get it done.
Removing a tree is a big task, but breaking it down into these simple, manageable steps makes all the difference. You’ve got this. Take pride in your work, stay safe out there, and as always, if you run into anything that feels beyond your skill level, don’t hesitate to call in a professional. Happy building—and un-building—in your yard!