How Long Does Oil Based Stain Take to Dry: Expert Timing Tips
Oil-based stains usually take 24-48 hours to dry. Factors like temperature, humidity, and wood type can affect drying time.
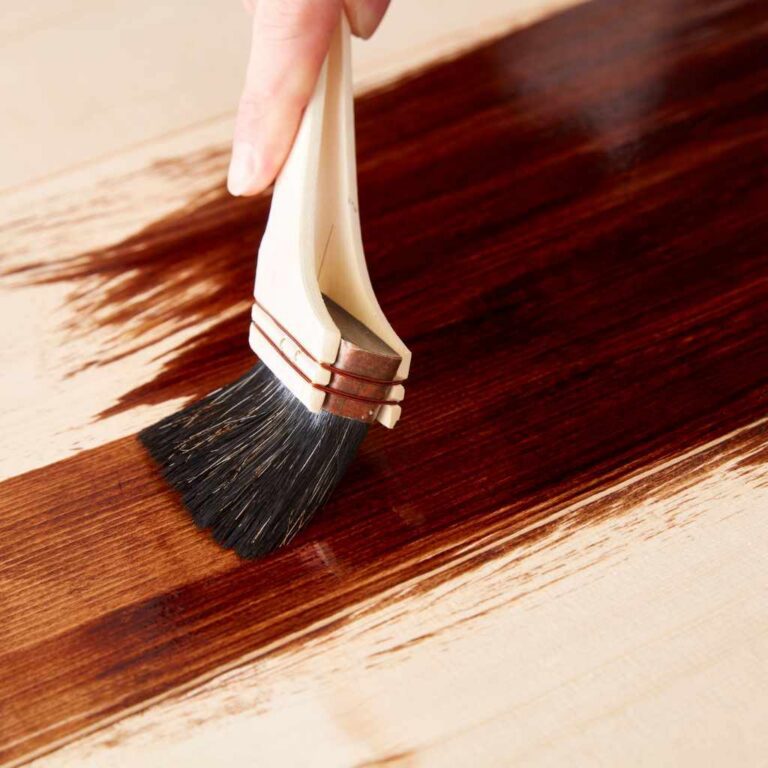
Are you planning to give your wooden surfaces a fresh look with oil-based stain? Understanding the drying time is crucial for achieving the perfect finish. Oil-based stains penetrate deeply into the wood, providing rich color and protection. Knowing how long it takes to dry helps you plan your project better, ensuring smooth and even results.
In this blog post, we’ll delve into the factors that influence drying time, the importance of proper application, and tips for speeding up the process. Whether you’re a DIY enthusiast or a professional, mastering this aspect will lead to impeccable outcomes. Ready to learn more? Let’s dive in!
Drying Time Factors
High humidity slows down drying. Moist air means the stain takes longer to dry. Low humidity speeds up drying. Dry air helps the stain dry faster.
Warm temperatures help the stain dry faster. Cold weather slows down the drying process. Aim for mild temperatures for best results.
Different woods affect drying time. Hardwoods like oak dry slower. Softwoods like pine dry faster. Porous wood absorbs more stain and takes longer to dry.
Credit: www.homedepot.com
Typical Drying Duration
Oil based stain usually takes longer to dry compared to other stains. The drying time depends on many factors. These include temperature, humidity, and the type of wood.
First Coat Time
The first coat of oil based stain can take about 24 to 48 hours to dry. Always let the first coat dry completely before adding more stain. This helps the wood to absorb the stain better.
Second Coat Time
The second coat may take a bit longer. It usually dries within 48 to 72 hours. Remember, patience is key for a good finish. Always check if the stain is dry before touching it.
Accelerating Drying Process
Using fans can help the stain dry faster. Place fans near the stained area. Ensure the fans blow directly on the stained surface. This will increase air flow. Increased air flow helps the stain dry quicker. Use multiple fans for larger areas. Remember to check the stain often.
Proper ventilation is key for drying. Open windows and doors. This allows fresh air to circulate. Fresh air speeds up the drying process. Good ventilation prevents moisture buildup. Moisture can slow drying. Ensure the area is well-ventilated.
Common Mistakes
Too much stain can cause problems. Thick layers take longer to dry. They may not dry evenly. Thin layers dry faster. They look better too. Extra stain can create sticky spots. Wipe off extra stain after applying. Use a clean cloth for this. Avoid puddles. Proper application helps stain dry faster.
Skipping prep work can cause issues. Dirty surfaces affect stain drying. Dust and grease slow down drying. Sanding helps. Smooth surfaces absorb stain better. Cleaning is crucial. Use soap and water. Let it dry before staining. Prep work ensures better results. Time spent on prep saves time later. Don’t skip it.
Testing Dryness
Lightly touch the stained surface. If it feels sticky, it is not dry. A dry surface will feel smooth. Check different spots to be sure. Touch gently to avoid marks. Wait longer if unsure.
Press a fingernail into the stain. If it leaves a mark, it is still wet. A hard surface means it is dry. Test in a hidden area first. This avoids visible damage. Patience is key for best results.

Credit: www.wikihow.com
Ideal Conditions For Drying
Oil based stain dries best at 70 to 90 degrees Fahrenheit. Lower temperatures slow down drying. Higher temperatures can cause uneven drying. Always check the weather forecast before starting.
Humidity affects drying time. 50% humidity is ideal. Too much moisture makes drying take longer. Use a dehumidifier if needed. Ensure good air circulation. Fans can help speed up drying.

Post-drying Care
Oil-based stain typically takes 24 to 48 hours to dry. Ensure proper ventilation to speed up the drying process. After drying, apply a protective finish for long-lasting results.
Buffing Surface
Once the oil-based stain is dry, buff the surface lightly. Use a soft cloth for this task. This helps to smooth out the finish. It can also remove any dust particles. Be gentle to avoid scratching the surface. Buffing gives the wood a nice shine. It makes it look polished and clean.
Applying Sealant
Apply a sealant to protect the stained wood. Use a brush or a cloth for this. Make sure to cover all areas evenly. Let the sealant dry completely. This can take several hours. The sealant helps to lock in the stain. It makes the surface more durable. It also adds an extra layer of protection.
Credit: www.rustoleum.com
Expert Tips
Pick a high-quality oil-based stain for the best results. Look for brands with good reviews. A good stain will last longer and look better. Check the label for drying times.
Plan your project when the weather is dry. Humidity and cold can slow drying. Warm and dry days work best. Apply the stain early in the day. This gives it time to dry before night.
Frequently Asked Questions
How Do You Know If Oil Based Stain Is Dry?
Oil-based stain is dry when it feels smooth, not tacky, and does not leave residue on your fingers.
How Long Should You Let Oil-based Stains Dry Before Applying A Finish?
Let oil-based stains dry for 24 to 48 hours before applying a finish. Ensure the surface is completely dry.
Does Oil Based Stain Need 2 Coats?
Oil-based stain usually needs 2 coats for a rich, even finish. Always follow the manufacturer’s instructions for best results.
How To Speed Up Oil-based Stain Drying Time?
To speed up oil-based stain drying time, increase ventilation, use a fan, or apply a thin coat. You can also use a heat gun or dehumidifier. Ensure the workspace is warm and dry.
Conclusion
Oil-based stains need time to dry. Patience ensures the best results. Factors like temperature and humidity affect drying time. Always read product instructions carefully. Proper ventilation speeds up the process. Test a small area first. This helps avoid mistakes. Remember, good preparation leads to a beautiful finish.
Happy staining!